Page 334 of 516

WARNING
If the shif t lever cannot be moved from
the P (Park) position while the engine is
running and the brake pedal is de-
pressed, the stop lights may not work.
Malfunctioning stop lights could cause
an accident injuring yourself and
others.
Accelerator downshif t
— in D (Drive) position —
For passing or hill climbing, depress the
accelerator pedal to the floor. This shif ts
the transmission down into a lower gear,
depending on the vehicle speed.
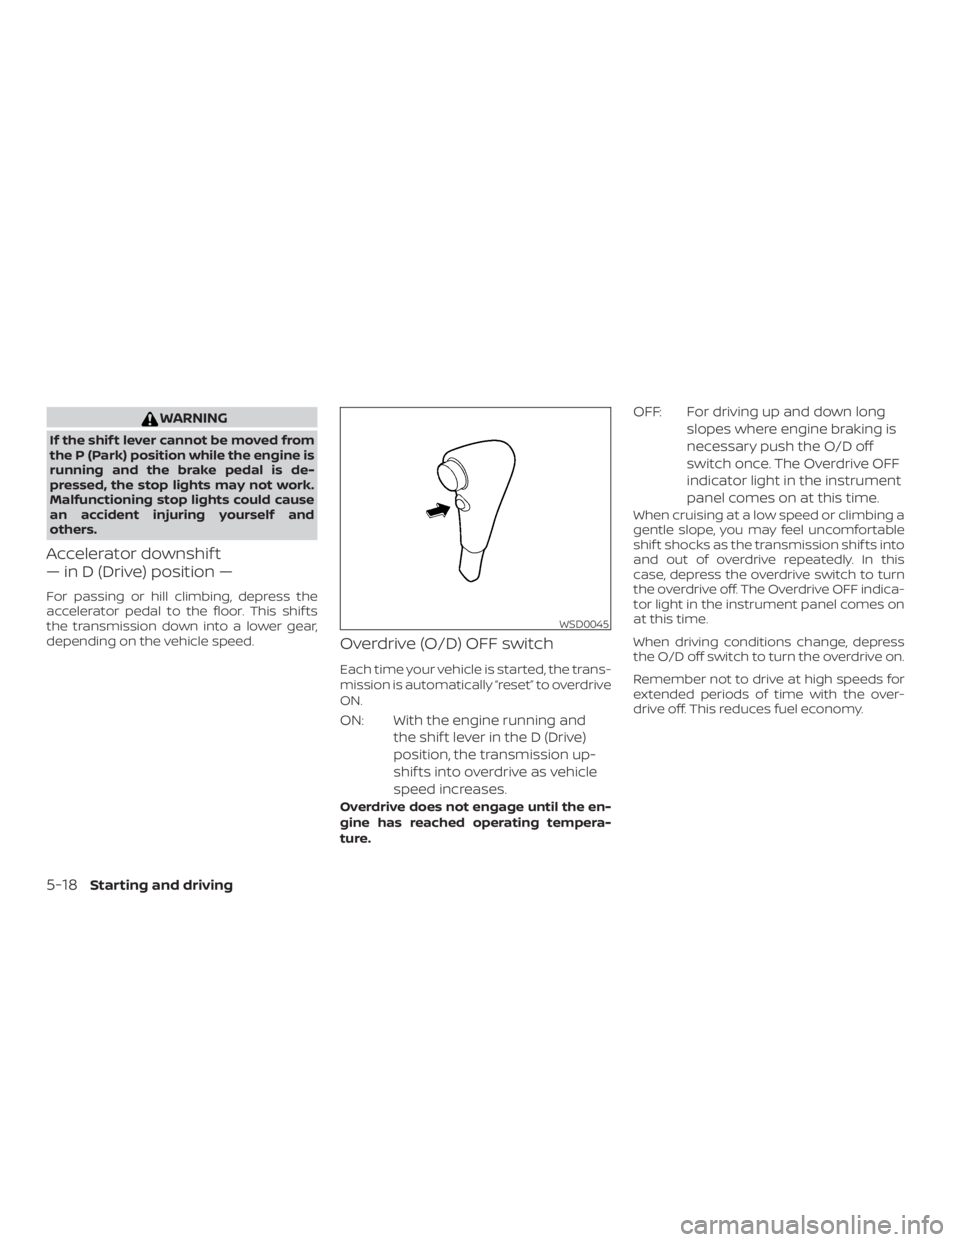
Overdrive (O/D) OFF switch
Each time your vehicle is started, the trans-
mission is automatically “reset” to overdrive
ON.
ON: With the engine running andthe shif t lever in the D (Drive)
position, the transmission up-
shif ts into overdrive as vehicle
speed increases.
Overdrive does not engage until the en-
gine has reached operating tempera-
ture.
OFF: For driving up and down longslopes where engine braking is
necessary push the O/D off
switch once. The Overdrive OFF
indicator light in the instrument
panel comes on at this time.
When cruising at a low speed or climbing a
gentle slope, you may feel uncomfortable
shif t shocks as the transmission shif ts into
and out of overdrive repeatedly. In this
case, depress the overdrive switch to turn
the overdrive off. The Overdrive OFF indica-
tor light in the instrument panel comes on
at this time.
When driving conditions change, depress
the O/D off switch to turn the overdrive on.
Remember not to drive at high speeds for
extended periods of time with the over-
drive off. This reduces fuel economy.
Page 340 of 516

CAUTION
During the first 1,200 miles (2,000 km),
follow these recommendations to ob-
tain maximum engine performance
and ensure the future reliability and
economy of your new vehicle. Failure to
follow these recommendations may re-
sult in shortened engine life and re-
duced engine performance.∙ Avoid driving for long periods at con- stant speed, either fast or slow, and do
not run the engine over 4,000 rpm.
∙ Do not accelerate at full throttle in any gear.
∙ Avoid quick starts.
∙ Avoid hard braking as much as pos- sible.
∙ Do not tow a trailer for the first 500 miles (805 kilometers). Your engine, axle or
other parts could be damaged. Follow these easy-to-use Fuel Efficient
Driving Tips to help you achieve the most
fuel economy from your vehicle.
1. Use Smooth Accelerator and Brake
Pedal Application
∙ Avoid rapid starts and stops.
∙ Use smooth, gentle accelerator and brake application whenever possible.
∙ Maintain constant speed while com- muting and coast whenever pos-
sible.
2. Maintain Constant Speed
∙ Look ahead to try and anticipate and minimize stops.
∙ Synchronizing your speed with traffic lights allows you to reduce your num-
ber of stops.
∙ Maintaining a steady speed can mini- mize red light stops and improve fuel
efficiency. 3.
Use Air Conditioning (A/C) at Higher
Vehicle Speeds
∙ Below 40 mph (64 km/h), it is more efficient to open windows to cool the
vehicle due to reduced engine load.
∙ Above 40 mph (64 km/h), it is more efficient to use A/C to cool the vehicle
due to increased aerodynamic drag.
∙ Recirculating the cool air in the cabin when the A/C is on reduces cooling
load.
4. Drive at Economical Speeds and Dis-
tances
∙ Observing the speed limit and not exceeding 60 mph (97 km/h) (where
legally allowed) can improve fuel effi-
ciency due to reduced aerodynamic
drag.
∙ Maintaining a safe following distance behind other vehicles reduces un-
necessary braking.
∙ Safely monitoring traffic to anticipate changes in speed permits reduced
braking and smooth acceleration
changes.
∙ Select a gear range suitable to road conditions.
BREAK-IN SCHEDULE FUEL EFFICIENT DRIVING TIPS
5-24Starting and driving
Page 364 of 516
Push the switch on to warn other drivers
when you must stop or park under emer-
gency conditions. All turn signal lights flash.
Page 365 of 516

For King Cab® model, lif t up the rear jump
seat and remove net to remove the first aid
kit. For additional information, refer to
“Jump Seat” in the “Safety — Seats, seat
belts and supplemental restraint system”
section of this manual.For Crew Cab model, lif t up the rear bench
seat and remove the net to remove the first
aid kit. For additional information, refer to
“Folding the rear bench seat up” in the
“Safety — Seats, seat belts and supplemen-
tal restraint system” section of this manual.
TIRE PRESSURE MONITORING
SYSTEM (TPMS)
This vehicle is equipped with TPMS. It moni-
tors tire pressure of all tires except the
spare. When the low tire pressure warning
light is lit, and the CHECK TIRE PRES (pres-
sure) warning message is displayed in the
odometer, one or more of your tires is sig-
nificantly under-inflated. If the vehicle is be-
ing driven with low tire pressure, the TPMS
will activate and warn you of it by the low
tire pressure warning light. This system will
activate only when the vehicle is driven at
speeds above 16 mph (25 km/h). For addi-
tional information, refer to “Warning lights,
indicator lights and audible reminders” in
the “Instruments and Controls” section,
and “Tire Pressure Monitoring System
(TPMS)” in the “Starting and driving” section
of this manual.
Page 375 of 516
WARNING
Always follow the instructions below.
Failure to do so could result in damage
to the charging system and cause per-
sonal injury.1. If the booster battery is in another ve- hicle, position the 2 vehicles to bring
their batteries near each other.
Do not allow the two vehicles to
touch.
2. Apply the parking brake. Move the shif t lever to P (Park). Switch off all unneces- sary electrical systems (lights, heater,
air conditioner, etc.).
3. Connect the jumper cables in the se- quence illustrated (
�A,�B,�C,�D).
Page 418 of 516
FCC Notice:
For USA:
This device complies with Part 15 of the
FCC Rules. Operation is subject to the fol-
lowing two conditions: (1) This device
may not cause harmful interference, and
(2) this device must accept any interfer-
ence received, including interference
that may cause undesired operation.
Note:
Changes or modifications not expressly
approved by the party responsible for
compliance could void the user’s author-
ity to operate the equipment.
For Canada:
This devise complies with Industry
Canada licence-exempt RSS standard(s).
Operation is subject to the following two
conditions: (1) this device may not cause
interference, and (2) this device must ac-
cept any interference, including interfer-
ence that may cause undesired opera-
tion of the device.HEADLIGHTS
The headlight is a semi-sealed beam type
which uses a replaceable headlight (halo-
gen) bulb. A bulb can be replaced from in-
side the engine compartment without re-
moving the headlight assembly.
Page 419 of 516

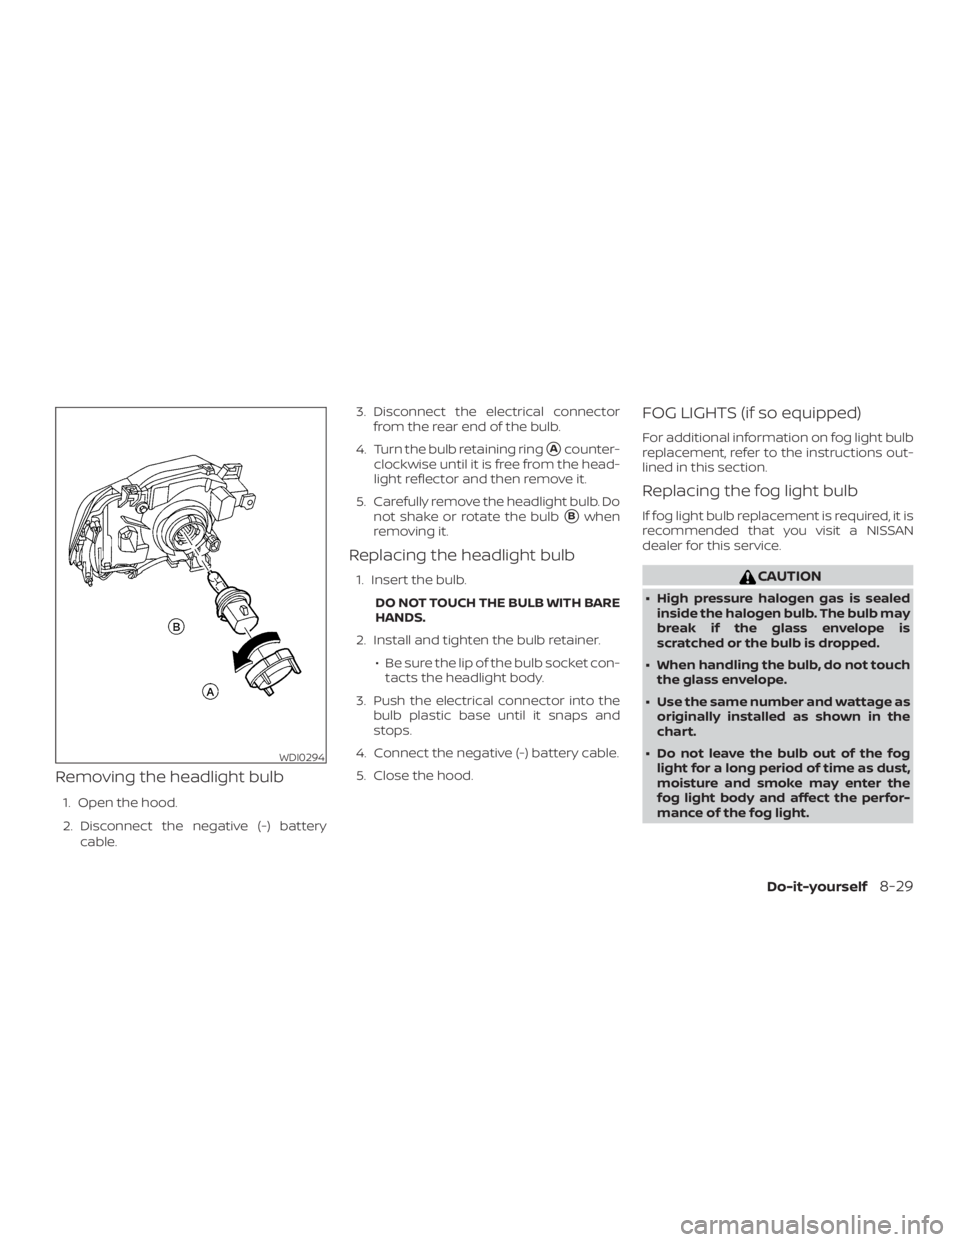
Removing the headlight bulb
1. Open the hood.
2. Disconnect the negative (-) batterycable. 3. Disconnect the electrical connector
from the rear end of the bulb.
4. Turn the bulb retaining ring
�Acounter-
clockwise until it is free from the head-
light reflector and then remove it.
5. Carefully remove the headlight bulb. Do not shake or rotate the bulb
�Bwhen
removing it.
Replacing the headlight bulb
1. Insert the bulb.
DO NOT TOUCH THE BULB WITH BARE
HANDS.
2. Install and tighten the bulb retainer. ∙ Be sure the lip of the bulb socket con-tacts the headlight body.
3. Push the electrical connector into the bulb plastic base until it snaps and
stops.
4. Connect the negative (-) battery cable.
5. Close the hood.
FOG LIGHTS (if so equipped)
For additional information on fog light bulb
replacement, refer to the instructions out-
lined in this section.
Replacing the fog light bulb
If fog light bulb replacement is required, it is
recommended that you visit a NISSAN
dealer for this service.
Page 490 of 516
Tire pressures
∙ When towing a trailer, inflate thevehicle tires to the recom-
mended cold tire pressure indi-
cated on the Tire and Loading In-
formation label.
∙ Trailer tire condition, size, load rat- ing and proper inflation pressure
should be in accordance with the
trailer and tire manufacturer’s
specifications.
Safety chains
Always use suitable safety chains between
your vehicle and the trailer. The safety
chains should be crossed and should be
attached to the hitch, not to the vehicle
bumper or axle. The safety chains can be
attached to the bumper if the hitch ball is
mounted to the bumper. Be sure to leave
enough slack in the chains to permit turn-
ing corners.
Trailer lights