2019 NISSAN 370Z USB
[x] Cancel search: USBPage 225 of 460

Turn the VOL control knob to adjust the
volume.
Adjusting tone quality and speaker
balance:
To adjust Bass, Treble, Balance and Fade,
push the Audio control knob. When the
display shows the setting you want to
change (Bass, Treble, Balance and Fade),
rotate the Audio control knob to set the
desired setting. For the other setting
methods, see “How to use SETTING but-
ton” (P.4-11).
This vehicle has some sound effect func-
tions as follows:
.Speed Sensitive Vol.
For more details, see “How to use SETTING
button” (P.4-11).
Switching the display:
Pushing the DISC·AUX button will switch
the displays as follows:
iPod®/USB ?CD/DVD ?Bluetooth®
Audio ?AUX ?iPod®/USBFM-AM-SAT radio operation
radio (FM/AM) band select:
Pushing the radio band select button will
change the band as follows:
AM ?FM1 ?FM2 ?AM
radio (SAT) band select:
Pushing the radio band select button will
change the band as follows:
XM1 ?XM2 ?XM3 ?XM1
When the radio band select button is
pushed while the ignition switch is in the
ACC or ON position, the radio will come
on at the channel last played.
The last channel played will also come on
when the ON·OFF button is pushed to ON.
The satellite radio is not available in
Alaska, Hawaii and Guam.
If another audio source is playing when
the radio band select button is turned to
ON, the audio source will automatically be
turned off and the last radio channel
played will come on.
When the stereo broadcast signal is weak,
the radio will automatically change from
stereo to monaural reception. TUNE (Tuning):
.
For AM and FM radio
Turn the radio TUNE knob for manual
tuning.
. For SiriusXM Satellite Radio
Turn the radio TUNE knob to seek
channels from all of the categories
when any category is not selected.
SEEK tuning/CATEGORY
(CAT):
. For AM and FM radio
Push the SEEK button
orto
tune from low to high or high to low
frequencies and to stop at the next
broadcasting station.
. For SiriusXM Satellite Radio
Push the SEEK button
orto
tune to the first channel of the next or
previous category.
During satellite radio reception, the fol-
lowing notices will be displayed under
certain conditions.
. NO SIGNAL (No signal is received while
the SAT tuner is connected.)
. OFF AIR (Broadcasting signed off)
. CHECK ANTENNA (Antenna connec-
tion error)
. LOADING (When the initial setting is
performed)
Center display, heater, air conditioner, audio, phone and voice recognition systems4-59
Page 231 of 460

USB (Universal Serial Bus) CON-
NECTION PORT (models with navi-
gation system)
Audio main operation
WARNING
Do not connect, disconnect or oper-
ate the USB device while driving.
Doing so can be a distraction. If
distracted you could lose control of
your vehicle and cause an accident
or serious injury.
CAUTION
.Do not force the USB device into
the USB connection port. Insert-
ing the USB device tilted or up-
side-down into the port may da-
mage the port. Make sure that
the USB device is connected cor-
rectly into the USB connection
port.
. Do not grab the USB connection
port cover (if so equipped) when
pulling the USB device out of the
port. This could damage the port and the cover.
. Do not leave the USB cable in a
place where it can be pulled
unintentionally. Pulling the cable
may damage the port.
Refer to your device manufacturer’s own-
er information regarding the proper use
and care of the device.
SAA2499
Open the console lid and connect a USB
memory as illustrated. Then, push the
DISC·AUX button repeatedly to switch to
the USB memory mode.
If the system has been turned off while
the USB memory was playing, pushing
the ON·OFF/VOL control knob will start
the USB memory.
Center display, heater, air conditioner, audio, phone and voice recognition systems4-65
Page 232 of 460

4-66Center display, heater, air conditioner, audio, phone and voice recognition systems
SAA2500
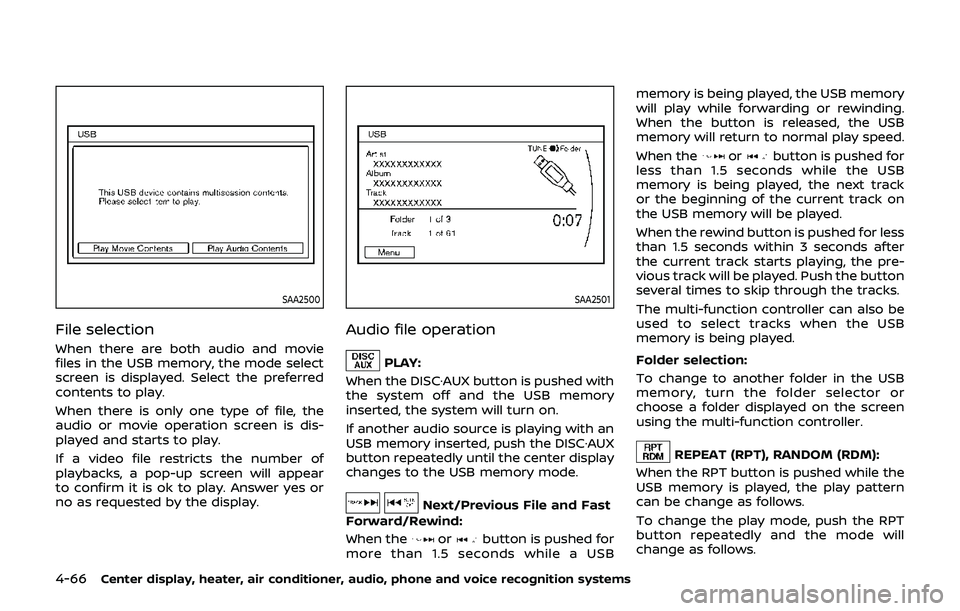
File selection
When there are both audio and movie
files in the USB memory, the mode select
screen is displayed. Select the preferred
contents to play.
When there is only one type of file, the
audio or movie operation screen is dis-
played and starts to play.
If a video file restricts the number of
playbacks, a pop-up screen will appear
to confirm it is ok to play. Answer yes or
no as requested by the display.
SAA2501
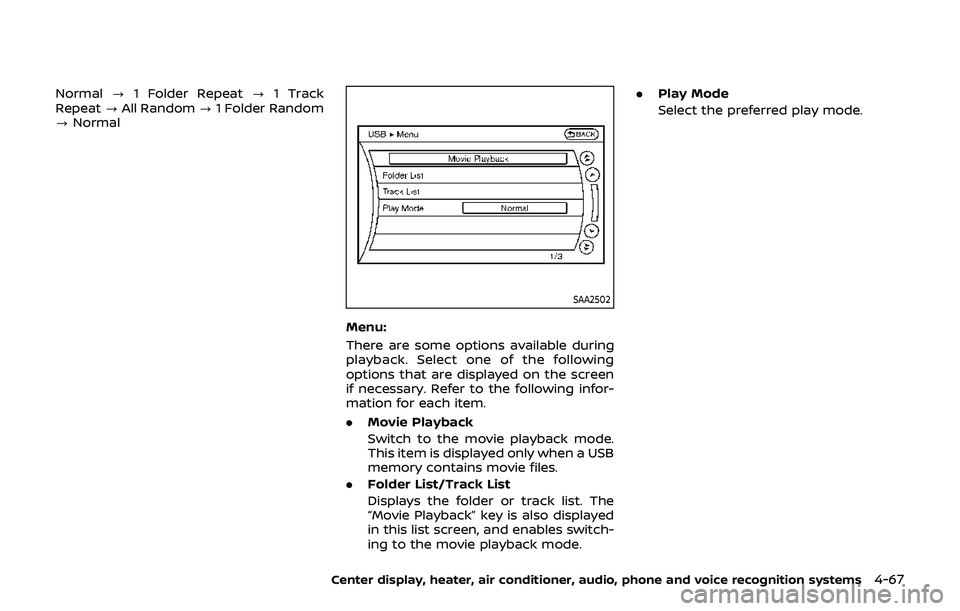
Audio file operation
PLAY:
When the DISC·AUX button is pushed with
the system off and the USB memory
inserted, the system will turn on.
If another audio source is playing with an
USB memory inserted, push the DISC·AUX
button repeatedly until the center display
changes to the USB memory mode.
Next/Previous File and Fast
Forward/Rewind:
When the
orbutton is pushed for
more than 1.5 seconds while a USB memory is being played, the USB memory
will play while forwarding or rewinding.
When the button is released, the USB
memory will return to normal play speed.
When the
orbutton is pushed for
less than 1.5 seconds while the USB
memory is being played, the next track
or the beginning of the current track on
the USB memory will be played.
When the rewind button is pushed for less
than 1.5 seconds within 3 seconds after
the current track starts playing, the pre-
vious track will be played. Push the button
several times to skip through the tracks.
The multi-function controller can also be
used to select tracks when the USB
memory is being played.
Folder selection:
To change to another folder in the USB
memory, turn the folder selector or
choose a folder displayed on the screen
using the multi-function controller.
REPEAT (RPT), RANDOM (RDM):
When the RPT button is pushed while the
USB memory is played, the play pattern
can be change as follows.
To change the play mode, push the RPT
button repeatedly and the mode will
change as follows.
Page 233 of 460

Normal?1 Folder Repeat ?1 Track
Repeat ?All Random ?1 Folder Random
? Normal
SAA2502
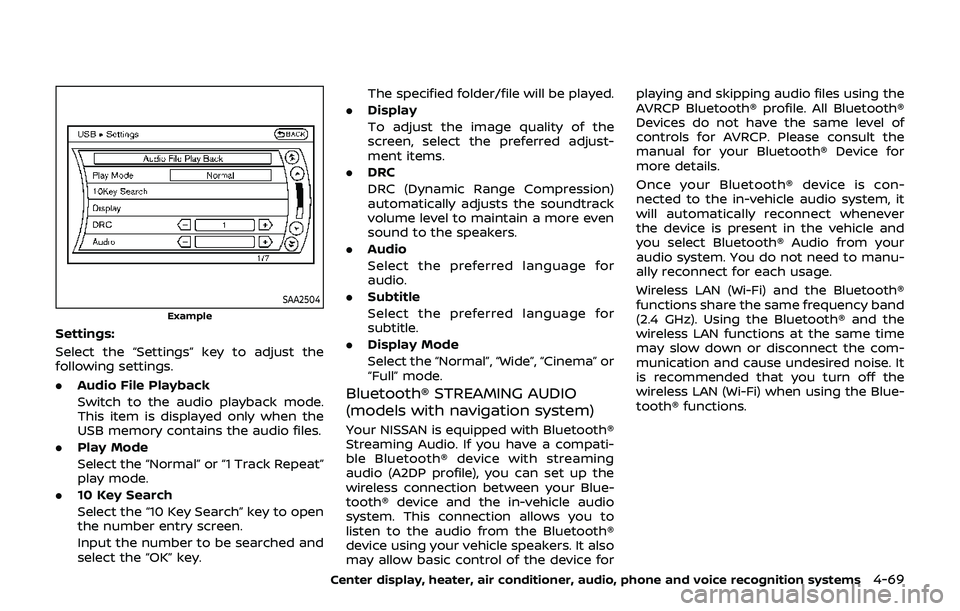
Menu:
There are some options available during
playback. Select one of the following
options that are displayed on the screen
if necessary. Refer to the following infor-
mation for each item.
. Movie Playback
Switch to the movie playback mode.
This item is displayed only when a USB
memory contains movie files.
. Folder List/Track List
Displays the folder or track list. The
“Movie Playback” key is also displayed
in this list screen, and enables switch-
ing to the movie playback mode. .
Play Mode
Select the preferred play mode.
Center display, heater, air conditioner, audio, phone and voice recognition systems4-67
Page 234 of 460

4-68Center display, heater, air conditioner, audio, phone and voice recognition systems
SAA2503
Movie file operation
Park the vehicle in a safe location for
the front seat occupants to operate the
USB memory while watching the
images.
PLAY:
When the DISC·AUX button is pushed with
the system off and the USB memory
inserted, the system will turn on.
If another audio source is playing with an
USB memory inserted, push the DISC·AUX
button repeatedly until the center display
changes to the USB memory mode. Operation keys:
To operate the USB memory, select the
desired key displayed on the operation
screen using the multi-function control-
ler.
Pause
Select the “
” key to pause the movie
file. To resume playing the movie file,
select the “
” key.
Play
Select the “
” key to start playing a
movie file, for example, after pausing a
movie file.
STOP
Select the “
” key to stop playing a
movie file.
Skip (Next chapter)
Select the “
” key to skip the chapter(s)
of the disc forward. The chapters will
advance the number of times the ENTER
button is pushed.
Skip (Previous chapter)
Select the “
” key to skip the chapter(s)
of the disc backward. The chapters will go
back the number of times the “
” key is selected.
List:
Select the “List” key on the movie file
operation screen to display the file list.
Page 235 of 460

SAA2504
Example
Settings:
Select the “Settings” key to adjust the
following settings.
.Audio File Playback
Switch to the audio playback mode.
This item is displayed only when the
USB memory contains the audio files.
. Play Mode
Select the “Normal” or “1 Track Repeat”
play mode.
. 10 Key Search
Select the “10 Key Search” key to open
the number entry screen.
Input the number to be searched and
select the “OK” key. The specified folder/file will be played.
. Display
To adjust the image quality of the
screen, select the preferred adjust-
ment items.
. DRC
DRC (Dynamic Range Compression)
automatically adjusts the soundtrack
volume level to maintain a more even
sound to the speakers.
. Audio
Select the preferred language for
audio.
. Subtitle
Select the preferred language for
subtitle.
. Display Mode
Select the “Normal”, “Wide”, “Cinema” or
“Full” mode.
Bluetooth® STREAMING AUDIO
(models with navigation system)
Your NISSAN is equipped with Bluetooth®
Streaming Audio. If you have a compati-
ble Bluetooth® device with streaming
audio (A2DP profile), you can set up the
wireless connection between your Blue-
tooth® device and the in-vehicle audio
system. This connection allows you to
listen to the audio from the Bluetooth®
device using your vehicle speakers. It also
may allow basic control of the device for playing and skipping audio files using the
AVRCP Bluetooth® profile. All Bluetooth®
Devices do not have the same level of
controls for AVRCP. Please consult the
manual for your Bluetooth® Device for
more details.
Once your Bluetooth® device is con-
nected to the in-vehicle audio system, it
will automatically reconnect whenever
the device is present in the vehicle and
you select Bluetooth® Audio from your
audio system. You do not need to manu-
ally reconnect for each usage.
Wireless LAN (Wi-Fi) and the Bluetooth®
functions share the same frequency band
(2.4 GHz). Using the Bluetooth® and the
wireless LAN functions at the same time
may slow down or disconnect the com-
munication and cause undesired noise. It
is recommended that you turn off the
wireless LAN (Wi-Fi) when using the Blue-
tooth® functions.
Center display, heater, air conditioner, audio, phone and voice recognition systems4-69
Page 240 of 460

4-74Center display, heater, air conditioner, audio, phone and voice recognition systems
Connected Devices:
Registered devices are shown on the list.
Select a Bluetooth® device from the list,
the following options will be available.
.Select
Select “Select” to connect the selected
device to the vehicle. If there is a
different device currently connected,
the selected device will replace the
current device.
. Edit
Rename the selected Bluetooth® de-
vice using the keypad displayed on
the screen. (See “How to use touch
screen” (P.4-5).)
. Delete
Delete the selected Bluetooth® device.
Edit Bluetooth Info:
Change the name broadcasted by this
system over Bluetooth®. Change the PIN
code that is entered when connecting a
hands free device to this system.
Replace Connected Phone:
Replace the Bluetooth® connection with a
connected Bluetooth® cellular phone. For
details about Hands-Free Phone System,
see “Bluetooth® hands-free phone system
(models with navigation system)” (P.4-82).iPod® PLAYER OPERATION (models
with navigation system)
Connecting iPod®
WARNING
Do not connect, disconnect or oper-
ate the USB device while driving.
Doing so can be a distraction. If
distracted you could lose control of
your vehicle and cause an accident
or serious injury.
CAUTION
. Do not force the USB device into
the USB connection port. Insert-
ing the USB device tilted or up-
side-down into the port may da-
mage the port. Make sure that
the USB device is connected cor-
rectly into the USB connection
port.
. Do not grab the USB connection
port cover (if so equipped) when
pulling the USB device out of the
port. This could damage the port
and the cover. .
Do not leave the USB cable in a
place where it can be pulled
unintentionally. Pulling the cable
may damage the port.
Refer to your device manufacturer’s own-
er information regarding the proper use
and care of the device.
Page 241 of 460

SAA2512
Open the console lid and connect the
iPod® cable to the USB connection port. If
compatible, the battery of the iPod® is
charged while the connection to the
vehicle.
Depending on the version of the iPod®,
the display on the iPod® shows a NISSAN
or Accessory Attached screen when the
connection is completed. When the iPod®
is connected to the vehicle, the iPod®
music library can only be operated by the
vehicle audio controls.
Compatibility
The following models are available:
.Fifth generation iPod® (version 1.2.3 or
later)
. iPod Classic® (version 1.1.1 or later)
. First generation iPod touch® (version
2.0.0 or later)
. Second generation iPod touch® (ver-
sion 1.2.3 or later)
. First generation iPod nano® (version
1.3.1 or later)
. Second generation iPod nano® (ver-
sion 1.1.3 or later)
. Third generation iPod nano® (version
1.1 or later)
. Fourth generation iPod nano® (version
1.0.2 or later)
Make sure that the iPod® version is
updated.
Audio main operation
Push the ignition switch to the ACC or ON
position. Then, push the DISC·AUX button
repeatedly to switch to the iPod® mode.
If the system has been turned off while
the iPod® was playing, pushing the
ON·OFF button will start the iPod®.
DISC·AUX button:
When the DISC·AUX button is pushed with
the system off and the iPod® connected,
the system will turn on. If another audio
source is playing and the iPod® is con-
nected, push the DISC·AUX button repeat-
edly until the center display changes to
the iPod® mode.
Interface:
The interface for iPod® operation shown
on the vehicle center display is similar to
the iPod® interface. Use the multi-func-
tion controller and the ENTER or BACK
button to play the iPod® with your
favorite settings.
The following items can be chosen from
the menu list screen. For further informa-
tion about each item, see the iPod®
Owner’s Manual.
. Now Playing
. Playlists
Center display, heater, air conditioner, audio, phone and voice recognition systems4-75