2019 NISSAN 370Z COUPE fuel
[x] Cancel search: fuelPage 189 of 460

4-22Center display, heater, air conditioner, audio, phone and voice recognition systems
.When the ignition switch is placed in
the OFF position and then placed back
in the ON position.
Language select mode
To change the language of the warning
text displayed on the mirror display, push
and hold the *switch
for approxi-
mately 6 to 11 seconds when the shift
lever is in the R (Reverse) position. When
the language select screen is displayed,
push the *switch
repeatedly until the
preferred language is displayed.
If the switch is not pushed for approxi-
mately 5 seconds, the language select
mode will automatically return to the
normal mode.
REARVIEW MONITOR SYSTEM LIM-
ITATIONS
WARNING
Listed below are the system limita-
tions for RearView Monitor. Failure to
operate the vehicle in accordance
with these system limitations could
result in serious injury or death.
. The system cannot completely
eliminate blind spots and may
not show every object. .
Underneath the bumper and the
corner areas of the bumper can-
not be viewed on the RearView
Monitor because of its monitoring
range limitation. The system will
not show small objects below the
bumper, and may not show ob-
jects close to the bumper or on
the ground.
. Objects viewed in the RearView
Monitor differ from actual dis-
tance because a wide-angle lens
is used.
. Objects in the RearView Monitor
will appear visually opposite
compared to when viewed in the
rear view and outside mirrors.
. Use the displayed lines as a re-
ference. The lines are highly af-
fected by the number of
occupants, fuel level, vehicle po-
sition, road conditions and road
grade.
. Make sure that the trunk lid or
rear hatch is securely closed
when backing up.
. Do not put anything on the rear
view camera. The rear view cam-
era is installed above the license
plate. .
When washing the vehicle with
high-pressure water, be sure not
to spray it around the camera.
Otherwise, water may enter the
camera unit causing water con-
densation on the lens, a malfunc-
tion, fire or an electric shock.
. Do not strike the camera. It is a
precision instrument. Otherwise,
it may malfunction or cause da-
mage resulting in a fire or an
electric shock.
The following are operating limitations
and do not represent a system malfunc-
tion:
. When the temperature is extremely
high or low, the screen may not clearly
display objects.
. When strong light is directly coming
on the camera, objects may not be
displayed clearly.
. Vertical lines may be seen in objects
on the screen. This is due to strong
reflected light from the bumper.
. The screen may flicker under fluores-
cent light.
. The colors of objects on the RearView
Monitor may differ somewhat from
the actual color of objects.
Page 196 of 460

.Use the displayed lines as a re-
ference. The lines are highly af-
fected by the number of
occupants, fuel level, vehicle po-
sition, road conditions and road
grade.
. Make sure that the trunk lid or
rear hatch is securely closed
when backing up.
. Do not put anything on the rear
view camera. The rear view cam-
era is installed above the license
plate.
. When washing the vehicle with
high-pressure water, be sure not
to spray it around the camera.
Otherwise, water may enter the
camera unit causing water con-
densation on the lens, a malfunc-
tion, fire or an electric shock.
. Do not strike the camera. It is a
precision instrument. Otherwise,
it may malfunction or cause da-
mage resulting in a fire or an
electric shock.
The following are operating limitations
and do not represent a system malfunc-
tion:
. When the temperature is extremely
high or low, the screen may not clearly display objects.
. When strong light is directly coming
on the camera, objects may not be
displayed clearly.
. Vertical lines may be seen in objects
on the screen. This is due to strong
reflected light from the bumper.
. The screen may flicker under fluores-
cent light.
. The colors of objects on the RearView
Monitor may differ somewhat from
the actual color of objects.
. Objects on the monitor may not be
clear in a dark environment.
. If dirt, rain or snow accumulates on
the camera, the RearView Monitor
may not display objects clearly. Clean
the camera.
. Do not use wax on the camera win-
dow. Wipe off any wax with a clean
cloth dampened with mild detergent
diluted with water.
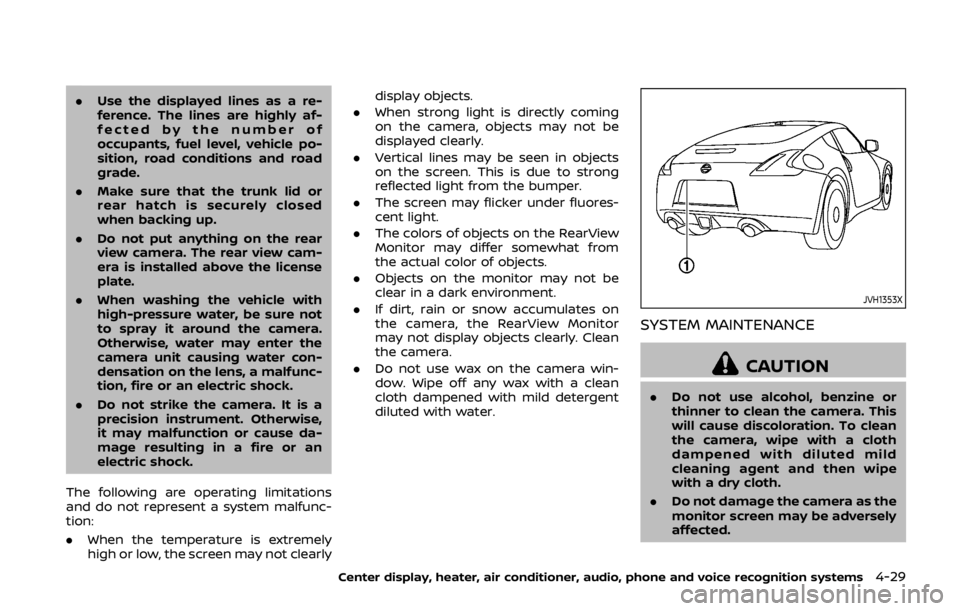
JVH1353X
SYSTEM MAINTENANCE
CAUTION
.Do not use alcohol, benzine or
thinner to clean the camera. This
will cause discoloration. To clean
the camera, wipe with a cloth
dampened with diluted mild
cleaning agent and then wipe
with a dry cloth.
. Do not damage the camera as the
monitor screen may be adversely
affected.
Center display, heater, air conditioner, audio, phone and voice recognition systems4-29
Page 281 of 460

4-114Center display, heater, air conditioner, audio, phone and voice recognition systems
CommandAction
Previous Destinations Sets a route to a previous destination.
.Information Command:
Command Action
Fuel Economy Displays fuel economy information.
Maintenance Displays maintenance information.
Traffic Information Turns the traffic information system ON and OFF.
Where am I? Displays your current location.
.Audio Command:
Command Action
AM Turns to the AM band, selecting the station last played.
FM Turns to the FM band, selecting the station last played.
XM Turns to the SiriusXM Satellite Radio band, selecting the channel last played.
CD Starts to play a CD.
.General Commands
Command Action
Go back Corrects the last recognition result to return to the previous screen
Exit Cancels Voice Recognition
Page 290 of 460

Information Commands:
CommandAction
Fuel Economy Displays fuel economy information.
Maintenance Displays maintenance information.
Where am I? Displays your current location.
Traffic Information Turns the traffic information system ON and OFF.
Weather Information Displays weather information.
Weather Map Displays a weather map.
Center display, heater, air conditioner, audio, phone and voice recognition systems4-123
Page 300 of 460

5 Starting and driving
Precautions when starting and driving ...................... 5-2Exhaust gas (carbon monoxide) ................................ 5-2
Three-way catalyst ............................................................... 5-3
Tire Pressure Monitoring System (TPMS) ........... 5-3
Avoiding collision and rollover .................................... 5-6
Off-road recovery .................................................................. 5-6
Rapid air pressure loss ...................................................... 5-6
Drinking alcohol/drugs and driving ........................ 5-7
Push-button ignition switch ................................................ 5-8 Operating range for engine start function ....... 5-8
Push-button ignition switch operation ................ 5-9
Push-button ignition switch positions ................. 5-9
Emergency engine shut off ........................................ 5-10
Intelligent Key battery discharge ........................... 5-10
Before starting the engine ................................................. 5-11
Starting the engine .................................................................. 5-11
Driving the vehicle .................................................................... 5-12 Automatic transmission ................................................ 5-12
Manual Transmission ....................................................... 5-17
Parking brake ........................................................................\
....... 5-21
Cruise control ........................................................................\
....... 5-22 Precautions on cruise control .................................. 5-22
Cruise control operations ............................................ 5-23
Break-in schedule ..................................................................... 5-24
Fuel efficient driving tips ..................................................... 5-24 Increasing fuel economy .................................................... 5-25
Parking/parking on hills ...................................................... 5-26
Power steering ........................................................................\
.... 5-27
Brake system ........................................................................\
....... 5-27
Braking precautions ....................................................... 5-27
Parking brake break-in ................................................ 5-28
Brake assist ........................................................................\
........... 5-28 Brake assist ........................................................................\
... 5-28
Anti-lock Braking System (ABS) ............................ 5-28
Vehicle Dynamic Control (VDC) system .................. 5-30
Performance dampers (NISMO models) ................. 5-32
Cold weather driving ............................................................. 5-33 Freeing a frozen door lock ....................................... 5-33
Antifreeze ........................................................................\
........ 5-33
Battery ........................................................................\
............... 5-33
Draining of coolant water ......................................... 5-33
Tire equipment ................................................................... 5-33
Special winter equipment ......................................... 5-33
Driving on snow or ice ................................................. 5-33
Engine block heater (if so equipped) ............... 5-34
Active noise cancellation/Active sound
enhancement (if so equipped) ....................................... 5-35 Active noise cancellation ........................................... 5-35
Active sound enhancement ..................................... 5-35
Page 302 of 460

THREE-WAY CATALYST
The three-way catalyst is an emission
control device installed in the exhaust
system. Exhaust gases in the three-way
catalyst are burned at high temperatures
to help reduce pollutants.
WARNING
.The exhaust gas and the exhaust
system are very hot. Keep people,
animals or flammable materials
away from the exhaust system
components.
. Do not stop or park the vehicle
over flammable materials such as
dry grass, waste paper or rags.
They may ignite and cause a fire.
CAUTION
.Do not use leaded gasoline. De-
posits from leaded gasoline ser-
iously reduce the three-way
catalyst’s ability to help reduce
exhaust pollutants.
. Keep your engine tuned up. Mal-
functions in the ignition, fuel in-
jection, or electrical systems can cause overrich fuel flow into the
three-way catalyst, causing it to
overheat. Do not keep driving if
the engine misfires, or if notice-
able loss of performance or other
unusual operating conditions are
detected. Have the vehicle in-
spected. It is recommended you
visit a NISSAN dealer for this
service.
. Avoid driving with an extremely
low fuel level. Running out of fuel
could cause the engine to misfire,
damaging the three-way catalyst.
. Do not race the engine while
warming it up.
. Do not push or tow your vehicle
to start the engine.
TIRE PRESSURE MONITORING SYS-
TEM (TPMS)
Each tire, including the spare (if provided),
should be checked monthly when cold
and inflated to the inflation pressure
recommended by the vehicle manufac-
turer on the vehicle placard or tire infla-
tion pressure label. (If your vehicle has
tires of a different size than the size
indicated on the vehicle placard or tire
inflation pressure label, you should deter-
mine the proper tire inflation pressure for those tires.)
As an added safety feature, your vehicle
has been equipped with a Tire Pressure
Monitoring System (TPMS) that illumi-
nates a low tire pressure telltale when
one or more of your tires is significantly
under-inflated. Accordingly, when the low
tire pressure telltale illuminates, you
should stop and check your tires as soon
as possible, and inflate them to the
proper pressure. Driving on a significantly
under-inflated tire causes the tire to
overheat and can lead to tire failure.
Under-inflation also reduces fuel effi-
ciency and tire tread life, and may affect
the vehicle’s handling and stopping abil-
ity.
Please note that the TPMS is not a
substitute for proper tire maintenance,
and it is the driver’s responsibility to
maintain correct tire pressure, even if
under-inflation has not reached the level
to trigger illumination of the TPMS low
tire pressure telltale.
Your vehicle has also been equipped with
a TPMS malfunction indicator to indicate
when the system is not operating prop-
erly. The TPMS malfunction indicator is
combined with the low tire pressure tell-
tale. When the system detects a malfunc-
tion, the telltale will flash for
approximately one minute and then re-
Starting and driving5-3
Page 310 of 460

.Make sure the area around the vehicle
is clear.
. Check fluid levels such as engine oil,
coolant, brake fluid and window
washer fluid as frequently as possible,
or at least whenever you refuel.
. Check that all windows and lights are
clean.
. Visually inspect tires for their appear-
ance and condition. Also check tires
for proper inflation.
. Lock all doors.
. Position seat and adjust head re-
straints.
. Adjust inside and outside mirrors.
. Fasten seat belts and ask all passen-
gers to do likewise.
. Check the operation of warning lights
when the ignition switch is pushed to
the ON position. (See “Warning lights,
indicator lights and audible remin-
ders” (P.2-10).) 1. Apply the parking brake.
2.
Automatic Transmission (AT) model:
Move the shift lever to the P (Park) or N
(Neutral) position. (P is recommended.)
The starter is designed not to operate
unless the shift lever is in either of the
above positions.
Manual Transmission (MT) model:
Move the shift lever to the N (Neutral)
position. Depress the clutch pedal fully
to the floor.
The starter is designed not to operate
unless the clutch pedal is fully de-
pressed.
The Intelligent Key must be carried
when operating the ignition switch.
3. Push the ignition switch to the ON position. Firmly depress the brake
pedal (AT model) or the clutch pedal
(MT model) and push the ignition
switch to start the engine.
To start the engine immediately, push
and release the ignition switch while
depressing the brake pedal or the
clutch pedal with the ignition switch
in any position.
.If the engine is very hard to start inextremely cold weather or when
restarting, depress the accelerator
pedal a little (approximately 1/3 to the floor) and while holding, crank
the engine. Release the accelerator
pedal when the engine starts.
.If the engine is very hard to start
because it is flooded, depress the
accelerator pedal all the way to the
floor and hold it. Push the ignition
switch to the ON position to start
cranking the engine. After 5 or 6
seconds, stop cranking by pushing
the ignition switch to OFF. After
cranking the engine, release the
accelerator pedal. Crank the engine
with your foot off the accelerator
pedal by depressing the brake
pedal and pushing the push-button
ignition switch to start the engine.
If the engine starts, but fails to run,
repeat the above procedure.
CAUTION
Do not operate the starter for more
than 15 seconds at a time. If the
engine does not start, push the
ignition switch to OFF and wait 10
seconds before cranking again,
otherwise the starter could be da-
maged.
Starting and driving5-11
BEFORE STARTING THE ENGINE STARTING THE ENGINE
Page 311 of 460

5-12Starting and driving
4.Warm-up
Allow the engine to idle for at least 30
seconds after starting. Do not race the
engine while warming it up. Drive at
moderate speed for a short distance
first, especially in cold weather. In cold
weather, keep the engine running for
a minimum of 2 - 3 minutes before
shutting it off. Starting and stopping
the engine over a short period of time
may make the vehicle more difficult to
start.
When racing the engine up to 4,500
rpm or more under no load condition,
the engine will enter the fuel cut
mode.
5. To stop the engine, shift the shift lever to the P (Park) position (AT model) or
move the shift lever to the N (Neutral)
position (MT model), and push the
ignition switch to the OFF position.
NOTE:
Care should be taken to avoid situations
that can lead to potential battery dis-
charge and potential no-start condi-
tions such as:
1. Installation or extended use of elec-
tronic accessories that consume
battery power when the engine is
not running (Phone chargers, GPS,
DVD players, etc.) 2.
Vehicle is not driven regularly and/
or only driven short distances.
In these cases, the battery may need to
be charged to maintain battery health.AUTOMATIC TRANSMISSION
7 speed automatic transmission
The automatic transmission in your vehi-
cle is electronically controlled by a trans-
mission control module to produce
maximum efficiency and smooth opera-
tion.
Shown on the following pages are the
recommended operating procedures for
this transmission. Follow these proce-
dures for maximum vehicle performance
and driving enjoyment.
Starting the vehicle
After starting the engine, fully depress the
foot brake pedal and push the shift lever
button before shifting the shift lever to
the R (Reverse), N (Neutral), D (Drive) or
Manual shift mode position. Be sure the
vehicle is fully stopped before attempting
to shift the shift lever.
This automatic transmission model is
designed so that the foot brake pedal
must be depressed before shifting from
P (Park) to any drive position while the
ignition switch position is ON.
The shift lever cannot be moved out of
the P (Park) position and into any of the
other gear positions if the ignition
switch is pushed to the LOCK, OFF or
ACC position.
DRIVING THE VEHICLE