2019 MERCEDES-BENZ SL CLASS height
[x] Cancel search: heightPage 172 of 330

Selecting the CURVE setting
In theCURVEdrive program, the curve tiltingfunction is activated. The vehicle tilts by up to2.65 degrees into bends. The tilt function andthe comfort suspension tuning increase drivingcomfort in corners.CURVEis available in thespeed range between 9 mph (15 km/h) and112 mph (180 km/h). Select this mode onwinding roads in particular. Outside this speedrange, theCURVEdrive program is the sameas theComfortdrive program.
The curve tilting function monitors the road infront of your vehicle by means of a cameraattached at the top of the windshield. Thisfunction is automatically active if you selecttheCURVEdrive program. The system isoperational at speeds of up to 112 mph(180 km/h).
XPress DYNAMIC SELECT button�Cas manytimes as necessary until theCURVEdriveprogram is selected.
The system is deactivated if you select a differ-ent drive program.
The system may be impaired or may not func-tion if:
Ryou are driving more slowly than 9 mph(15 km/h) or faster than 112 mph(180 km/h).
Rthe vehicle is fully laden.
Ryou drive with very high lateral acceleration.
Activating the driving dynamics dis-
play
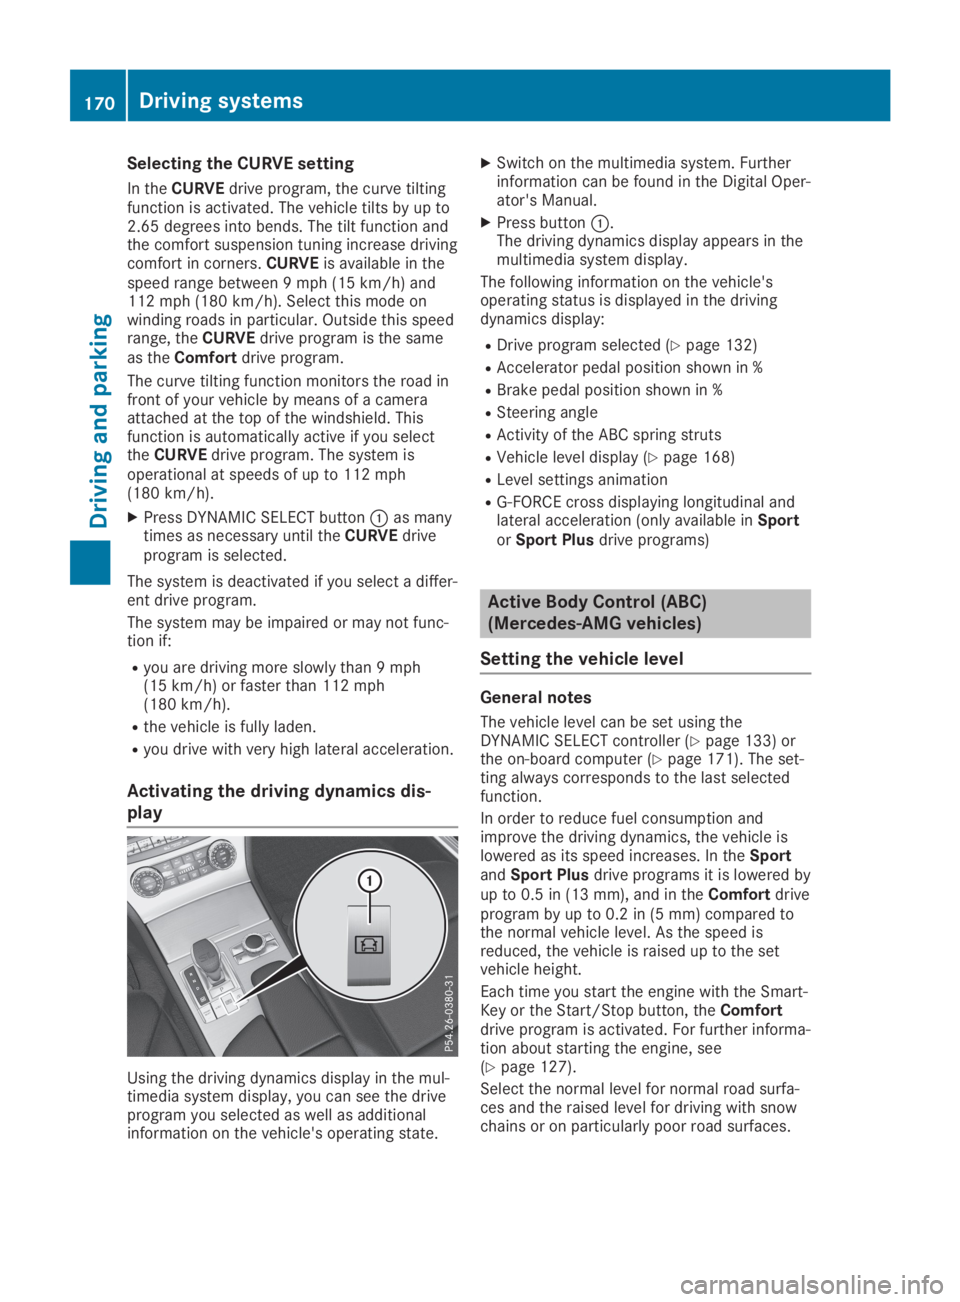
Using the driving dynamics display in the mul-timedia system display, you can see the driveprogram you selected as well as additionalinformation on the vehicle's operating state.
XSwitch on the multimedia system. Furtherinformation can be found in the Digital Oper-ator's Manual.
XPress button�C.The driving dynamics display appears in themultimedia system display.
The following information on the vehicle'soperating status is displayed in the drivingdynamics display:
RDrive program selected (Ypage 132)
RAccelerator pedal position shown in %
RBrake pedal position shown in %
RSteering angle
RActivity of the ABC spring struts
RVehicle level display (Ypage 168)
RLevel settings animation
RG-FORCE cross displaying longitudinal andlateral acceleration (only available inSportorSport Plusdrive programs)
Active Body Control (ABC)
(Mercedes-AMG vehicles)
Setting the vehicle level
General notes
The vehicle level can be set using theDYNAMIC SELECT controller (Ypage 133) orthe on-board computer (Ypage 171). The set-ting always corresponds to the last selectedfunction.
In order to reduce fuel consumption andimprove the driving dynamics, the vehicle islowered as its speed increases. In theSportandSport Plusdrive programs it is lowered byup to 0.5 in (13 mm), and in theComfortdriveprogram by up to 0.2 in (5 mm) compared tothe normal vehicle level. As the speed isreduced, the vehicle is raised up to the setvehicle height.
Each time you start the engine with the Smart-Key or the Start/Stop button, theComfortdrive program is activated. For further informa-tion about starting the engine, see(Ypage 127).
Select the normal level for normal road surfa-ces and the raised level for driving with snowchains or on particularly poor road surfaces.
170Driving systems
Driving and parking
Page 173 of 330

Important safety notes
The vehicle is slightly lowered when the engineis switched off.
GWARNING
When the vehicle is being lowered, people
could become trapped if their limbs are
between the vehicle body and the wheels or
underneath the vehicle. There is a risk of
injury.
Make sure no one is underneath the vehicle
or in the immediate vicinity of the wheel
arches when the vehicle is being lowered.
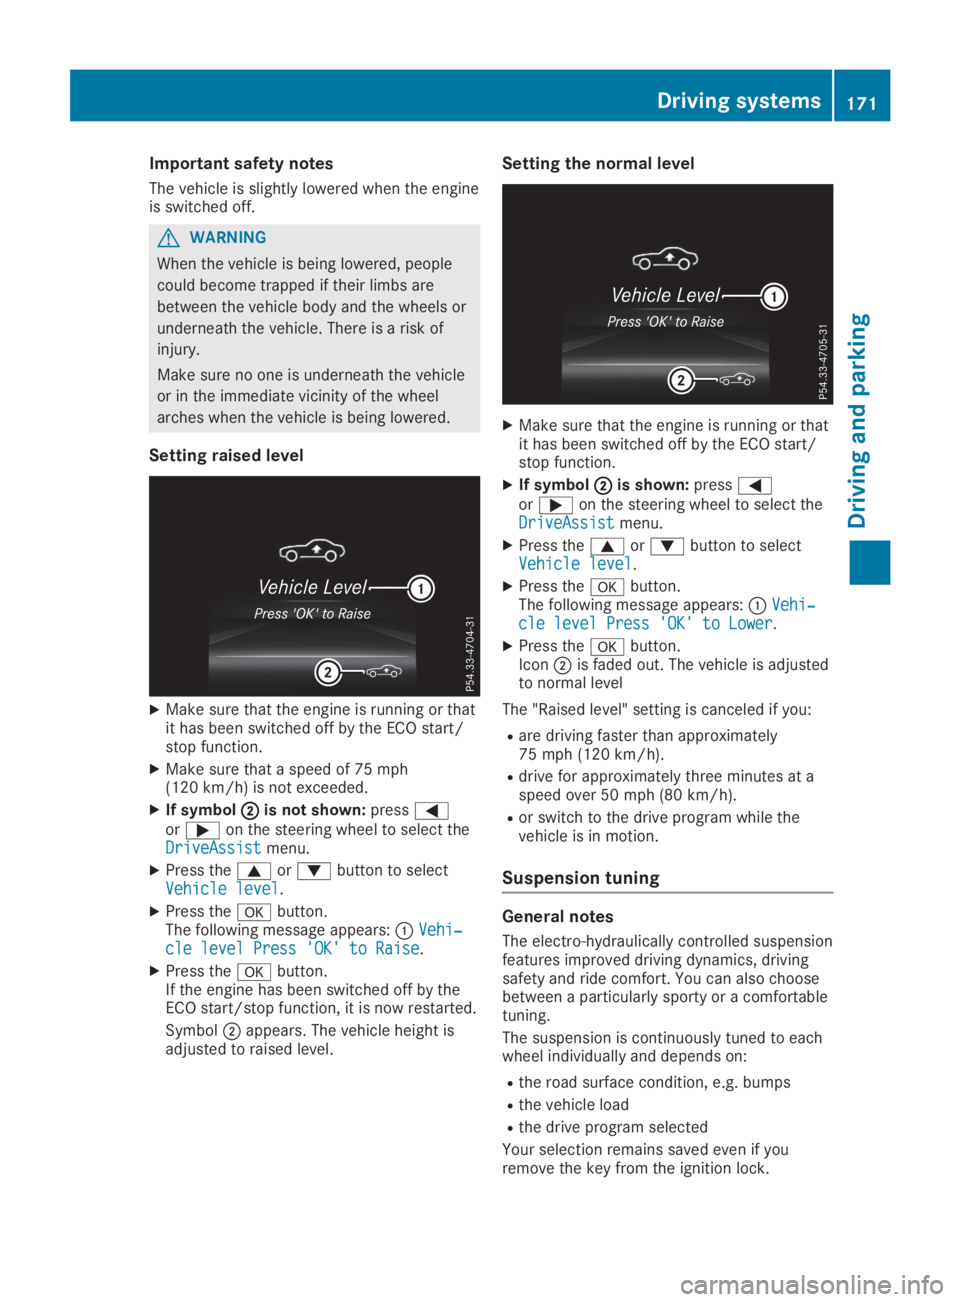
Setting raised level
XMake sure that the engine is running or thatit has been switched off by the ECO start/stop function.
XMake sure that a speed of 75 mph(120 km/h) is not exceeded.
XIf symbol�D�Dis not shown:press�Yor�eon the steering wheel to select theDriveAssistDriveAssistmenu.
XPress the�cor�dbutton to selectVehicle levelVehicle level.
XPress the�vbutton.The following message appears:�CVehi‐Vehi‐cle level Press 'OK' to Raisecle level Press 'OK' to Raise.
XPress the�vbutton.If the engine has been switched off by theECO start/stop function, it is now restarted.
Symbol�Dappears. The vehicle height isadjusted to raised level.
Setting the normal level
XMake sure that the engine is running or thatit has been switched off by the ECO start/stop function.
XIf symbol�D�Dis shown:press�Yor�eon the steering wheel to select theDriveAssistDriveAssistmenu.
XPress the�cor�dbutton to selectVehicle levelVehicle level.
XPress the�vbutton.The following message appears:�CVehi‐Vehi‐cle level Press 'OK' to Lowercle level Press 'OK' to Lower.
XPress the�vbutton.Icon�Dis faded out. The vehicle is adjustedto normal level
The "Raised level" setting is canceled if you:
Rare driving faster than approximately75 mph (120 km/h).
Rdrive for approximately three minutes at aspeed over 50 mph (80 km/h).
Ror switch to the drive program while thevehicle is in motion.
Suspension tuning
General notes
The electro-hydraulically controlled suspensionfeatures improved driving dynamics, drivingsafety and ride comfort. You can also choosebetween a particularly sporty or a comfortabletuning.
The suspension is continuously tuned to eachwheel individually and depends on:
Rthe road surface condition, e.g. bumps
Rthe vehicle load
Rthe drive program selected
Your selection remains saved even if youremove the key from the ignition lock.
Driving systems171
Driving and pa rking
Z
Page 182 of 330

Under the following circumstances, the rearview camera will not function, or will functionin a limited manner:
Rif the trunk lid is open
Rin heavy rain, snow or fog
Rat night or in very dark places
Rif the camera is exposed to very bright light
Rif the area is lit by fluorescent bulbs or LEDlighting (the display may flicker)
Rif there is a sudden change in temperature,e.g. when driving into a heated garage inwinter
Rif the camera lens is dirty or obstructed.Observe the notes on cleaning(Ypage 275)
Rif the rear of your vehicle is damaged. In thiscase, have the camera position and settingchecked at a qualified specialist workshop.
The field of vision and other functions of therear view camera may be restricted due toadditional accessories on the rear of the vehi-cle (e.g. license plate holder, bicycle rack).
On vehicles with height-adjustable chassis,leaving the standard height can result in inac-curacies in the guide lines, depending on tech-nical conditions.
iThe contrast of the display may be affec-ted by the sudden presence of sunlight orother light sources, e.g. when exiting agarage. Pay particular attention in this situa-tion.
iIf usability is severely restricted, e.g. dueto pixel errors, have the display repaired orreplaced.
Activating/deactivating the rear view
camera
XTo activate:make sure that the SmartKeyis in position�Hin the ignition lock.
XMake sure that theActivation by R gearActivation by R gearfunction is selected in the multimedia sys-tem; see the Digital Operator's Manual.
XEngage reverse gear.The multimedia system shows the areabehind the vehicle with guide lines.
The image from the rear view camera isavailable throughout the maneuvering proc-ess.
To deactivate:the rear view camera deacti-vates if you shift the transmission to position�], or after driving forwards a short distance.
The inner segments of the warning indicatorare displayed in red if there is a complete sys-tem failure. The indicator lamp in thePARKTRONIC button lights up.
If the system fails at the rear of the vehicle:
Rthe rear segments are shown in red whenbacking up.
Rthe rear segments are hidden when drivingforwards.
Displays in the multimedia system
The rear view camera may show a distortedview of obstacles, show them incorrectly ornot at all. The rear view camera does not showobjects in the following positions:
Rvery close to the rear bumper
Runder the rear bumper
Rin close range above the handle on the trunklid
!Objects not at ground level may appear tobe further away than they actually are, e.g.:
Rthe bumper of a parked vehicle
Rthe drawbar of a trailer
Rthe ball coupling of a trailer tow hitch
Rthe rear section of an HGV
Ra slanted post
Use the guidelines only for orientation.Approach objects no further than the bot-tom-most guideline.
�CYellow guide line at a distance of approx-imately 13 ft (4.0 m) from the rear area
�DWhite guide line without steering input –vehicle width including the exterior mirrors(static)
180Driving systems
Driving and parking
Page 268 of 330

XReach into the gap, pull hood catch han-dle�Dup and lift hood�C.
If you lift the hood by approximately 15 in(40 cm), the hood is opened and held openautomatically by the gas-filled strut.
Closing the hood
XLower the hood and let it fall from a heightof approximately 8 in (20 cm).
XCheck that the hood has engaged properly.If the hood can be raised slightly, it is notproperly engaged. Open it again and close itwith a little more force.
Engine oil
Notes on the oil level
Depending on your driving style, the vehicleconsumes up to 0.9 US qt(0.8 liters) of oil per600 miles (1,000 km). The oil consumptionmay be higher than this when the vehicle isnew or if you frequently drive at high enginespeeds.
Depending on the engine, the oil dipstick maybe in a different location.
When checking the oil level:
Rpark the vehicle on a level surface
Rthe engine should be switched off forapproximately five minutes if the engine isat normal operating temperature
Rif the engine is not at normal operating tem-perature, e.g. if the engine was only startedbriefly, wait about 30 minutes before carry-ing out the measurement
Checking the oil level using the oil dip-
stick
GWARNING
Certain components in the engine compart-
ment, such as the engine, radiator and parts
of the exhaust system, can become very
hot. Working in the engine compartment
poses a risk of injury.
Only touch the following components descri-
bed.
If work is being carried out on public roads,pay attention to the road and traffic conditionsand secure the area as appropriate.
Example
XPull out oil dipstick�C.
XWipe off oil dipstick�C.
XSlowly slide oil dipstick�Cinto the guidetube as far as it will go, and take it outagain.If the level is between MIN mark�
Page 314 of 330

Maximum loaded vehicle weight
The maximum weight is the sum of:
Rthe curb weight of the vehicle
Rthe weight of the accessories
Rthe load limit
Rthe weight of the factory installed optionalequipment
Kilopascal (kPa)
Metric unit for tire pressure. 6.9 kPa corre-sponds to 1 psi. Another unit for tire pressureis bar. 100 kilopascals (kPa) are the equivalentof 1 bar.
Load index
In addition to the load-bearing index, the loadindex may also be imprinted on the sidewall ofthe tire. This specifies the load-bearing capa-city more precisely.
Curb weight
The weight of a vehicle with standard equip-ment including the maximum capacity of fuel,oil and coolant. It also includes the air-condi-tioning system and optional equipment if theseare installed in the vehicle, but does notinclude passengers or luggage.
Maximum load rating
The maximum load rating is the maximum per-missible weight in kilograms or lbs for which atire is approved.
Maximum permissible tire pressure
Maximum permissible tire pressure for onetire.
Maximum load on one tire
Maximum load on one tire. This is calculatedby dividing the maximum axle load of one axleby two.
PSI (pounds per square inch)
A standard unit of measure for tire pressure.
Aspect ratio
Relationship between tire height and tire widthin percent.
Tire pressure
This is pressure inside the tire applying an out-ward force to each square inch of the tire'ssurface. The tire pressure is specified in
pounds per square inch (psi), in kilopascal(kPa) or in bar. The tire pressure should onlybe corrected when the tires are cold.
Cold tire pressure
The tires are cold:
Rif the vehicle has been parked with the tiresout of direct sunlight for at least three hoursand
Rif the vehicle has not been driven furtherthan 1 mile (1.6 km)
Tread
The part of the tire that comes into contactwith the road.
Bead
The tire bead ensures that the tire sitssecurely on the wheel. There are several steelwires in the bead to prevent the tire from com-ing loose from the wheel rim.
Sidewall
The part of the tire between the tread and thebead.
Weight of optional extras
The combined weight of those optional extrasthat weigh more than the replaced standardparts and more than 2.3 kg (5 lbs). Theseoptional extras, such as high-performancebrakes, level control, a roof rack or a high-per-formance battery, are not included in the curbweight and the weight of the accessories.
TIN (Tire Identification Number)
This is a unique identifier which can be usedby a tire manufacturer to identify tires, forexample for a product recall, and thus identifythe purchasers. The TIN is made up of themanufacturer's identity code, tire size, tiretype code and the manufacturing date.
Load bearing index
The load bearing index (also load index) is acode that contains the maximum load bearingcapacity of a tire.
Traction
Traction is the result of friction between thetires and the road surface.
312All about wheels and tires
Wheels and tires
Page 317 of 330

RThe jack must be placed on a firm, flat andnon-slip surface. On a loose surface, a large,flat, load-bearing underlay must be used. Ona slippery surface, a non-slip underlay mustbe used, e.g. rubber mats.
RDo not use wooden blocks or similar objectsas a jack underlay. Otherwise, the jack willnot be able to achieve its load-bearing capa-city due to the restricted height.
RMake sure that the distance between theunderside of the tires and the ground doesnot exceed 1.2 in (3 cm).
RNever place your hands and feet under theraised vehicle.
RDo not lie under the vehicle.
RDo not start the engine when the vehicle israised.
RDo not open or close a door or the trunk lidwhen the vehicle is raised.
RMake sure that no persons are present inthe vehicle when the vehicle is raised.
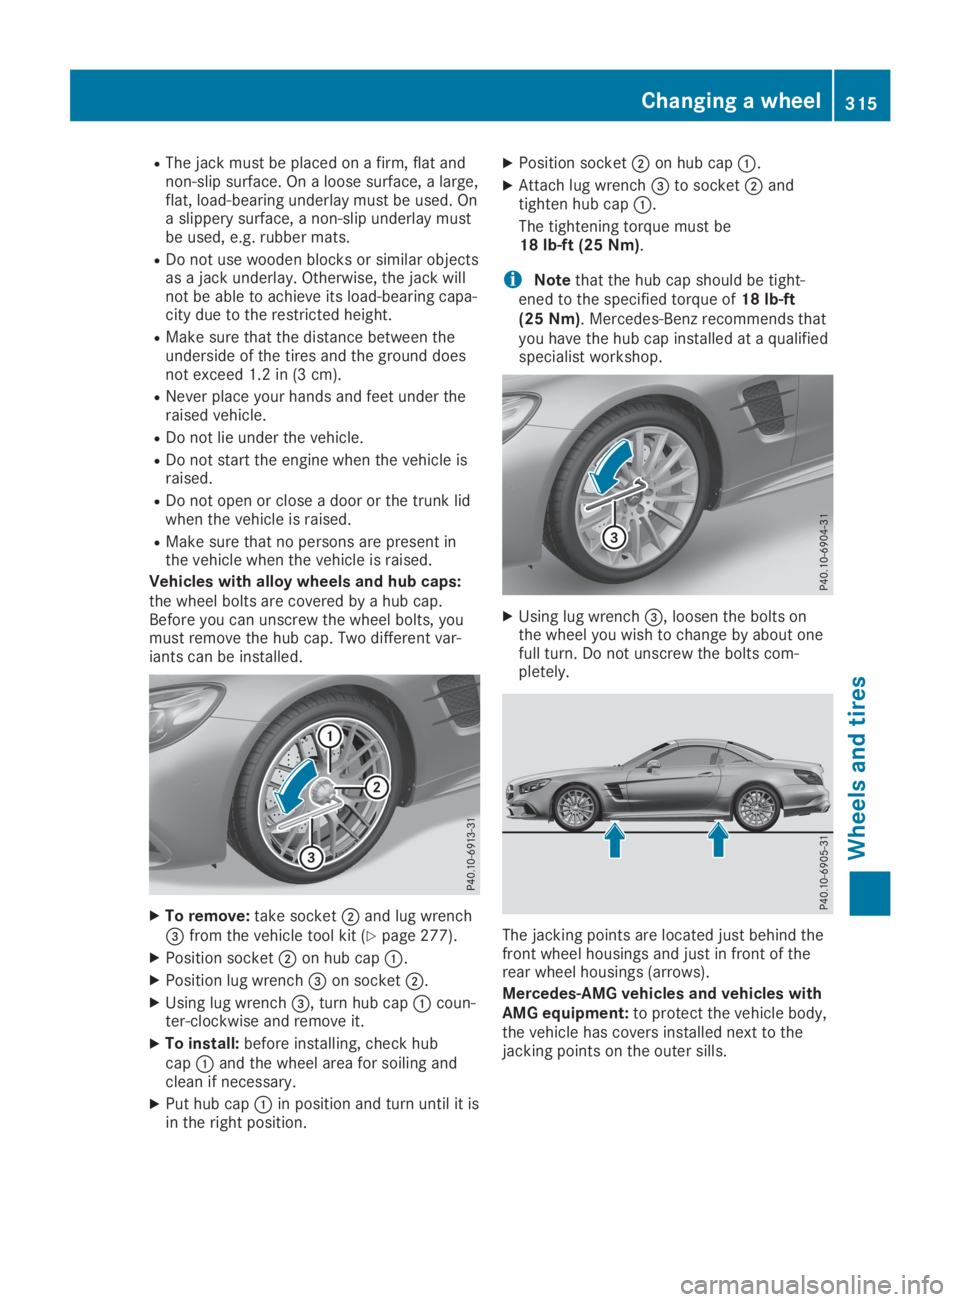
Vehicles with alloy wheels and hub caps:the wheel bolts are covered by a hub cap.Before you can unscrew the wheel bolts, youmust remove the hub cap. Two different var-iants can be installed.
XTo remove:take socket�Dand lug wrench�
Page 329 of 330

Missing values were not available at time ofgoing to print.
Mercedes‑AMGvehicles
Vehicle length182.7 in (4640 mm)
Vehicle lengthwhen opening/clos-ing the roof
Vehicle widthincluding exteriormirrors
82.6 in (2099 mm)
Vehicle height51.2 in - 51.5 in(1300 mm -1308 mm)
Vehicle heightwhen opening/clos-ing the roof
66.1 in - 66.6 in(1679 mm -1691 mm)
Wheelbase101.7 in (2584 mm)
Turning radius
All other models
Vehicle length,SL 450182.3 in (4631 mm)
Vehicle length,SL 550182.3 in (4631 mm)
Vehicle lengthwhen opening/clos-ing the roof, SL 450
188.5 in (4787 mm)
Vehicle lengthwhen opening/clos-ing the roof, SL 550
188.5 in (4787 mm)
Vehicle widthincluding exteriormirrors
82.6 in (2099 mm)
Vehicle height51.8 in (1315 mm)
Vehicle heightwhen opening/clos-ing the roof
66.8 in (1696 mm)
Wheelbase101.8 in (2585 mm)
Turning radius36.2 ft (11.04m)
Vehicle data327
Technical data
Z