2019 MERCEDES-BENZ GLS SUV rear view mirror
[x] Cancel search: rear view mirrorPage 318 of 398
The data you receive contains the following
information:
R the location where the speed limit was excee-
ded
R the time at which the speed limit was excee-
ded
R the selected speed limit which was exceeded
Geo fencing Geo fencing allows you to select areas which the
vehicle should not enter or leave. You will be
informed if the vehicle crosses the boundaries
of the selected areas. You can select the way in which you receive this information beforehand.
Possible options include text message, e-mail or an automated call.
The area can be determined as either a circle or
a polygon with a maximum of ten corners. You
can specify up to ten areas simultaneously. Dif- ferent settings are possible for each area.
These settings can be called up under "Owners
Online" at http://www.mbusa.com.
Alternatively, you can also trigger an Info call
and notify the customer service representative
that you wish to activate geo-fencing.
Currently inactive areas can be activated by text
message.
Triggering the vehicle alarm With this function, you can trigger the vehicle's
panic alarm via text message. An alarm sounds
and the exterior lighting flashes. Depending on
the setting, the panic alarm lasts five or ten sec-
onds. Afterwards, the alarm switches off. Garage door opener
General notes The HomeLink
®
garage door opener integrated
in the rear-view mirror allows you to operate up to three different door and gate systems.
Use the integrated garage door opener only on
garage doors that:
R they are equipped with a safety stop and
reverse feature
R they conform to the current U.S. safety stand-
ards When it has been programmed, the integrated
garage door opener in the rear-view mirror will
assume the function of the garage door sys-
tem's remote control. Please also read the oper-
ating instructions for the garage door system.
When programming a garage door opener, park the vehicle outside the garage. Do not leave the
engine running while programming.
Certain garage door drives are incompatible
with the integrated garage door opener. If you
have difficulty programing the integrated garage
door opener, contact a Mercedes-Benz Service
Center.
Alternatively, you can call the following tele-
phone assistance services:
R USA: Mercedes-Benz Customer Assistance
Center at 1-800-FOR-MERCedes
R Canada: Customer Service at
1-800-387-0100
R HomeLink ®
hotline 1-800-355-3515 (free of
charge)
More information on HomeLink ®
and/or com-
patible products is also available on the Internet
at http://www.homelink.com.
Notes on the declaration of conformity
(Y page 30).
USA: FCC ID: CB2HMIHL4
Canada: IC: 279B-HMIHL4
Important safety notes G
WARNING
When you operate or program the door with
the integrated garage door opener, persons in the range of movement of the door may
become trapped or be struck by the door.
There is a risk of injury.
When using the integrated garage door
opener, always make sure that nobody is
within the range of movement of the door. G
DANGER
Combustion engines emit poisonous exhaust
gases such as carbon monoxide. Inhaling
these exhaust gases is hazardous to health
and can result in poisoning. There is a risk of
fatal injury. Therefore, never leave the engine running an enclosed space without adequate
ventilation. 316
FeaturesStowage and features
Page 319 of 398
Programming
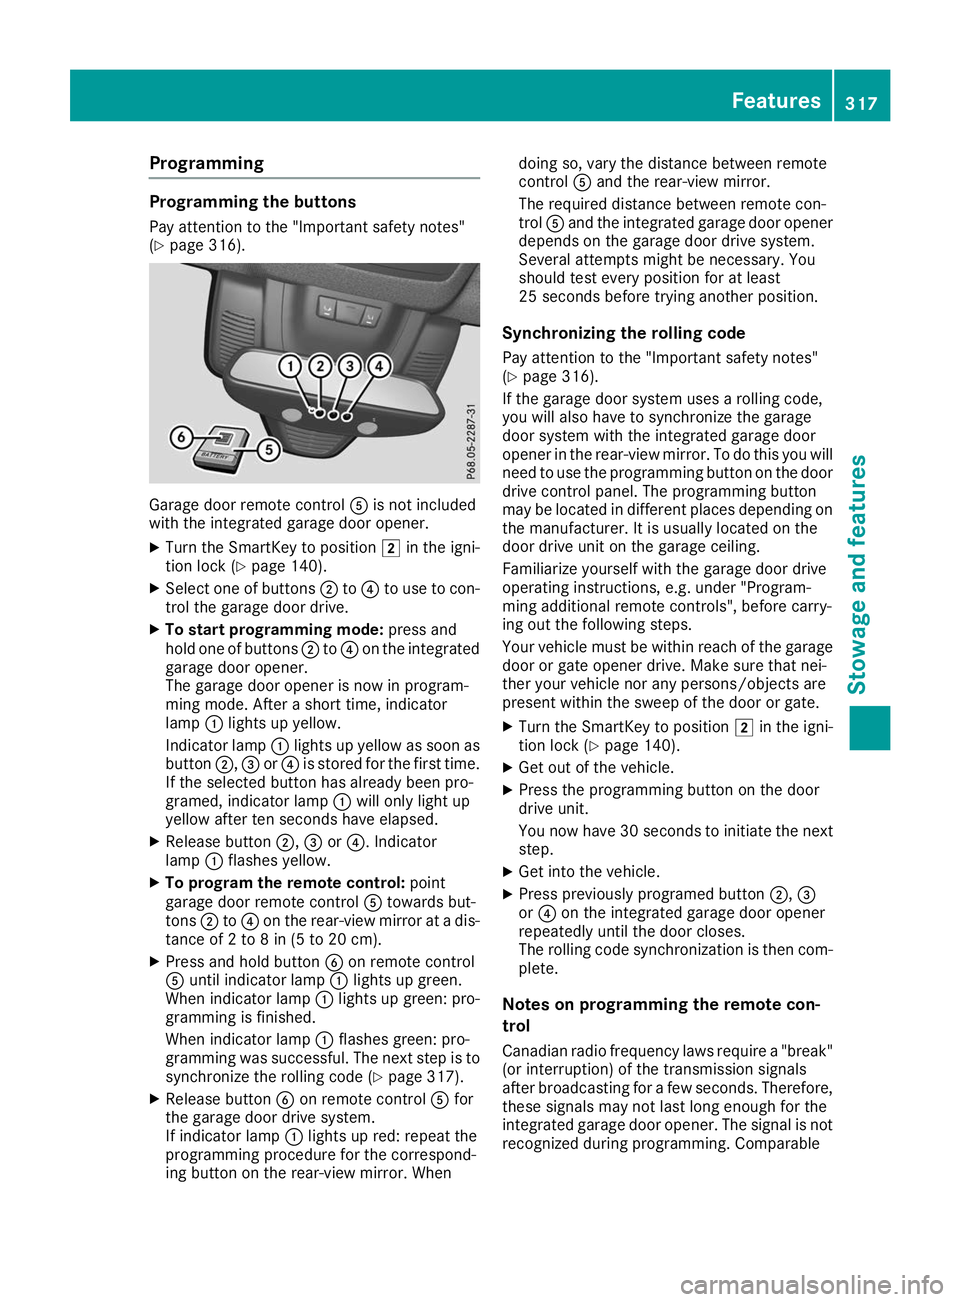
Programming the buttons
Pay attention to the "Important safety notes"
(Y page 316). Garage door remote control
0083is not included
with the integrated garage door opener.
X Turn the SmartKey to position 0048in the igni-
tion lock (Y page 140).
X Select one of buttons 0044to0085 to use to con-
trol the garage door drive.
X To start programming mode: press and
hold one of buttons 0044to0085 on the integrated
garage door opener.
The garage door opener is now in program-
ming mode. After a short time, indicator
lamp 0043lights up yellow.
Indicator lamp 0043lights up yellow as soon as
button 0044,0087or0085 is stored for the first time.
If the selected button has already been pro-
gramed, indicator lamp 0043will only light up
yellow after ten seconds have elapsed.
X Release button 0044,0087or0085. Indicator
lamp 0043flashes yellow.
X To program the remote control: point
garage door remote control 0083towards but-
tons 0044to0085 on the rear-view mirror at a dis-
tance of 2 to 8 in (5 to 20 cm).
X Press and hold button 0084on remote control
0083 until indicator lamp 0043lights up green.
When indicator lamp 0043lights up green: pro-
gramming is finished.
When indicator lamp 0043flashes green: pro-
gramming was successful. The next step is to synchronize the rolling code (Y page 317).
X Release button 0084on remote control 0083for
the garage door drive system.
If indicator lamp 0043lights up red: repeat the
programming procedure for the correspond-
ing button on the rear-view mirror. When doing so, vary the distance between remote
control
0083and the rear-view mirror.
The required distance between remote con-
trol 0083and the integrated garage door opener
depends on the garage door drive system.
Several attempts might be necessary. You
should test every position for at least
25 seconds before trying another position.
Synchronizing the rolling code
Pay attention to the "Important safety notes"
(Y page 316).
If the garage door system uses a rolling code,
you will also have to synchronize the garage
door system with the integrated garage door
opener in the rear-view mirror. To do this you will
need to use the programming button on the door
drive control panel. The programming button
may be located in different places depending on the manufacturer. It is usually located on the
door drive unit on the garage ceiling.
Familiarize yourself with the garage door drive
operating instructions, e.g. under "Program-
ming additional remote controls", before carry-
ing out the following steps.
Your vehicle must be within reach of the garage
door or gate opener drive. Make sure that nei-
ther your vehicle nor any persons/objects are
present within the sweep of the door or gate.
X Turn the SmartKey to position 0048in the igni-
tion lock (Y page 140).
X Get out of the vehicle.
X Press the programming button on the door
drive unit.
You now have 30 seconds to initiate the next
step.
X Get into the vehicle.
X Press previously programed button 0044,0087
or 0085 on the integrated garage door opener
repeatedly until the door closes.
The rolling code synchronization is then com- plete.
Notes on programming the remote con-
trol
Canadian radio frequency laws require a "break" (or interruption) of the transmission signals
after broadcasting for a few seconds. Therefore,
these signals may not last long enough for the
integrated garage door opener. The signal is not recognized during programming. Comparable Features
317Stowage and features Z
Page 320 of 398
with Canadian law, some U.S. garage door open-
ers also feature a "break".
Proceed as follows:
R if you live in Canada.
R if you have difficulties programming the
garage door opener (regardless of where you
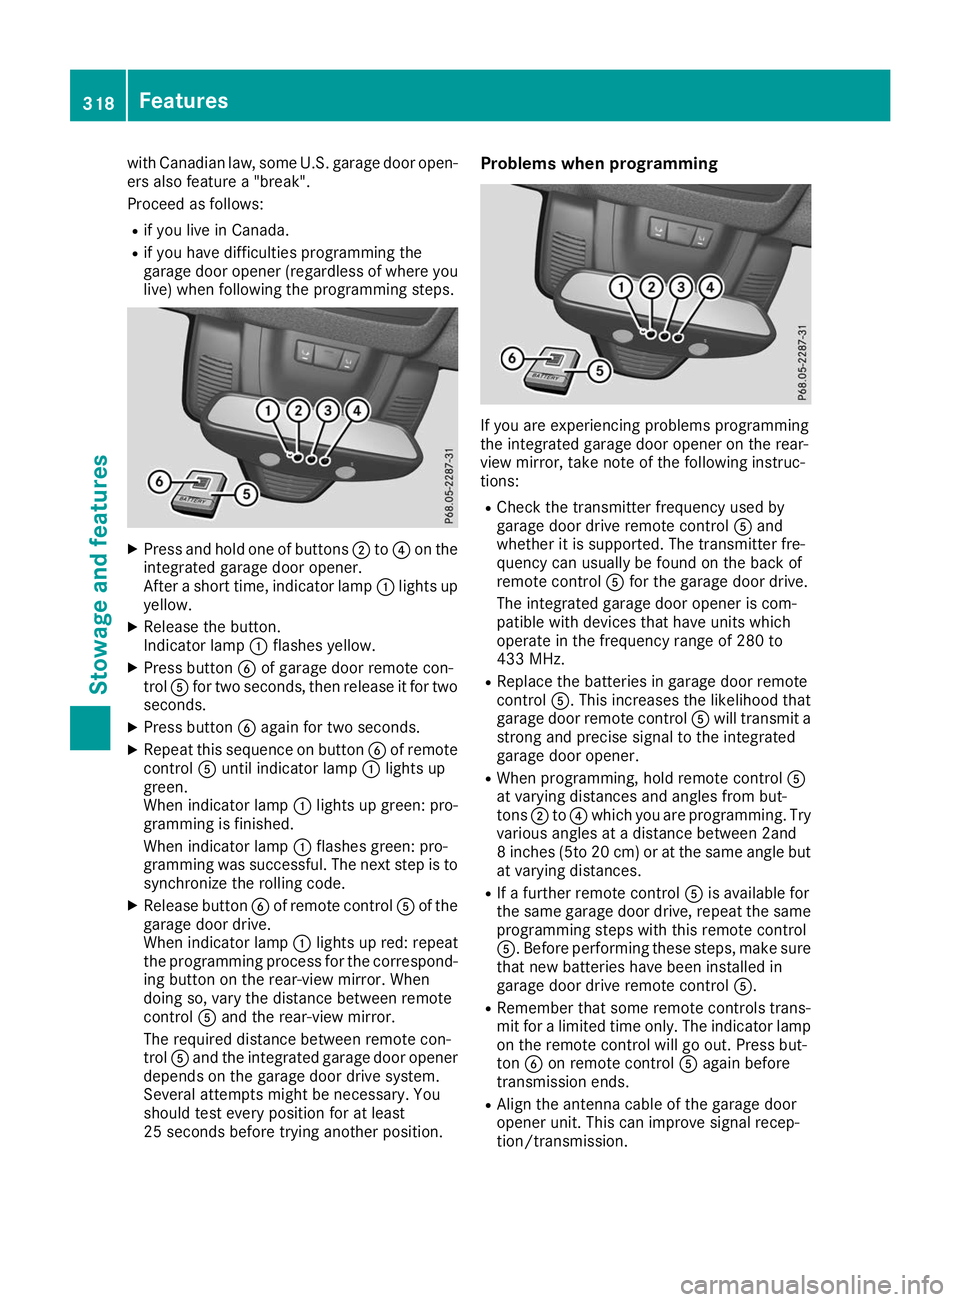
live) when following the programming steps. X
Press and hold one of buttons 0044to0085 on the
integrated garage door opener.
After a short time, indicator lamp 0043lights up
yellow.
X Release the button.
Indicator lamp 0043flashes yellow.
X Press button 0084of garage door remote con-
trol 0083for two seconds, then release it for two
seconds.
X Press button 0084again for two seconds.
X Repeat this sequence on button 0084of remote
control 0083until indicator lamp 0043lights up
green.
When indicator lamp 0043lights up green: pro-
gramming is finished.
When indicator lamp 0043flashes green: pro-
gramming was successful. The next step is to
synchronize the rolling code.
X Release button 0084of remote control 0083of the
garage door drive.
When indicator lamp 0043lights up red: repeat
the programming process for the correspond- ing button on the rear-view mirror. When
doing so, vary the distance between remote
control 0083and the rear-view mirror.
The required distance between remote con-
trol 0083and the integrated garage door opener
depends on the garage door drive system.
Several attempts might be necessary. You
should test every position for at least
25 seconds before trying another position. Problems when programming
If you are experiencing problems programming
the integrated garage door opener on the rear-
view mirror, take note of the following instruc-
tions:
R Check the transmitter frequency used by
garage door drive remote control 0083and
whether it is supported. The transmitter fre-
quency can usually be found on the back of
remote control 0083for the garage door drive.
The integrated garage door opener is com-
patible with devices that have units which
operate in the frequency range of 280 to
433 MHz.
R Replace the batteries in garage door remote
control 0083. This increases the likelihood that
garage door remote control 0083will transmit a
strong and precise signal to the integrated
garage door opener.
R When programming, hold remote control 0083
at varying distances and angles from but-
tons 0044to0085 which you are programming. Try
various angles at a distance between 2and
8 inches (5to 20 cm) or at the same angle but at varying distances.
R If a further remote control 0083is available for
the same garage door drive, repeat the same
programming steps with this remote control
0083. Before performing these steps, make sure
that new batteries have been installed in
garage door drive remote control 0083.
R Remember that some remote controls trans-
mit for a limited time only. The indicator lamp
on the remote control will go out. Press but-
ton 0084on remote control 0083again before
transmission ends.
R Align the antenna cable of the garage door
opener unit. This can improve signal recep-
tion/transmission. 318
FeaturesStowage and features
Page 321 of 398
Opening/closing the garage door
After it has been programmed, the integrated
garage door opener performs the function of the
garage door system remote control. Please also
read the operating instructions for the garage
door system.
X Turn the SmartKey to position 0048in the igni-
tion lock (Y page 140).
X Press either button 0044,0087or0085 which you
have programmed to operate the garage
door.
Garage door system with a fixed code: indi-
cator lamp 0043lights up green.
Garage door system with a rolling code: indi-
cator lamp 0043flashes green.
The transmitter will transmit a signal as long
as the button is pressed. The transmission is
halted after a maximum of ten seconds and
indicator lamp 0043lights up yellow.
X Press button 0044,0087or0085 again if necessary.
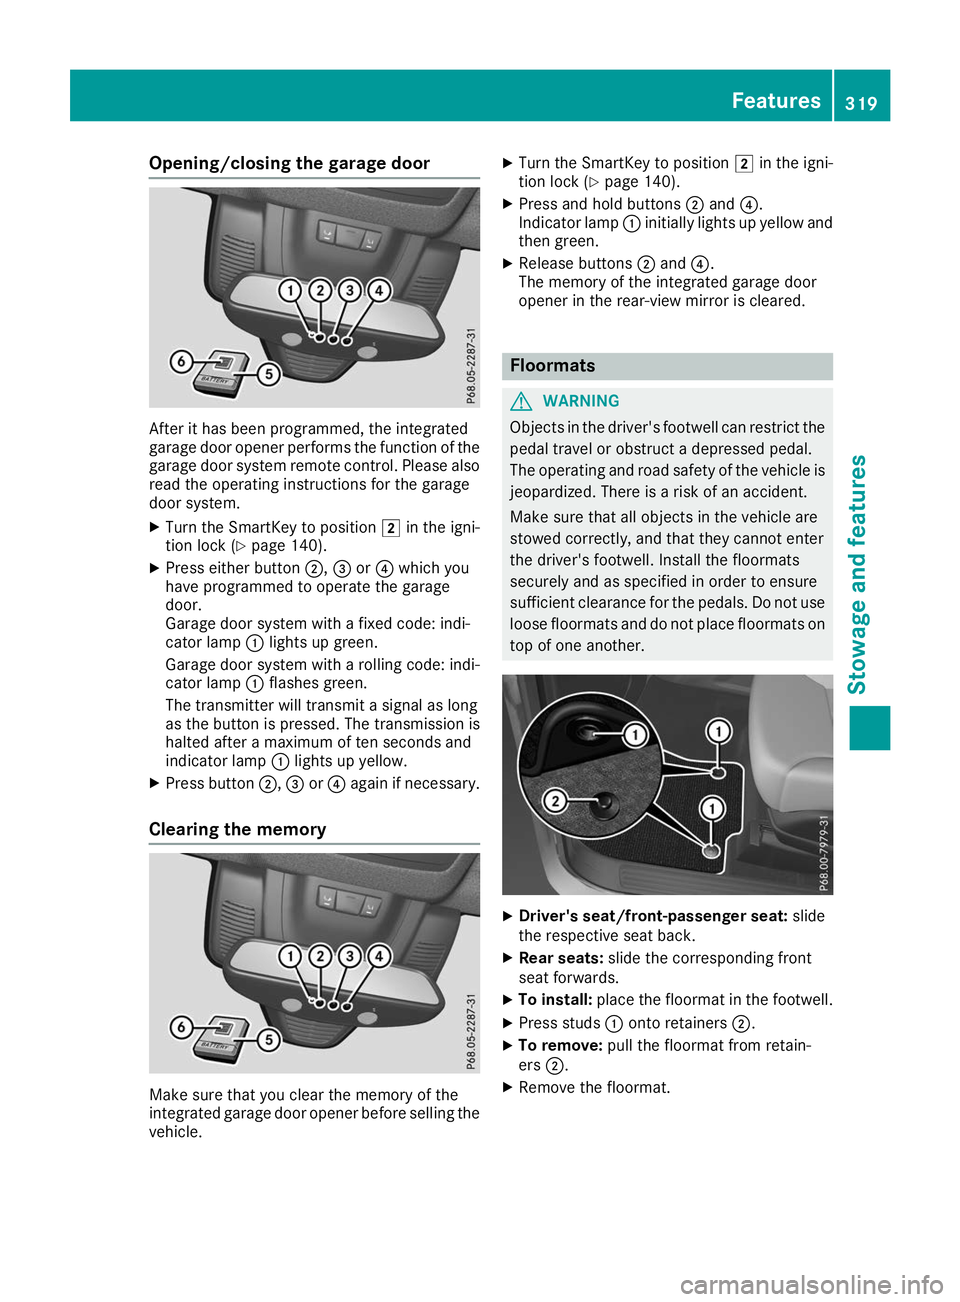
Clearing the memory Make sure that you clear the memory of the
integrated garage door opener before selling the vehicle. X
Turn the SmartKey to position 0048in the igni-
tion lock (Y page 140).
X Press and hold buttons 0044and 0085.
Indicator lamp 0043initially lights up yellow and
then green.
X Release buttons 0044and 0085.
The memory of the integrated garage door
opener in the rear-view mirror is cleared. Floormats
G
WARNING
Objects in the driver's footwell can restrict the pedal travel or obstruct a depressed pedal.
The operating and road safety of the vehicle is
jeopardized. There is a risk of an accident.
Make sure that all objects in the vehicle are
stowed correctly, and that they cannot enter
the driver's footwell. Install the floormats
securely and as specified in order to ensure
sufficient clearance for the pedals. Do not use loose floormats and do not place floormats on
top of one another. X
Driver's seat/front-passenger seat: slide
the respective seat back.
X Rear seats: slide the corresponding front
seat forwards.
X To install: place the floormat in the footwell.
X Press studs 0043onto retainers 0044.
X To remove: pull the floormat from retain-
ers 0044.
X Remove the floormat. Features
319Stowage and features Z
Page 332 of 398
Always switch off the windshield wipers and
the ignition before cleaning the windshield or wiper blades.
! Do not pull the wiper blade. Otherwise, the
wiper blade could be damaged.
! Do not clean wiper blades too often and do
not rub them too hard. Otherwise, the graph-
ite coating could be damaged. This could
cause wiper noise.
! Hold the wiper arm securely when folding
back. The windshield could be damaged if the wiper arm smacks against it suddenly.
X Fold the windshield wiper arms away from the
windshield (Y page 123).
X Carefully clean the wiper blades with a damp
cloth.
X Fold the windshield wiper arms back again
before switching on the ignition.
Cleaning the exterior lighting !
Only use cleaning agents or cleaning cloths
which are suitable for plastic light lenses.
Unsuitable cleaning agents or cleaning cloths
could scratch or damage the plastic light len- ses.
X Clean the plastic lenses of the exterior light-
ing using a wet sponge and a mild cleaning
agent, e. g. Mercedes-Benz car shampoo or
cleaning cloths.
Cleaning the mirror turn signals !
Only use cleaning agents or cleaning cloths
that are suitable for plastic lenses. Unsuitable
cleaning agents or cleaning cloths could
scratch or damage the plastic lenses of the
mirror turn signals.
X Clean the plastic lenses of the mirror turn sig-
nals in the exterior mirror housing using a wet sponge and mild cleaning agent, e.g.
Mercedes-Benz car shampoo or cleaning
cloths.
Cleaning the side running board !
Do not clean the aluminum insert of the side
running board with alkaline or acid-based
cleaning agents, such as wheel cleaner. Do
not use acidic wheel cleaners to remove brake dust. The aluminum inserts could oth-
erwise be damaged.
Cleaning the sensors !
If you clean the sensors with a power
washer, make sure that you keep a distance
of at least 11.8 in (30 cm) between the vehicle
and the power washer nozzle. Information
about the correct distance is available from
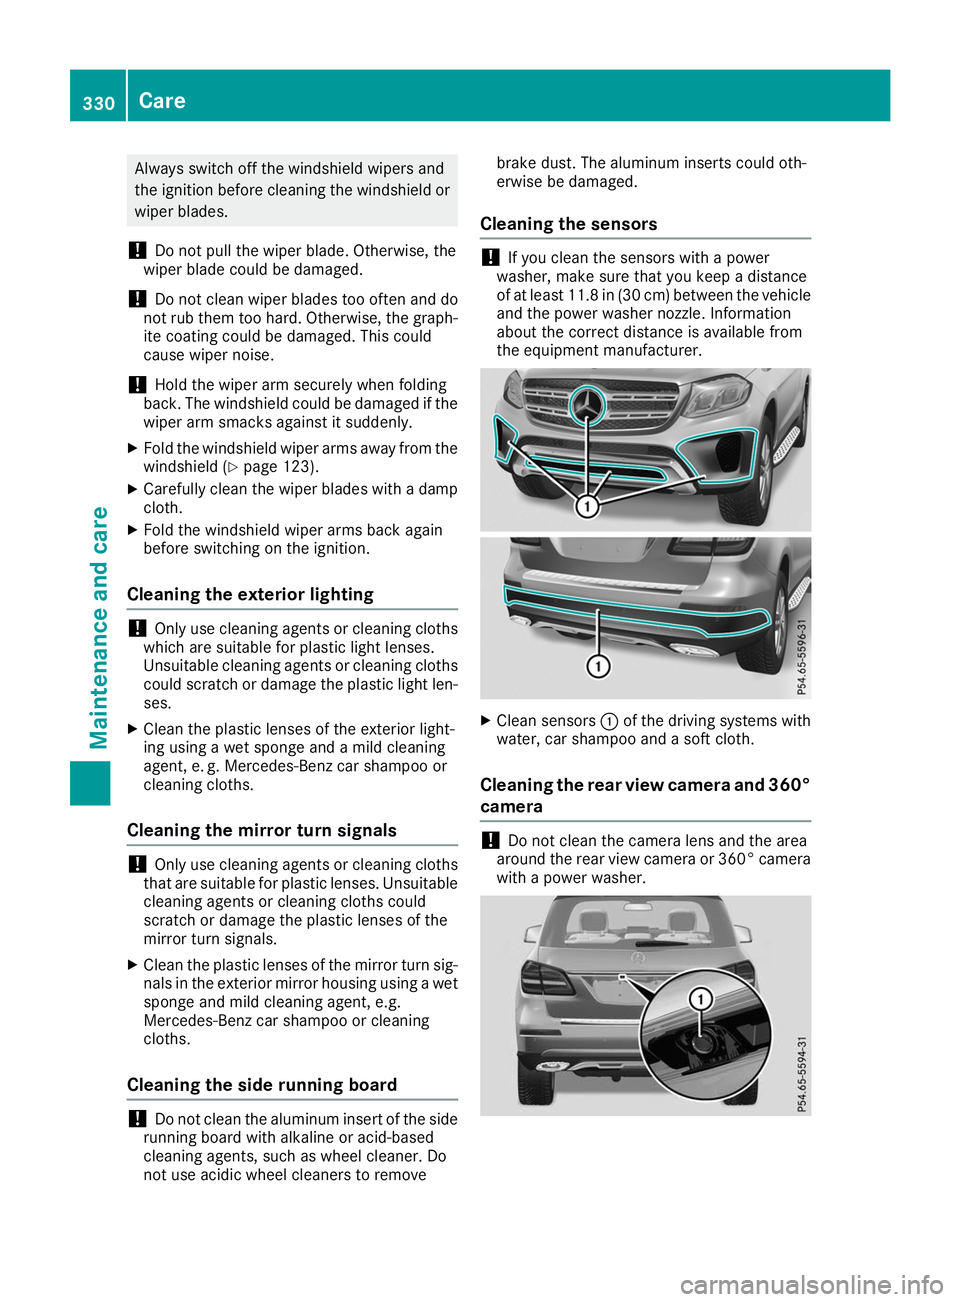
the equipment manufacturer. X
Clean sensors 0043of the driving systems with
water, car shampoo and a soft cloth.
Cleaning the rear view camera and 360° camera !
Do not clean the camera lens and the area
around the rear view camera or 360° camera with a power washer. 330
CareMaintenance and care