2019 MERCEDES-BENZ GLE SUV brake
[x] Cancel search: brakePage 298 of 681
#
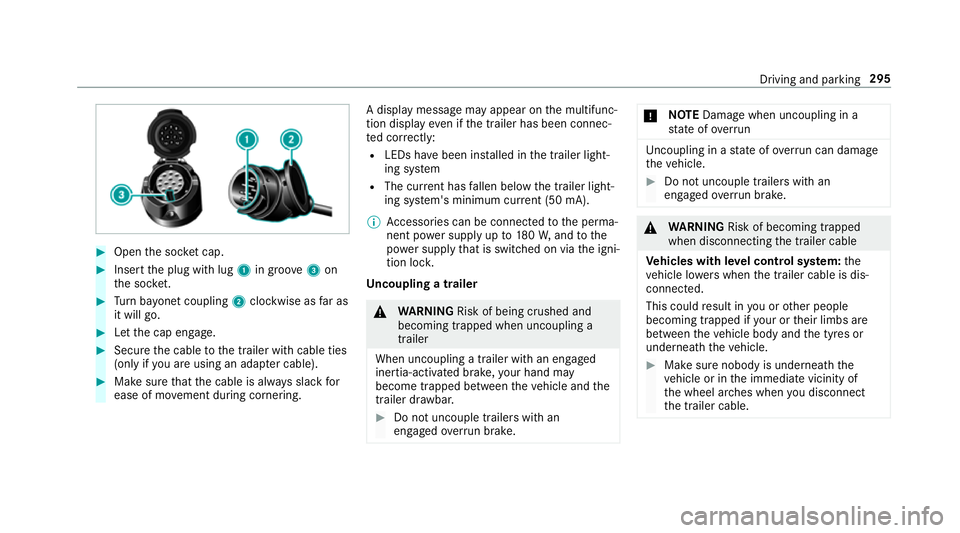
Open the soc ket cap. #
Inse rtthe plug with lug 1in groo ve3 on
th e soc ket. #
Turn bayonet coupling 2clockwise as far as
it will go. #
Let the cap engage. #
Secure the cable tothe trailer with cable ties
(only if you are using an adap ter cable). #
Make sure that the cable is alw ays slack for
ease of mo vement during cornering. A display messa
gemay appear on the multifunc‐
tion display even if the trailer has been connec‐
te d cor rectly:
R LEDs ha vebeen ins talled in the trailer light‐
ing sy stem
R The cur rent has fallen below the trailer light‐
ing sy stem's minimum cur rent (50 mA).
% Accessories can be connected tothe perma‐
nent po wer supp lyup to180W, and tothe
po we r supp lythat is swit ched on via the igni‐
tion loc k.
Un coupling a trailer &
WARNING Risk of being crushed and
becoming trapped when uncoupling a
trailer
When uncoupling a trailer wi than engaged
ine rtia-activated brake, your hand may
become trapped between theve hicle and the
trailer dr awbar. #
Do not uncouple trailers with an
engaged overrun brake. *
NO
TEDama gewhen uncoupling in a
st ate of overrun Uncou
pling in a state of overru n can dama ge
th eve hicle. #
Do not uncouple trailers with an
engaged overrun brake. &
WARNING Risk of becoming trapped
when disconnecting the trailer cable
Ve hicles with le vel control sy stem: the
ve hicle lo werswhen the trailer cable is dis‐
connected.
This could result in you or other people
becoming trapped if your or their limbs are
between theve hicle body and the tyres or
underneath theve hicle. #
Make sure nobody is underneath the
ve hicle or in the immediate vicinity of
th e wheel ar ches when you disconnect
th e trailer cable. Driving and parking
295
Page 307 of 681
4
Displ aycontent, right (e xamp lerev counter)
Display content selection, right:
R Rev counter
R Average fuel consum ption
R ECO display
R Navigation
R G-me ter
R Assi stant display
R 4MATIC
R Suspension (depending on theve hicle's
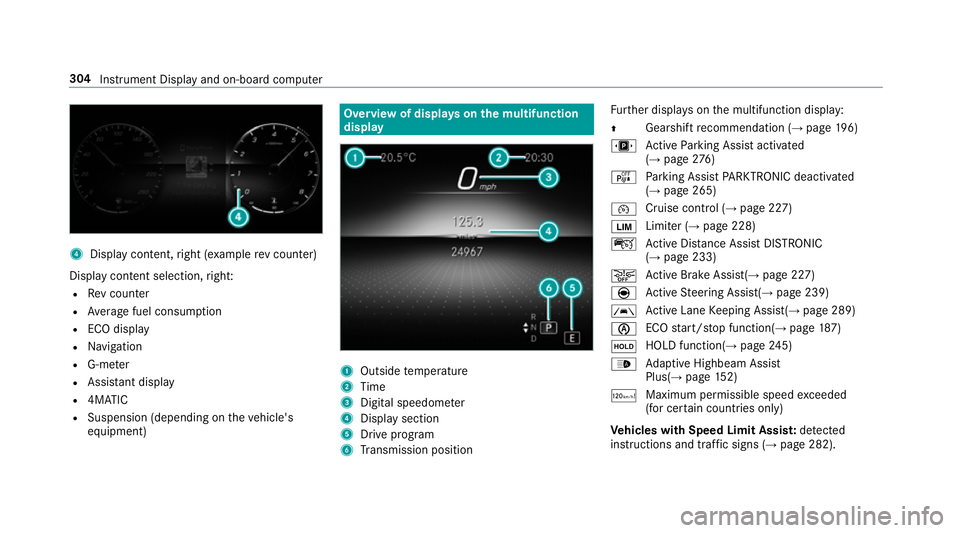
equipment) Overview of displa
yson the multifunction
display 1
Outside temp erature
2 Time
3 Digital speedome ter
4 Displ aysection
5 Drive program
6 Transmission position Fu
rther displa yson the multifunction display:
Z Gearshift
recommendation (→ page 196)
u Active Parking Assist activated
(→ page 276)
é Parking Assist PARKTRONIC deacti vated
( → page 265)
¯ Cruise control (→
page 227)
È Limiter (→
page 228)
ç Active Dis tance Assi stDISTRONIC
(→ page 233)
æ Ac
tive Brake Assi st(→ page 227)
è Active Steering Assis t(→ page 239)
à Ac
tive Lane Keeping Assist(→ page 289)
è ECO
start/ stop function(→ page187)
ë HOLD fu
nction(→ page 245)
_ Ad
aptive Highbeam Assist
Plus(→ page152)
ð Ma
ximum pe rmissible speed exceeded
(for cer tain countries only)
Ve hicles with Speed Limit Assis t:de tected
instructions and traf fic signs (→ page 282). 304
Instrument Displ ayand on-board computer
Page 378 of 681
Fu
nction of important sy stem upda tes
Impor tant sy stem updates may be necessary for
th e security of your multimedia sy stem's data.
Ins tallth ese updates, or else the security of your
multimedia sy stem cann otbe ensured.
% If automatic software updates are activated,
th e sy stem updates will be downloaded auto‐
matically (→ page374).
As soon as an update is available for download,
a cor responding message appears onthe media
displa y.
Yo u ha vethefo llowing selection options:
R Accept and install
The update will be downloaded in the back‐
ground.
R Information
Information about the pending sy stem
update is displa yed.
R Later
The update can be downloaded manually at a
later time (→ page374). Dee
p sy stem upda tes
Deep sy stem updates access vehicle or sy stem
settings and can therefore only be car ried out
when theve hicle is stationary and the ignition is
switched off.
If th e download of a deep sy stem update is com‐
ple ted and the update is ready for ins tallation,
yo u will be informed of this af terth e next igni‐
tion cycle, forex ample.
% Park theve hicle safely in a suitable location
before starting the ins tallation.
Re quirements forth e ins tallation:
R The ignition is switched off.
R Notes and warnings ha vebeen read and
accep ted.
R The elect ric pa rking brake is applied.
If all requirements are met, the update will be
ins talled. The multimedia sy stem cann otbe
operated while the update is being ins talled and
ve hicle functions are restricted.
If er rors should occur during the ins tallation, the
multimedia sy stem automatically attem ptsto
re store the pr evious version. If restoration of thepr
ev ious version is not possible, a symbol
appears on the media displa y.Please consult a
qu alified specialist workshop toresol vethe
problem. Re
setting the multimedia sy stem (reset func‐
tion) Multimedia sy
stem:
, © .
Settings .
System .
Reset
Pe rsonal data is dele ted, forex ample:
R Station presets
R Connec ted mobile phones
R individual user profiles
% The guest profile is reset when the settings
are restored tothefa ctory settings.
A prom ptappears again asking whe ther you
re ally wish toreset. #
Select Yes.
The multimedia sy stem is reset tothefa ctory
settings. If you ha veset a PIN foryo ur sys‐
te m, this will also be reset. MBUX multimedia sy
stem 375
Page 497 of 681
#
Make sure that no windsc reen washer
concentrate spills out next tothefiller
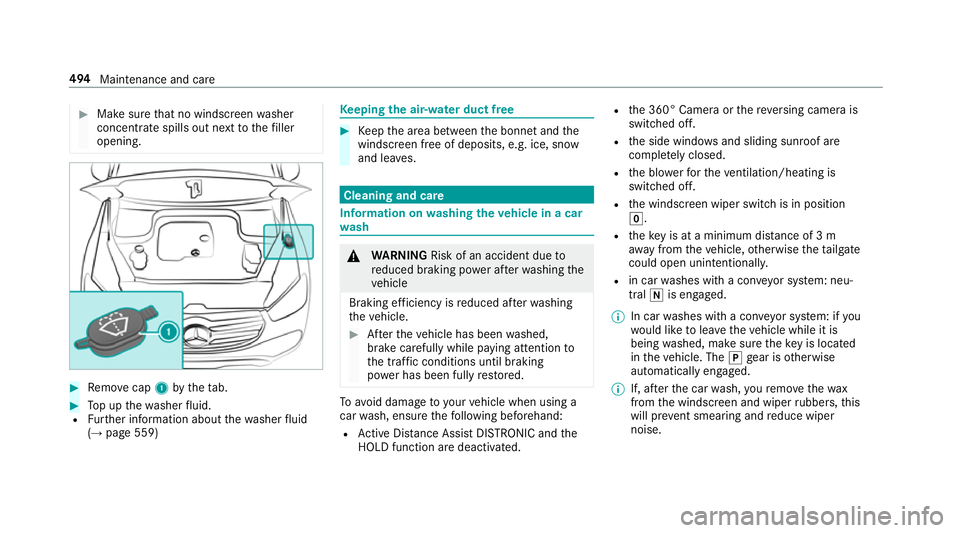
opening. #
Remo vecap 1bytheta b. #
Top up thewa sher fluid.
R Further information about thewa sher fluid
(→ page 559) Ke
eping the air-water duct free #
Keep the area between the bonn etand the
windscreen free of deposits, e.g. ice, sn ow
and lea ves. Cleaning and care
Information on
washing theve hicle in a car
wa sh &
WARNING Risk of an accident due to
re duced braking po wer af terwa shing the
ve hicle
Braking ef ficiency is reduced af terwa shing
th eve hicle. #
Afterth eve hicle has been washed,
brake carefully while paying attention to
th e traf fic conditions until braking
po we r has been fully restored. To
avo id damage to yourvehicle when using a
car wash, ensure thefo llowing beforehand:
R Active Dis tance Assi stDISTRONIC and the
HOLD function are deactivated. R
the 360° Camera or there ve rsing camera is
switched off.
R the side windo wsand sliding sun roof are
comple tely closed.
R the blo werfo rth eve ntilation/heating is
switched off.
R the windscreen wiper switch is in position
g.
R theke y is at a minimum dis tance of 3 m
aw ay from theve hicle, otherwise theta ilgate
could open unin tentionally.
R in car washes with a con veyo r sy stem: neu‐
tral iis engaged.
% In car washes with a con veyo r sy stem: if you
wo uld like tolea vetheve hicle while it is
being washed, make sure theke y is located
in theve hicle. The jgear is otherwise
automatically engaged.
% If, af terth e car wash, youre mo vethewax
from the windscreen and wiper rubbers, this
will pr event smearing and reduce wiper
noise. 494
Maintenance and care
Page 499 of 681
Note
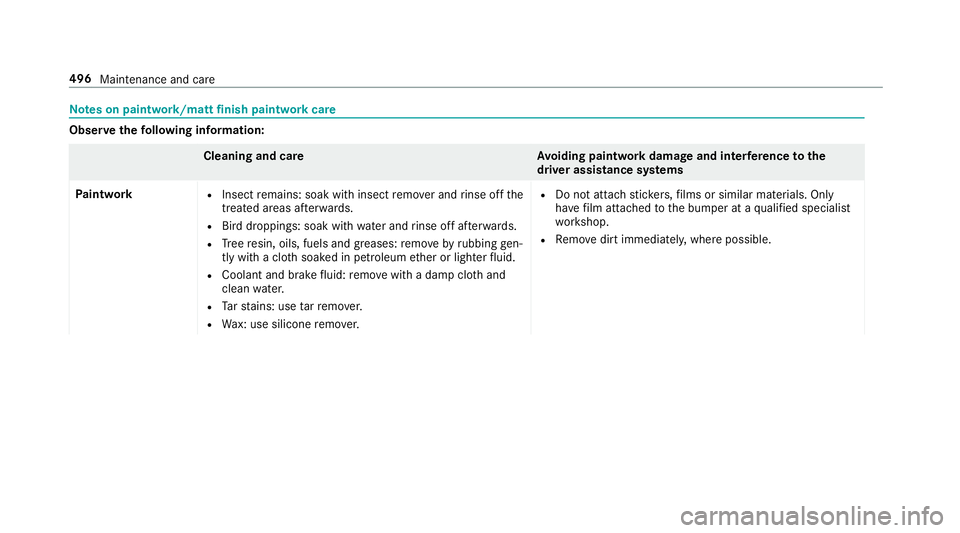
s on paint work/matt finish paint workcare Obser
vethefo llowing information: Cleaning and car
eA voiding paintwork damage and inter fere nce tothe
dr iver assistance sy stems
Pa intwork R
Insect remains: soak with insect remo ver and rinse off the
trea ted areas af terw ards.
R Bird droppings: soak with water and rinse off af terw ards.
R Tree resin, oils, fuels and greases: remo veby rubbing gen‐
tly wi tha clo thsoaked in petroleum ether or lighter fluid.
R Coolant and brake fluid: remo vewith a damp clo thand
clean water.
R Tarst ains: use tarre mo ver.
R Wax: use silicone remo ver. R
Do not attach sticke rs,fi lms or similar materials. Only
ha ve film attached tothe bumper at a qualified specialist
wo rkshop.
R Remo vedirt immediately, where possible. 496
Maintenance and care
Page 502 of 681
Note
s on care of car parts &
WARNING Risk of entrapment if the
windscreen wipers are swit ched on while
th e windscreen is being cleaned
If th e windscreen wipers are set in motion
while you are cleaning the windscreen or
wiper blades, you can be trapped bythe
wiper arm. #
Alw ays switch off the windscreen wip‐
ers and the ignition before cleaning the
windscreen or wiper blades. &
WARNING Risk of bu rns from tailpipes
and tailpipe trim
The tailpipe and tailpipe trim can become
ve ry hot. If you come into contact with these
parts of theve hicle, you could burn yourself. #
Alw ays be particular lycareful around
th eta ilpipe and theta ilpipe trim. #
Allow theve hicle parts tocool down
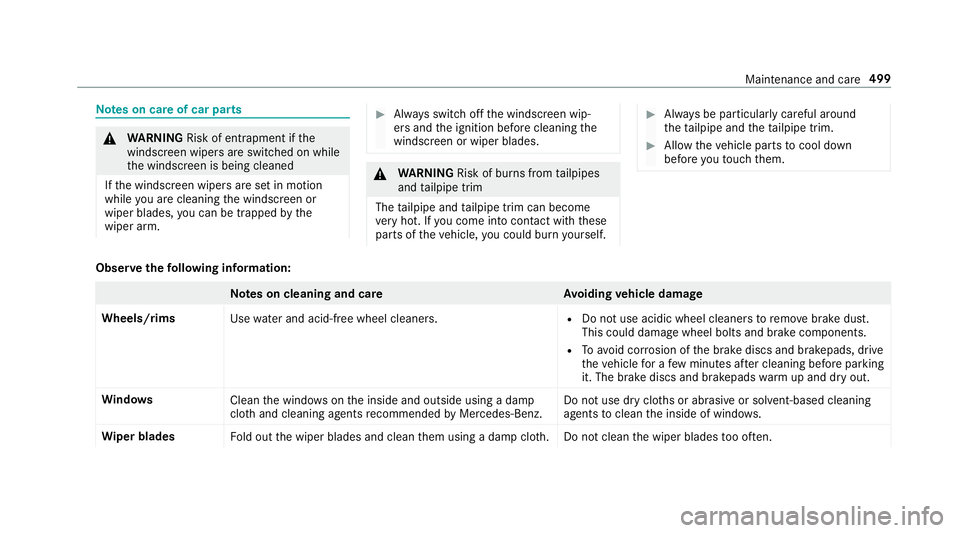
before youto uch them. Obser
vethefo llowing information: Note
s on cleaning and car eA voiding vehicle damage
Wheels/rims Usewate r and acid-free wheel cleaners. R
Do not use acidic wheel cleaners toremo vebrake dust.
This could damage wheel bolts and brake components.
R Toavoid cor rosion of the brake discs and brakepads, drive
th eve hicle for a few minutes af ter cleaning before parking
it. The brake discs and brakepads warm up and dry out.
Wi ndo ws
Cleanthe windo wsonthe inside and outside using a damp
clo thand cleaning agents recommended byMercedes-Benz. Do not use dry clo
ths or abrasive or sol vent-based cleaning
agents toclean the inside of windo ws.
Wi per blades
Fold out the wiper blades and clean them using a damp clo th.D o not clean the wiper blades too of ten. Maintenance and care
499
Page 503 of 681
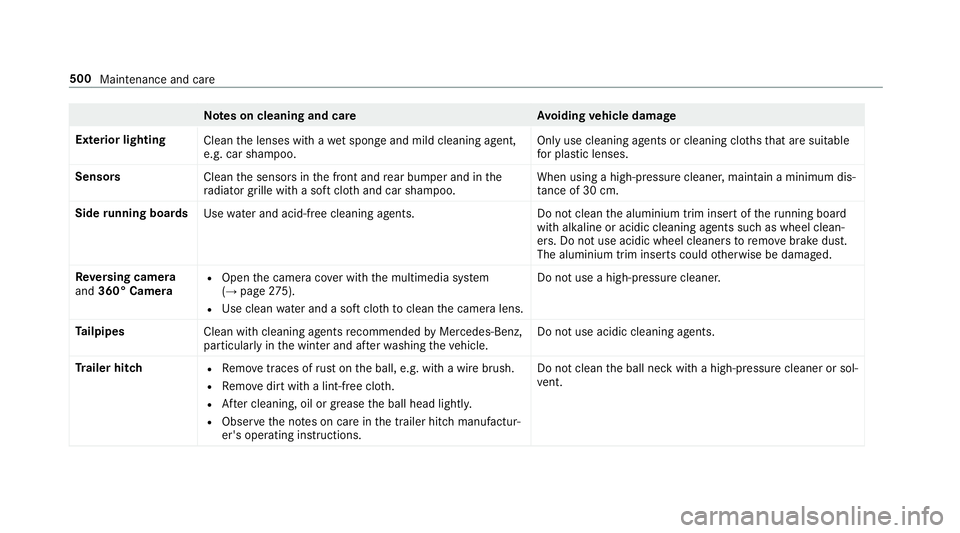
Note
s on cleaning and car eA voiding vehicle damage
Exterior lighting Cleanthe lenses with a wet sponge and mild cleaning agent,
e.g. car sha mpoo. Only use cleaning agents or cleaning clo
thsth at are suitable
fo r plast ic lenses.
Sensors Cleanthe sensors in the front and rear bumper and in the
ra diator grille with a soft clo thand car shampoo. When using a high-pressure cleaner, main
tain a minimum dis‐
ta nce of 30 cm.
Side running boards
Usewate r and acid-free cleaning agents. Do not cleanthe aluminium trim insert of theru nning board
wi th alkaline or acidic cleaning agents such as wheel clean‐
ers. Do not use acidic wheel cleaners toremo vebrake dust.
The aluminium trim inserts could otherwise be damaged.
Re versing camera
and 360° Camera R
Open the camera co ver with the multimedia sy stem
(→ page 275).
R Use clean water and a soft clo thtoclean the camera lens. Do not use a high-pressure cleaner.
Ta ilpipes
Clean with cleaning agents recommended byMercedes-Benz,
particularly in the winter and af terwa shing theve hicle. Do not use acidic cleaning agents.
Tr ailer hitch R
Remo vetraces of rust on the ball, e.g. with a wire brush.
R Remo vedirt with a lint-free clo th.
R After cleaning, oil or grease the ball head lightl y.
R Obser vethe no tes on care in the trailer hitch manufactur‐
er's operating instructions. Do not clean
the ball neck with a high-pressure cleaner or sol‐
ve nt. 500
Maintenance and care
Page 519 of 681
St
arting assi stance and charging the12 V
battery Re
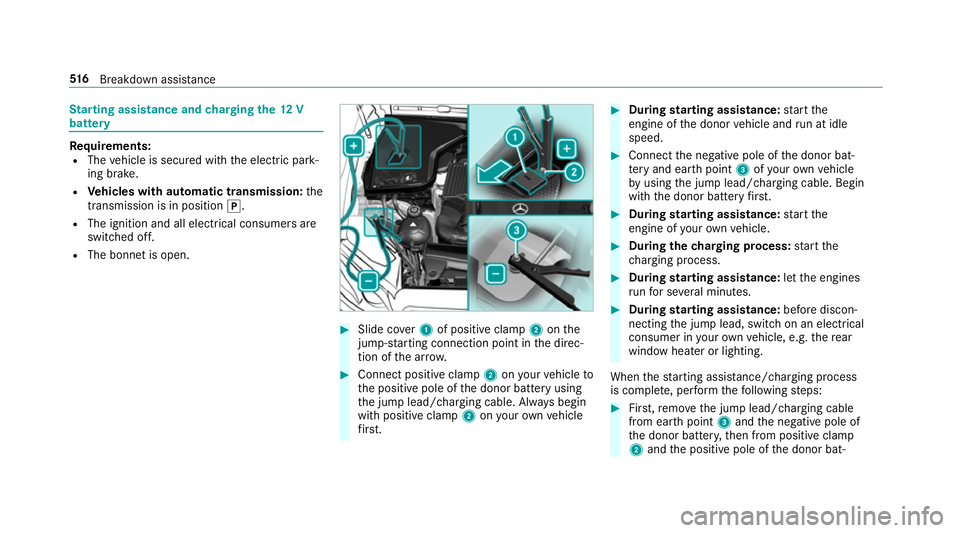
quirements:
R The vehicle is secured with the electric park‐
ing brake.
R Vehicles with automatic transmission: the
transmission is in position j.
R The ignition and all electrical consumers are
switched off.
R The bonnet is open. #
Slide co ver1 of positive clamp 2onthe
jump-s tarting connection point in the direc‐
tion of the ar row. #
Connect positive clamp 2onyour vehicle to
th e positive pole of the donor battery using
th e jump lead/charging cable. Alw ays begin
with positive clamp 2onyour ow nve hicle
fi rs t. #
During starting assi stance: start the
engine of the donor vehicle and run at idle
speed. #
Connect the negative pole of the donor bat‐
te ry and ear thpoint 3ofyour ow nve hicle
by using the jump lead/charging cable. Begin
with the donor battery firs t. #
During starting assi stance: start the
engine of your ow nve hicle. #
During thech arging process: start the
ch arging process. #
During starting assi stance: letthe engines
ru nfo r se veral minutes. #
During starting assi stance: before discon‐
necting the jump lead, switch on an electrical
consumer in your ow nve hicle, e.g. there ar
wind owheater or lighting.
When thest arting assis tance/charging process
is compl ete, per form thefo llowing steps: #
First,re mo vethe jump lead/charging cable
from ear thpoint 3and the negative pole of
th e donor batter y,then from positive clamp
2 and the positive pole of the donor bat‐ 516
Breakdown assis tance