2019 MERCEDES-BENZ GLE SUV height
[x] Cancel search: heightPage 254 of 681
Ve
hicle
le vel Ve
hicles
without Off-
ro ad pac kage Ve
hicles with
Off-road pack‐
age
Spor tA pprox.
-15 mm App
rox.
-15 mm
Spo rt+A pprox.
-25 mm App
rox.
-25 mm Ra
ising theve hicle (vehicles without Off-
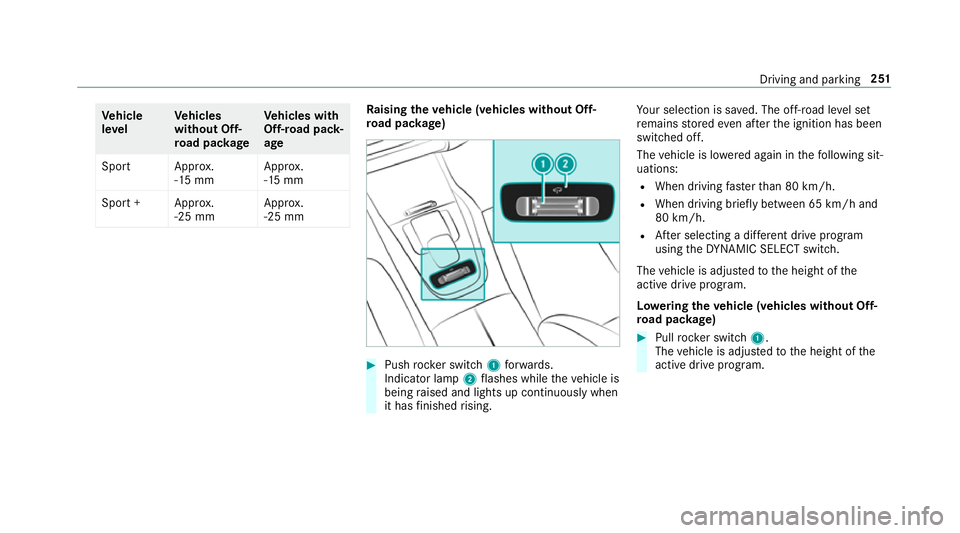
ro ad pac kage) #
Push rocker switch 1forw ards.
Indicator lamp 2flashes while theve hicle is
being raised and lights up continuously when
it has finished rising. Yo
ur selection is sa ved. The off-road le vel set
re mains stored even af terth e ignition has been
switched off.
The vehicle is lo wered again in thefo llowing sit‐
uations:
R When driving fasterthan 80 km/h.
R When driving brief ly between 65 km/ h and
80 km/h.
R After selecting a dif fere nt drive program
using theDY NA MIC SELECT switch.
The vehicle is adjus tedto the height of the
active drive prog ram.
Lo weri ngtheve hicle (vehicles without Off-
ro ad pac kage) #
Pull rock er switch 1.
The vehicle is adjus tedto the height of the
active drive program. Driving and parking
251
Page 255 of 681
Ra
ising theve hicle (vehicles with Off-road
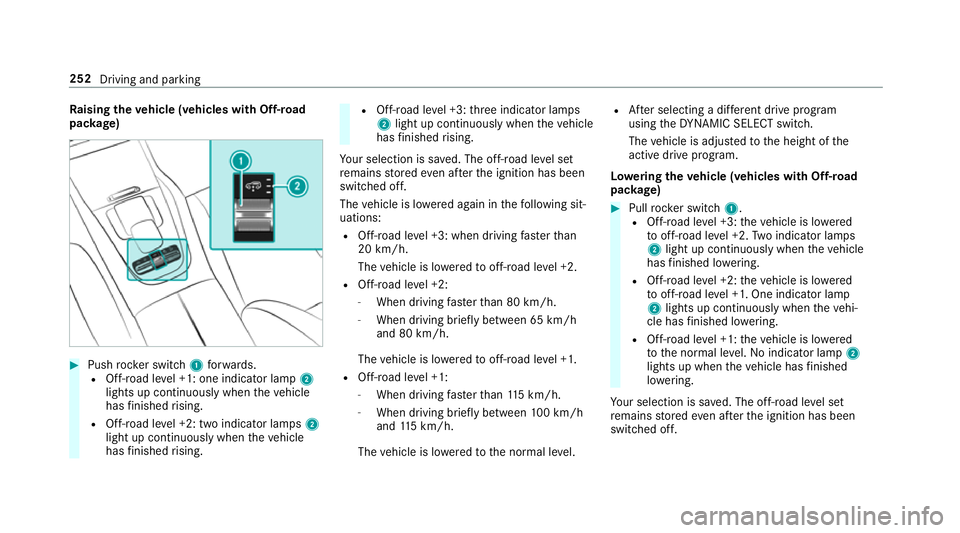
pac kage) #
Push rocker switch 1forw ards.
R Off- road le vel +1: one indicator lamp 2
lights up continuously when theve hicle
has finished rising.
R Off-road le vel +2: two indicator lamps 2
light up continuously when theve hicle
has finished rising. R
Off-road le vel +3: thre e indicator lamps
2 light up continuously when theve hicle
has finished rising.
Yo ur selection is sa ved. The off-road le vel set
re mains stored even af terth e ignition has been
switched off.
The vehicle is lo wered again in thefo llowing sit‐
uations:
R Off- road le vel +3: when driving fasterthan
20 km/h.
The vehicle is lo weredto off-road le vel +2.
R Off- road le vel +2:
- When driving fasterthan 80 km/h.
- When driving brief ly between 65 km/h
and 80 km/h.
The vehicle is lo weredto off-road le vel +1.
R Off- road le vel +1:
- When driving fasterthan 115 km/h.
- When driving brief lybetween 100 km/h
and 115 km/h.
The vehicle is lo weredto the normal le vel. R
After selecting a dif fere nt drive program
using theDY NA MIC SELECT switch.
The vehicle is adjus tedto the height of the
active drive program.
Lo weri ngtheve hicle (vehicles with Off-road
pac kage) #
Pull rock er switch 1.
R Off-road le vel +3: theve hicle is lo wered
to off-road le vel +2. Two indicator lamps
2 light up continuously when theve hicle
has finished lo wering.
R Off-road le vel +2: theve hicle is lo wered
to off-road le vel +1. One indicator lamp
2 lights up continuously when theve hi‐
cle has finished lo wering.
R Off-road le vel +1: theve hicle is lo wered
to the normal le vel. No indicator lamp 2
lights up when theve hicle has finished
lo we ring.
Yo ur selection is sa ved. The off-road le vel set
re mains stored even af terth e ignition has been
switched off. 252
Driving and parking
Page 263 of 681
&
WARNING Risk of entrapment from vehi‐
cle lo wering
Ve hicles with AIRMATIC or le vel control:
when you unload luggage or lea vetheve hi‐
cle, theve hicle firs trises slightly and then
re turns tothe set le vel shortly af terw ards.
Yo u or an yone else in the vicinity of the
wheel ar ches or the underbody could thus
become trapped.
The vehicle can also be lo wered af ter being
loc ked. #
When leaving theve hicle, make sure
th at nobody is in the vicinity of the
wheel ar ches or the underbody. Re
quirements:
R The vehicle has been star ted.
R Vehicles without Off-road pac kage: the
ve hicle is not moving fasterthan 65 km/h.
R Vehicles with Off-road pac kage:
- Off-road le vel +1: theve hicle is not mov‐
ing fast erthan 100 km/h -
Off-road le vel +2: theve hicle is not mov‐
ing fast erthan 65 km/h
- Off- road le vel +3: theve hicle is not mov‐
ing fast erthan 20 km/h
Ra ising theve hicle (vehicles without Off-
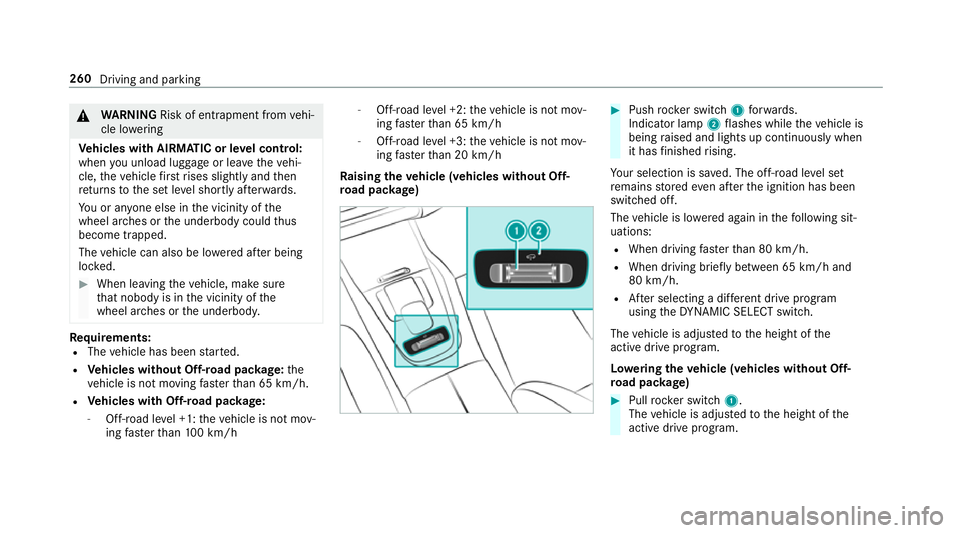
ro ad pac kage) #
Push rocker switch 1forw ards.
Indicator lamp 2flashes while theve hicle is
being raised and lights up continuously when
it has finished rising.
Yo ur selection is sa ved. The off-road le vel set
re mains stored even af terth e ignition has been
switched off.
The vehicle is lo wered again in thefo llowing sit‐
uations:
R When driving fasterthan 80 km/h.
R When driving brief ly between 65 km/ h and
80 km/h.
R After selecting a dif fere nt drive program
using theDY NA MIC SELECT switch.
The vehicle is adjus tedto the height of the
active drive prog ram.
Lo weri ngtheve hicle (vehicles without Off-
ro ad pac kage) #
Pull rock er switch 1.
The vehicle is adjus tedto the height of the
active drive program. 260
Driving and parking
Page 264 of 681
Ra
ising theve hicle (vehicles with Off-road
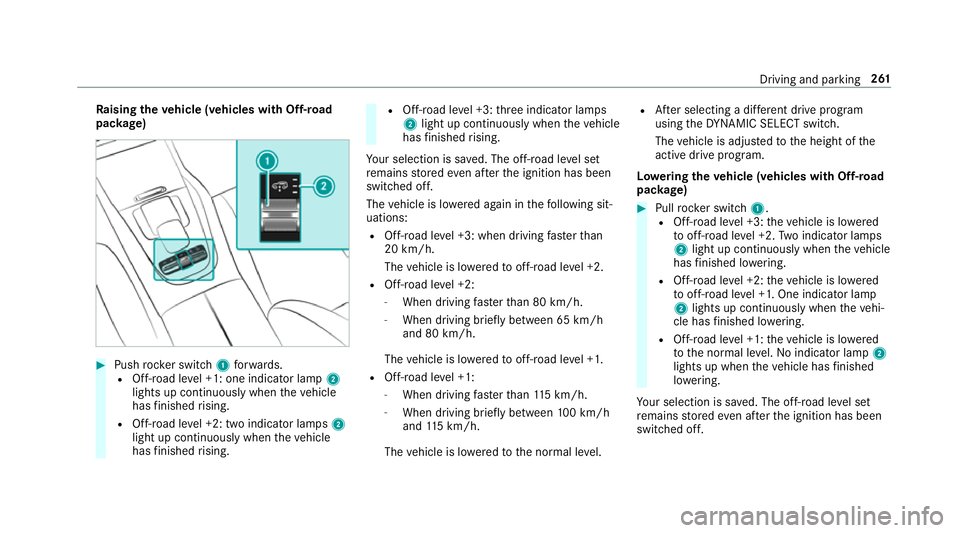
pac kage) #
Push rocker switch 1forw ards.
R Off- road le vel +1: one indicator lamp 2
lights up continuously when theve hicle
has finished rising.
R Off-road le vel +2: two indicator lamps 2
light up continuously when theve hicle
has finished rising. R
Off-road le vel +3: thre e indicator lamps
2 light up continuously when theve hicle
has finished rising.
Yo ur selection is sa ved. The off-road le vel set
re mains stored even af terth e ignition has been
switched off.
The vehicle is lo wered again in thefo llowing sit‐
uations:
R Off- road le vel +3: when driving fasterthan
20 km/h.
The vehicle is lo weredto off-road le vel +2.
R Off- road le vel +2:
- When driving fasterthan 80 km/h.
- When driving brief ly between 65 km/h
and 80 km/h.
The vehicle is lo weredto off-road le vel +1.
R Off- road le vel +1:
- When driving fasterthan 115 km/h.
- When driving brief lybetween 100 km/h
and 115 km/h.
The vehicle is lo weredto the normal le vel. R
After selecting a dif fere nt drive program
using theDY NA MIC SELECT switch.
The vehicle is adjus tedto the height of the
active drive program.
Lo weri ngtheve hicle (vehicles with Off-road
pac kage) #
Pull rock er switch 1.
R Off-road le vel +3: theve hicle is lo wered
to off-road le vel +2. Two indicator lamps
2 light up continuously when theve hicle
has finished lo wering.
R Off-road le vel +2: theve hicle is lo wered
to off-road le vel +1. One indicator lamp
2 lights up continuously when theve hi‐
cle has finished lo wering.
R Off-road le vel +1: theve hicle is lo wered
to the normal le vel. No indicator lamp 2
lights up when theve hicle has finished
lo we ring.
Yo ur selection is sa ved. The off-road le vel set
re mains stored even af terth e ignition has been
switched off. Driving and parking
261
Page 273 of 681
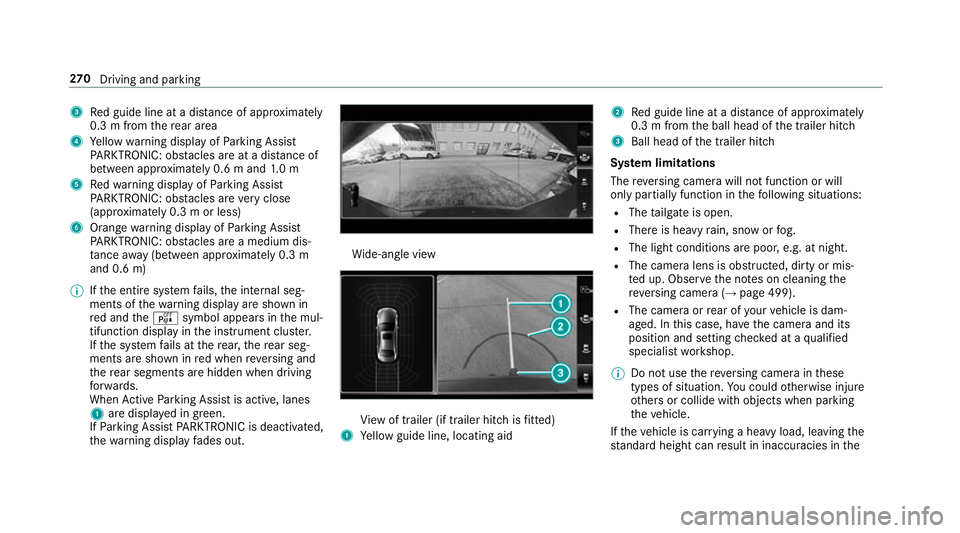
3
Red guide line at a dis tance of appr oximately
0.3 m from there ar area
4 Yellow warning display of Parking Assist
PA RKTRONIC: obstacles are at a dis tance of
between appr oximately 0.6 m and 1.0 m
5 Redwa rning display of Parking Assist
PA RKTRONIC: obstacles are very close
(appr oximately 0.3 m or less)
6 Orange warning display of Parking Assist
PA RKTRONIC: obstacles are a medium dis‐
ta nce away (between appr oximately 0.3 m
and 0.6 m)
% Ifth e entire sy stem fails, the internal seg‐
ments of thewa rning display are shown in
re d and theé symbol appears in the mul‐
tifunction display in the instrument clus ter.
If th e sy stem fails at there ar, there ar seg‐
ments are shown in red when reve rsing and
th ere ar segments are hidden when driving
fo rw ards.
When Active Parking Assist is active, lanes
1 are displa yed in green.
If Pa rking Assist PARKTRONIC is deacti vated,
th ewa rning display fades out. Wi
de-angle view Vi
ew of trailer (if trailer hitch is fitted)
1 Yellow guide line, locating aid 2
Red guide line at a dis tance of appr oximately
0.3 m from the ball head of the trailer hitch
3 Ball head of the trailer hitch
Sy stem limitations
The reve rsing camera will not function or will
only partially function in thefo llowing situations:
R The tailgate is open.
R There is heavy rain, snow or fog.
R The light conditions are poor, e.g. at night.
R The camera lens is obstructed, dirty or mis‐
ted up. Obser vethe no tes on cleaning the
re ve rsing camera (→ page 499).
R The camera or rear of your vehicle is dam‐
aged. In this case, ha vethe camera and its
position and setting checked at a qualified
specialist workshop.
% Do not use there ve rsing camera in these
types of situation. You could otherwise injure
ot hers or collide with objects when parking
th eve hicle.
If th eve hicle is car rying a heavy load, leaving the
st andard height can result in inaccuracies in the270
Driving and pa rking
Page 277 of 681
Sy
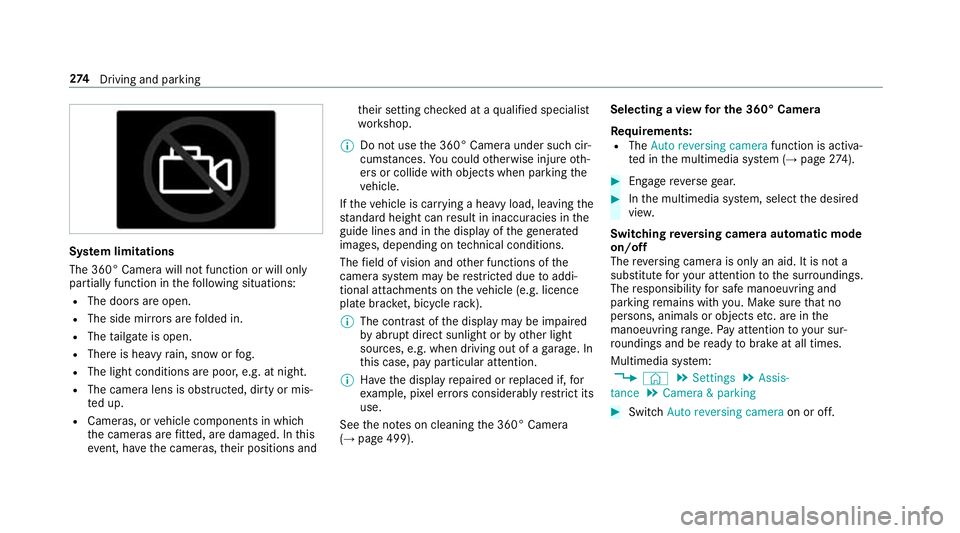
stem limitations
The 360° Camera will not function or will only
partially function in thefo llowing situations:
R The doors are open.
R The side mir rors are folded in.
R The tailgate is open.
R There is heavy rain, snow or fog.
R The light conditions are poor, e.g. at night.
R The camera lens is obstructed, dirty or mis‐
ted up.
R Cameras, or vehicle components in which
th e cameras are fitted, are dama ged. In this
eve nt, ha vethe cameras, their positions and th
eir setting checked at a qualified specialist
wo rkshop.
% Do not use the 360° Camera under such cir‐
cums tances. You could otherwise injure oth‐
ers or collide with objects when parking the
ve hicle.
If th eve hicle is car rying a heavy load, leaving the
st andard height can result in inaccuracies in the
guide lines and in the display of thege nerated
ima ges, depending on tech nical conditions.
The field of vision and other functions of the
came rasystem may be restricted due toaddi‐
tional attachments on theve hicle (e.g. licence
plate brac ket, bicycle rack ).
% The contrast of the display may be impaired
by abrupt direct sunlight or by other light
sources, e.g. when driving out of a garage . In
th is case, pay particular attention.
% Have the display repaired or replaced if, for
ex ample, pixel er rors considerably restrict its
use.
See the no tes on cleaning the 360° Camera
(→ page 499). Selecting a view
for the 360° Camera
Re quirements:
R The Auto reversing camera function is activa‐
te d in the multimedia sy stem (→ page274). #
Engage reve rsege ar. #
Inthe multimedia sy stem, select the desired
vie w.
Switching reve rsing camera automatic mode
on/off
The reve rsing camera is only an aid. It is not a
substitute foryo ur attention tothe sur roundings.
The responsibility for safe manoeuvring and
parking remains with you. Make sure that no
persons, animals or objects etc. are in the
manoeuvring range. Pay attention to your sur‐
ro undings and be ready tobrake at all times.
Multimedia sy stem:
, © .
Settings .
Assis-
tance .
Camera & parking #
Switch Auto reversing camera on or off.274
Driving and pa rking
Page 422 of 681
If
th e map data on your vehicle has been ins tal‐
led at thefa ctory and you wish toreins tall it, you
do not need toenter the activation code.
Fo r map data that you ha vepur chased in the
fo rm of a data storage medium, you must en ter
th e accompanying activation code.
% Ifyo u sa vethe map data on a data storage
medium with the online map update service,
no entry isrequ ired. The activation code is
st ored on the data storage medium during
th e downloading process.
Obser vethefo llowing when entering the activa‐
tion code:
R The activation code can be used for one vehi‐
cle
R The activation code is not transferable
R The activation code has six digits
In theeve nt of thefo llowing problems, please
con tact a Mercedes-Benz service centre:
R The multimedia sy stem does not accept the
activation code
R You ha velost the activation code Displaying
the compass
Multimedia sy stem:
, © .
Navigation .
¡ .
Position #
Select Compass.
The compass display sho wsthefo llowing
information:
R the cur rent di rection of tr avel with bear‐
ing (360° form at) and compass direction
R longitude and latitude coo rdinates in
degrees, minutes and seconds
R height (rounded)
R number of GPS satellites from which a
signal can be recei ved
The information is not available in every count ry.
Displaying Qibla
Multimedia sy stem:
, © .
Navigation .
¡ .
Position #
Select Qibla.
The ar rowonthe compass sho wsthe direc‐
tion toMecca in relation tothe cur rent di rec‐
tion of tr avel. The number of satellites
recei ved is shown.
% This function is not available in all countries.
Setting the map scale automatically
Multimedia sy stem:
, © .
Naviga-
tion .
Z .
Advanced #
Select View. #
Select Map orientation. #
Activate Auto zoom.
The display button is acti vated. The map
scale is set automatically depending on your
driving speed and the type of road.
% The automatically selec ted map scale can be
ch anged manuall y.After a few seconds, this
is automatically reset.
Displaying the satellite map
Multimedia sy stem:
, © .
Naviga-
tion .
Z .
Advanced #
Select View. #
Select Map elements. MBUX multimedia sy
stem 419
Page 424 of 681
Showing map view in
the multifunction dis‐
play of the instrument clus ter
Multimedia sy stem:
, © .
Naviga-
tion .
Z .
Advanced #
Select View. #
Select Map orientation. #
Scroll up and show theINSTRUMENT CLUS-
TER VIEW category. #
Toset the map scale automaticall y:switch
on Auto zoom.
The display button is activated. The map
scale is set automatically depending on your
driving speed and the type of road. #
Toselect map orientation: select an option.
The #dot indicates the cur rent selection.
The following options are available:
R 2D heading up option:the 2D map view is
aligned tothe direction of tra vel.
R 2D north up option:the 2D map view is
displa yed so that no rth is alw ays at the
to p. R
3Doption: the 3D map view is aligned to
th e direction of tra vel. Pa
rking service Note
s onthe pa rking service &
WARNING Risk of accident and inju ry
due tonot observing the maximum per‐
mitted access height
If th eve hicle height exceeds the maximum
permitted access height for multi-s torey car
par ksand unde rgro und car par ks,th eve hicle
ro of as well as other vehicle parts could be
damaged.
There could be a risk of injury totheve hicle
occupants. #
Before driving into a multi-s torey car
park or under ground car pa rkobser ve
th e locally signpos ted access height. #
Ifth eve hicle height, including any addi‐
tional equipment, exceeds the maxi‐
mum permitted access height, do not drive into
the multi-s torey car park or
underground car par k. This service is not
available in all countries.
Selecting pa rking options
* NO
TEBefore selecting the parking
option The data is based on information pr
ovided by
th ere spective service pr ovider.
Mercedes Benz accepts no liability forthe
accuracy of the information pr ovided relating
to the multi-s torey car park/parking area. #
Alwa ys obser vethe local Information
and conditions. Re
quirements:
R The navigation services option is available,
subsc ribed toand activated in the Mercedes
me por tal.
R The parking service is within the scope of the
navigation service.
R Parking is activated (→ page 422). MBUX multimedia sy
stem 421