2019 MERCEDES-BENZ GLE COUPE light
[x] Cancel search: lightPage 169 of 370
The electric parking brake secures the vehicle
automatically if the HOLD function is activated
when the vehicle is stationary and:
R a system malfunction occurs
R the power supply is insufficient
On steep uphill or downhill gradients or if there
is a malfunction, the transmission may also be
automatically shifted to position 005D.4MATIC
4MATIC ensures that all four wheels are perma-
nently driven. Together with ESP ®
and 4ETS, it
improves the traction of your vehicle whenever
a drive wheel spins due to insufficient grip.
If you fail to adapt your driving style, 4MATIC can
neither reduce the risk of accident nor override the laws of physics. 4MATIC cannot take
account of road, weather and traffic conditions.
4MATIC is only an aid. You are responsible for
the distance to the vehicle in front, for vehicle
speed, for braking in good time and for staying in
your lane.
! Never tow the vehicle with one axle raised.
This may damage the transfer case. Damage
of this sort is not covered by the Mercedes-
Benz Limited Warranty. All wheels must
remain either on the ground or be fully raised.
Observe the instructions for towing the vehi-
cle with all wheels in full contact with the
ground.
! A function or performance test should only
be carried out on a two-axle dynamometer.
Before you operate the vehicle on such a
dynamometer, please consult a qualified
workshop. You could otherwise damage the
drive train or the brake system.
i In wintry driving conditions, the maximum
effect of 4MATIC can only be achieved if you
use winter tires (M+S tires), with snow chains if necessary. DSR (Downhill Speed Regulation)
General notes DSR is an aid to assist you when driving down-
hill. It keeps the speed of travel at the speed
selected on the on-board computer. The steeper
the downhill gradient, the greater the DSR brak- ing effect on the vehicle. When driving on flat
stretches of road or on an uphill gradient, the
DSR braking effect is minimal or nonexistent.
DSR controls the vehicle’s speed when it is acti-
vated and the transmission is in position 005B,005E
or 005C. You can drive at a higher or a lower speed
than that set on the on-board computer at any
time by accelerating or braking.
Important safety notes G
WARNING
If the speed driven and the set speed deviate and you activate DSR on a slippery road sur-
face, the wheels may lose traction. There is an
increased danger of skidding and accidents.
Before switching DSR on, please take into
consideration the road surface and the differ- ence between driving speed and the set
speed.
If you fail to adapt your driving style, DSR can
neither reduce the risk of accident nor override the laws of physics. DSR cannot take account of
road, weather and traffic conditions. DSR is only
an aid. You are responsible for the distance to
the vehicle in front, for vehicle speed, for brak-
ing in good time and for staying in your lane.
You are always responsible for keeping control
of the vehicle and for assessing whether the
downhill gradient can be managed. DSR may not always be able to keep to the set speed, depend-
ing on road surface and tire conditions. Select a
set speed suitable for the prevailing conditions
and when necessary, apply the brakes manually.
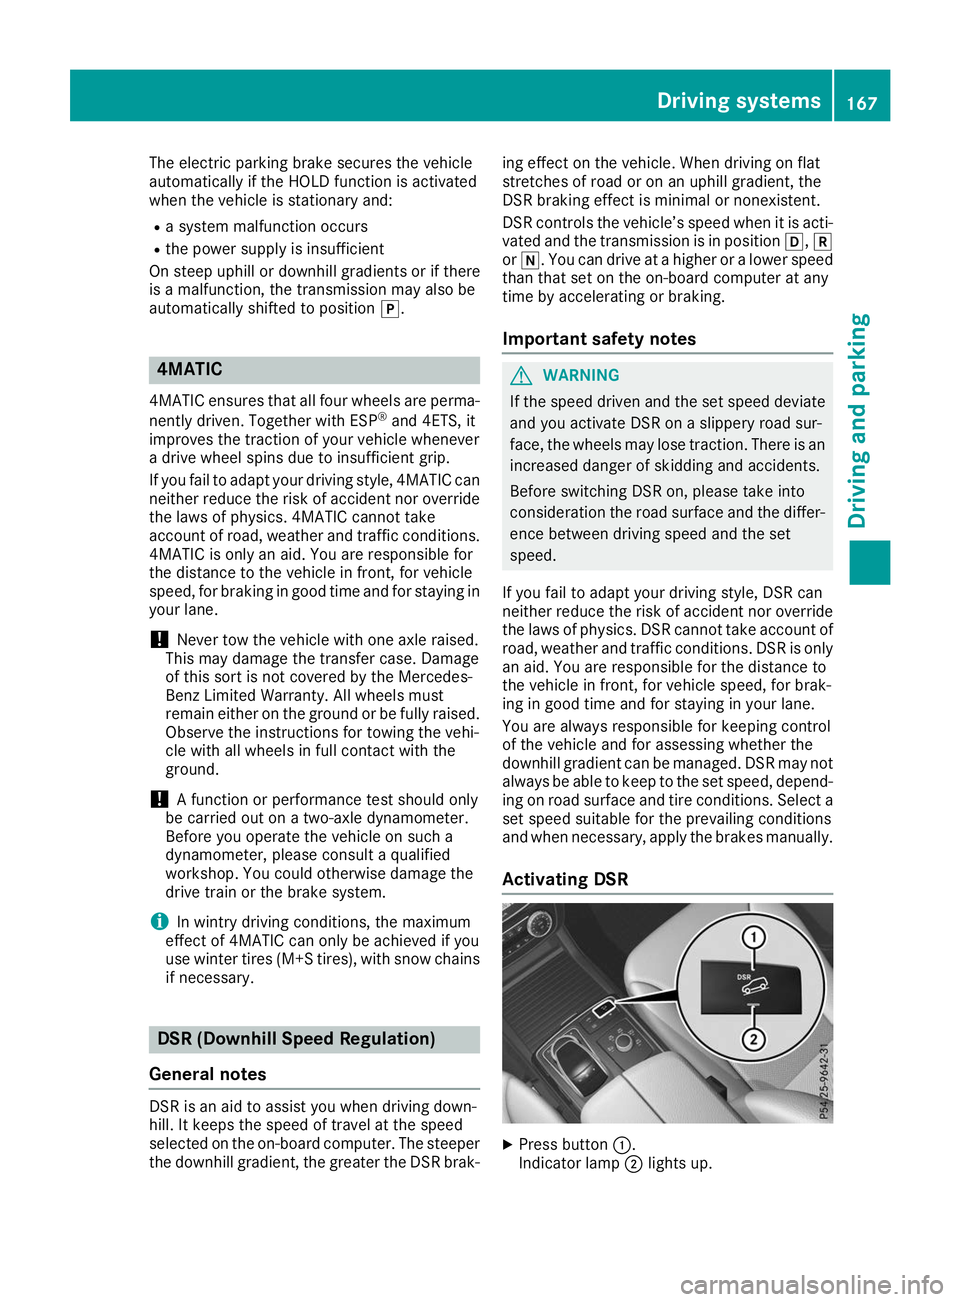
Activating DSR X
Press button 0043.
Indicator lamp 0044lights up. Driving systems
167Driving and parking Z
Page 173 of 370
Adjust the vehicle level before pulling away.
G
WARNING
Due to the high center of gravity, the vehicle
may start to skid and roll over in the event of
an abrupt steering maneuver and/or when
the vehicle's speed is not adapted to the road conditions. There is a risk of an accident.
Always adapt your speed and driving style to
the vehicle's driving characteristics and to the prevailing road and weather conditions.
! When driving on extremely rough terrain,
select a high vehicle level in good time. Make
sure there is always sufficient ground clear-
ance. You will otherwise damage the vehicle.
R Utility vehicles have a significantly higher roll-
over rate than other types of vehicles.
Failure to operate this vehicle safely may
result in an accident, rollover of the vehicle,
and severe or fatal injury.
R In a rollover crash, an unbelted person is sig-
nificantly more likely to die than a person
wearing a seat belt.
You and all vehicle occupants should always
wear your seat belts.
General notes
Only select raised level if this is appropriate for
the road conditions. Otherwise, fuel consump-
tion may increase and handling may be affected.
Make changes to the vehicle level while the
vehicle is in motion. This enables the vehicle to adjust to the new level as quickly as possible.
The vehicle level may change visibly if you park
the vehicle and the outside temperature
changes. If the temperature drops, the vehicle
level is lower; with an increase in temperature,
the vehicle level rises.
If you unlock the vehicle or open a door, the
vehicle begins to compensate for load discrep-
ancies while still parked. However, for signifi-
cant level changes, such as after the vehicle has
been stationary for a long period, the engine
must be on. For safety reasons, the vehicle is
only lowered when the doors are closed. Low-
ering is interrupted if a door is opened, and it
continues once the door has been closed.
Vehicles with no trailer coupled: below a
speed of 40 mph (64 km/h) you can choose
between the normal and raised vehicle level. Select the normal vehicle level for normal road
surfaces and the raised vehicle level for driving
with snow chains or on particularly poor road
surfaces. Your selection remains stored even if
you remove the SmartKey from the ignition lock.
If you try to select raised level at a speed above
40 mph (64 km/h), the Drive More Slowly
Drive More Slowly
message appears in the multifunction display.
Vehicles with a trailer coupled: below a speed
of 19 mph (30 km/h), you can choose between
the normal and raised vehicle level.
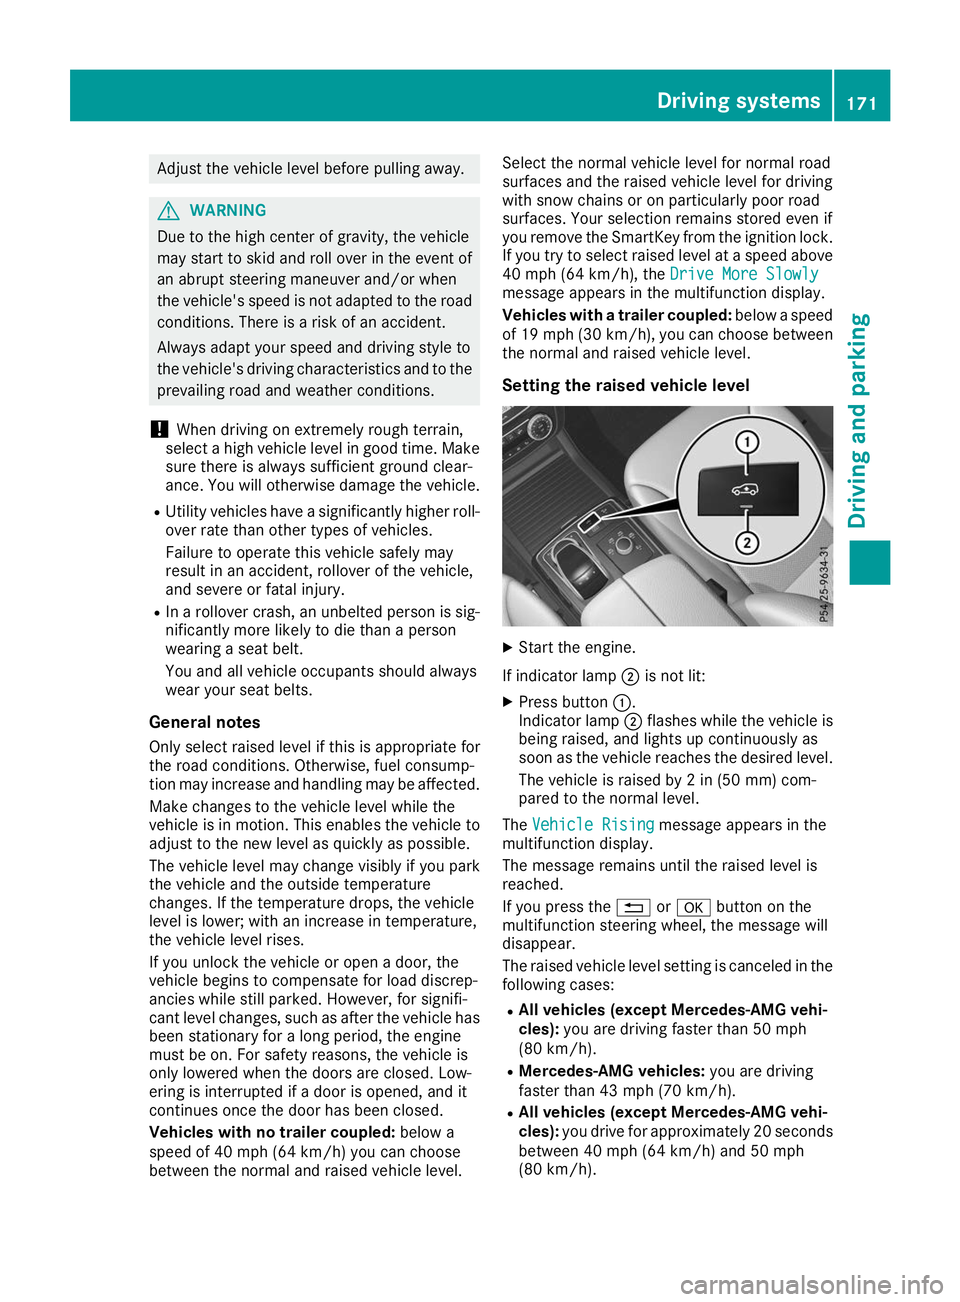
Setting the raised vehicle level X
Start the engine.
If indicator lamp 0044is not lit:
X Press button 0043.
Indicator lamp 0044flashes while the vehicle is
being raised, and lights up continuously as
soon as the vehicle reaches the desired level.
The vehicle is raised by 2 in (50 mm) com-
pared to the normal level.
The Vehicle Rising Vehicle Rising message appears in the
multifunction display.
The message remains until the raised level is
reached.
If you press the 0038or0076 button on the
multifunction steering wheel, the message will
disappear.
The raised vehicle level setting is canceled in the following cases:
R All vehicles (except Mercedes-AMG vehi-
cles): you are driving faster than 50 mph
(80 km/h).
R Mercedes-AMG vehicles: you are driving
faster than 43 mph (70 km/h).
R All vehicles (except Mercedes-AMG vehi-
cles): you drive for approximately 20 seconds
between 40 mph (64 km/h) and 50 mph
(80 km/h). Driving systems
171Driving and parking Z
Page 174 of 370
R
Mercedes-AMG vehicles: you drive at
speeds between 40 mph (64 km/h) and
43 mph (70 km/h) for approximately 20 sec- onds.
R You drive with a trailer at speeds greater than
19 mph (30 km/h).
The raised vehicle level remains saved when you are not driving within these speed ranges.
Setting the normal vehicle level
! Make sure that there is enough ground
clearance when the vehicle is being lowered.
It could otherwise hit the ground, damaging
the underbody.
X Start the engine.
If indicator lamp 0044is lit:
X Press button 0043.
Indicator lamp 0044flashes while the vehicle is
being lowered, and goes out as soon as the
desired vehicle level is reached.
Vehicles with no trailer coupled: the vehi-
cle is adjusted to the height of the selected
drive program (Y page 134).
Vehicles with a trailer coupled: the vehicle
is adjusted to normal level regardless of the
drive program selected (Y page 134). The
vehicle remains at the normal level, even if the
drive program is changed.
During the adjustment, the Lowering
Lowering mes-
sage appears in the multifunction display.
If you press the 0038or0076 button on the
multifunction steering wheel, the message will
disappear. AMG adaptive sport suspension sys-
tem
General notes The electronically controlled damping system
works continuously. This improves driving
safety and ride comfort.
The damping is tuned individually to each wheel
and depends on:
R your driving style, e.g. sporty
R the road surface condition, e.g. bumps
R your individual selection of Sport, Sport+ or
Comfort The suspension setting can be adjusted using
the appropriate button on the center console or
the DYNAMIC SELECT controller (Y page 134).
Each time you restart the engine with the Smart- Key or the Start/Stop button, Comfort mode is
activated. For further information about starting
the engine, see (Y page 128).
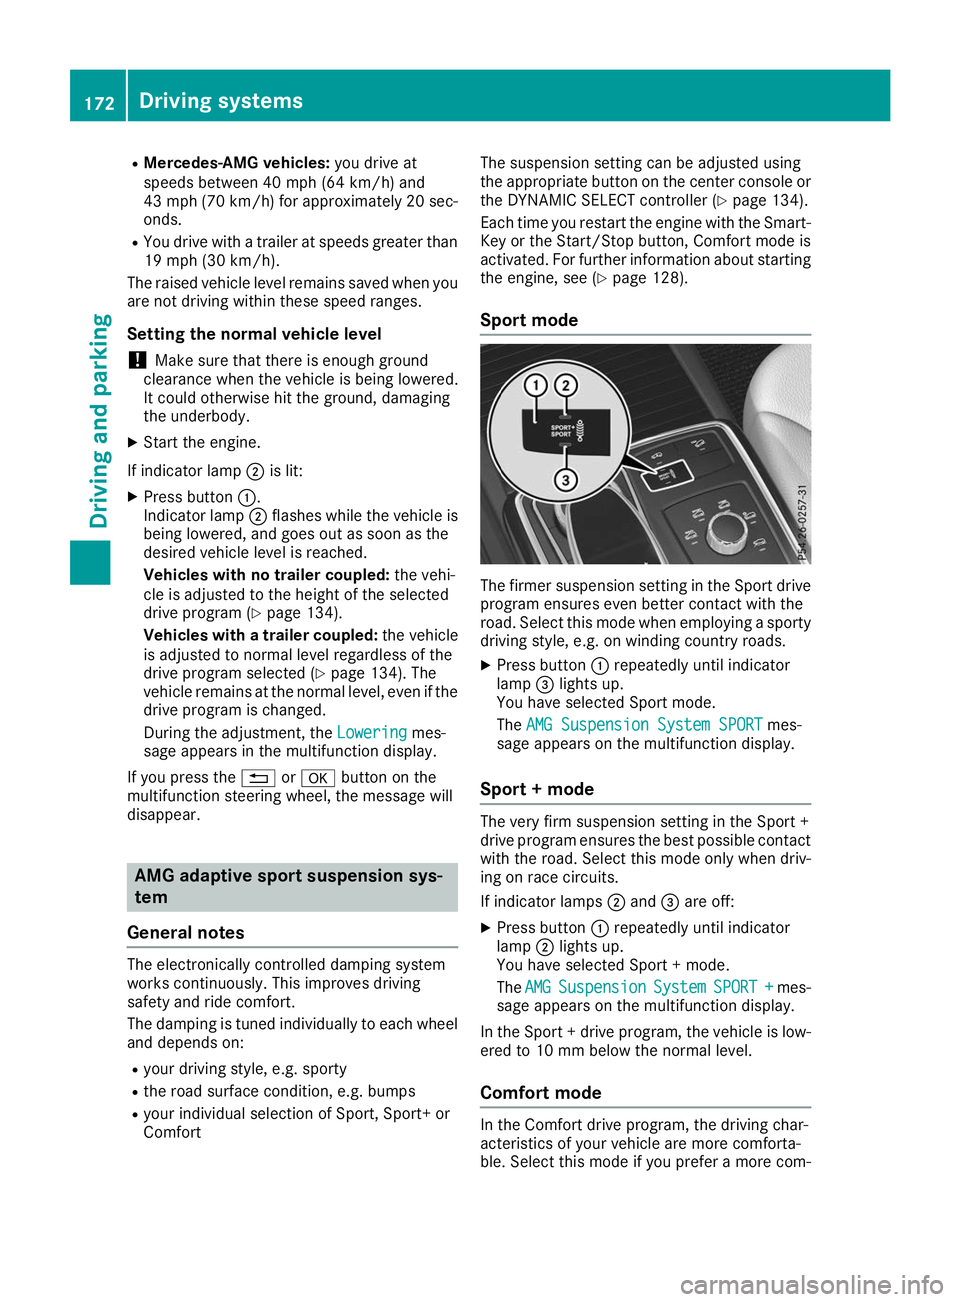
Sport mode The firmer suspension setting in the Sport drive
program ensures even better contact with the
road. Select this mode when employing a sporty driving style, e.g. on winding country roads.
X Press button 0043repeatedly until indicator
lamp 0087lights up.
You have selected Sport mode.
The AMG Suspension System SPORT AMG Suspension System SPORT mes-
sage appears on the multifunction display.
Sport + mode The very firm suspension setting in the Sport +
drive program ensures the best possible contact
with the road. Select this mode only when driv-
ing on race circuits.
If indicator lamps 0044and 0087are off:
X Press button 0043repeatedly until indicator
lamp 0044lights up.
You have selected Sport + mode.
The AMG AMG Suspension
Suspension System
SystemSPORT +
SPORT + mes-
sage appears on the multifunction display.
In the Sport + drive program, the vehicle is low-
ered to 10 mm below the normal level.
Comfort mode In the Comfort drive program, the driving char-
acteristics of your vehicle are more comforta-
ble. Select this mode if you prefer a more com-172
Driving systemsDriving and parking
Page 176 of 370
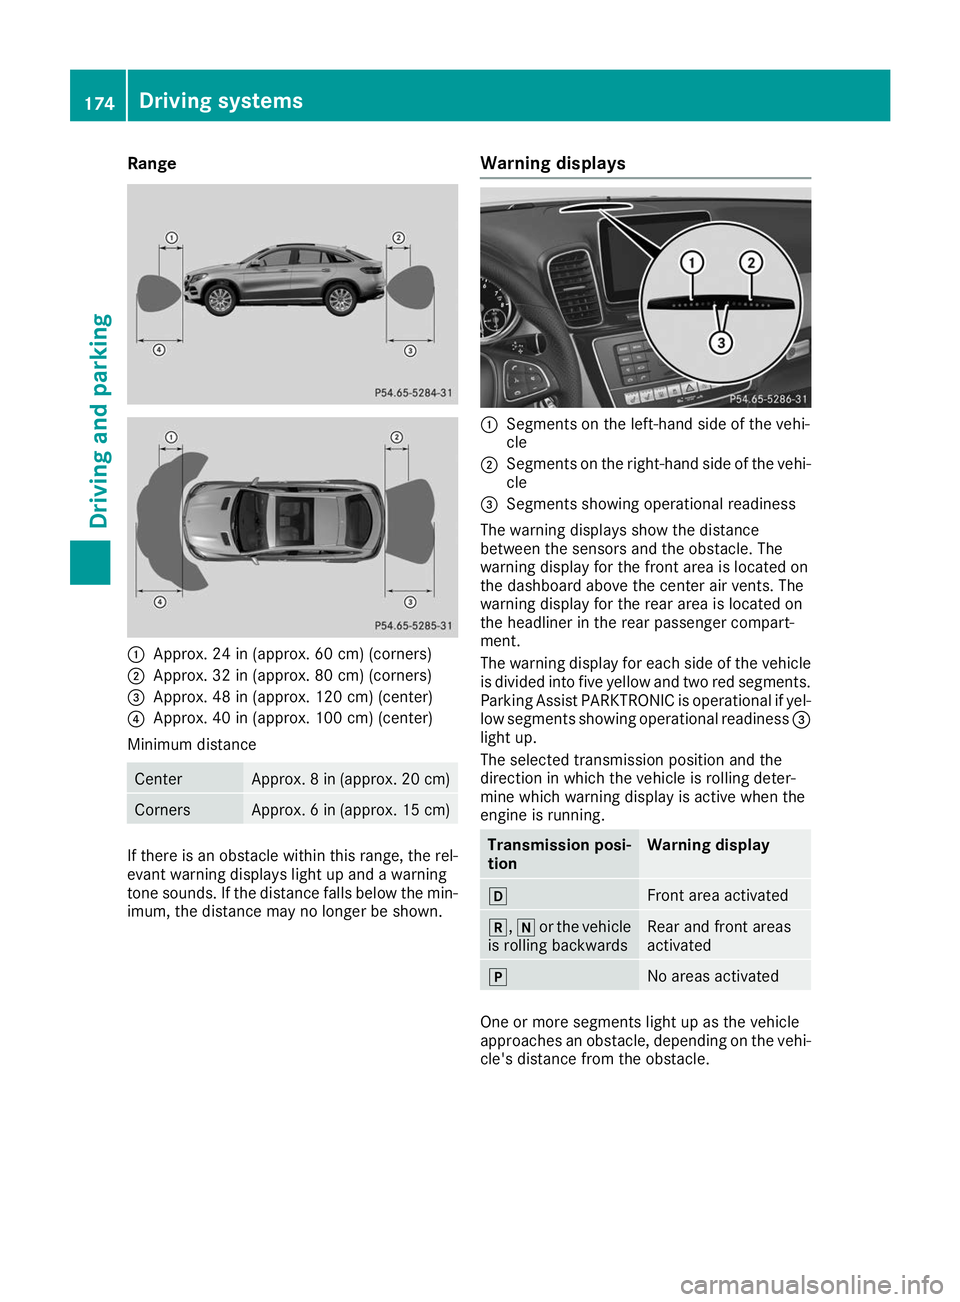
Range
0043
Approx. 24 in (approx. 60 cm) (corners)
0044 Approx. 32 in (approx. 80 cm) (corners)
0087 Approx. 48 in (approx. 120 cm) (center)
0085 Approx. 40 in (approx. 100 cm) (center)
Minimum distance Center Approx. 8 in (approx. 20 cm)
Corners Approx. 6 in (approx. 15 cm)
If there is an obstacle within this range, the rel-
evant warning displays light up and a warning
tone sounds. If the distance falls below the min- imum, the distance may no longer be shown. Warning displays 0043
Segments on the left-hand side of the vehi-
cle
0044 Segments on the right-hand side of the vehi-
cle
0087 Segments showing operational readiness
The warning displays show the distance
between the sensors and the obstacle. The
warning display for the front area is located on
the dashboard above the center air vents. The
warning display for the rear area is located on
the headliner in the rear passenger compart-
ment.
The warning display for each side of the vehicle
is divided into five yellow and two red segments.
Parking Assist PARKTRONIC is operational if yel-
low segments showing operational readiness 0087
light up.
The selected transmission position and the
direction in which the vehicle is rolling deter-
mine which warning display is active when the
engine is running. Transmission posi-
tion Warning display
005B
Front area activated
005E,
005Cor the vehicle
is rolling backwards Rear and front areas
activated
005D
No areas activated
One or more segments light up as the vehicle
approaches an obstacle, depending on the vehi-
cle's distance from the obstacle. 174
Driving systemsDriving and parking
Page 177 of 370
From the:
R sixth segment onwards, you will hear an inter-
mittent warning tone for approximately two
seconds.
R seventh segment onwards, you will hear a
warning tone for approximately two seconds.
This indicates that you have now reached the minimum distance.
Deactivating or activating Parking
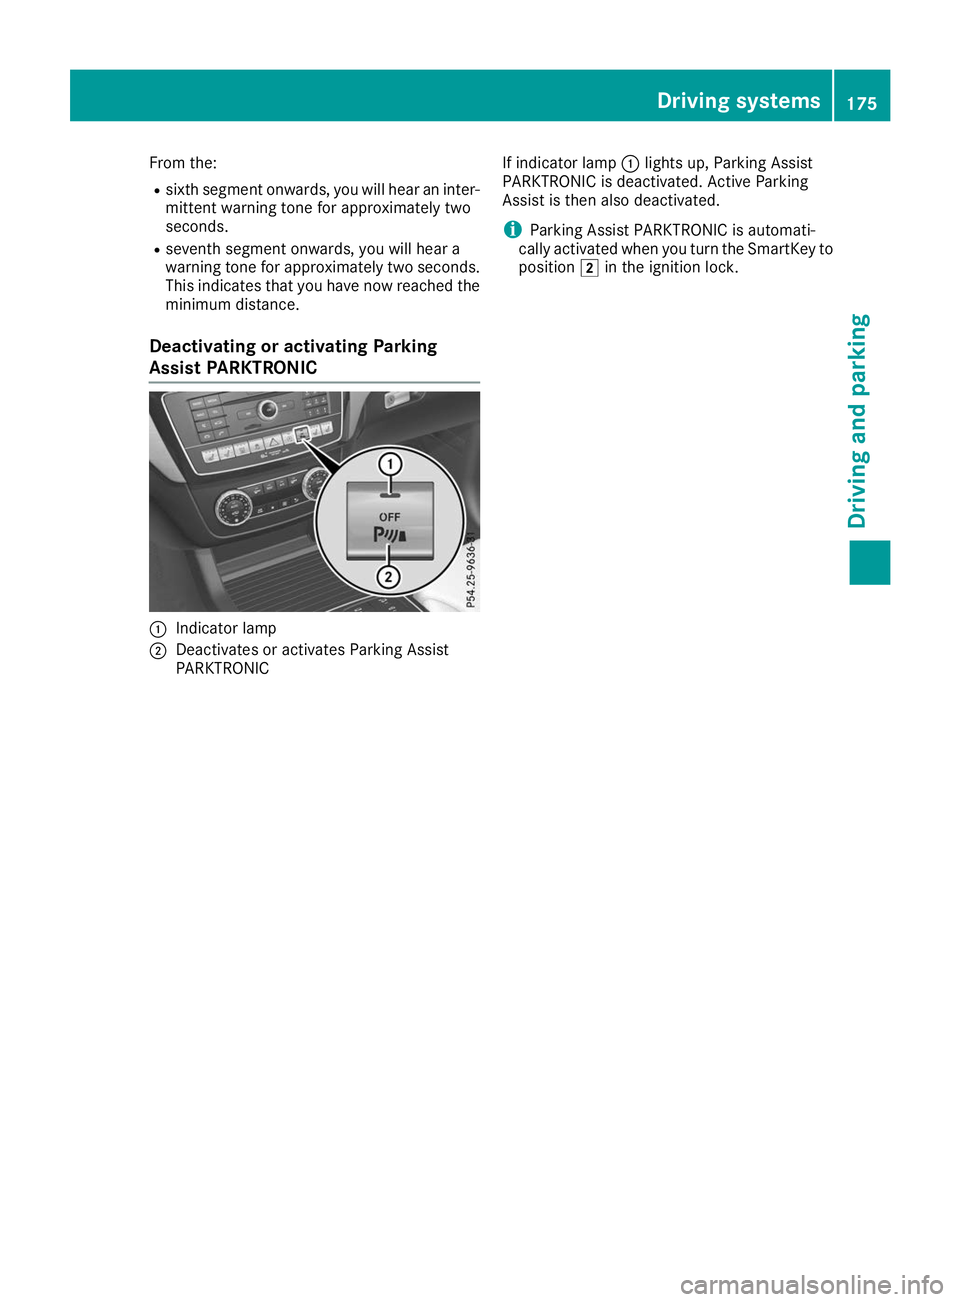
Assist PARKTRONIC 0043
Indicator lamp
0044 Deactivates or activates Parking Assist
PARKTRONIC If indicator lamp
0043lights up, Parking Assist
PARKTRONIC is deactivated. Active Parking
Assist is then also deactivated.
i Parking Assist PARKTRONIC is automati-
cally activated when you turn the SmartKey to
position 0048in the ignition lock. Driving systems
175Driving and parking Z
Page 178 of 370
Problems with Parking Assist PARKTRONIC
Problem
Possible causes/consequences and
0050
0050Solutions Only the red segments in
the Parking Assist
PARKTRONIC warning
displays are lit. You also
hear a warning tone for
approximately two sec-
onds.
Parking Assist
PARKTRONIC is deacti-
vated after approx-
imately five seconds,
and the indicator lamp in
the Parking Assist
PARKTRONIC button
lights up. Parking Assist PARKTRONIC has malfunctioned and has been deacti-
vated.
X If problems persist, have Parking Assist PARKTRONIC checked at a
qualified specialist workshop. Only the red segments in
the Parking Assist
PARKTRONIC warning
displays are lit. Parking
Assist PARKTRONIC is
deactivated after
approximately five sec-
onds. The Parking Assist PARKTRONIC sensors are dirty or there is inter-
ference.
X Clean the Parking Assist PARKTRONIC sensors (Y page 305).
X Switch the ignition back on. The problem may be caused by an external source of radio or ultra-
sound waves.
X Check to see if Parking Assist PARKTRONIC works at a different
location. Active Parking Assist
General notes Active Parking Assist is an electronic parking aid
with ultrasound. It measures the road on both
sides of the vehicle. A parking symbol indicates a suitable parking space. Active steering inter-
vention and brake application can assist you
during parking. Parking Assist PARKTRONIC is
also available (Y page 173).
Important safety notes Active Parking Assist is merely an aid. It is not a
replacement for your attention to your immedi-
ate surroundings. You are always responsible
for safe maneuvering, parking and exiting a
parking space. Make sure that no persons, ani-
mals or objects are in the path of your vehicle.
When Parking Assist PARKTRONIC is deactiva-
ted, Active Parking Assist is also unavailable. G
WARNING
While parking or pulling out of a parking
space, the vehicle swings out and can drive
onto areas of the oncoming lane. This could
cause you to collide with other road users or
objects. There is a risk of an accident.
Pay attention to other road users or objects.
Stop the vehicle if necessary or cancel the
Active Parking Assist parking procedure.
! If they cannot be avoided, drive over obsta-
cles such as curbs slowly and at an obtuse
angle. Otherwise, you may damage the
wheels or tires.
Active Parking Assist may also show parking
spaces that are not suitable for parking, e.g.: R where parking or stopping is prohibited
R in front of driveways or entrances and exits
R on unsuitable surfaces 176
Driving systemsDriving and parking
Page 182 of 370
the vehicle has exited the parking space com-
pletely. This is useful, for example when you
recognize that it is already possible to pull out of
the parking space.
Canceling Active Parking Assist X
Stop the movement of the multifunction
steering wheel or steer yourself.
Active Parking Assist will be canceled at once.
The Active Parking Assist Canceled
Active Parking Assist Canceled
message appears on the multifunction dis-
play.
or X Press the Parking Assist PARKTRONIC button
(Y page 175).
Parking Assist PARKTRONIC is switched off
and Active Parking Assist is immediately can-
celed. The Active Parking Assist Can‐
Active Parking Assist Can‐
celed celed message appears on the multifunction
display.
Active Parking Assist is canceled automatically
if: R the electric parking brake is engaged
R transmission position 005Dis selected
R parking using Active Parking Assist is no lon-
ger possible
R you are driving faster than 6 mph (10 km/h)
R a wheel spins, ESP ®
intervenes or fails. The
00E5 warning lamp lights up in the instrument
cluster
A warning tone sounds. The parking symbol dis-
appears and the multifunction display shows the
Active
Active Parking Parking Assist
AssistCanceled
Canceled message.
When Active Parking Assist is canceled, you
must steer and brake again yourself.
If a system malfunction occurs, the vehicle is
braked to a standstill. To drive on, depress the
accelerator again. Rear view camera
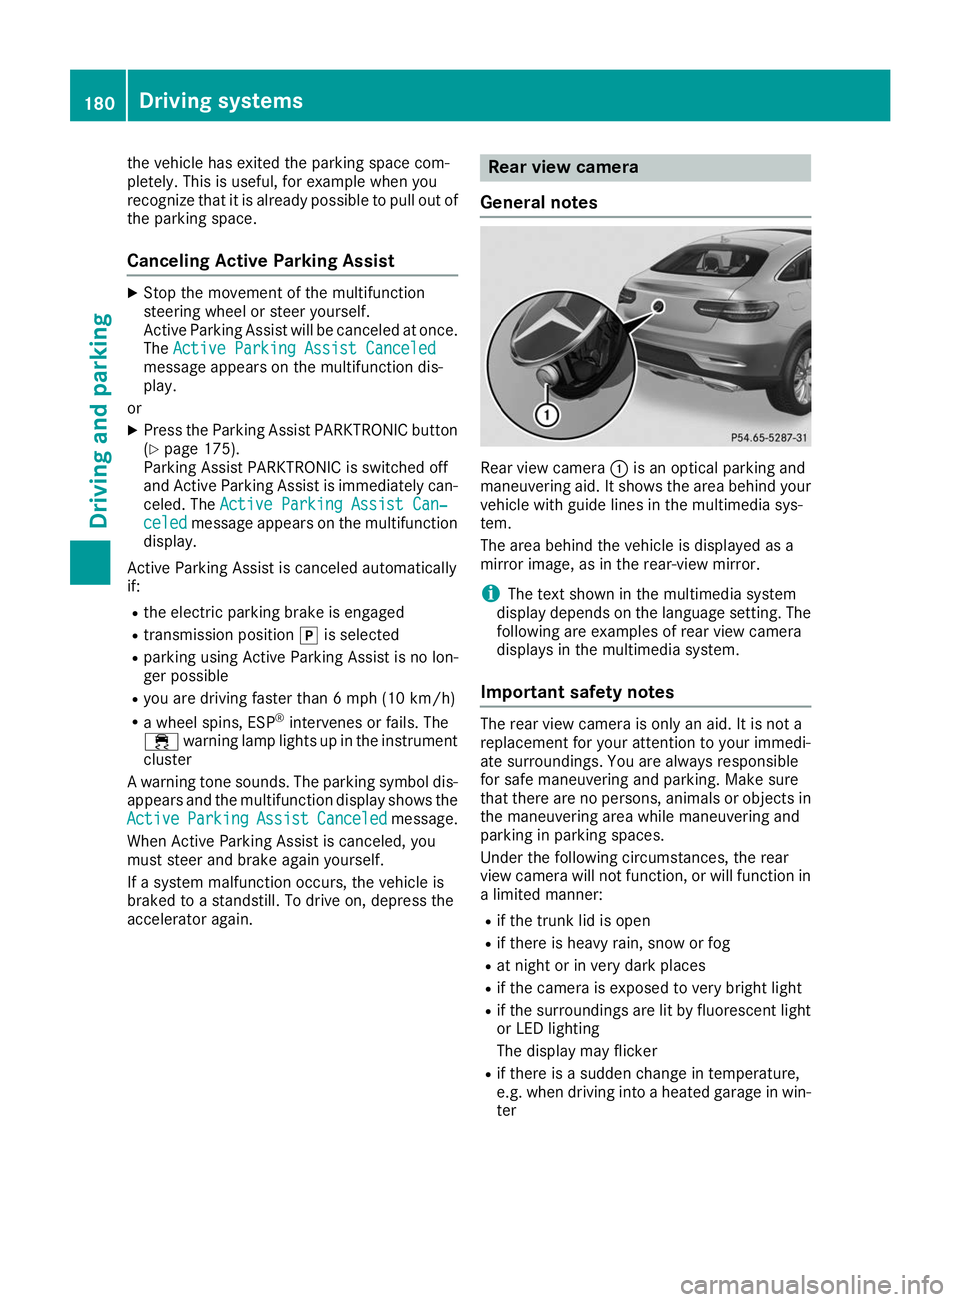
General notes Rear view camera
0043is an optical parking and
maneuvering aid. It shows the area behind your
vehicle with guide lines in the multimedia sys-
tem.
The area behind the vehicle is displayed as a
mirror image, as in the rear-view mirror.
i The text shown in the multimedia system
display depends on the language setting. The
following are examples of rear view camera
displays in the multimedia system.
Important safety notes The rear view camera is only an aid. It is not a
replacement for your attention to your immedi-
ate surroundings. You are always responsible
for safe maneuvering and parking. Make sure
that there are no persons, animals or objects in
the maneuvering area while maneuvering and
parking in parking spaces.
Under the following circumstances, the rear
view camera will not function, or will function in
a limited manner:
R if the trunk lid is open
R if there is heavy rain, snow or fog
R at night or in very dark places
R if the camera is exposed to very bright light
R if the surroundings are lit by fluorescent light
or LED lighting
The display may flicker
R if there is a sudden change in temperature,
e.g. when driving into a heated garage in win-
ter 180
Driving systemsDriving an
d parking
Page 183 of 370
R
if the camera lens is dirty or obstructed.
Observe the notes on cleaning
(Y page 305)
R if the rear of your vehicle is damaged. In this
event, have the camera position and setting
checked at a qualified specialist workshop
The field of vision and other functions of the rear
view camera may be restricted due to additional
accessories on the rear of the vehicle (e.g.
license plate holder, bicycle rack).
On vehicles with height-adjustable chassis,
leaving the standard height can result in inac-
curacies in the guide lines, depending on tech-
nical conditions.
i The contrast of the display may be affected
by the sudden presence of sunlight or other
light sources, e.g. when exiting a garage. Pay
particular attention in this situation.
i If usability is severely restricted, e.g. due to
pixel errors, have the display repaired or
replaced.
i The rear view camera is protected from rain-
drops and dust. When the rear view camera is
switched on, the Mercedes emblem opens
with the rear view camera in the cover on the tailgate.
The emblem closes again when:
R you have finished the maneuvering process
R you switch off the engine
R you open the trunk
Observe the notes on cleaning (Y page 305).
For technical reasons, the emblem may
remain open briefly after the rear view camera
has been deactivated.
Activating/deactivating the rear view
camera X
To activate: make sure that the SmartKey is
in position 0048in the ignition lock.
X Make sure that the Activation by R gear
Activation by R gear
function is selected on the multimedia system (see the Digital Operator's Manual).
X Engage reverse gear.
The rear view camera flap opens. The multi-
media system shows the area behind the vehi-
cle with guide lines.
The image from the rear view camera is avail- able throughout the maneuvering process. X
To switch the function mode for vehicles
with trailer tow hitch: using the controller,
select symbol 0043for the "Reverse parking"
function or symbol 0044for "Coupling up a
trailer".
The symbol of the selected function is high-
lighted.
To deactivate: shift the transmission to posi-
tion 005Dor drive forwards.
Displays in the multimedia system The rear view camera may show a distorted view
of obstacles, show them incorrectly or not at all.
The rear view camera does not show objects in
the following positions:
R very close to the rear bumper
R under the rear bumper
R in the area immediately above the tailgate
handle
! Objects not at ground level may appear to
be further away than they actually are, e.g.:
R the bumper of a parked vehicle
R the drawbar of a trailer
R the ball coupling of a trailer tow hitch
R the rear section of an HGV
R a slanted post
Use the guidelines only for orientation.
Approach objects no further than the bottom-
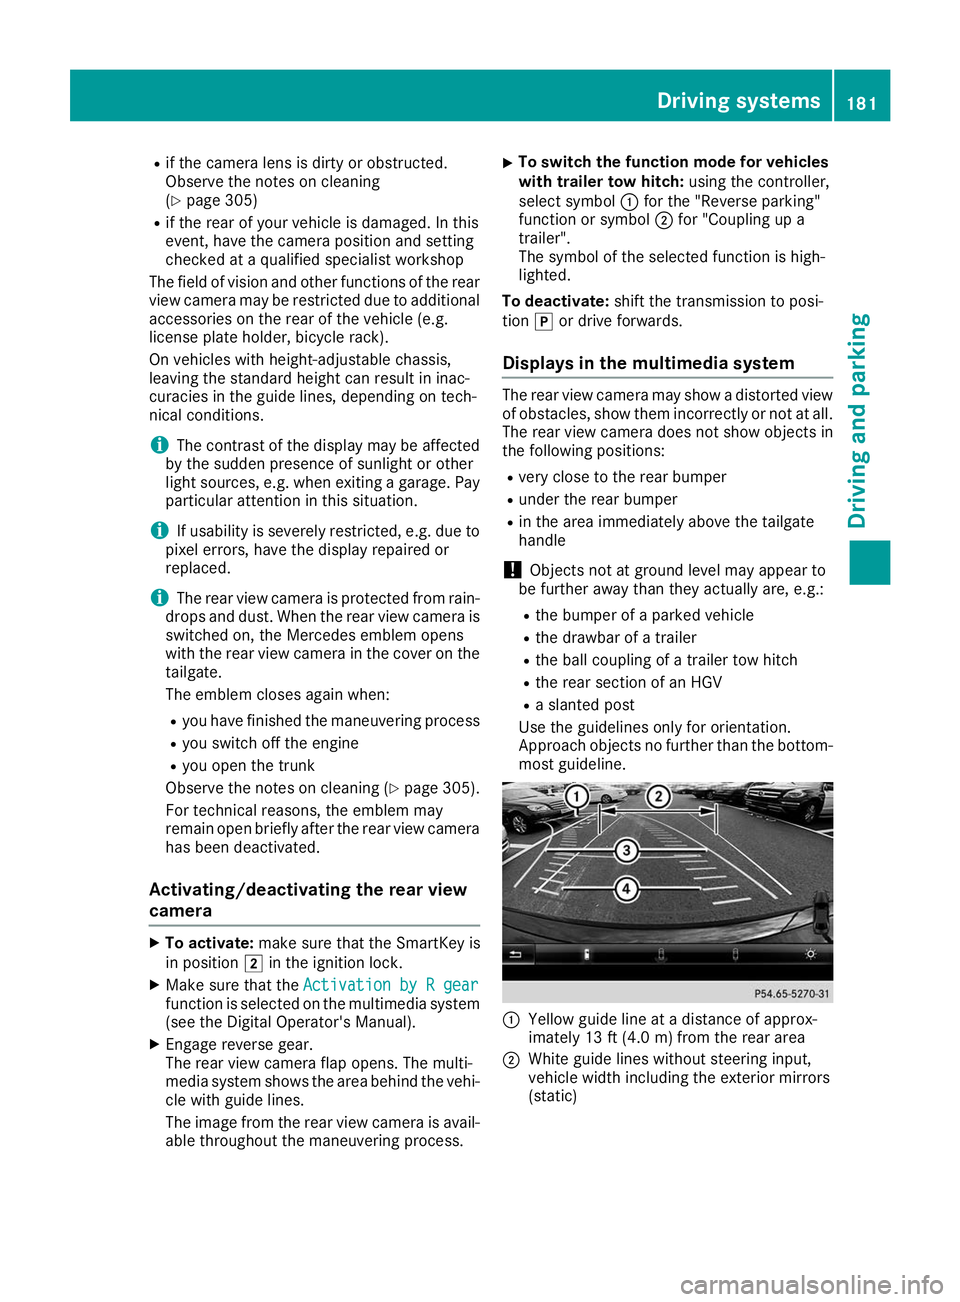
most guideline. 0043
Yellow guide line at a distance of approx-
imately 13 ft (4.0 m) from the rear area
0044 White guide lines without steering input,
vehicle width including the exterior mirrors
(static) Driving systems
181Driving and parking Z