2019 MERCEDES-BENZ GLB SUV ECO mode
[x] Cancel search: ECO modePage 180 of 689
Calling up
the air conditioning menu Calling up
the air conditioning menu using
th e multimedia sy stem #
Select one of thete mp erature displa ysatthe
lo we r edge of the media displa y.
Calling up the air conditioning menu using
th e but ton on the control panel #
Press theA button on the control panel. Ac
tivating/deactivating the A/C function via
the multimedia sy stem The A/C function heats, cools and dehumidifies
th eve hicle's interior air. #
Call up the air conditioning menu
(/ page 177). #
Select First row of seats. #
Select A/C.
Depending on the pr evious status, the func‐
tion is activated or deactivated. Setting climate control
toautomatic mode In auto
matic mode, the set temp erature is con‐
trolled and maintained at a const ant levelby the
air suppl y. #
Press the à button. #
Toswitch tomanual mode: pressthe _
or à button.
In automatic mode, you can choose between five
dif fere nt air quantities using the H button.
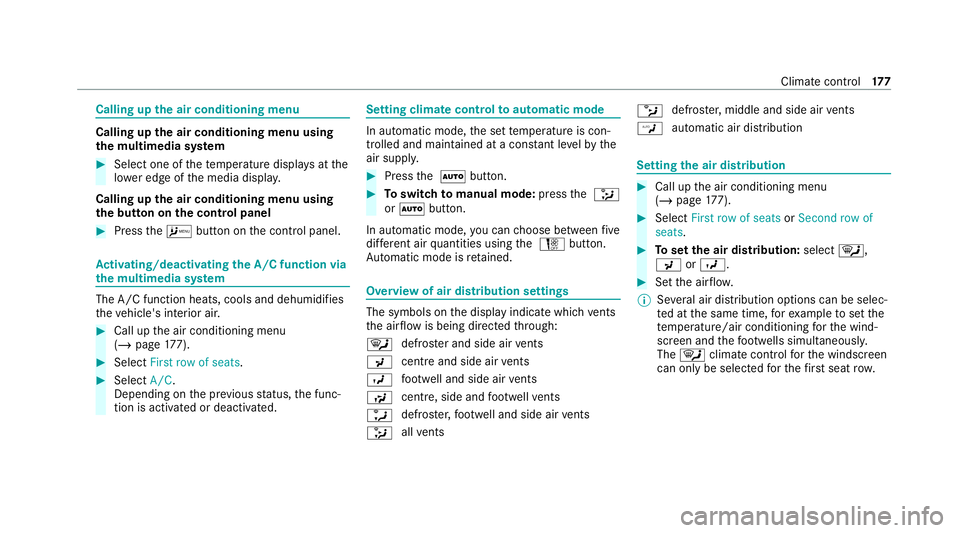
Au tomatic mode is retained. Overview of air distribution settings
The symbols on
the display indicate which vents
th e air flow is being directed thro ugh:
¯ def
rost er and side air vents
P centre and side air
vents
O fo
ot we ll and side air vents
S centre, side and
foot we llve nts
a defros
ter,fo ot we ll and side air vents
_ all
vents b
defros
ter,middle and side air vents
W au
tomatic air distribution Setting
the air distribution #
Call up the air conditioning menu
(/ page 177). #
Select First row of seats orSecond row of
seats. #
Toset the air distribution: select¯,
P orO. #
Set the air flow.
% Several air distribution options can be selec‐
te d at the same time, forex ample toset the
te mp erature/air conditioning forth e wind‐
screen and thefo ot we lls simultaneousl y.
The ¯ climate contro lfo rth e windscreen
can only be selected forth efirs t seat row. Climate cont
rol17 7
Page 182 of 689
R
The air inside theve hicle cannot be cooled
down totemp eratures below the outside
te mp erature.
R Ifth e outside temp erature changes, ventila‐
tion mode au tomatical lyswitches toheating
mode or heating mode automatically
switches toventilation mode.
The stationary heater and theex haust gas outlet
are situated in front of theright-hand front
wheel.
Switching thest ationary heater/stationary
ve ntilation on/off via the control panel &
DANG ER Risk of fata l injury due topoi‐
sonous exhaust gases
If th eta ilpipe is bloc ked or suf ficient ventila‐
tion is not possible, poisonous exhaust gases
such as carbon monoxide may enter theve hi‐
cle. This is the case in enclosed spaces or if
th eve hicle gets stuck in sn ow,fo rex ample. #
Alw ays switch thest ationary heater off
in enclosed spaces without an air
ex traction sy stems, e.g. in garage s. #
Keep theta ilpipe and the area around
th eve hicle free from snow when the
engine or thest ationary heater are run‐
ning. #
Open a window on the windward side of
th eve hicle toensure an adequate sup‐
ply of fresh air. &
WARNING Risk offire due tohot station‐
ary heater components
When thest ationary heater is swit ched on,
parts of theve hicle can become very hot,
e.g. thest ationary heater exhaust sy stem.
Flammable materials such as lea ves, grass or
twigs may ignite if they come into contact
wi th:
R hot parts of thest ationary heater exhaust
sy stem
R theex haust gas itself
There is a risk of fire. #
When thest ationary heater is swit ched
on, make sure that: R
hot vehicle parts do not come into
contact with flammable materials.
R theex haust gas can flow out of the
st ationary heater exhaust pipe
unhindered.
R theex haust gas does not come into
contact with flammable materials. *
NO
TEBattery discharge caused bysta‐
tionary heater or stationary ventilation
operation Ope
rating thest ationary heater or stationary
ve ntilation drains the batter y. #
After heating or ventilating theve hicle
twice, drive for a longer period of time. Re
quirements:
R The fuel tank has been filled toat least Õ. Climate control
17 9
Page 190 of 689
#
Therefore, check regularly that there
are no flammable materials in the
engine compartment or on theex haust
sy stem. Re
quirements:
R theke y is in theve hicle and is recognised.
R or: a Digi talVe hicle Key is located in the
mar ked space and is recognised
(/ page 187). #
Vehicles with manual transmission:
depress the clutch pedal. #
Vehicles with automatic transmission:
shift the transmission toposition jori. #
depress the brake pedal and press button 1
once. #
Ifth eve hicle does not star t:switch off non-
essential consumers and press button 1
once.
If th eve hicle still does not start, one of thefo l‐
lowing display messages appears in the multi‐
function display: #
Place the key in the marked space See Own-
er's Manual :st art theve hicle in emer gency
operation mode (/ page 188).
or #
Key not detected Place smartphone in charg-
ing bracket: place the mobile phone in the
mar ked space (/ page152).
% You can swit choff the engine while driving
by pressing button 1for about thre e sec‐
onds or bypressing button 1thre e times
within thre e seconds. Be sure toobser vethe
saf ety no tes under "Driving tips"
(/ page 191).
St arting theve hicle with a Digital Vehicle
Key
Re quirements:
R one of thefo llowing versions of the Digital
Ve hicle Key is available:
- suitable mobile phone
- Digital Vehicle Keyst icker
R theve hicle is equipped with the "Digital Vehi‐
cle Key" function. R
the "Digital Vehicle Key" function is activated
via Mercedes me connec t:https://
www.mercedes.me.
R the mobile phone is suf ficiently charge d.
% You can check the suitability of your mobile
phone byentering the phone number at
https://www.mercedes.me.
Information about suitable mobile phones
can be obtained from your Mercedes-Benz
Service Centre or at https://
www.mercedes-benz.com/connect.
% Mercedes-Benz recommends that you car ry
th e emer gency key in case of function
re strictions.
% The function is only available in connection
with Mercedes me connect and on lyin cer‐
ta in countries.
% Protective cases around the mobile phone
can impair thera nge of functions. Driving and pa
rking 187
Page 201 of 689
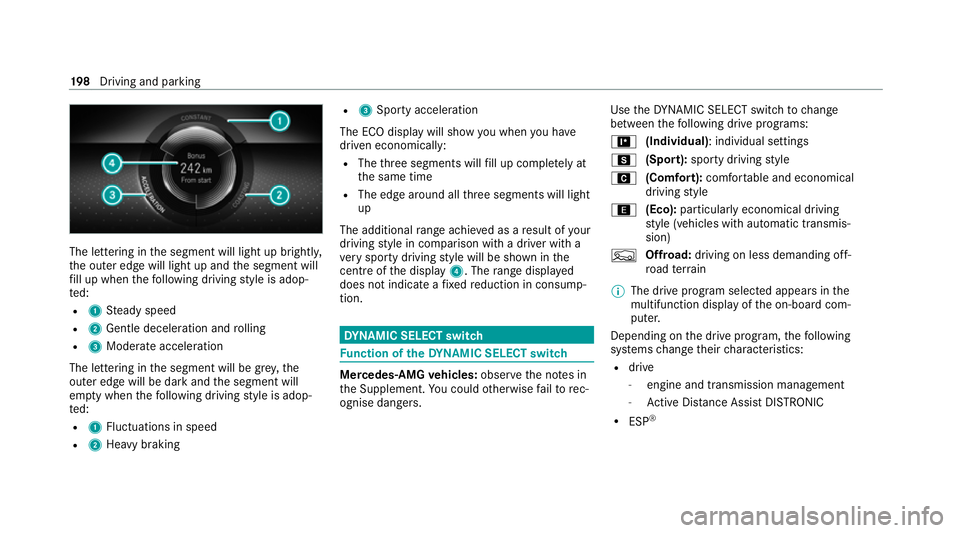
The lettering in
the segment will light up brightl y,
th e outer edge will light up and the segment will
fi ll up when thefo llowing driving style is adop‐
te d:
R 1 Steady speed
R 2 Gentle deceleration and rolling
R 3 Moderate acceleration
The lettering in the segment will be gr ey,the
outer edge will be dark and the segment will
em pty when thefo llowing driving style is adop‐
te d:
R 1 Fluctuations in speed
R 2 Heavy braking R
3 Sporty acceleration
The ECO display will show you when you ha ve
driven economically:
R The thre e segments will fill up comple tely at
th e same time
R The edge around all thre e segments will light
up
The additional range achi eved as a result of your
driving style in comparison with a driver with a
ve ry sporty driving style will be shown in the
centre of the display 4. Therange displ ayed
does not indicate a fixe dre duction in consump‐
tion. DY
NA MIC SELECT switch Fu
nction of theDY NA MIC SELECT switch Mercedes-AMG
vehicles: observeth e no tes in
th e Supplement. You could otherwise failto rec‐
ognise dangers. Use
theDY NA MIC SELECT switch tochange
between thefo llowing drive prog rams:
= (Individual): individual settings
C (Sport): sporty driving style
A (Comfort): comfortable and economical
driving style
; (Eco):particularly economical driving
st yle (vehicles with automatic transmis‐
sion)
F Offroad: driving on less demanding off-
ro ad terrain
% The drive prog ram selected appears in the
multifunction display of the on-board com‐
puter.
Depending on the drive prog ram, thefo llowing
sy stems change their characteristics:
R drive
-
engine and transmission management
- Active Dis tance Assi stDISTRONIC
R ESP ® 19 8
Driving and pa rking
Page 209 of 689
#
toactivate: pullsteering wheel gearshift
paddle 1or2.
Manual gearshifting is activated for a short
time. Transmission position pand the cur‐
re nt gear appear in the multifunction displa y.
% How long the manual gearshifting stay s acti‐
va ted is dependant on various factors. Man‐
ual shi fting can be deactivated automatically
when changing the drive prog ram, restarting
th eve hicle when the transmission position is
engaged again hor due tothe driving style. #
Toshift up: pullsteering wheel gearshift
paddle 2. #
Toshift down: pullsteering wheel gearshift
paddle 1.
If yo u pull and hold thesteering wheel gear‐
shift paddle 1,the transmission shifts to
th e lo west possible gear. #
Todeactivate: pullsteering wheel gearshift
paddle 2and hold it in place.
The transmission position happears in the
multifunction displa y.
Pe rm anent setting: #
change todrive prog ram =(/ page199). #
Select drive setting p(/ page 200).
Mercedes-AMG vehicles: observeth e no tes in
th e Supplement. Otherwise, you may failto rec‐
ognise dangers. Gearshi
ftrecommendation Mercedes
-AMG vehicles: observeth e no tes in
th e Supplement. Otherwise, you may failto rec‐
ognise dangers.
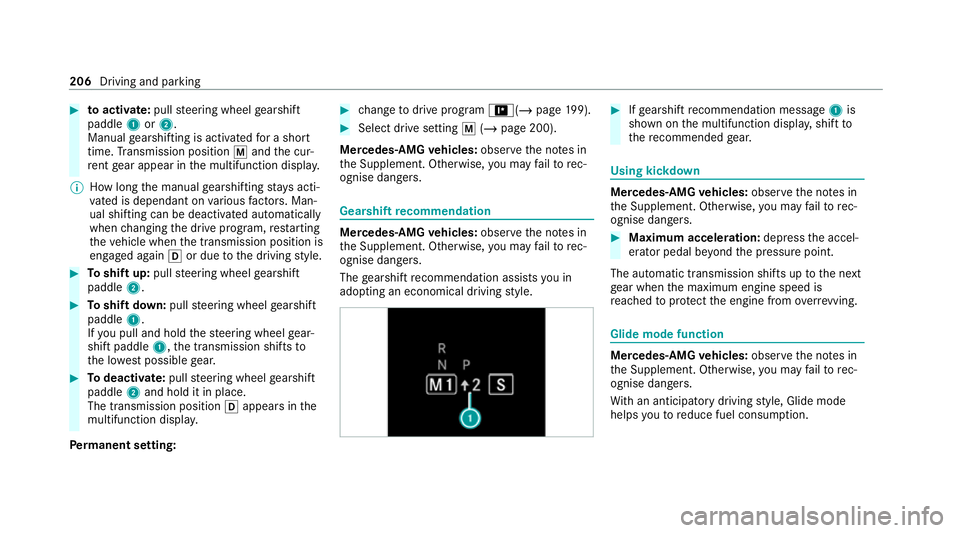
The gearshift recommendation assists you in
adopting an economical driving style. #
Ifge arshift recommendation message 1is
shown on the multifunction displa y,shift to
th ere commended gear. Using kickd
own Mercedes-AMG
vehicles: observeth e no tes in
th e Supplement. Otherwise, you may failto rec‐
ognise dangers. #
Maximum acceleration: depress the accel‐
erator pedal be yond the pressure point.
The automatic transmission shifts up tothe next
ge ar when the maximum engine speed is
re ached toprotect the engine from overrev ving. Glide mode function
Mercedes-AMG
vehicles: observeth e no tes in
th e Supplement. Otherwise, you may failto rec‐
ognise dangers.
Wi th an anticipatory driving style, Glide mode
helps youto reduce fuel consum ption. 206
Driving and parking
Page 210 of 689
Glide mode is
characterised bythefo llowing:
R the combustion engine is disconnected from
th e driv etra in and continues torun in neutral.
R the transmission position his displa yed in
green in the multifunction displa y.
Glide mode is activated if thefo llowing condi‐
tions are me t:
R drive prog ram ; is selected.
R the speed is within a suitable range.
R thero ad's course is suitable, e.g. no steep
uphill or downhill inclines or tight bends.
R there is no trailer coupled tothe trailer hitch,
and no bicycle rack fitted.
R you do not depress the accelerator or brake
pedal (e xcept for light brake applications).
% Glide mode can also be activated if you ha ve
selected the "Eco" setting forth e drive in the
drive prog ram =.
Glide mode is deactivated again if one of the
conditions is no longer met.
Ve hicles with Active Di stance Assist
DISTRO NIC:when Active Dis tance Assi st DISTRONIC is acti
ve,th eglide mode function is
not available.
Glide mode can also be pr evented bythefo llow‐
ing parame ters:
R Incline
R Downhill gradient
R temp erature
R height
R Speed
R operating status of the engine
R traffic situation
% Glide mode can be ended bypressing a
st eering wheel gearshift paddle
(/ page 205). Driving and parking
207
Page 211 of 689

Problems with
the transmission Problem
Possible causes/consequences and M
MSolutions
The transmission has a faulty gear
shift. The transmission is losing oil. #
Have the transmission checked at a qualified specialist workshop immediatel y.
The acceleration characteristics are
de teriorating.
The transmission no longer shifts gear. The transmission is in emer
gency operation mode. #
Pull over and stop theve hicle, paying attention toroad and traf fic conditions. #
Switch the transmission toposition j. #
Switch off the engine. #
Wait at least ten seconds be fore re starting the engine. #
Switch the transmission toposition h. #
Have the transmission checked at a qualified specialist workshop immediatel y.Fu
nction of the 4MATIC
4MATIC ensures that all four wheels are driven
when needed. Toget her with ESP ®
and 4ETS,
4MATIC impr ovesth e traction of your vehicle
whene ver a driven wheel spins due toinsuf fi‐
cient traction. If
yo ufa ilto adapt your driving style, 4MATIC can
neither reduce therisk of an accident nor over‐
ri de the la wsof ph ysics. 4MATIC cannot take
account of road, weather and traf fic conditions.
4MATIC is only an aid. You are responsible espe‐
cially for maintaining a safe dis tance from the
ve hicle in front, forve hicle speed, for braking in
good time and forst ay ing in lane. %
In wint ryroad conditions, the maximum
ef fect of 4MATIC can be achie ved only if you
use winter tyres (M+S tyres), with sn ow
ch ains if necessar y.208
Driving and parking
Page 232 of 689
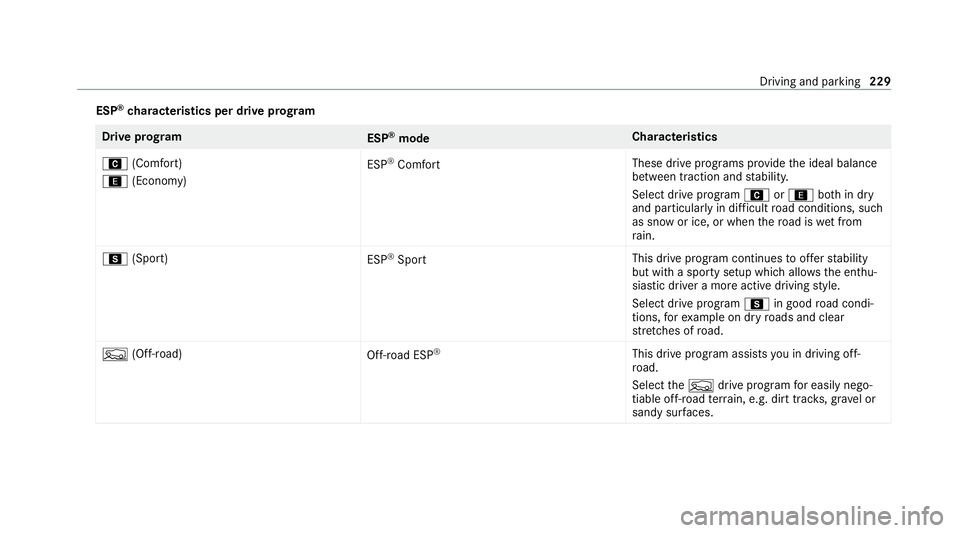
ESP
®
ch aracteristics per drive prog ramDrive prog
ram
ESP®
mode Cha
racteristics
A (Comfort)
; (Economy) ESP
®
Comfort These drive prog
rams pr ovide the ideal balance
between traction and stabilit y.
Select drive program Aor; both in dry
and particular lyin dif ficult road conditions, such
as sn owor ice, or when thero ad is wet from
ra in.
C (Sport)
ESP®
Sport This drive program continues
toofferst ability
but with a sporty setup which allo wsthe enthu‐
siastic driver a more active driving style.
Select drive program Cin good road condi‐
tions, forex ample on dry roads and clear
st re tches of road.
F (Off-road)
Off-road ESP ®
This drive program assi stsyo u in driving off-
ro ad.
Select theF drive prog ram for easily nego‐
tiable off-road terrain, e.g. dirt trac ks, gr ave l or
sandy sur faces. Driving and pa
rking 229