2019 MERCEDES-BENZ G-CLASS key
[x] Cancel search: keyPage 241 of 514
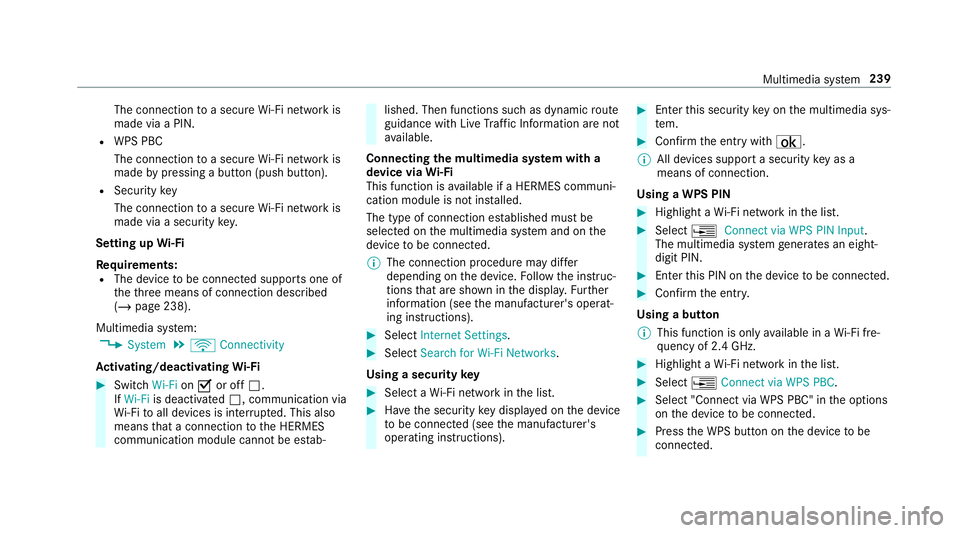
The
conn ection toasec ureWi -Fi networkis
mad evia aPIN .
R WPS PBC
The conne ctionto asec ureWi -Fi networkis
mad eby pressing abutt on(push button).
R Secur itykey
The conn ection toasec ureWi -Fi networkis
mad evia asecu rity key.
Se tting upWi-Fi
Re quirement s:
R The device tobe con nectedsuppor tsone of
th eth re emeans ofcon nect iondescr ibed
(/ page238).
Multimedia system:
4 System 5
ö Connec tivity
Ac tiv atin g/deac tivatin gWi -Fi #
Switc hWi-Fi on0073 oroff0053.
If Wi-Fi isdea ctivated 0053, communi cationvia
Wi -Fi toall devic es isint erru pte d.This also
means that acon nectionto theHERME S
comm unication modulecannotbe estab‐ lished.
Thenfunctionssuc has dynamic route
guidan cewithLiv eTr af fic Inf ormati onareno t
av ailable.
Connect ingthemu ltim edia system witha
de vice viaWi-Fi
Thi sfunction isavailable ifaHE RME Scom mun i‐
cat ion modul eis no tins talled.
The type ofcon nection established mustbe
select edon themultimedia system and onthe
de vice tobe con nected.
% The connection procedur ema ydif fer
dependin gon thede vice. Followtheins truc‐
tion sth at aresho wninthedispla y.Fu rther
inf ormation (seethemanuf acturer'soper at‐
ing instruction s). #
Select Internet Setting s. #
Select Search forWi-Fi Network s.
Using asecur itykey #
Select aWi -Fi networkin thelis t. #
Have thesecur itykeydisp laye don thede vice
to be con nected(see themanuf acturer's
oper ating instruction s). #
Enterth is secur itykeyon themultimedia sys‐
te m. #
Conf irm theent rywit h¡.
% Alldevic es suppor ta sec urity keyas a
mean sof conn ection .
Usin gaWPS PIN #
Highlig htaWi -Fi networkin thelis t. #
Select 0080Connec tvia WPS PINInput.
The multimedia system gener ates an eight-
di gitPIN . #
Enterthis PIN onthede vice tobe con nected. #
Conf irm theent ry.
Using abutt on
% This function isonl yav ailable inaWi -Fi fre‐
qu ency of2.4 GHz. #
Highlight aWi -Fi networkin thelis t. #
Select 0080Connec tvia WPS PBC. #
Select "Connec tvia WPS PBC" intheop tion s
on thede vice tobe con nected. #
Press theWPS buttononthede vice tobe
con nected. Multimedia
system 239
Page 242 of 514
#
Select Continu ein themultimedia system.
De vice hasalready been connect ed: #
Toaut omatic allyco nne ct:high light aWi -Fi
ne tworkin thelis t. #
Activate0080 Connect Automatica lly0073 . #
Toconnect :high light aWi -Fi networkin the
lis t. #
Selec t0080 Connect.
The connection ises tablished again. These
func tionsar epossible whenthede vice has
alr eady been connect edtotheWi -Fi network.
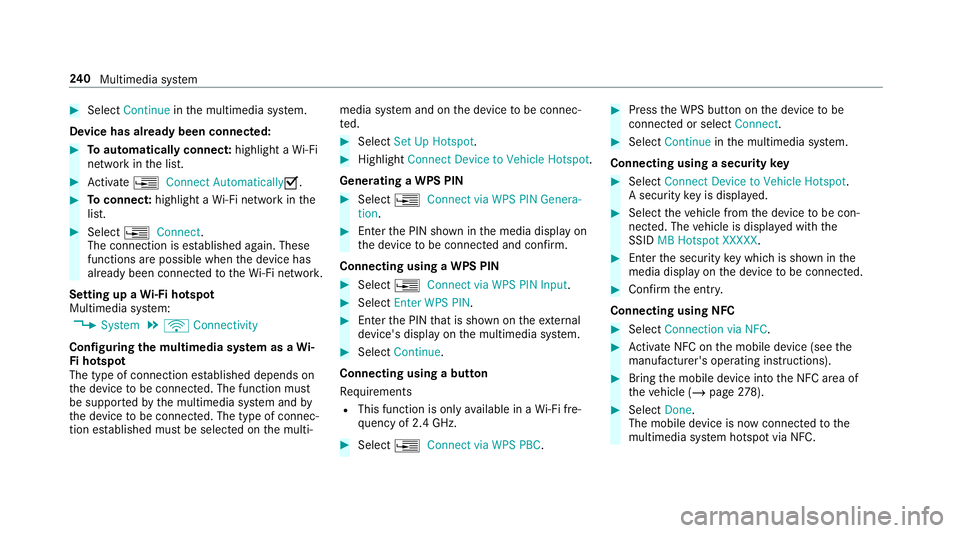
Se tting upaWi -Fiho tspo t
Mul timed iasystem:
4 System 5
ö Connec tivity
Conf iguringthemu ltim edia system asaWi -
Fi ho tspo t
The type ofconnection established depends on
th ede vice tobe con nected. The func tion must
be suppor tedby themultimedia system and by
th ede vice tobe con nected. The type ofcon nec‐
tion established mustbe select edon themulti‐ media
system and onthede vice tobe con nec‐
te d. #
Select SetUpHot spot. #
Highlight ConnectDevic eto Vehicle Hotspot.
Gener atingaWPS PIN #
Select 0080Connec tvia WPS PINGenera-
tion . #
Enterth ePIN showninthemedia displayon
th ede vice tobe con nectedand confirm .
Connect ingusin gaWPS PIN #
Sele ct0080 ConnectviaWPS PINInput. #
Sele ctEnter WPS PIN. #
Enterth ePIN that issho wnontheex tern al
de vic e's displa yon themultimedia system. #
Select Continue.
Connecting usingabutt on
Re quiremen ts
R This function isonl yav ailable inaWi -Fi fre‐
qu ency of2.4 GHz. #
Select 0080Connec tvia WPS PBC. #
Press theWPS buttonon thede vice tobe
con nectedor select Connec t. #
Select Continueinthemultimedia system.
Connecting usingasecur itykey #
Select Connect DevicetoVeh icleHotsp ot.
A secu rity keyis disp laye d. #
Select theve hicle from thede vice tobe con ‐
nec ted. The vehicle isdispla yedwit hth e
SSID MBHotsp otXXX XX. #
Enterthesecur itykeywhic his sho wninthe
media display on thede vice tobe con nected. #
Conf irm theent ry.
Connect ingusin gNFC #
Sele ctConn ection viaNFC. #
ActivateNFC onthemobile device (see the
manuf acturer'soper ating instructions). #
Bring themobile device intoth eNFC area of
th eve hicle (/page27 8). #
Select Done.
The mobi lede vice isno wconnect edtothe
multime diasystem hotspo tvia NFC. 24
0
Multimedia system
Page 243 of 514
Gene
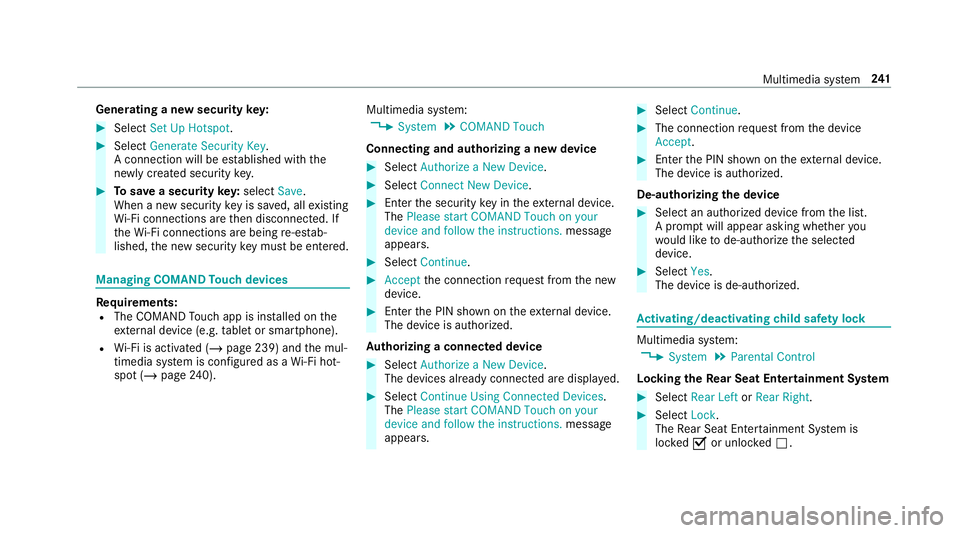
ratin gane wse cur itykey: #
Select Set UpHotsp ot. #
Select Genera teSecu rityKey.
A connecti onwillbe established withth e
ne wly crea tedsecur itykey. #
Tosave asec urity key:select Save.
When ane wsecur itykeyis save d, all existin g
Wi -Fi conne ctionsareth en discon nected.If
th eWi -Fi conne ctionsarebe ing re-es tab‐
lished, thene wsecur itykeymus tbe entere d. Mana
gingCOMAND Touc hde vic es Re
quirement s:
R The COMAND Touc happ isins talled onthe
ex tern al de vic e(e. g.table tor smar tphon e).
R Wi-Fi isacti vated(/ page239) andthemul‐
timedia system iscon figur edasaWi -Fi hot‐
spo t(/ page 240). Mul
timediasystem:
4 System 5
COMAND Touch
Connecting andauthor izing ane wde vice #
Select AuthorizeaNew Devic e. #
Select Connec tNew Devic e. #
Enterth esecur itykeyin theex tern al de vic e.
The Please start COMA NDTouc hon your
devi ceand follow theins truct ions.mes sage
appear s. #
Select Con tinue. #
Accep tth econ nect ionrequ estfr om thene w
de vice. #
Enterth ePIN shownontheex tern al de vic e.
The devic eis aut hor ized.
Au thorizing aconnect eddevice #
Sele ctAut hori zeaNew Device.
The devic es already connectedar edispla yed. #
Select Continue Using Connec tedDevic es.
The Please startCOMAND Touchonyour
device andfollow theinstruct ions. messag e
appear s. #
Select Continue. #
The connection requ estfr om thede vice
Acc ept. #
Enterth ePIN shownontheex tern al de vic e.
The devic eis aut hor ized.
De-a uthor izin gth ede vice #
Sele ctan aut hor ized devic efrom thelis t.
A pr om ptwill appear askingwhe ther you
wo uld liketo de-aut horize theselect ed
de vice. #
Select Yes.
The device isde-aut horized. Ac
tiv atin g/deac tivatin gch ild safetyloc k Multimedi
asy stem:
4 System 5
Parent alContr ol
Loc king theRe ar Seat Entertai nment System #
Sele ctRear Leftor Rear Right. #
Sele ctLoc k.
The Rear Seat Entertainm entSystem is
loc ked0073 orunloc ked0053. Multimedia
system 24
1
Page 281 of 514
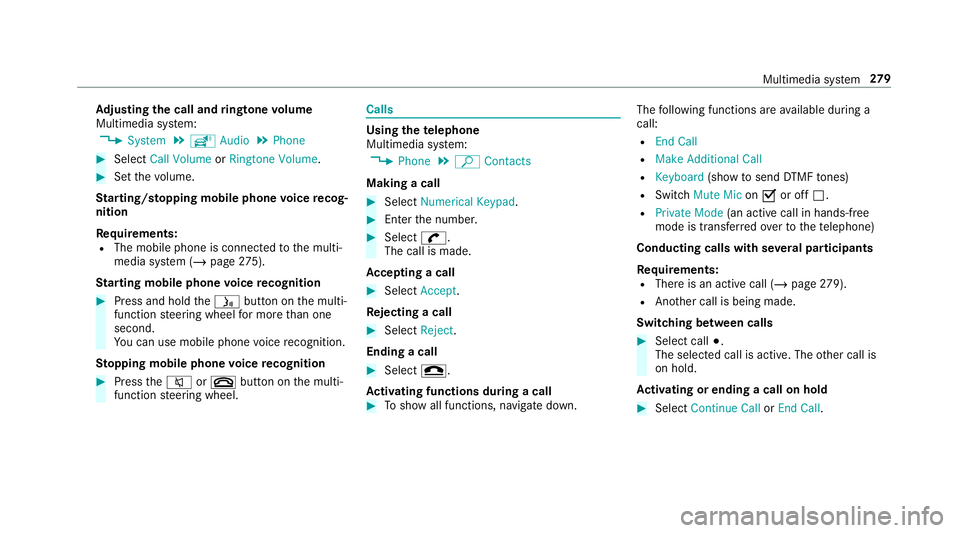
Ad
jus tingthe calland ringt one volum e
Multime diasystem:
4 System 5
õ Audio 5
Phone #
Select CallVolume orRington eVolume. #
Setth evo lume.
St arting/ stopping mobilephon evo ice recog‐
nit ion
Re quirement s:
R The mobile phoneis con nectedto themulti‐
media system (/ page27 5).
St arting mobi lephone voice recognit ion #
Press and hold the00E3 buttononthemulti‐
func tion steer ing wheel formor eth an one
sec ond.
Yo ucan usemob ilephon evo ice recogni tion.
St opp ingmobil eph one voice recognit ion #
Press the0063 or0076 buttononthemulti‐
func tion steer ing wheel. Calls
Using
thete lephone
Multime diasystem:
4 Phone 5
ª Contac ts
Making acall #
Select Numerical Keypad. #
Enterth enumber . #
Select 0097.
The callismade.
Ac cep tingacall #
Select Accep t.
Re jec tingaca ll #
Select Reject .
En din gaca ll #
Select 005A.
Ac tiv atin gfunc tions dur ingacal l #
Tosho wall functions, navig atedo wn. The
follo wing functionsar eav ailable during a
call:
R EndCall
R Mak eAdd ition alCall
R Keybo ard(sho wto send DTMF tones)
R Swi tchMu teMicon 0073 oroff0053.
R Private Mode(a nacti vecal lin ha nds-fr ee
mod eis transf erredove rto thete lephon e)
Conduct ingcalls withse ve ralpar ticip ants
Re quirement s:
R Ther eis an act ive call (/ page27 9).
R Ano ther call isbeing made.
Switc hingbetw een calls #
Select call003B.
The select edcall isactiv e.The other call is
on hold.
Ac tiv atin gor endin gacal lon hol d #
Select Continu eCa llor End Call. Mu
ltimed iasystem 27
9
Page 309 of 514
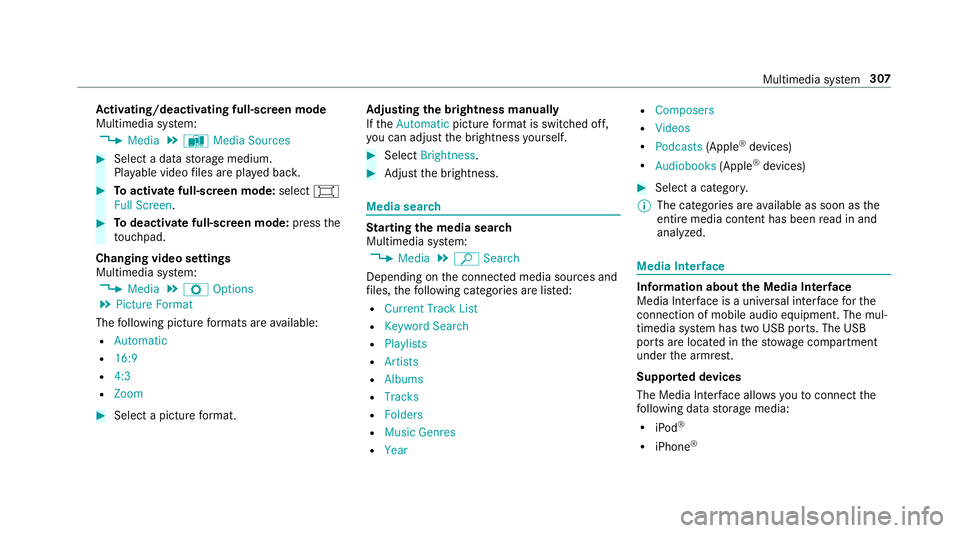
Ac
tiv atin g/deac tivatin gful l-scree nmode
Mu ltimed iasystem:
4 Media 5
à Media Sources #
Select adat ast or ag emedium.
Pla yable video files arepla yedbac k. #
Toactiv atefull-s cree nmode: select0008
Full Screen. #
Todeac tivatefull -screen mod e:press the
to uc hpad.
Cha nging videosettings
Mult imed iasystem:
4 Media 5
Z Option s
5 Picture Format
The follo wing picturefo rm ats areav ailable:
R Automat ic
R 16:9
R 4:3
R Zoom #
Select apict urefo rm at. Ad
jus tingthe brightne ssmanu ally
If th eAutom aticpictur efo rm atisswit ched off,
yo ucan adjustth ebr ightn essyourself . #
Select Bright ness. #
Adjus tth ebr ightn ess. Media
search St
arting themed iasear ch
Multimedia system:
4 Media 5
ª Search
Depen dingonthecon nect edmedia sourcesand
fi les, thefo llo wing categor iesarelis ted:
R Current TrackList
R Keyword Search
R Playlists
R Artists
R Albums
R Track s
R Folders
R Music Genres
R Year R
Composers
R Videos
R Podcast s(Apple ®
de vices)
R Audiobook s(Apple ®
de vices) #
Select acat egor y.
% The categor iesareav ailable assoon asthe
ent ire media content hasbe en read inand
anal yzed . Med
iaInt erface Inf
orma tion abou tth eMed iaInt erface
Media Inte rface isauniv ersal interface forth e
connecti onofmob ile au dio equipm ent.Themul‐
time diasy stem has twoUSB ports.The USB
por tsarelocat edinthestow agecom partment
unde rth ear mr est.
Supp ortedde vic es
The Med iaInt erface allo ws youto connect the
fo llo wing datast or ag emedia:
R iPod ®
R iPhone ® Multimedia
system 30
7
Page 345 of 514
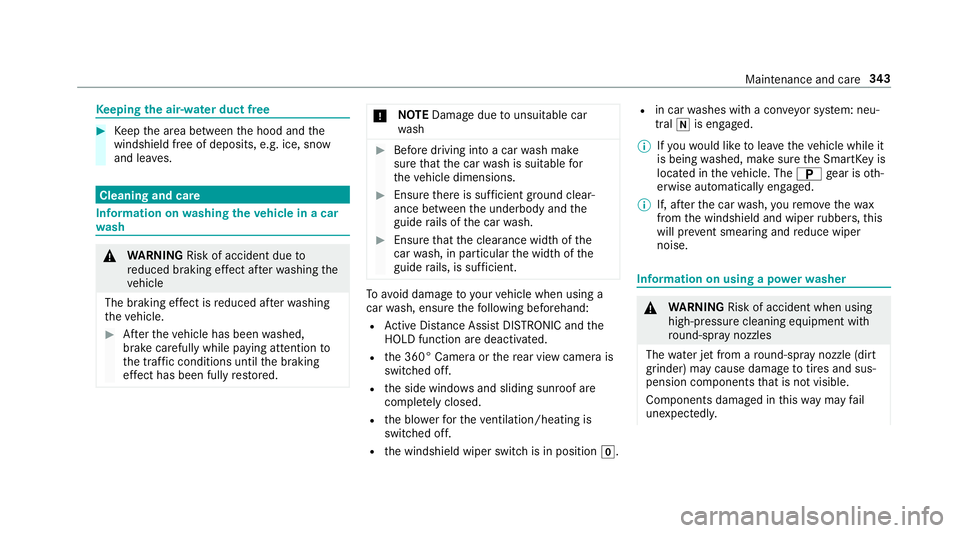
Ke
eping theair -water duct free #
Keep thear ea between thehood andthe
winds hieldfree ofdepos its,e.g .ice, snow
and leaves. Cleani
ngand care Inf
ormat iononwashing theve hicl ein acar
wa sh &
WARNIN GRisk ofacci dent dueto
re duced braking effect afte rwa shing the
ve hicle
The braking effect isreduced afte rwa shing
th eve hicle. #
Afterth eve hicle hasbeen washed,
br ak ecar efully whilepaying attention to
th etraf fic condi tions untilth ebr aking
ef fect hasbee nful lyrestor ed. *
NO
TEDama gedue touns uitable car
wa sh #
Beforedr iving intoacar wash mak e
sur eth at thecar wash issuit able for
th eve hicle dimensions. #
Ensur eth er eis suf ficie ntgrou nd clear‐
ance between theunderbody andthe
guide rails ofthecar wash. #
Ensur eth at theclear ance widthof the
car wash, inpar ticular thewidt hof the
guide rails, issuf ficie nt. To
avo iddamag eto your vehicle when usinga
car wash, ensur eth efo llo wing beforehand:
R ActiveDis tance AssistDIS TRONI Cand the
HOLD functio nar edea ctivated.
R the360° Camer aor there ar vie wcam erais
swit ched off.
R theside windo wsand slidin gsun roof are
com pletely clos ed.
R theblo werfo rth eve ntil ation/he ating is
sw itched off.
R thewindshield wiperswitchis in position 005A.R
incar washes withacon veyo rsy stem: neu‐
tra l005C iseng aged.
% Ifyo uwo uld liketo lea vetheve hicle while it
is being washed, makesur eth eSmar tKey is
locat edintheve hicle. The0045 gear isoth‐
er wise automaticall yeng aged.
% If,afte rth ecar wash, youre mo vethewa x
fr om thewindshield andwiper rubber s,this
will preve ntsme aring and reduce wiper
noise. Inf
ormat iononusing apo we rwa sher &
WARNIN GRisk ofacci dent whenus ing
hig h-pr essurecle ani ng equipm entwith
ro und -spr ay nozzl es
The waterje tfr om aro und -spr ay nozzl e(d irt
gr ind er) maycau sedama getotires and sus‐
pe nsi on components that isno tvisi ble.
Com ponentsdamag edinthis wa yma yfa il
une xpec tedly. Maint
enance andcare34
3
Page 448 of 514
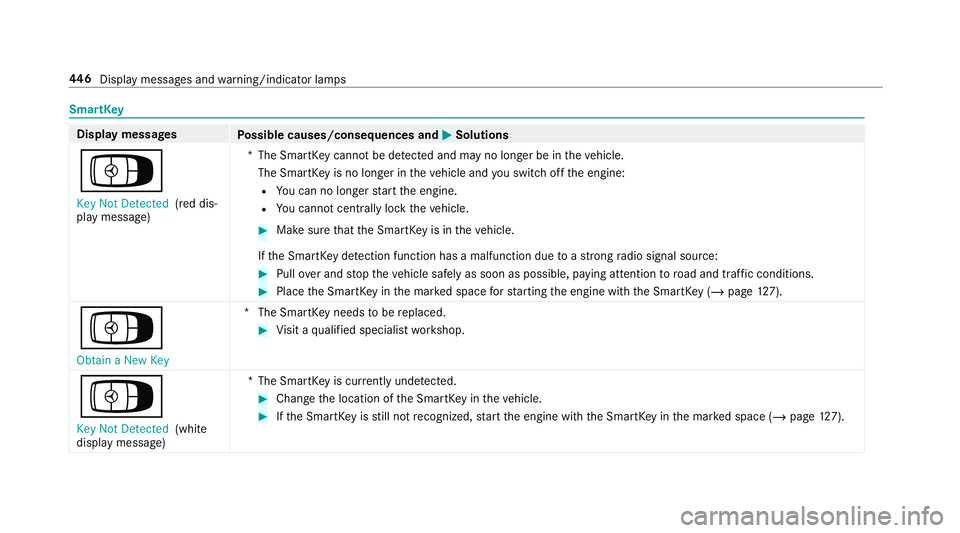
Smar
tKey Disp
laymes sages
Possible causes/conseq uencesand0050 0050
Solutions
Á Key NotDetected (red dis‐
pla ymessag e) *T
heSmar tKey canno tbe detected and mayno long erbe intheve hicle.
The Smar tKey isno long erintheve hicle andyouswit choffth eengine:
R Youcan nolongerst ar tth eengine.
R Youcan notcen trally lockth eve hicle. #
Mak esur eth at theSmar tKey isin theve hicle.
If th eSmar tKey detection functi onhasa mal functi ondueto ast ro ng radio signal source: #
Pull overand stop theve hicle safely assoon aspossible, paying attention toroad and traf fic condi tions. #
PlacetheSmar tKey inthemar kedspace forst ar tin gth eengine withth eSmar tKey (/ pag e12 7).
Á
Ob tainaNew Key *T
heSmar tKey nee dstobe replaced. #
Visit aqu alif ied spec ialistwo rkshop.
Á Key NotDetect ed(whit e
displa ymessag e) *T
heSmar tKey iscur rently undetect ed. #
Chang eth elocation oftheSmar tKey intheve hicle. #
Ifth eSmar tKey isstill no tre cogni zed,star tth eengine withth eSmar tKey inthemar kedspace (/page12 7). 44
6
Dis play messa gesand warning/ indic ator lam ps
Page 449 of 514
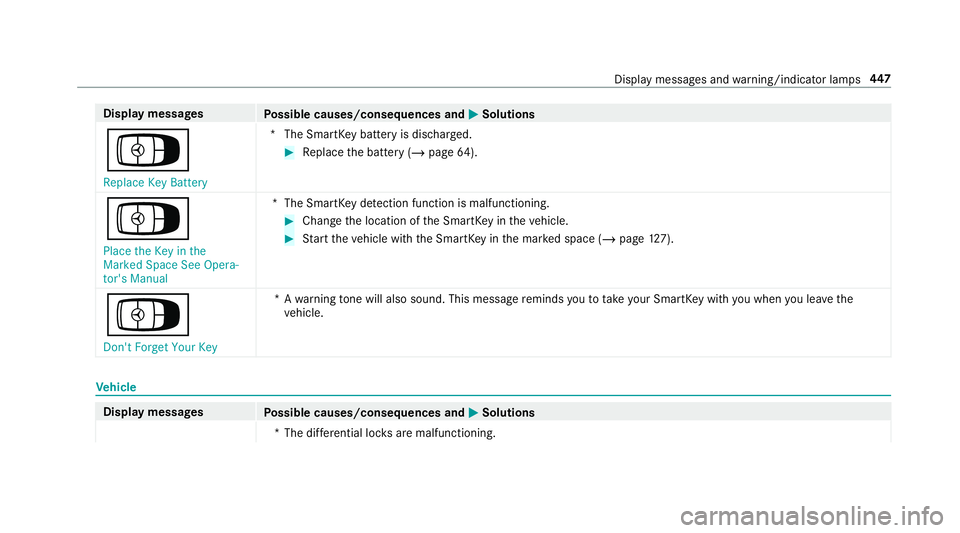
Disp
laymes sages
Possible causes/conseq uencesand0050 0050
Solutions
Á Replace KeyBattery *T
heSmar tKey batt eryis disc harged. #
Replace thebatt ery(/ page64 ).
Á
Pl ace theKey inthe
Mark edSpac eSee Oper a-
to r's Man ual *T
heSmar tKey detection functi onismal functi oning. #
Chang eth elocation oftheSmar tKey intheve hicle. #
Startth eve hicle withth eSmar tKey inthemar kedspace (/page12 7).
Á Don't Forget YourKey *A
warning tone willal so sou nd. Thismes sage reminds youto take your Sm artK ey wit hyo uwhen youlea vethe
ve hicle. Ve
hicl e Dis
playmessag es
Possible causes/conseq uencesand0050 0050
Solutions
*T hediffere ntia llo ck sar emalfunctioning. Displa
ymessag esand warning/ indic ator lam ps 44
7