2019 MASERATI QUATTROPORTE length
[x] Cancel search: lengthPage 62 of 396

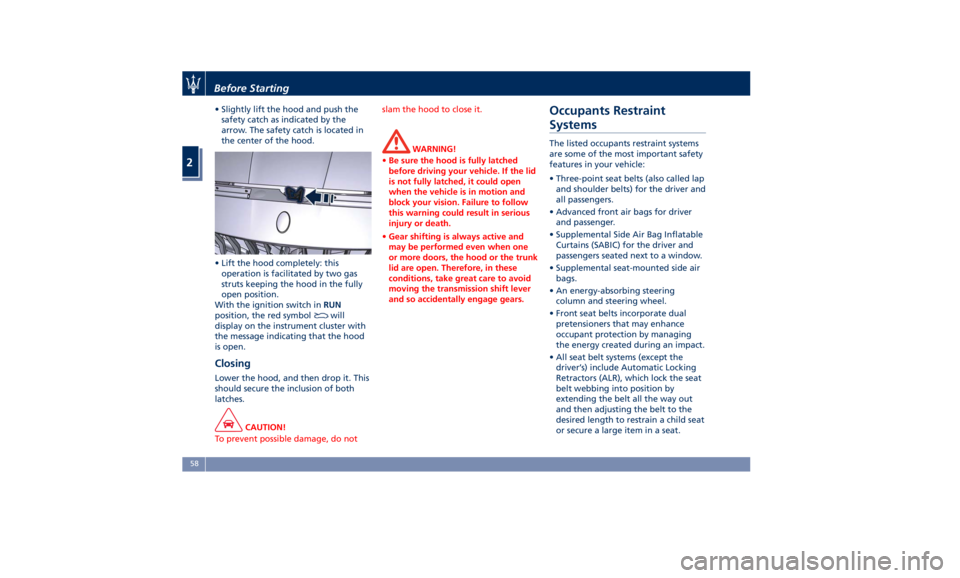
• Slightly lift the hood and push the
safety catch as indicated by the
arrow. The safety catch is located in
the center of the hood.
• Lift the hood completely: this
operation is facilitated by two gas
struts keeping the hood in the fully
open position.
With the ignition switch in RUN
position, the red symbol
will
display on the instrument cluster with
the message indicating that the hood
is open.
Closing Lower the hood, and then drop it. This
should secure the inclusion of both
latches.
CAUTION!
To prevent possible damage, do not slam the hood to close it.
WARNING!
• Be sure the hood is fully latched
before driving your vehicle. If the lid
is not fully latched, it could open
when the vehicle is in motion and
block your vision. Failure to follow
this warning could result in serious
injury or death.
• Gear shifting is always active and
may be performed even when one
or more doors, the hood or the trunk
lid are open. Therefore, in these
conditions, take great care to avoid
moving the transmission shift lever
and so accidentally engage gears.Occupants Restraint
Systems The listed occupants restraint systems
are some of the most important safety
features in your vehicle:
• Three-point seat belts (also called lap
and shoulder belts) for the driver and
all passengers.
• Advanced front air bags for driver
and passenger.
• Supplemental Side Air Bag Inflatable
Curtains (SABIC) for the driver and
passengers seated next to a window.
• Supplemental seat-mounted side air
bags.
• An energy-absorbing steering
column and steering wheel.
• Front seat belts incorporate dual
pretensioners that may enhance
occupant protection by managing
the energy created during an impact.
• All seat belt systems (except the
driver’s) include Automatic Locking
Retractors (ALR), which lock the seat
belt webbing into position by
extending the belt all the way out
and then adjusting the belt to the
desired length to restrain a child seat
or secure a large item in a seat.Before Starting
2
58
Page 115 of 396

Power Steering Wheel
Adjustment This feature allows you to tilt the
steering column upward or downward
or to lengthen or shorten it in order to
adjust the steering wheel to an
optimized position.
The power tilt/telescoping steering
column/wheel switch is located on the
lower left side of the steering column.
To adjust the tilt of the steering
column/wheel, move the switch up or
down as desired.
To lengthen or shorten the steering
column/wheel, pull the switch toward
you or push the switch away from you
as desired. NOTE:
You can use your key fob with RKE
transmitter or the memory buttons on
the driver's door trim panel to return
the tilt/telescopic steering
column/wheel to programmed
positions. See “Driver Memory Seat”
in this section.
WARNING!
Do not adjust the steering
column/wheel while driving.
Adjusting the steering column/wheel
while driving could cause the driver to
lose control of the vehicle. Be sure the
steering column/wheel is adjusted
before driving your vehicle. Failure to
follow this warning may result in
serious injury or death.
Heated Steering Wheel
(optional) The steering wheel contains a heating
element inside the rim that helps
warm driver’s hands by cold weather.
The heated steering wheel has only
one temperature setting. Once turned
on, this function will operate for
approximately 58 to 70 minutes
before automatically shutting off. The heated steering wheel can shut
off early or may not turn on when the
steering wheel is already warm.
The heating steering wheel command
is in the “Climate” screen of MTC+.
See “Air Conditioning Controls” in
section “Dashboard Instruments and
Controls” for further details.
NOTE:
The engine must be running for the
heated steering wheel to operate.
• Touch the “Climate” softkey located
on the lower part of the MTC+
display.
• When the heating function is in the
off state, soft-key is not highlighted.
• Within 15 seconds, touch the heated
steering wheel soft-key to turn on
the function.Understanding the Vehicle
3
111
Page 145 of 396

latched seat could cause serious
injury.
• The cargo area in the rear of the
vehicle with the rear seatbacks in
the folded down position should not
be used as a play area by children
when the vehicle is in motion. They
could be seriously injured in a
collision. Children should be seated
and use proper restraint system.
Power Sunroof with
Sunshade The sunroof is power controlled and
can only be operated with the ignition
switch in RUN position.
It can slide lengthways and be raised
at the rear (tilting).
By opening the sunroof a front flap
rises automatically in order to deviate
the air flow.
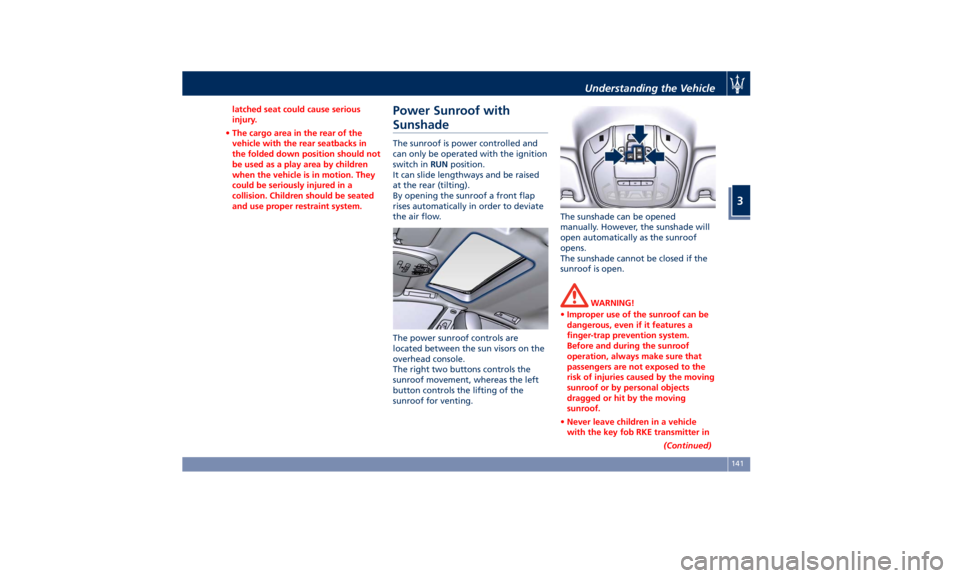
The power sunroof controls are
located between the sun visors on the
overhead console.
The right two buttons controls the
sunroof movement, whereas the left
button controls the lifting of the
sunroof for venting. The sunshade can be opened
manually. However, the sunshade will
open automatically as the sunroof
opens.
The sunshade cannot be closed if the
sunroof is open.
WARNING!
• Improper use of the sunroof can be
dangerous, even if it features a
finger-trap prevention system.
Before and during the sunroof
operation, always make sure that
passengers are not exposed to the
risk of injuries caused by the moving
sunroof or by personal objects
dragged or hit by the moving
sunroof.
• Never leave children in a vehicle
with the key fob RKE transmitter in
(Continued)Understanding the Vehicle
3
141
Page 195 of 396

(if equipped). The available
languages are specific to the target
markets.
• Touchscreen Beep
When in this display, you can turn
on or shut off the sound activated
by pressure of a touchscreen
soft-key.
• Controls Screen Time-Out
When this mode is selected, the
“Controls” screen will remain
displayed for 5 seconds. If this mode
is not selected, the screen will
remain displayed until closed
manually.
• Nav Next Turn Pop-ups in Cluster
By selecting this feature, the next
turn direction will appear on the
instrument cluster along a
programmed route until the desired
destination is reached (see picture). • AutoShow Smartphone Display
Upon Connection
This feature allows to use the MTC+
display as a projection device
connected via USB port in order to
browse the Apple CarPlay and
Android Auto apps. By setting this
feature, automatic switch from
native screen to projection device
will happen every time you connect
your smartphone. For further details
refer to the “Maserati Touch
Control Plus (MTC+)” guide.
Units After pressing the “Units” and then
“Custom” softkey on the touchscreen
you may select between “Imperial”
units and “Metric” of measure. Each
unit of measure can be independently displayed in the TFT Display and in the
navigation system. The following
selectable units of measure are listed
below:
• Distance unit :
select from: “mi” or “km”.
• Speed unit :
select from: “MPH” or “km/h”.
• Consumption unit :
select from: “MPG (US)”, “MPG
(UK)”, “L/100km” or “km/L”.
• Capacity unit :
select from: “gal (US)”, “gal (UK)”
or “L”.
• Pressure unit :
select from: “psi”, “kPa” or “bar”.
• Temperature unit :
select from: “°F” or “°C”.
• Power unit :
select from: “kW”, “hp (US)” or “hp
(UK)”.
• Torque unit :
select from: “lb-ft” or “Nm”.
Voice Commands After pressing “Voice” softkey the
following modes will be available.
• Voice Response Length
When in this display, you canDashboard Instruments and Controls
4
191
Page 196 of 396

change the voice response length
settings. To change the voice
response length, touch the “Brief”
or “Detailed” softkey.
• Show Command List
When this feature is selected, it is
possible to select options during a
voice control session. Options for
available controls are: “Always”,
“w/Help” or “Never”.
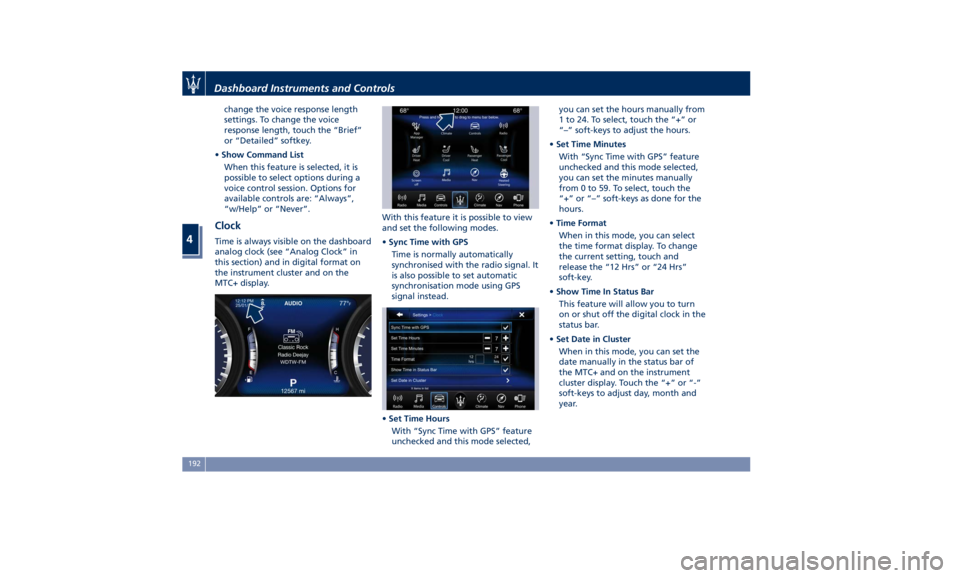
Clock Time is always visible on the dashboard
analog clock (see “Analog Clock” in
this section) and in digital format on
the instrument cluster and on the
MTC+ display. With this feature it is possible to view
and set the following modes.
• Sync Time with GPS
Time is normally automatically
synchronised with the radio signal. It
is also possible to set automatic
synchronisation mode using GPS
signal instead.
• Set Time Hours
With “Sync Time with GPS” feature
unchecked and this mode selected, you can set the hours manually from
1 to 24. To select, touch the “+” or
“–” soft-keys to adjust the hours.
• Set Time Minutes
With “Sync Time with GPS” feature
unchecked and this mode selected,
you can set the minutes manually
from 0 to 59. To select, touch the
“+” or “–” soft-keys as done for the
hours.
• Time Format
When in this mode, you can select
the time format display. To change
the current setting, touch and
release the “12 Hrs” or “24 Hrs”
soft-key.
• Show Time In Status Bar
This feature will allow you to turn
on or shut off the digital clock in the
status bar.
• Set Date in Cluster
When in this mode, you can set the
date manually in the status bar of
the MTC+ and on the instrument
cluster display. Touch the “+” or “-”
soft-keys to adjust day, month and
year.Dashboard Instruments and Controls
4
192
Page 384 of 396

Dimensions Wheel base 124.84 in (3171 mm)
Total length 207.32 in (5266 mm)
Width without mirrors 76.69 in (1948 mm)
Width with mirrors 82.63 in (2099 mm)
Front track (*) 64.13 ÷ 64.25 in (1629 ÷ 1632 mm)
Rear track (*) 64.29 ÷ 64.88 in (1633 ÷ 1648 mm)
Front overhang 38.30 in (973 mm)
Rear overhang 44.17 in (1122 mm)
Height (*) 57.87 ÷ 58.42 in (1470 ÷ 1484 mm)
Boot compartment volume 18.7 cu. ft. (530 l)
(*) Variable size according to the motorization, the tire size and the optional installed.Features and Specifications
8
380