2019 MASERATI QUATTROPORTE tire size
[x] Cancel search: tire sizePage 68 of 396
(Continued)
• In the event of a collision, the seat
belts help reduce the possibility of
the vehicle’s occupants being thrown
against the structures of the
passenger compartment or out of
the vehicle.
• The air bags are designed to work
together with the seat belts, not to
substitute them. The front air bags
only deploy in the event of certain
head-on collisions of sufficient
intensity. They may not be activated
if the vehicle rolls over, or in the
event of rear bumps or minor frontal
collisions, or non-frontal collisions.
Using Seat Belt in Automatic
Locking Retractor Mode (ALR) Use the seat belt automatic locking
mode anytime a child safety seat is
installed in a seating position that has
a belt with this feature.
Children under 5 ft (1.50 m) in height,
should be properly buckled up in a
child restraint system.
Automatic Locking Mode Setting
• Buckle the lap and shoulder belt.
• Grasp the shoulder portion and pull
downward until the entire belt is
extracted. • Allow the belt to retract. As the belt
retracts, you will hear a clicking
sound. This indicates the safety belt
is now in the automatic locking
mode.
Automatic Locking Mode Unsetting
Unbuckle the three point seat belt and
allow it to retract completely to
disengage the automatic locking mode
and activate the vehicle emergency
locking mode.
WARNING!
• The belt and retractor assembly must
be checked by an Authorized
Maserati Dealer and must be
replaced if the Automatic Locking
Retractor (ALR) feature or any other
seat belt function is not working
properly.
• Failure to replace the belt and
retractor assembly could increase the
risk of injury in collisions.
Seat Belt Pretensioners The car is equipped with front seat
belt pretensioners, that reduce slack in
the belts in the event of a severe
frontal impact. This guarantees the
perfect adherence of the seat belts to the occupants bodies before the
restraining action begins.
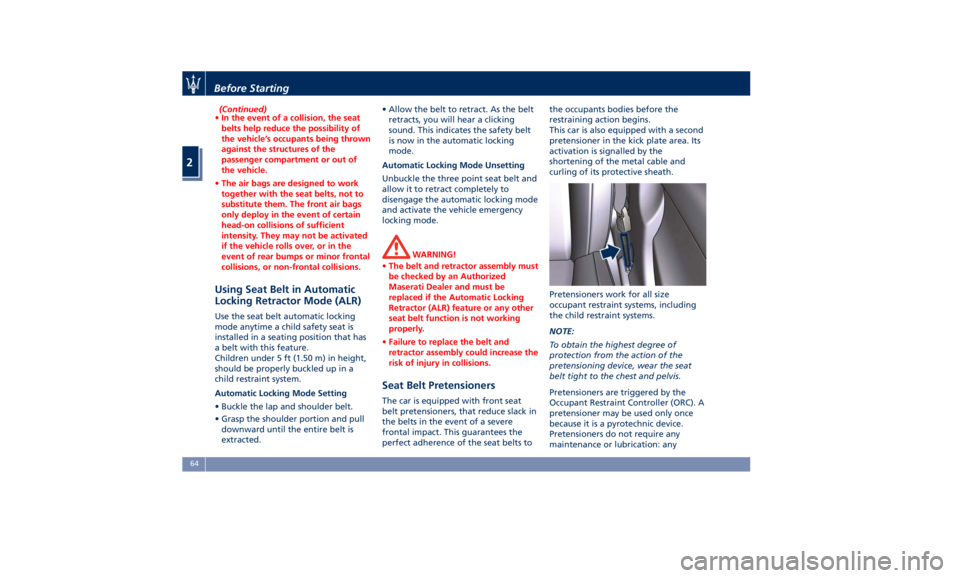
This car is also equipped with a second
pretensioner in the kick plate area. Its
activation is signalled by the
shortening of the metal cable and
curling of its protective sheath.
Pretensioners work for all size
occupant restraint systems, including
the child restraint systems.
NOTE:
To obtain the highest degree of
protection from the action of the
pretensioning device, wear the seat
belt tight to the chest and pelvis.
Pretensioners are triggered by the
Occupant Restraint Controller (ORC). A
pretensioner may be used only once
because it is a pyrotechnic device.
Pretensioners do not require any
maintenance or lubrication: anyBefore Starting
2
64
Page 95 of 396
checked by the Authorized Maserati
Dealer .
WARNING!
Certain components of this vehicle
such as air bag modules, seat belt
pretensioners, adaptive steering
columns, and button cell batteries
may contain Perchlorate material.
Special handling may apply for service
or vehicle end of life disposal. See
www.dtsc.ca.gov/hazardouswaste/
perchlorate.
Defroster
Check
operation by
selecting the
defrost mode and place the fan system
on high speed (see “Air Conditioning
Controls” chapter in section
“Dashboard Instruments and
Controls”).
You should be able to feel the air
directed against the windshield and
front side windows. Contact
Authorized Maserati Dealer for service
if your defroster is inoperable.
Floor Mat
Always use floor mats designed to fit
the footwell of your vehicle. Use only
floor mats that leave the pedal area
unobstructed and that are firmly secured so that they cannot slip out of
position and interfere with the pedals
or impair safe operation of your
vehicle.
NOTE:
The Authorized Maserati Dealer can
provide you with any information
about the available Maserati floor
mats included in the “Genuine
Accessories” range.
WARNING!
Pedals that cannot move freely can
cause loss of vehicle control and
increase the risk of serious personal
injury.
• Always make sure that floor mats
are properly attached to the proper
fasteners.
• Never place or install floor mats or
other floor coverings in the vehicle
that cannot be properly secured to
prevent them from moving and
interfering with the pedals.
• Never put floor mats or other floor
coverings on top of already installed
floor mats. Additional floor mats
and other coverings will reduce the
size of the pedal area and interfere with the pedals.
• Check mounting of mats on a
regular basis. Always properly
reinstall and secure floor mats that
have been removed for cleaning.
• Always make sure that objects
cannot fall into the driver footwell
while the vehicle is moving. Objects
can become trapped under the
brake pedal and accelerator pedal
causing a loss of vehicle control.
• Mounting posts must be properly
installed, if not equipped from the
factory. Failure to properly follow
floor mat installation or mounting
can cause interference with the
brake pedal and accelerator pedal
operation causing loss of control of
the vehicle.
Tires
•
Examine tires for excessive tread
wear and uneven wear patterns.
• Check for stones, nails, glass, or
other objects lodged in the tread or
sidewall.
• Inspect the tread for cuts and cracks.
• Inspect sidewalls for cuts, cracks and
bulges.
• Check the wheel nuts for tightness.Before Starting
2
91
Page 296 of 396
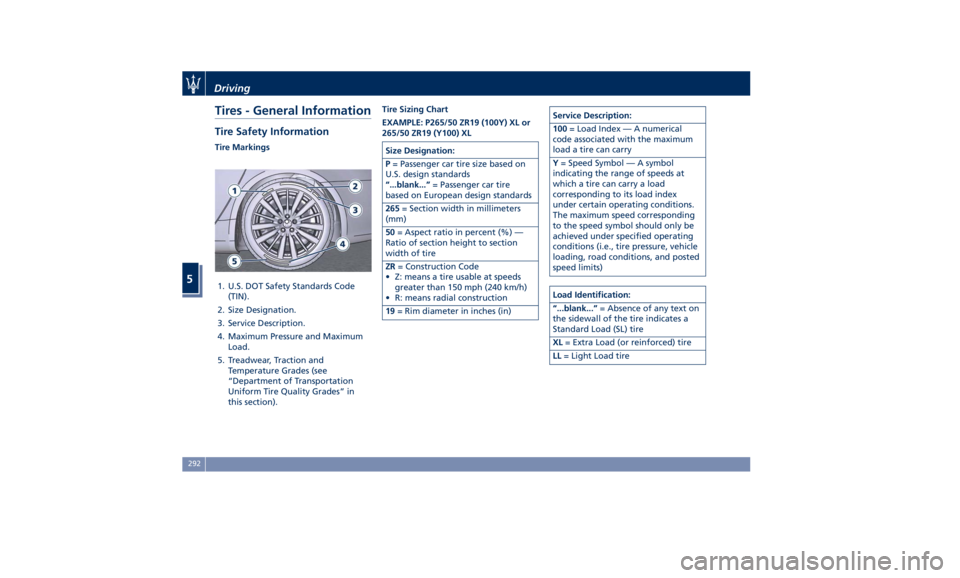
Tires - General Information Tire Safety Information Tire Markings
1. U.S. DOT Safety Standards Code
(TIN).
2. Size Designation.
3. Service Description.
4. Maximum Pressure and Maximum
Load.
5. Treadwear, Traction and
Temperature Grades (see
“Department of Transportation
Uniform Tire Quality Grades” in
this section). Tire Sizing Chart
EXAMPLE: P265/50 ZR19 (100Y) XL or
265/50 ZR19 (Y100) XL
Size Designation:
P = Passenger car tire size based on
U.S. design standards
“...blank...” = Passenger car tire
based on European design standards
265 = Section width in millimeters
(mm)
50 = Aspect ratio in percent (%) —
Ratio of section height to section
width of tire
ZR = Construction Code
• Z: means a tire usable at speeds
greater than 150 mph (240 km/h)
• R: means radial construction
19 = Rim diameter in inches (in) Service Description:
100 = Load Index — A numerical
code associated with the maximum
load a tire can carry
Y = Speed Symbol — A symbol
indicating the range of speeds at
which a tire can carry a load
corresponding to its load index
under certain operating conditions.
The maximum speed corresponding
to the speed symbol should only be
achieved under specified operating
conditions (i.e., tire pressure, vehicle
loading, road conditions, and posted
speed limits)
Load Identification:
“...blank...” = Absence of any text on
the sidewall of the tire indicates a
Standard Load (SL) tire
XL = Extra Load (or reinforced) tire
LL = Light Load tireDriving
5
292
Page 297 of 396
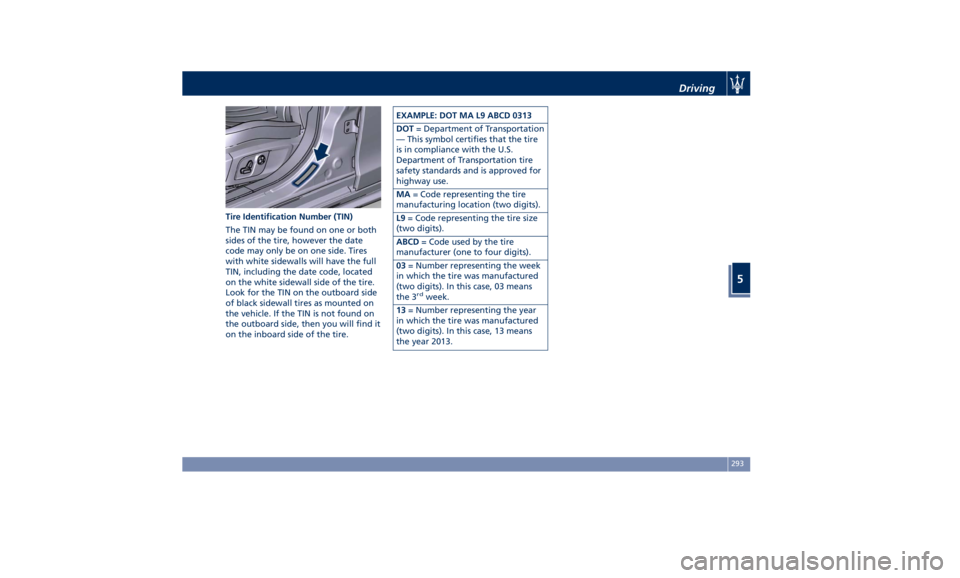
Tire Identification Number (TIN)
The TIN may be found on one or both
sides of the tire, however the date
code may only be on one side. Tires
with white sidewalls will have the full
TIN, including the date code, located
on the white sidewall side of the tire.
Look for the TIN on the outboard side
of black sidewall tires as mounted on
the vehicle. If the TIN is not found on
the outboard side, then you will find it
on the inboard side of the tire. EXAMPLE: DOT MA L9 ABCD 0313
DOT = Department of Transportation
— This symbol certifies that the tire
is in compliance with the U.S.
Department of Transportation tire
safety standards and is approved for
highway use.
MA = Code representing the tire
manufacturing location (two digits).
L9 = Code representing the tire size
(two digits).
ABCD = Code used by the tire
manufacturer (one to four digits).
03 = Number representing the week
in which the tire was manufactured
(two digits). In this case, 03 means
the 3 rd
week.
13 = Number representing the year
in which the tire was manufactured
(two digits). In this case, 13 means
the year 2013. Driving
5
293
Page 298 of 396
Tire Terminology and Definitions
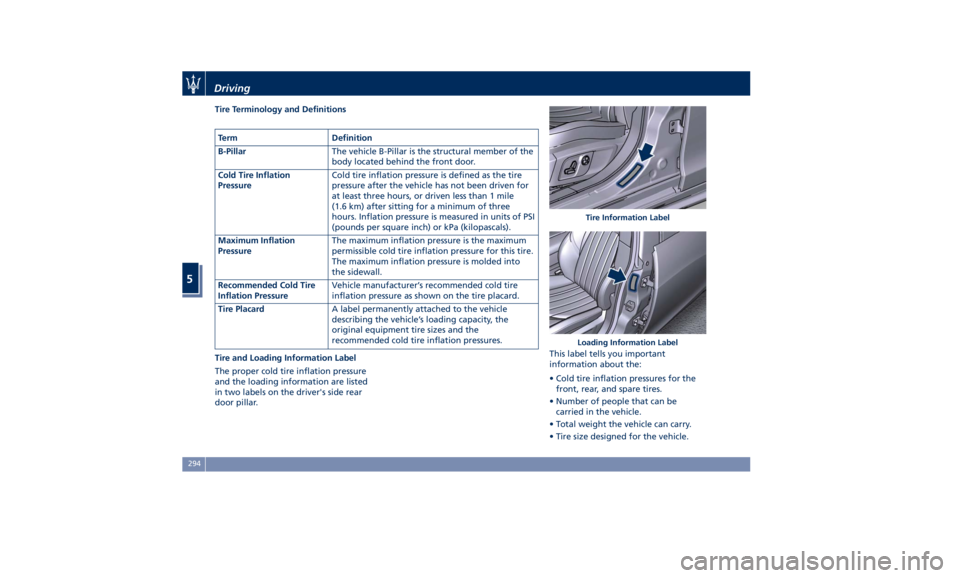
Tire and Loading Information Label
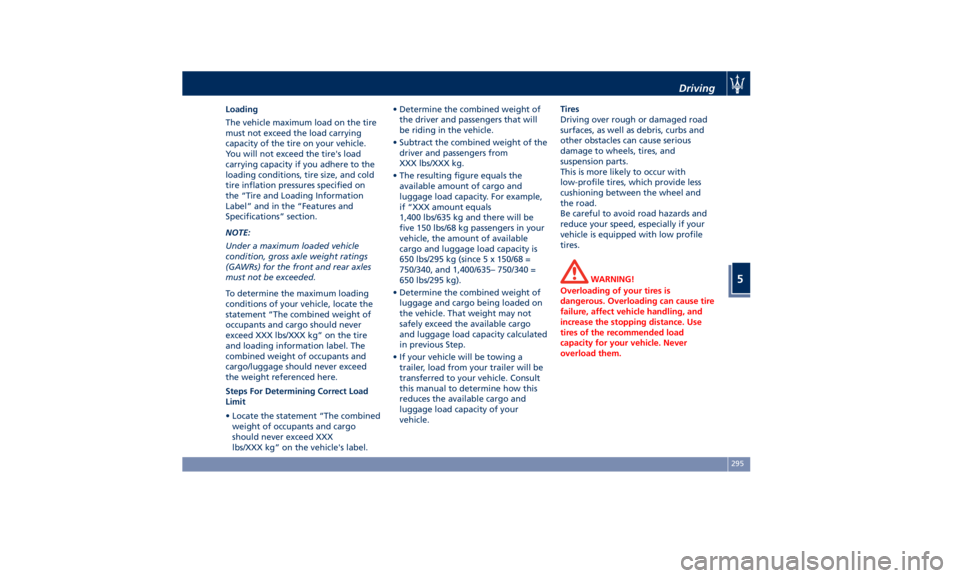
The proper cold tire inflation pressure
and the loading information are listed
in two labels on the driver's side rear
door pillar. This label tells you important
information about the:
• Cold tire inflation pressures for the
front, rear, and spare tires.
• Number of people that can be
carried in the vehicle.
• Total weight the vehicle can carry.
• Tire size designed for the vehicle.Term Definition
B-Pillar The vehicle B-Pillar is the structural member of the
body located behind the front door.
Cold Tire Inflation
Pressure Cold tire inflation pressure is defined as the tire
pressure after the vehicle has not been driven for
at least three hours, or driven less than 1 mile
(1.6 km) after sitting for a minimum of three
hours. Inflation pressure is measured in units of PSI
(pounds per square inch) or kPa (kilopascals).
Maximum Inflation
Pressure The maximum inflation pressure is the maximum
permissible cold tire inflation pressure for this tire.
The maximum inflation pressure is molded into
the sidewall.
Recommended Cold Tire
Inflation Pressure Vehicle manufacturer’s recommended cold tire
inflation pressure as shown on the tire placard.
Tire Placard A label permanently attached to the vehicle
describing the vehicle’s loading capacity, the
original equipment tire sizes and the
recommended cold tire inflation pressures. Tire Information Label
Loading Information LabelDriving
5
294
Page 299 of 396
Loading
The vehicle maximum load on the tire
must not exceed the load carrying
capacity of the tire on your vehicle.
You will not exceed the tire's load
carrying capacity if you adhere to the
loading conditions, tire size, and cold
tire inflation pressures specified on
the “Tire and Loading Information
Label” and in the “Features and
Specifications” section.
NOTE:
Under a maximum loaded vehicle
condition, gross axle weight ratings
(GAWRs) for the front and rear axles
must not be exceeded.
To determine the maximum loading
conditions of your vehicle, locate the
statement “The combined weight of
occupants and cargo should never
exceed XXX lbs/XXX kg” on the tire
and loading information label. The
combined weight of occupants and
cargo/luggage should never exceed
the weight referenced here.
Steps For Determining Correct Load
Limit
• Locate the statement “The combined
weight of occupants and cargo
should never exceed XXX
lbs/XXX kg” on the vehicle's label. • Determine the combined weight of
the driver and passengers that will
be riding in the vehicle.
• Subtract the combined weight of the
driver and passengers from
XXX lbs/XXX kg.
• The resulting figure equals the
available amount of cargo and
luggage load capacity. For example,
if “XXX amount equals
1,400 lbs/635 kg and there will be
five 150 lbs/68 kg passengers in your
vehicle, the amount of available
cargo and luggage load capacity is
650 lbs/295 kg (since 5 x 150/68 =
750/340, and 1,400/635– 750/340 =
650 lbs/295 kg).
• Determine the combined weight of
luggage and cargo being loaded on
the vehicle. That weight may not
safely exceed the available cargo
and luggage load capacity calculated
in previous Step.
• If your vehicle will be towing a
trailer, load from your trailer will be
transferred to your vehicle. Consult
this manual to determine how this
reduces the available cargo and
luggage load capacity of your
vehicle. Tires
Driving over rough or damaged road
surfaces, as well as debris, curbs and
other obstacles can cause serious
damage to wheels, tires, and
suspension parts.
This is more likely to occur with
low-profile tires, which provide less
cushioning between the wheel and
the road.
Be careful to avoid road hazards and
reduce your speed, especially if your
vehicle is equipped with low profile
tires.
WARNING!
Overloading of your tires is
dangerous. Overloading can cause tire
failure, affect vehicle handling, and
increase the stopping distance. Use
tires of the recommended load
capacity for your vehicle. Never
overload them.Driving
5
295
Page 302 of 396

When the tread is worn to one of the
tread wear indicators, the tire should
be replaced.
WARNING!
The wet performance (aquaplaning
resistance) will decrease
proportionally to the thickness of the
tread.
Tires Durability The service life of a tire depends on
various factors including, but not
limited to:
• driving style;
• tire pressure;
• distance driven.
WARNING!
Tires and the spare tire (if equipped)
should be replaced after six years,
regardless of the remaining tread.
Failure to follow this warning could
result in tire failure. Replacement Tires NOTE:
In order to maintain high performance
and safety level under all driving
conditions, Maserati strongly
recommends to use tires equivalent to
the originals in size, quality and
performance when replacement is
needed.
For the size designation of your tire
see the label on the driver's side rear
door pillar or see table “Wheels” in
section “Features and Specifications”.
The “Load Index” and “Speed Symbol”
for your tire will be found on the
original equipment tire sidewall.
NOTE:
Maserati recommends Maserati
Genuine Tires marked with “MGT”
logo specifically designed for its
models.
It is recommended to replace the two
front tires or two rear tires as a pair.
Replacing just one tire can seriously
affect your vehicle’s handling.
If you ever replace a wheel assembly,
make sure that the wheel’s
specifications (valve, TPMS sensor and
tire) match those of the original
wheels. Failure to use equivalent replacement tires may adversely affect
the safety, handling, and ride of your
vehicle.
Your Authorized Maserati Dealer is
available to provide suggestions as to
the types of tires most suited to the
use foreseen by the Customer.
WARNING!
• Do not use a tire, wheel size or
rating other than that specified for
your vehicle. Some combinations of
unapproved tires and wheels may
change suspension dimensions and
performance characteristics,
resulting in altered steering,
handling, and braking operations of
the vehicle. This can cause
unpredictable handling and stress to
steering and suspension
components. Use only the tire and
wheel sizes with load ratings
appointed for your vehicle.
• Never use a tire with a smaller load
index or capacity, other than what
was originally equipped on your
vehicle. Using a tire with a smaller
load index could result in tire
overloading and failure.
• Always check the maximum speed
rating on the tire sidewall on anyDriving
5
298
Page 303 of 396

tire on the vehicle.
• Never exceed the maximum speed
rating of the tires. Risk of accident
and serious personal injury due to
excessive speed.
• Failure to equip your vehicle with
tires having adequate speed
capability can result in tire failure.
CAUTION!
Replacing original tires with tires of a
different size may result in false
speedometer and odometer readings.
Winter Tires These tires are specially designed for
driving on snow and ice and are fitted
to replace the ones supplied with the
vehicle. Winter or all-season tires can
be identified by the M+S (Mud &
Snow) or 3PMSF (3 Peaks Mountain
Snow Flake) designation on the tire
sidewall.
Before mounting winter tires, contact
an Authorized Maserati Dealer to
receive the technical information
necessary to advise you on wheel and
tire compatibility.
As to the type of tires to use, inflation
pressures and winter tires specifications, carefully follow the
indications as reported in the
“Technical Data” and “Tire Inflation
Pressure” chapters in section “Features
and Specifications”.
WARNING!
The standard tires profile and rubber
mixture are optimized for wet and dry
driving conditions. Standard tires may
not prove favorable for snow
conditions.
NOTE:
Snow
tires should have the same load
capacity as original equipment tires
and should be mounted on all four
wheels.
Snow Chains Maserati approved traction devices (or
snow chains) may be used to improve
traction on compacted snow in heavy
snow conditions.
The use of snow chains is specified by
local regulations of each country.
Use snow chains of reduced
dimensions, with a maximum
projection of 0.23 in (6 mm) beyond
the tire tread. The chains may be fitted only on 19”
rear wheel tires.
Please contact an Authorized Maserati
Dealer for further information.
Check the snow chain tension after
driving for a distance of about 55 yd
(50 m) with the chains fitted.
With the snow chains fitted, it is
advisable to deactivate the ESC system
(see chapter “Drive Mode” in this
section).
CAUTION!
• The use of non-recommended snow
chains may damage the vehicle.
• Broken snow chains can cause
serious damage. Stop the vehicle
immediately if noise occurs that
could indicate snow chain breakage.
Replace the damaged parts of the
snow chain before further use.
• Do not exceed 30 mph (50 km/h).
• Drive cautiously and avoid severe
turns and large bumps, especially
with a loaded vehicle.
• Avoid holes in the road, do not drive
over steps or sidewalks and do not
drive on long stretches without
snow. This will prevent damage to
the vehicle and the roadbed.Driving
5
299