2019 MASERATI LEVANTE sensor
[x] Cancel search: sensorPage 125 of 436

NOTE:
• The function is enabled only if the
brightness sensor detects the right
lighting conditions and them switch
to low beam on.
• Broken, muddy, or obstructed
headlights and taillights of vehicles
in the field of view will cause
headlights to remain on longer
(closer to the vehicle). Also, dirt,
film, and other obstructions on the
windshield or camera lens will cause
the system to function improperly.
Automatic High Beam Failure
In the event of an automatic high
beam system failure, the related
amber warning light will light up on
the TFT display.
Take your vehicle to the nearest
Authorized Maserati Dealer as soon as
possible avoiding to use this system. High Beam with “Glare Free”
Feature (for “Full-LED”
headlight with AFS) The "Glare Free" feature associated
with "Full-LED" headlamps assists the
driver during traveling on an off-city
road with not sufficient environmental
illumination allowing the high beam
use also with other traffic participants
without glaring disturbance.
The no glaring effect is obtained
through matrixes of LED that are
dynamically switched on and off in
order to create a shadow zone in
correspondence of each other traffic
participants lights (motor vehicles and
bicycles, as well), according to the
information about other vehicles’
lights coming from the forward-facing
digital camera located on the
windshield , behind the internal
rear-view mirror.
The no glaring system is a
multi-shadow system, since it’s able to
create up to four light tunnels
simultaneously , each tunnel zone is as
large as the obstacle that should not
be glared.
The figure represents an example of
the car that is travelling in the
following scenarios: 1. two vehicles ahead in the same
direction;
2. another vehicle that is
overtaking;
3. another vehicle proceeding in the
opposite direction.
The system is able to detect and react
to an oncoming vehicle starting from
a distance of about 400 yd (400 m), in
a couple of seconds. Instead, in case of
the preceding vehicles, the system is
able to detect and react in few
seconds starting from a distance of
about 100 yd (100 m).
Activation Mode
The digital camera is the same used
for the automatic high beam, and like
automatic high beam also for "Glare
Free" feature it needs to be activated
by MTC+ “Controls” screen, touchingUnderstanding the Vehicle
3
121
Page 129 of 436
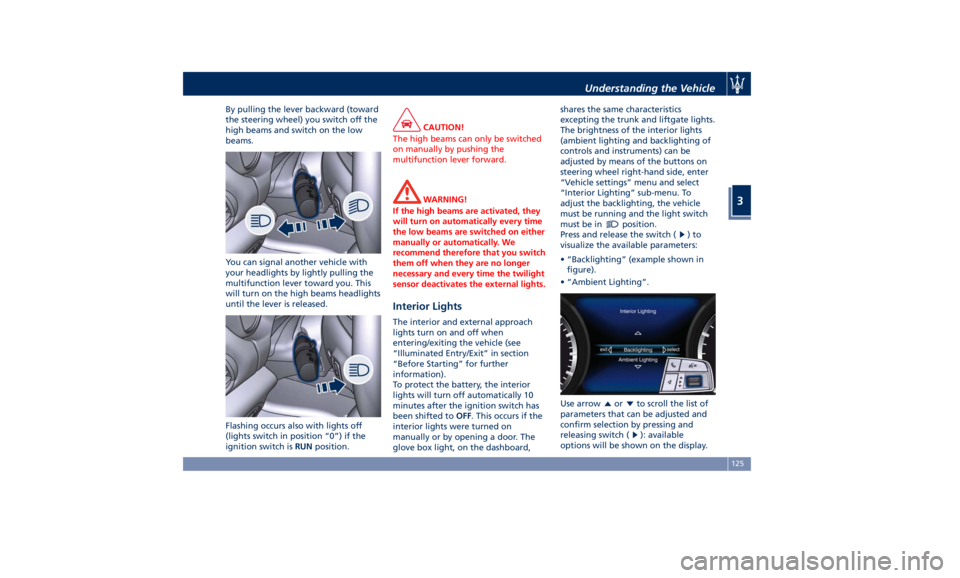
By pulling the lever backward (toward
the steering wheel) you switch off the
high beams and switch on the low
beams.
You can signal another vehicle with
your headlights by lightly pulling the
multifunction lever toward you. This
will turn on the high beams headlights
until the lever is released.
Flashing occurs also with lights off
(lights switch in position “0”) if the
ignition switch is RUN position. CAUTION!
The high beams can only be switched
on manually by pushing the
multifunction lever forward.
WARNING!
If the high beams are activated, they
will turn on automatically every time
the low beams are switched on either
manually or automatically. We
recommend therefore that you switch
them off when they are no longer
necessary and every time the twilight
sensor deactivates the external lights.
Interior Lights The interior and external approach
lights turn on and off when
entering/exiting the vehicle (see
“Illuminated Entry/Exit” in section
“Before Starting” for further
information).
To protect the battery, the interior
lights will turn off automatically 10
minutes after the ignition switch has
been shifted to OFF . This occurs if the
interior lights were turned on
manually or by opening a door. The
glove box light, on the dashboard, shares the same characteristics
excepting the trunk and liftgate lights.
The brightness of the interior lights
(ambient lighting and backlighting of
controls and instruments) can be
adjusted by means of the buttons on
steering wheel right-hand side, enter
“Vehicle settings” menu and select
“Interior Lighting” sub-menu. To
adjust the backlighting, the vehicle
must be running and the light switch
must be in
position.
Press and release the switch (
)to
visualize the available parameters:
• “Backlighting” (example shown in
figure).
• “Ambient Lighting”.
Use arrow
or to scroll the list of
parameters that can be adjusted and
confirm selection by pressing and
releasing switch (
): available
options will be shown on the display.Understanding the Vehicle
3
125
Page 134 of 436

Rain Sensing Windshield
Wipers This feature detects moisture on the
windshield through an internal
rearview mirror integrated sensor,
which automatically activates the
relative wipers.
Rotate forward the end of the
multifunction lever to one of four
settings to adjust the detection system.
First wiper delay position is the least
sensitive, and fourth wiper delay
position is the most sensitive. Third
position should be used for normal
rain conditions.
The rain sense wipers will
automatically change between an
intermittent wipe, slow wipe and a
fast wipe depending on the amount of
detected moisture sensed by a
particular area of the windshield.
Place the wiper switch in the “OFF”
position when you do not want to use
the automatic intermittent system.
The rain sensing feature can be turned
on and off using the MTC+ System, see
“MTC+ Settings” in section
“Dashboard Instruments and Controls”
for further information. CAUTION!
• The rain sensing feature may not
function properly by ice or dried salt
water on the windshield.
• Use on the windshield of RainX ®
or
products containing wax or silicone
may reduce rain sensor performance.
The rain sensing system has protective
features for the wiper
blades and
arms. It will not operate under the
following conditions:
• Low Temperature Wipe Inhibit : the
rain sensing feature will not operate
when the ignition is in RUN position,
the vehicle is stationary and the
outside temperature is below 32°F
(0°C). To resume, set the automatic
feature on the multifunction lever,
start the engine and drive or wait
until the outside temperature rises
above freezing.
• Wipe Inhibit with Transmission in
Neutral Position : the rain sensing
feature will not operate when the
ignition is placed in the RUN
position, the transmission shift lever
is in the N (Neutral) position and the
vehicle speed is less than 5 mph
(8 km/h). To resume, set the multifunction lever to the automatic
function or move the shift lever out
of N (Neutral).
Headlights On with Windshield
Wipers When activating this function, the
headlights will light up approximately
10 seconds after the wipers acting on
the windshield are turned on if the
light switch is placed in “AUTO”
position. In addition, the headlights
switch off when the wipers are turned
off (position “OFF”) if they were
previously turned by using this
function. Powering on Headlights with
wipers can be activated and
deactivated with the MTC+ System, see
“MTC+ Settings” in section
“Dashboard Instruments and Controls”
for further information.
Wiper Blade Maintenance When the wiper arms acting on the
windshield are in the rest position it is
not possible to check or replace the
blades (Service position) as they are
folded under the hood. To service the
blades (see paragraph “Wiper
Maintenance and Blades
Replacement” in chapter
“Maintenance Procedures” of section
“Maintenance and Care”) it isUnderstanding the Vehicle
3
130
Page 135 of 436
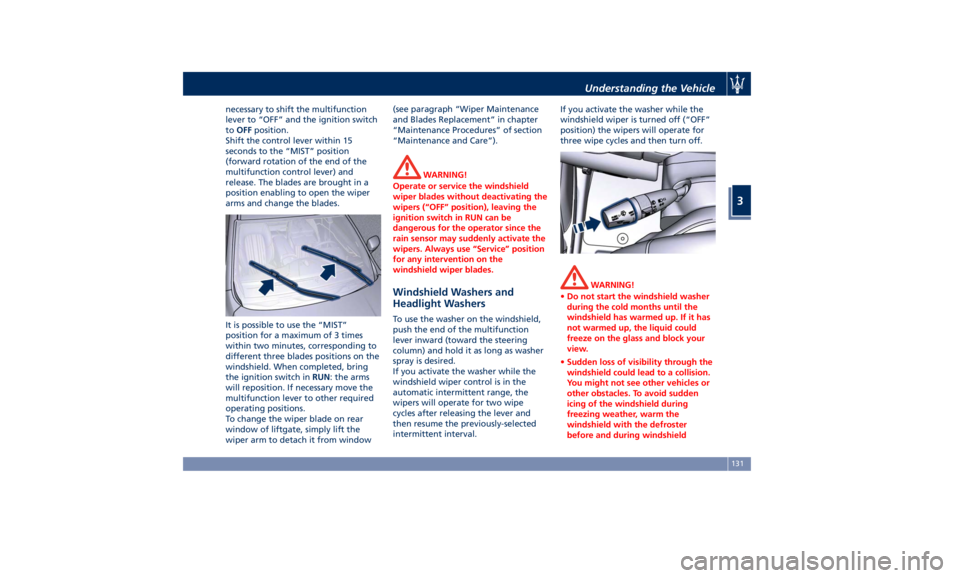
necessary to shift the multifunction
lever to “OFF” and the ignition switch
to OFF position.
Shift the control lever within 15
seconds to the “MIST” position
(forward rotation of the end of the
multifunction control lever) and
release. The blades are brought in a
position enabling to open the wiper
arms and change the blades.
It is possible to use the “MIST”
position for a maximum of 3 times
within two minutes, corresponding to
different three blades positions on the
windshield. When completed, bring
the ignition switch in RUN : the arms
will reposition. If necessary move the
multifunction lever to other required
operating positions.
To change the wiper blade on rear
window of liftgate, simply lift the
wiper arm to detach it from window (see paragraph “Wiper Maintenance
and Blades Replacement” in chapter
“Maintenance Procedures” of section
“Maintenance and Care”).
WARNING!
Operate or service the windshield
wiper blades without deactivating the
wipers (“OFF” position), leaving the
ignition switch in RUN can be
dangerous for the operator since the
rain sensor may suddenly activate the
wipers. Always use “Service” position
for any intervention on the
windshield wiper blades.
Windshield Washers and
Headlight Washers To use the washer on the windshield,
push the end of the multifunction
lever inward (toward the steering
column) and hold it as long as washer
spray is desired.
If you activate the washer while the
windshield wiper control is in the
automatic intermittent range, the
wipers will operate for two wipe
cycles after releasing the lever and
then resume the previously-selected
intermittent interval. If you activate the washer while the
windshield wiper is turned off (“OFF”
position) the wipers will operate for
three wipe cycles and then turn off.
WARNING!
• Do not start the windshield washer
during the cold months until the
windshield has warmed up. If it has
not warmed up, the liquid could
freeze on the glass and block your
view.
• Sudden loss of visibility through the
windshield could lead to a collision.
You might not see other vehicles or
other obstacles. To avoid sudden
icing of the windshield during
freezing weather, warm the
windshield with the defroster
before and during windshieldUnderstanding the Vehicle
3
131
Page 206 of 436
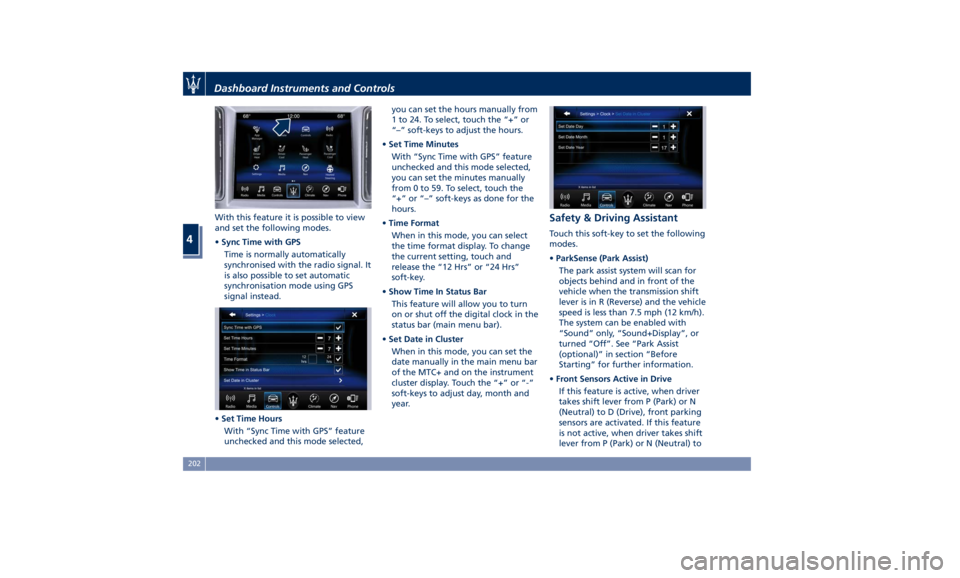
With this feature it is possible to view
and set the following modes.
• Sync Time with GPS
Time is normally automatically
synchronised with the radio signal. It
is also possible to set automatic
synchronisation mode using GPS
signal instead.
• Set Time Hours
With “Sync Time with GPS” feature
unchecked and this mode selected, you can set the hours manually from
1 to 24. To select, touch the “+” or
“–” soft-keys to adjust the hours.
• Set Time Minutes
With “Sync Time with GPS” feature
unchecked and this mode selected,
you can set the minutes manually
from 0 to 59. To select, touch the
“+” or “–” soft-keys as done for the
hours.
• Time Format
When in this mode, you can select
the time format display. To change
the current setting, touch and
release the “12 Hrs” or “24 Hrs”
soft-key.
• Show Time In Status Bar
This feature will allow you to turn
on or shut off the digital clock in the
status bar (main menu bar).
• Set Date in Cluster
When in this mode, you can set the
date manually in the main menu bar
of the MTC+ and on the instrument
cluster display. Touch the “+” or “-”
soft-keys to adjust day, month and
year. Safety & Driving Assistant Touch this soft-key to set the following
modes.
• ParkSense (Park Assist)
The park assist system will scan for
objects behind and in front of the
vehicle when the transmission shift
lever is in R (Reverse) and the vehicle
speed is less than 7.5 mph (12 km/h).
The system can be enabled with
“Sound” only, “Sound+Display”, or
turned “Off”. See “Park Assist
(optional)” in section “Before
Starting” for further information.
• Front Sensors Active in Drive
If this feature is active, when driver
takes shift lever from P (Park) or N
(Neutral) to D (Drive), front parking
sensors are activated. If this feature
is not active, when driver takes shift
lever from P (Park) or N (Neutral) toDashboard Instruments and Controls
4
202
Page 207 of 436
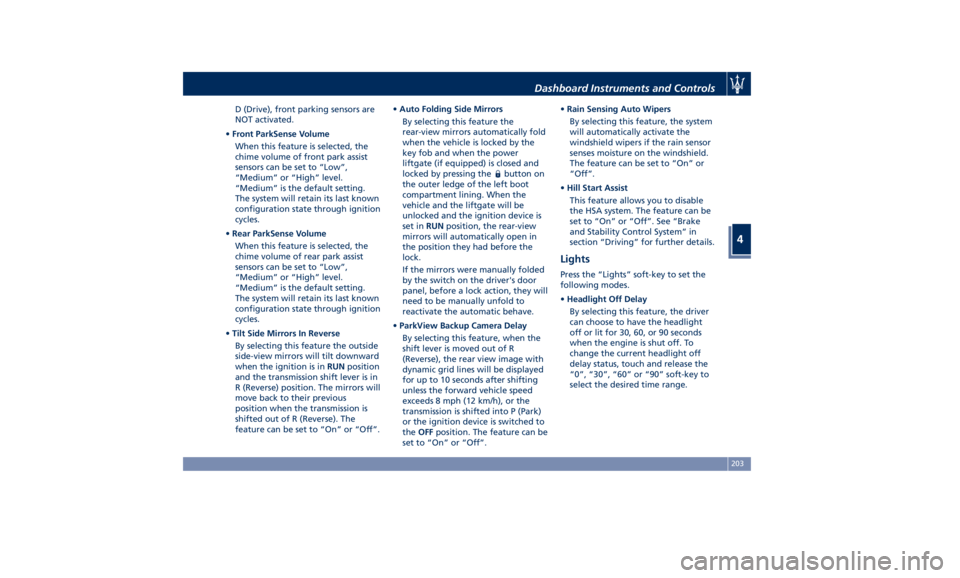
D (Drive), front parking sensors are
NOT activated.
• Front ParkSense Volume
When this feature is selected, the
chime volume of front park assist
sensors can be set to “Low”,
“Medium” or “High” level.
“Medium” is the default setting.
The system will retain its last known
configuration state through ignition
cycles.
• Rear ParkSense Volume
When this feature is selected, the
chime volume of rear park assist
sensors can be set to “Low”,
“Medium” or “High” level.
“Medium” is the default setting.
The system will retain its last known
configuration state through ignition
cycles.
• Tilt Side Mirrors In Reverse
By selecting this feature the outside
side-view mirrors will tilt downward
when the ignition is in RUN position
and the transmission shift lever is in
R (Reverse) position. The mirrors will
move back to their previous
position when the transmission is
shifted out of R (Reverse). The
feature can be set to “On” or “Off”. • Auto Folding Side Mirrors
By selecting this feature the
rear-view mirrors automatically fold
when the vehicle is locked by the
key fob and when the power
liftgate (if equipped) is closed and
locked by pressing the
button on
the outer ledge of the left boot
compartment lining. When the
vehicle and the liftgate will be
unlocked and the ignition device is
set in RUN position, the rear-view
mirrors will automatically open in
the position they had before the
lock.
If the mirrors were manually folded
by the switch on the driver's door
panel, before a lock action, they will
need to be manually unfold to
reactivate the automatic behave.
• ParkView Backup Camera Delay
By selecting this feature, when the
shift lever is moved out of R
(Reverse), the rear view image with
dynamic grid lines will be displayed
for up to 10 seconds after shifting
unless the forward vehicle speed
exceeds 8 mph (12 km/h), or the
transmission is shifted into P (Park)
or the ignition device is switched to
the OFF position. The feature can be
set to “On” or “Off”. • Rain Sensing Auto Wipers
By selecting this feature, the system
will automatically activate the
windshield wipers if the rain sensor
senses moisture on the windshield.
The feature can be set to “On” or
“Off”.
• Hill Start Assist
This feature allows you to disable
the HSA system. The feature can be
set to “On” or “Off”. See “Brake
and Stability Control System” in
section “Driving” for further details.
Lights Press the “Lights” soft-key to set the
following modes.
• Headlight Off Delay
By selecting this feature, the driver
can choose to have the headlight
off or lit for 30, 60, or 90 seconds
when the engine is shut off. To
change the current headlight off
delay status, touch and release the
“0”, “30”, “60” or “90” soft-key to
select the desired time range.Dashboard Instruments and Controls
4
203
Page 218 of 436
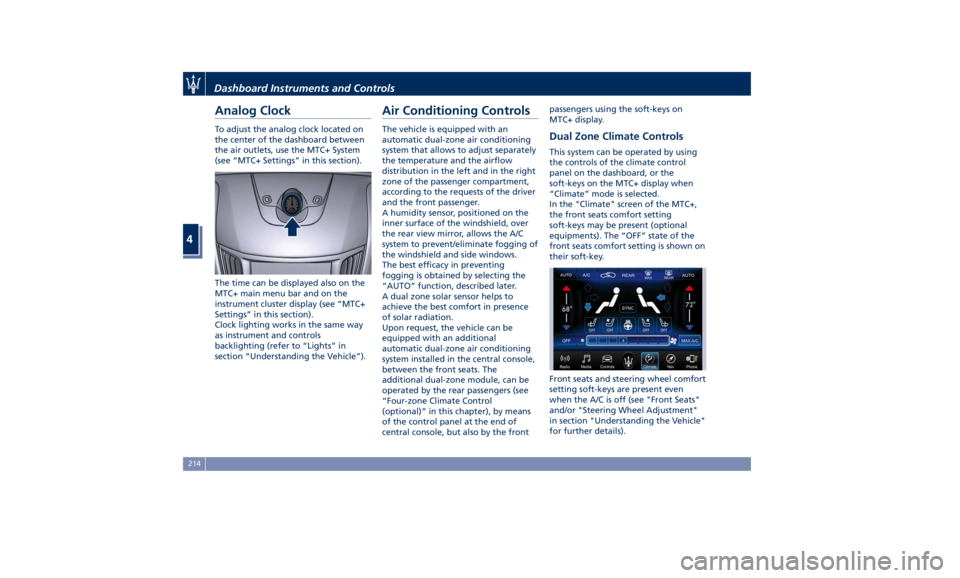
Analog Clock To adjust the analog clock located on
the center of the dashboard between
the air outlets, use the MTC+ System
(see “MTC+ Settings” in this section).
The time can be displayed also on the
MTC+ main menu bar and on the
instrument cluster display (see “MTC+
Settings” in this section).
Clock lighting works in the same way
as instrument and controls
backlighting (refer to “Lights” in
section “Understanding the Vehicle”). Air Conditioning Controls The vehicle is equipped with an
automatic dual-zone air conditioning
system that allows to adjust separately
the temperature and the airflow
distribution in the left and in the right
zone of the passenger compartment,
according to the requests of the driver
and the front passenger.
A humidity sensor, positioned on the
inner surface of the windshield, over
the rear view mirror, allows the A/C
system to prevent/eliminate fogging of
the windshield and side windows.
The best efficacy in preventing
fogging is obtained by selecting the
“AUTO” function, described later.
A dual zone solar sensor helps to
achieve the best comfort in presence
of solar radiation.
Upon request, the vehicle can be
equipped with an additional
automatic dual-zone air conditioning
system installed in the central console,
between the front seats. The
additional dual-zone module, can be
operated by the rear passengers (see
“Four-zone Climate Control
(optional)” in this chapter), by means
of the control panel at the end of
central console, but also by the front passengers using the soft-keys on
MTC+ display.
Dual Zone Climate Controls This system can be operated by using
the controls of the climate control
panel on the dashboard, or the
soft-keys on the MTC+ display when
“Climate” mode is selected.
In the "Climate" screen of the MTC+,
the front seats comfort setting
soft-keys may be present (optional
equipments). The “OFF” state of the
front seats comfort setting is shown on
their soft-key.
Front seats and steering wheel comfort
setting soft-keys are present even
when the A/C is off (see "Front Seats"
and/or "Steering Wheel Adjustment"
in section "Understanding the Vehicle"
for further details).Dashboard Instruments and Controls
4
214
Page 223 of 436
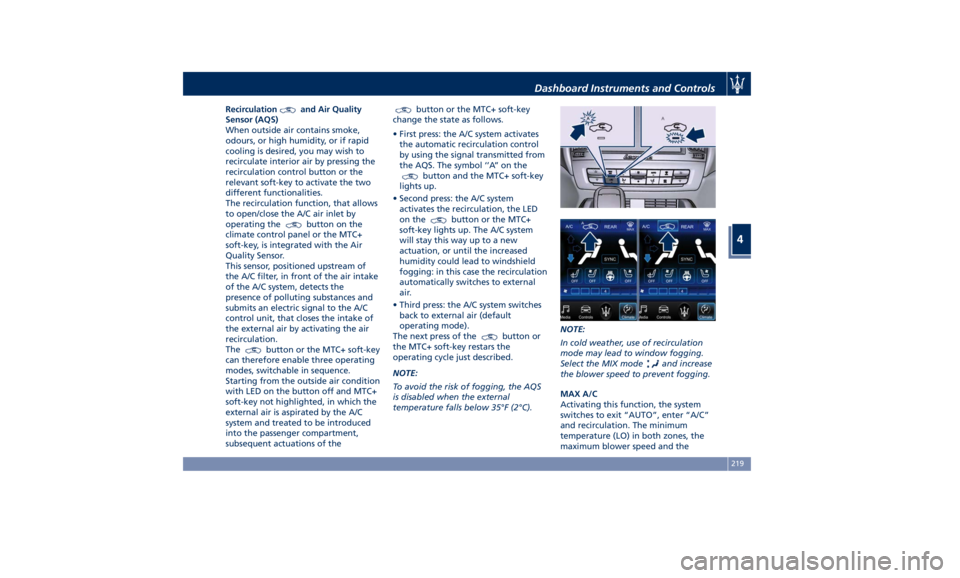
Recirculation and Air Quality
Sensor (AQS)
When outside air contains smoke,
odours, or high humidity, or if rapid
cooling is desired, you may wish to
recirculate interior air by pressing the
recirculation control button or the
relevant soft-key to activate the two
different functionalities.
The recirculation function, that allows
to open/close the A/C air inlet by
operating the
button on the
climate control panel or the MTC+
soft-key, is integrated with the Air
Quality Sensor.
This sensor, positioned upstream of
the A/C filter, in front of the air intake
of the A/C system, detects the
presence of polluting substances and
submits an electric signal to the A/C
control unit, that closes the intake of
the external air by activating the air
recirculation.
The
button or the MTC+ soft-key
can therefore enable three operating
modes, switchable in sequence.
Starting from the outside air condition
with LED on the button off and MTC+
soft-key not highlighted, in which the
external air is aspirated by the A/C
system and treated to be introduced
into the passenger compartment,
subsequent actuations of the button or the MTC+ soft-key
change the state as follows.
• First press: the A/C system activates
the automatic recirculation control
by using the signal transmitted from
the AQS. The symbol ‘’A’’ on the
button and the MTC+ soft-key
lights up.
• Second press: the A/C system
activates the recirculation, the LED
on the
button or the MTC+
soft-key lights up. The A/C system
will stay this way up to a new
actuation, or until the increased
humidity could lead to windshield
fogging: in this case the recirculation
automatically switches to external
air.
• Third press: the A/C system switches
back to external air (default
operating mode).
The next press of the
button or
the MTC+ soft-key restars the
operating cycle just described.
NOTE:
To avoid the risk of fogging, the AQS
is disabled when the external
temperature falls below 35°F (2°C). NOTE:
In cold weather, use of recirculation
mode may lead to window fogging.
Select the MIX mode
and increase
the blower speed to prevent fogging.
MAX A/C
Activating this function, the system
switches to exit “AUTO”, enter “A/C”
and recirculation. The minimum
temperature (LO) in both zones, the
maximum blower speed and theDashboard Instruments and Controls
4
219