2019 MASERATI LEVANTE rear view mirror
[x] Cancel search: rear view mirrorPage 317 of 436

When ABSA is turned off from MTC+
"Controls" page, there will be no
visual or audible alerts from RCP
subsystem.
When ABSA is turned on with any
setting,RCP subsystem shall respond
with both visual and audible alerts
when a detected vehicle or object is
present. Whenever an audible alert is
requested, the radio (if on) is also
muted.
Right/left turn/hazard signal status is
ignored; the RCP status always
requests the chime.
System Temporarily
Unavailable The blind spot system will become
temporarily unavailable and the
instrument cluster display will show
the message “Blind Spot Alert
Temporarily Unavailable” when the
vehicle enters a radio quite zone
(example the areas around radio
telescopes).
The warning light on the outside
rear-view mirrors will be lit up and
stay lit until the vehicle exits the zone.
System in Fault The ABSA system cannot properly
operate either due to a fault of its
components, or because the area on windshield where the forward-facing
camera is located or on the rear
bumper fascia where the radar sensors
are located is dirty. In these cases the
amber warning light and the related
message will be displayed on the
instrument cluster.
In these cases do not use the system
and have the vehicle inspected at an
Authorized Maserati Dealer .
Radar Device - Regulatory
Information The “Regulatory Information” for all
the radio frequency and radar devices
can be consulted by accessing the
"Services" section on the website
www.maserati.com.Highway Assist – HAS
(optional, with ACC only) The Highway Assist (HAS) is a level 2
Autonomy system (in reference to
NHTSA standards) that is designed to
aid the driver in the steering,
acceleration, and braking functions of
the vehicle.
HAS is designed to only function on
highways or limited access freeways.
HAS centers the vehicle by controlling
the EPS system based off of lane line
information from the forward-facing
camera and data from the front radar
sensor.
HAS combines ACC and LKA to
manage the steering and speed of the
vehicle under specific conditions. The
conditions to engage HAS are listed in
the next paragraph. If a lane line cross
is imminent, the steering wheel willDriving
5
313
Page 323 of 436

Traffic Sign Assist – TSA
(optional) TSA detects traffic signs through the
use of a forward-facing digital camera
mounted on windshield, behind the
rear-view mirror. TSA assists the driver
by displaying on the instrument
cluster detected speed limits and
traffic signs with a restriction
indicated by an additional sign (e.g. in
snow conditions). TSA also uses the
data of the navigation system, in
order to provide information to the
driver in all cases in which the camera
is not able to detect the traffic signs
that are present on the road where
the car is travelling.
Some examples of these are: due to
low visibility, light reflection, damaged
traffic signs, traffic signs in wrong
position like rotated or fallen poles.
NOTE:
• Overtaking restriction signs are not
displayed by the TSA system.
• TSA provides a visual warning to the
driver when he/she unintentionally
reaches the maximum speed limit
allowed or when it exceeds the set
“Sensitivity” value. • The performance of TSA depends on
the update degree of navigation
system’s maps.
Customised Settings TSA is configurable by the customer
regarding the display mode on the
instrument cluster and the warning
sensitivity.
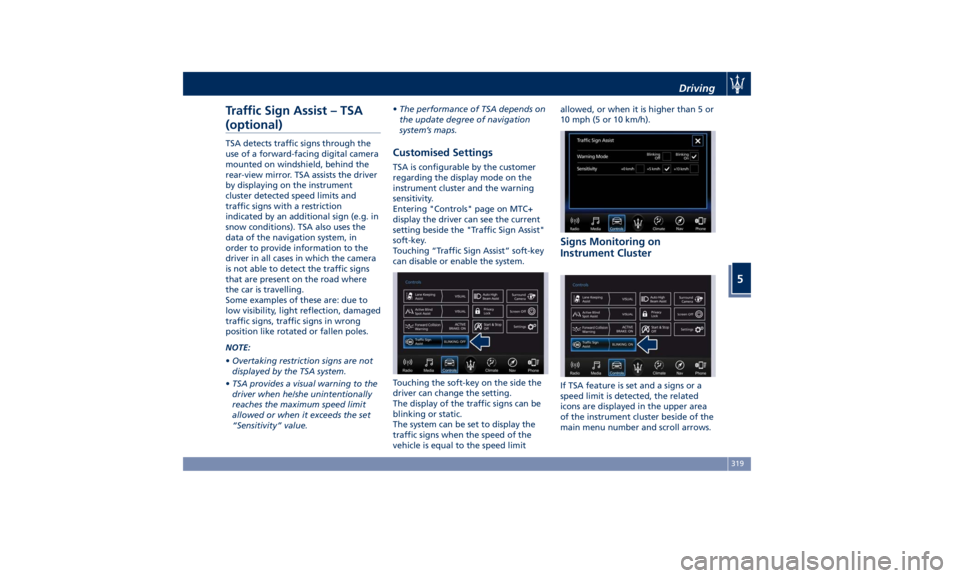
Entering "Controls" page on MTC+
display the driver can see the current
setting beside the "Traffic Sign Assist"
soft-key.
Touching “Traffic Sign Assist” soft-key
can disable or enable the system.
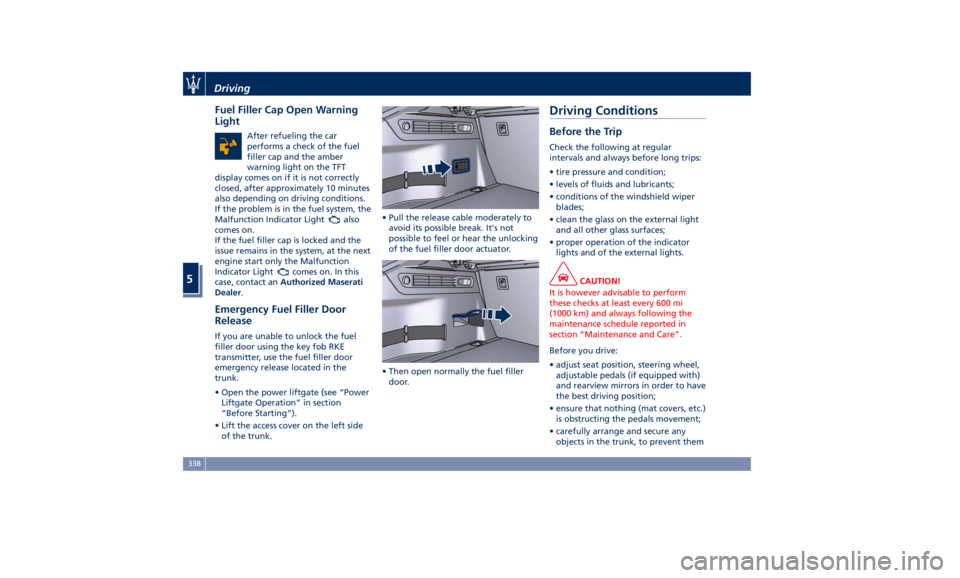
Touching the soft-key on the side the
driver can change the setting.
The display of the traffic signs can be
blinking or static.
The system can be set to display the
traffic signs when the speed of the
vehicle is equal to the speed limit allowed, or when it is higher than 5 or
10 mph (5 or 10 km/h).
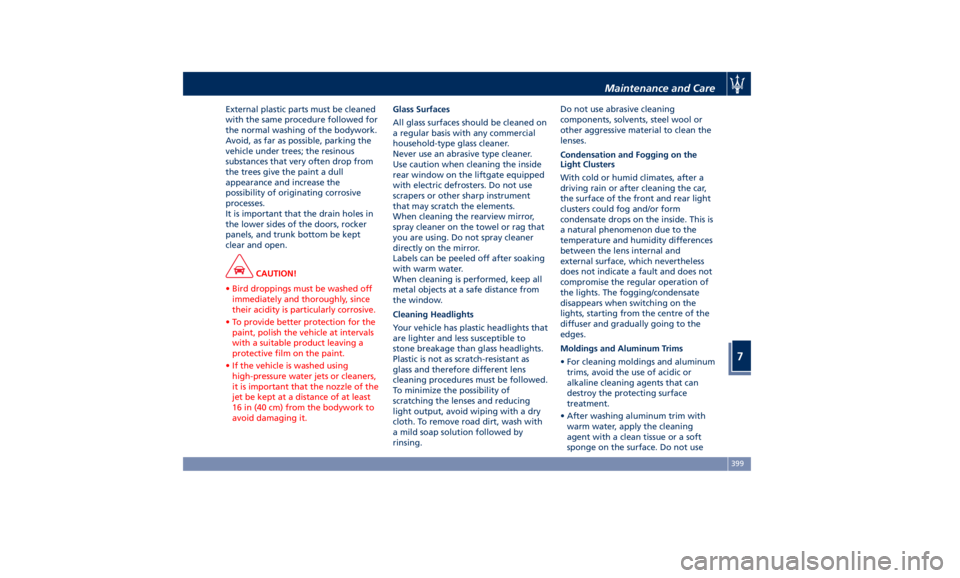
Signs Monitoring on
Instrument Cluster
If TSA feature is set and a signs or a
speed limit is detected, the related
icons are displayed in the upper area
of the instrument cluster beside of the
main menu number and scroll arrows.Driving
5
319
Page 342 of 436

Fuel Filler Cap Open Warning
Light After refueling the car
performs a check of the fuel
filler cap and the amber
warning light on the TFT
display comes on if it is not correctly
closed, after approximately 10 minutes
also depending on driving conditions.
If the problem is in the fuel system, the
Malfunction Indicator Light
also
comes on.
If the fuel filler cap is locked and the
issue remains in the system, at the next
engine start only the Malfunction
Indicator Light
comes on. In this
case, contact an Authorized Maserati
Dealer .
Emergency Fuel Filler Door
Release If you are unable to unlock the fuel
filler door using the key fob RKE
transmitter, use the fuel filler door
emergency release located in the
trunk.
• Open the power liftgate (see “Power
Liftgate Operation” in section
“Before Starting”).
• Lift the access cover on the left side
of the trunk. • Pull the release cable moderately to
avoid its possible break. It's not
possible to feel or hear the unlocking
of the fuel filler door actuator.
• Then open normally the fuel filler
door.Driving Conditions Before the Trip Check the following at regular
intervals and always before long trips:
• tire pressure and condition;
• levels of fluids and lubricants;
• conditions of the windshield wiper
blades;
• clean the glass on the external light
and all other glass surfaces;
• proper operation of the indicator
lights and of the external lights.
CAUTION!
It is however advisable to perform
these checks at least every 600 mi
(1000 km) and always following the
maintenance schedule reported in
section “Maintenance and Care”.
Before you drive:
•
adjust seat position, steering wheel,
adjustable pedals (if equipped with)
and rearview mirrors in order to have
the best driving position;
• ensure that nothing (mat covers, etc.)
is obstructing the pedals movement;
• carefully arrange and secure any
objects in the trunk, to prevent themDriving
5
338
Page 346 of 436

For pressure of trailer tires, follow the
instructions given by the trailer
manufacturer.
After adjusting vehicle tire pressure
and connecting and disconnecting the
trailer, initialize the Tire Pressure
Monitoring System (TPMS) following
the instructions under chapter “Tire
Pressure Monitoring System (TPMS)” in
this section.
Field of Vision of External
Rearview Mirrors Law provisions require the field of
vision of external rearview mirrors to
include the rear trailer corners.
If vehicle external rearview mirrors
cannot cover the required field of
vision, it is possible to install additional
rearview mirrors sticking further out at
the sides.
The Authorized Maserati Dealer can
provide you with information about
towing a trailer and about the
approved components available in the
"Genuine Accessories" range. Trailer Lights Law provisions require trailers to be
equipped with an electrical lighting
system that must include the following
lights:
• Turn signals;
• Position lights;
• Stop lights;
• Rear fog lights;
• Reverse lights;
• License plate lights;
• Side marker lights (for trailer width
over 6.8 ft/2.1 m).
The power input of the trailer lights
must not exceed the values in the
following list.
• Position lights, side marker lights and
license plate lights :6x5Wper side.
• Rear fog lights :2x21W
• Turn signals :2x21W
• Stop lights :4x21W
• Reverse lights :2x21W
Minimum detectable current of Trailer
Tow Module (TTM): 100mA. Trailer Wiring Harness
Vehicle trailer tongue includes a 4-pin
sealed connector powered at 12VDC
for connection of the corresponding
trailer wiring connector.
In addition to the electrical branches,
the vehicle electrical system can only
be connected to the supply cable for
an electric brake and to the cable for
an internal light for the trailer, not
exceeding 15W.
CAUTION!
Do not cut or splice wiring into the
vehicle wiring harness. Do not change
cable connections on connectors. TheDriving
5
342
Page 395 of 436

Ref. Type Function
36 Mini – 10A Transmission
lever, TPMS
module, Navtrak,
USB/AUX and
USB cherger,
ASBM Control
suspension and
Hands Free
access module
37 Mini – 25A ASCM module
38 Mini – 30A RH front seat
movement
41 Maxi – 40A ASCM motor
supply
42 – –
43 Mini – 20A Seat passenger
heater module
44 – –
45 – –
46 Mini – 5A Rear camera
47 Mini – 5A Navtrak
48 Mini – 5A Surround view
49 Mini – 10A Internal
temperature
sensor, umidity
sensor, internal
mirror and HALF Ref. Type Function
50 – –
51 Mini – 25A Rear seat and
steering wheel
heater module
52 Mini – 20A Trunk power
outlet
53 – –
54 Mini – 7,5A Blind Spot
module
55 – –
56 Mini – 10A Blower front
HVAC coil relay
57 Mini – 10A Blower rear
HVAC coil relay
58 Mini – 10A Trailer harness
(not for TROFEO
version)
59 Mini – 10A USB charger,
transmission
lever, ASBM, rear
tunnel stack
switch
60 – –
61 Mini – 15A Rear window
wiper relay
62 Mini – 7,5A Front HVAC
module Ref. Type Function
63 Mini – 20A Blower rear
HVAC
64 Mini – 7,5A Rear HVAC
module
65 Mini – 10A Intelligent
battery sensor
66 Mini – 10A Rear Seat
Entertainment
(RSE)
67 Mini – 10A Sunroof
68 Mini – 20A Power outlet on
central console
rear side
69 Mini – 25A Rear console
power outlet
and cigar lighter
70 Mini – 10A Front HVAC
module, Parking
Aid Module
(PAM), ASCM
Front HVAC
module, Parking
Aid Module
(PAM), ASCM
and ELDOR coil
(V8 engines only)Maintenance and Care
7
391
Page 403 of 436

External plastic parts must be cleaned
with the same procedure followed for
the normal washing of the bodywork.
Avoid, as far as possible, parking the
vehicle under trees; the resinous
substances that very often drop from
the trees give the paint a dull
appearance and increase the
possibility of originating corrosive
processes.
It is important that the drain holes in
the lower sides of the doors, rocker
panels, and trunk bottom be kept
clear and open.
CAUTION!
• Bird droppings must be washed off
immediately and thoroughly, since
their acidity is particularly corrosive.
• To provide better protection for the
paint, polish the vehicle at intervals
with a suitable product leaving a
protective film on the paint.
• If the vehicle is washed using
high-pressure water jets or cleaners,
it is important that the nozzle of the
jet be kept at a distance of at least
16 in (40 cm) from the bodywork to
avoid damaging it. Glass Surfaces
All
glass surfaces should be cleaned on
a regular basis with any commercial
household-type glass cleaner.
Never use an abrasive type cleaner.
Use caution when cleaning the inside
rear window on the liftgate equipped
with electric defrosters. Do not use
scrapers or other sharp instrument
that may scratch the elements.
When cleaning the rearview mirror,
spray cleaner on the towel or rag that
you are using. Do not spray cleaner
directly on the mirror.
Labels can be peeled off after soaking
with warm water.
When cleaning is performed, keep all
metal objects at a safe distance from
the window.
Cleaning Headlights
Your vehicle has plastic headlights that
are lighter and less susceptible to
stone breakage than glass headlights.
Plastic is not as scratch-resistant as
glass and therefore different lens
cleaning procedures must be followed.
To minimize the possibility of
scratching the lenses and reducing
light output, avoid wiping with a dry
cloth. To remove road dirt, wash with
a mild soap solution followed by
rinsing. Do not use abrasive cleaning
components, solvents, steel wool or
other aggressive material to clean the
lenses.
Condensation and Fogging on the
Light Clusters
With cold or humid climates, after a
driving rain or after cleaning the car,
the surface of the front and rear light
clusters could fog and/or form
condensate drops on the inside. This is
a natural phenomenon due to the
temperature and humidity differences
between the lens internal and
external surface, which nevertheless
does not indicate a fault and does not
compromise the regular operation of
the lights. The fogging/condensate
disappears when switching on the
lights, starting from the centre of the
diffuser and gradually going to the
edges.
Moldings and Aluminum Trims
• For cleaning moldings and aluminum
trims, avoid the use of acidic or
alkaline cleaning agents that can
destroy the protecting surface
treatment.
• After washing aluminum trim with
warm water, apply the cleaning
agent with a clean tissue or a soft
sponge on the surface. Do not useMaintenance and Care
7
399
Page 431 of 436

Interior Maintenance and Care . .400
Maintenance Procedures ..... .371
Periodic Maintenance ....... .367
Scheduled Maintenance Service .364
Scheduled Service Plan ...... .365
Wheels Maintenance ....... .396
Maserati Roadside Assistance
Program ...................17
Mesh Pockets .............. .138
Messages on Main Display Area . . .165
MIL (Malfunction Indicator Light). .161
Mirrors ................... .110
External Mirrors ........... .110
Folding Mirrors ........... .112
Integrated External Rearview Mirror
Lights .................. .128
Internal Rearview Mirror ..... .112
Mirrors Positioning ......... .111
Rearview Mirrors .......... .110
Tilt Mirrors in Reverse ....... .111
MTC+ “Controls” Screen ....... .195
MTC+ Settings - Customer
Programmable Features ...... .198
Auto-On Comfort & Remote
Start ................... .206
Clear Personal Data ........ .210
Clock & Date ............. .201
Display ................. .200
Doors & Locks ............ .204
Engine Off Options ......... .206
Lights .................. .203
Pneumatic Suspension ....... .206
Restore Settings ........... .210 Safety and Driving Assistance . . .202
Voice Commands .......... .201
Occupant Restraint System .......57
Off-road Drive .............. .264
After Driving Off-road ....... .267
Driving in Snow and Wet Grass . .266
Driving Through Water ...... .265
Traction Downhill .......... .267
On Board Diagnostics ......... .281
ORC (Occupant Restraint
Controller) .................69
Park Assist ..................
79
Enabling and Disabling Park
Assist ....................83
Parking .................. .271
Parking Brake .............. .268
Passive Entry System ...........42
Pedals, adjustable ........... .110
Pedestrian Emergency Braking
(PEB) ................... .297
Pets, transporting .............79
Phone and Voice Controls on Steering
Wheel .................. .224
Phone Mode ............. .224
Phone/Bluetooth, Customer
settings ................. .208
Power Outlets .............. .133
Power Outlet Inside the Central
Console ................. .134
Power Outlet Inside the
Cupholder ............... .133 Power Outlet Inside the Trunk . .134
Rear Power Outlets ......... .134
Power Sunshades on Rear Door
Windows ..................48
Rear Parking Camera ...........85
Refueling ................. .336
Fuel Filler Neck Access ....... .336
Remote Start System ...........37
Restarting the Vehicle ........ .402
Restraint System ..............65
Child Restraint Systems ........74
RKE (Remote Keyless Entry)
Transmitter .................24
Roadside Assistance Program .....17
Roll-Over Mitigation (ROM) ..... .276
Roll-Over Warning .............15
Roof Rails ................. .147
Safety
Child Restraint Systems ........74
Reporting Safety Defects .......12
Safety Net for Cargo Area ...... .144
Safety Tips ..................57
Scheduled Maintenance Service . . .364
Scheduled Service Plan
Scheduled Maintenance
Indicator ................ .364
Seat Belt ...................57
Automatic Locking Retractor (ALR)
Mode ....................63
Enhanced Seat Belt Use Reminder
System (SBR) ...............64Index
9 427