2019 MASERATI LEVANTE radio
[x] Cancel search: radioPage 86 of 436

Front Sensors - Warning Alerts
Front distance More than 50 in
(120 cm) 50-40 in
(120-101 cm) 40-24 in
(100-61 cm) 23.6-12.2 in
(60-31 cm) Less than 12 in
(30 cm)
Audible Alert None None Slow Fast Continuous
Arc in left and
right areas None 4 th
3 rd
2 nd
1 st
(inner most)
Light type None Solid Solid Flash Flash
Arc color - Green Amber Amber Red
Radio sound Active Active Mute Mute Mute
Rear Sensors - Warning Alerts
Rear
distance More than 78 in
(200 cm) 78-59.4 in
(200-151 cm) 60-40 in
(150-101 cm) 40-24 in
(100-61 cm) 23.6-12.2 in
(60-31 cm) Less than 12 in
(30 cm)
Audible
Alert None Single Slow Slow Fast Continuous
Arc in left
and right
areas None 5 th
4 th
3 rd
2 nd
1 st
(inner most)
Light type None Solid Solid Solid Flash Flash
Arc color – Green Amber Amber Amber Red
Radio sound Active Mute Mute Mute Mute Mute
NOTE:
• Maserati reserves the right to change specifications without prior notification.
• Park Assist will turn off the front park assist audible alert (chime) after approximately 4 seconds when an obstacle has
been detected, the vehicle is stationary, and brake pedal is applied.Before Starting
2
82
Page 88 of 436

Cleaning the Park Assist
Sensors When cleaning the sensors, take
special care not to scratch or damage
them; therefore, do not use dry, rough
or hard cloths.
The sensors must be washed with clean
water, possibly adding car shampoo.
Should you need to repaint the
bumper or in case of paint touch-ups
in the sensor area, please contact
exclusively the Authorized Maserati
Dealer . Incorrect paint application
could affect the parking sensors
operation.
Park Assist System Usage
Precautions NOTE:
• Jackhammers, large trucks, and other
vibrations could affect the
performance of Park Assist.
• Objects such as bicycle carriers, trailer
hitches, etc., must not be placed
within 12 in (30 cm) from the rear
bumper while driving the vehicle.
Failure to do so can result in the
system misinterpreting a close object
as a sensor problem, causing the
service Park Assist message to be
displayed in the instrument cluster. CAUTION!
• Park Assist is only a parking aid and
it is unable to recognize every
obstacle, including small obstacles.
Parking curbs might only be
temporarily detected or not detected
at all. Obstacles located above or
below the sensors will not be
detected when they are in close
proximity.
• The vehicle must be driven slowly
when using Park Assist in order to be
able to stop in time when an
obstacle is detected. When backing
up, it is recommended that the driver
looks over his/her shoulder when
using Park Assist.
WARNING!
Drivers must be careful when backing
up even when using the Park Assist
system. Always check carefully behind
your vehicle, look behind you, and be
sure to check for pedestrians, animals,
other vehicles, obstructions, and blind
spots before backing up. You are
responsible for safety and must
continue to pay attention to your surroundings. Failure to do so can
result in serious injury or death.
Park Assist Volume The volume of the acoustic signal
emitted by the front and rear parking
sensors is set to the medium level.
Three different levels of volume can be
selected via the submenu “Safety &
Driving Assistant” from the MTC+
System.
Low level is useful in certain conditions
when the parking sensor acoustic
signal keeps coming on although there
is no actual collision hazard. This may
typically occur when driving in a queue
or when the vehicle is overtaken by
motorcycles or other vehicles on one
or both sides in a queue of traffic.
When you set the volume, only the
parking sensor acoustic signal will be
affected. The radio or any other
devices connected to the vehicle sound
system will not be affected.
Refer to chapter “MTC+ Settings” in
section “Dashboard Instruments and
Controls” for further information.
Operation with a Trailer The operation of the rear sensors is
automatically deactivated when the
trailer's electric plug is inserted in theBefore Starting
2
84
Page 103 of 436
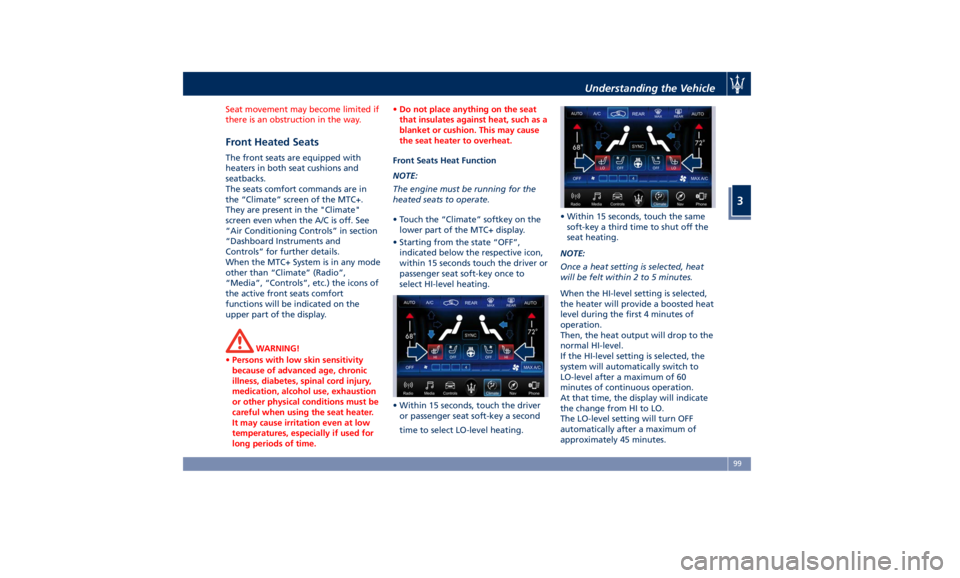
Seat movement may become limited if
there is an obstruction in the way.
Front Heated Seats The front seats are equipped with
heaters in both seat cushions and
seatbacks.
The seats comfort commands are in
the “Climate” screen of the MTC+.
They are present in the "Climate"
screen even when the A/C is off. See
“Air Conditioning Controls” in section
“Dashboard Instruments and
Controls” for further details.
When the MTC+ System is in any mode
other than “Climate” (Radio”,
“Media”, “Controls”, etc.) the icons of
the active front seats comfort
functions will be indicated on the
upper part of the display.
WARNING!
• Persons with low skin sensitivity
because of advanced age, chronic
illness, diabetes, spinal cord injury,
medication, alcohol use, exhaustion
or other physical conditions must be
careful when using the seat heater.
It may cause irritation even at low
temperatures, especially if used for
long periods of time. • Do not place anything on the seat
that insulates against heat, such as a
blanket or cushion. This may cause
the seat heater to overheat.
Front Seats Heat Function
NOTE:
The
engine must be
running for the
heated seats to operate.
• Touch the “Climate” softkey on the
lower part of the MTC+ display.
• Starting from the state “OFF”,
indicated below the respective icon,
within 15 seconds touch the driver or
passenger seat soft-key once to
select HI-level heating.
• Within 15 seconds, touch the driver
or passenger seat soft-key a second
time to select LO-level heating. • Within 15 seconds, touch the same
soft-key a third time to shut off the
seat heating.
NOTE:
Once a heat setting is selected, heat
will be felt within 2 to 5 minutes.
When the HI-level setting is selected,
the heater will provide a boosted heat
level during the first 4 minutes of
operation.
Then, the heat output will drop to the
normal HI-level.
If the HI-level setting is selected, the
system will automatically switch to
LO-level after a maximum of 60
minutes of continuous operation.
At that time, the display will indicate
the change from HI to LO.
The LO-level setting will turn OFF
automatically after a maximum of
approximately 45 minutes.Understanding the Vehicle
3
99
Page 104 of 436
Front Ventilated Seats
(optional) To enhance occupants comfort by high
external temperatures, both the driver
and passenger seats, on request, can
be ventilated.
Small fans are located in the seat
cushion and seatback, they draw air
from the seat surface through fine
perforations in the seat cover to help
keep the driver and front passenger
cooler when the temperature is high.
The seats comfort commands are in
the “Climate” screen of the MTC+.
They are present in the “Climate”
screen even when the A/C is off. See
“Air Conditioning Controls” in section
“Dashboard Instruments and Controls”
for further details.
When the MTC+ System is in any mode
other than “Climate” (Radio”,
“Media”, “Controls”, etc.) the icons of
the active front seats comfort
functions will be indicated on the
upper part of the display.
Front Ventilated Seats Function
NOTE:
The engine must be running for the
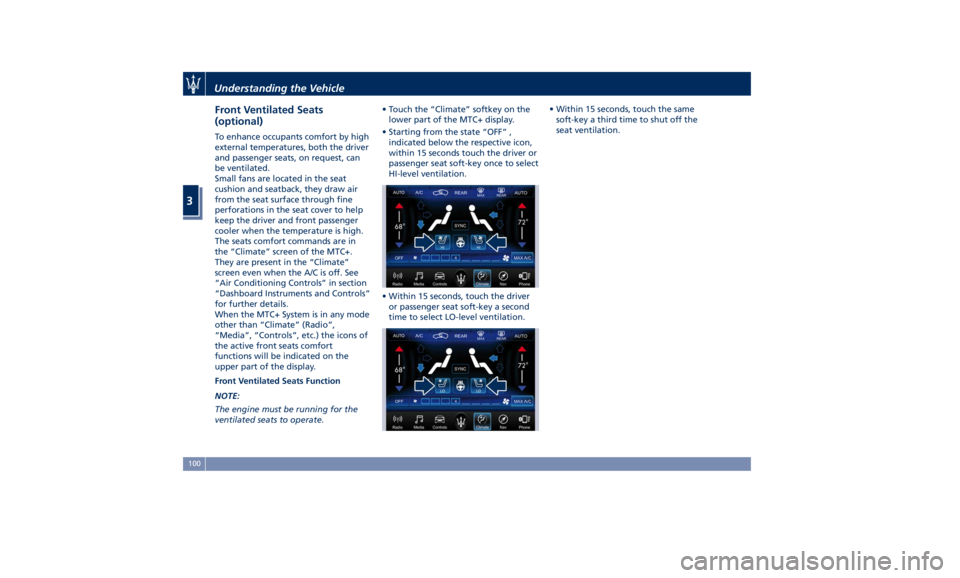
ventilated seats to operate. • Touch the “Climate” softkey on the
lower part of the MTC+ display.
• Starting from the state “OFF” ,
indicated below the respective icon,
within 15 seconds touch the driver or
passenger seat soft-key once to select
HI-level ventilation.
• Within 15 seconds, touch the driver
or passenger seat soft-key a second
time to select LO-level ventilation. • Within 15 seconds, touch the same
soft-key a third time to shut off the
seat ventilation.
Understanding the Vehicle
3
100
Page 105 of 436
Driver Memory Seat This feature allows the driver to store
up to two different memory profiles
for easy recall through a memory
switch. Each memory profile contains
desired position settings for the driver
seat, external side mirrors, adjustable
pedals (optional), and power tilt and
telescopic steering column and a set of
programmed radio stations.
Your key fob RKE transmitter can also
be set to recall the same positions by
pressing the
button.
NOTE:
• Only one key fob RKE transmitter
can be linked to each of the memory
positions.
• “Passive Entry” door handles cannot
be linked to the memory function.
Use either the memory recall switch
or the key fob RKE transmitter (if
linked to the memory feature) to
recall memory positions 1 or 2.
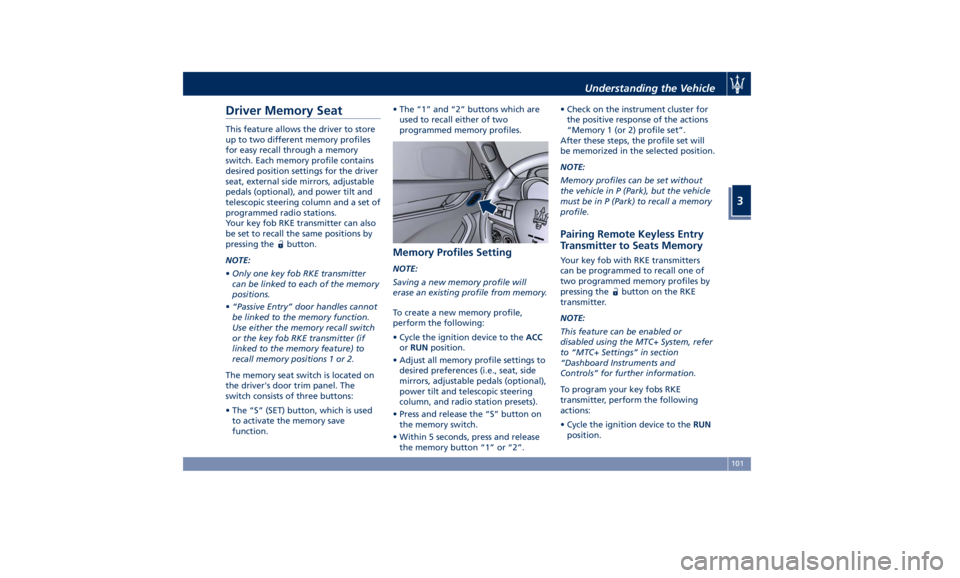
The memory seat switch is located on
the driver's door trim panel. The
switch consists of three buttons:
• The “S” (SET) button, which is used
to activate the memory save
function. • The “1” and “2” buttons which are
used to recall either of two
programmed memory profiles.
Memory Profiles Setting NOTE:
Saving a new memory profile will
erase an existing profile from memory.
To create a new memory profile,
perform the following:
• Cycle the ignition device to the ACC
or RUN position.
• Adjust all memory profile settings to
desired preferences (i.e., seat, side
mirrors, adjustable pedals (optional),
power tilt and telescopic steering
column, and radio station presets).
• Press and release the “S” button on
the memory switch.
• Within 5 seconds, press and release
the memory button “1” or “2”. • Check on the instrument cluster for
the positive response of the actions
“Memory 1 (or 2) profile set”.
After these steps, the profile set will
be memorized in the selected position.
NOTE:
Memory profiles can be set without
the vehicle in P (Park), but the vehicle
must be in P (Park) to recall a memory
profile.
Pairing Remote Keyless Entry
Transmitter to Seats Memory Your key fob with RKE transmitters
can be programmed to recall one of
two programmed memory profiles by
pressing the
button on the RKE
transmitter.
NOTE:
This feature can be enabled or
disabled using the MTC+ System, refer
to “MTC+ Settings” in section
“Dashboard Instruments and
Controls” for further information.
To program your key fobs RKE
transmitter, perform the following
actions:
• Cycle the ignition device to the RUN
position.Understanding the Vehicle
3
101
Page 113 of 436
The heated steering wheel can shut
off early or may not turn on when the
steering wheel is already warm.
The heating steering wheel command
is in the “Climate” screen of MTC+. It
is present in the “Climate” screen even
when the A/C is off. See “Air
Conditioning Controls” in section
“Dashboard Instruments and
Controls” for further details.
When the MTC+ System is in any mode
other than “ Climate” (“Radio”,
“Media”, “Controls”, etc.) the icon of
the heated steering wheel will be
indicated on the upper part of the
display.
NOTE:
The engine must be running for the
heated steering wheel to operate.
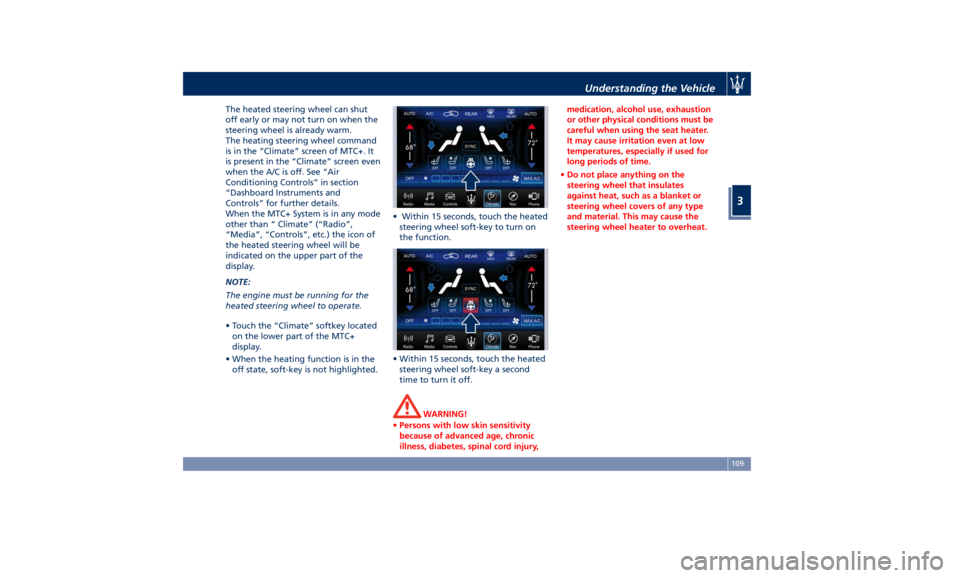
• Touch the “Climate” softkey located
on the lower part of the MTC+
display.
• When the heating function is in the
off state, soft-key is not highlighted. • Within 15 seconds, touch the heated
steering wheel soft-key to turn on
the function.
• Within 15 seconds, touch the heated
steering wheel soft-key a second
time to turn it off.
WARNING!
• Persons with low skin sensitivity
because of advanced age, chronic
illness, diabetes, spinal cord injury, medication, alcohol use, exhaustion
or other physical conditions must be
careful when using the seat heater.
It may cause irritation even at low
temperatures, especially if used for
long periods of time.
• Do not place anything on the
steering wheel that insulates
against heat, such as a blanket or
steering wheel covers of any type
and material. This may cause the
steering wheel heater to overheat.Understanding the Vehicle
3
109
Page 155 of 436
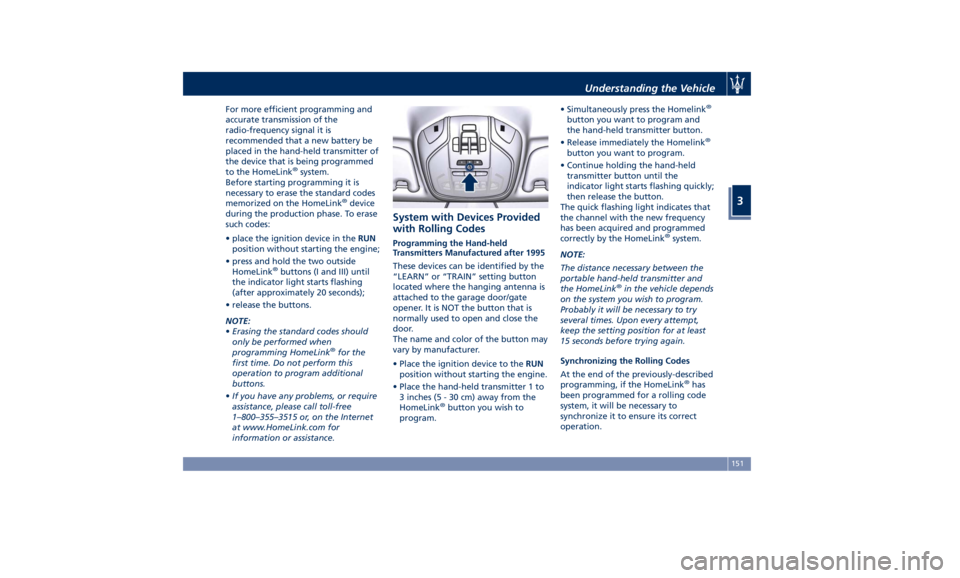
For more efficient programming and
accurate transmission of the
radio-frequency signal it is
recommended that a new battery be
placed in the hand-held transmitter of
the device that is being programmed
to the HomeLink ®
system.
Before starting programming it is
necessary to erase the standard codes
memorized on the HomeLink ®
device
during the production phase. To erase
such codes:
• place the ignition device in the RUN
position without starting the engine;
• press and hold the two outside
HomeLink ®
buttons (I and III) until
the indicator light starts flashing
(after approximately 20 seconds);
• release the buttons.
NOTE:
• Erasing the standard codes should
only be performed when
programming HomeLink ®
for the
first time. Do not perform this
operation to program additional
buttons.
• If you have any problems, or require
assistance, please call toll-free
1–800–355–3515 or, on the Internet
at www.HomeLink.com for
information or assistance. System with Devices Provided
with Rolling Codes Programming the Hand-held
Transmitters Manufactured after 1995
These devices can be identified by the
“LEARN” or “TRAIN” setting button
located where the hanging antenna is
attached to the garage door/gate
opener. It is NOT the button that is
normally used to open and close the
door.
The name and color of the button may
vary by manufacturer.
• Place the ignition device to the RUN
position without starting the engine.
• Place the hand-held transmitter 1 to
3 inches (5 - 30 cm) away from the
HomeLink ®
button you wish to
program. • Simultaneously press the Homelink ®
button you want to program and
the hand-held transmitter button.
• Release immediately the Homelink ®
button you want to program.
• Continue holding the hand-held
transmitter button until the
indicator light starts flashing quickly;
then release the button.
The quick flashing light indicates that
the channel with the new frequency
has been acquired and programmed
correctly by the HomeLink ®
system.
NOTE:
The distance necessary between the
portable hand-held transmitter and
the HomeLink ®
in the vehicle depends
on the system you wish to program.
Probably it will be necessary to try
several times. Upon every attempt,
keep the setting position for at least
15 seconds before trying again.
Synchronizing the Rolling Codes
At the end of the previously-described
programming, if the HomeLink ®
has
been programmed for a rolling code
system, it will be necessary to
synchronize it to ensure its correct
operation.Understanding the Vehicle
3
151
Page 157 of 436

hand-held transmitters” from second
step and follow all remaining steps.
Using HomeLink ®
To operate, press and release the
programmed HomeLink ®
button.
Activation will now occur for the
programmed device (i.e., garage door
opener, gate operator, security system,
entry door lock, home/office lighting,
etc.). The hand-held transmitter of the
device may also be used at any time.
Security It is advisable to erase all channels
before you sell or turn in your vehicle.
To erase the channels press and hold
the two outside HomeLink ®
buttons (I
and III) until the indicator light starts
flashing (after approximately 20
seconds).
The HomeLink ®
Universal Transceiver
is disabled when the vehicle security
alarm is active (see “Vehicle security
alarm” in section “Before Starting”).
Troubleshooting Tips If you are having trouble while
programming HomeLink ®
, here are
some of the most common solutions:
• Replace the battery in the original
hand-held transmitter. • Press the LEARN button on the
garage door opener to complete the
training for a rolling code.
• Did you unplug the device for
programming and forgot to plug it
back in?
If you have any problems, or require
assistance, please call toll-free
1–800–355–3515 or, on the Internet at
www.HomeLink.com for information
or assistance.
Radio Frequency Device -
Regulatory Information The “Regulatory Information” for all
the radio frequency and radar devices
can be consulted by accessing the
"Services" section on the website
www.maserati.com. Understanding the Vehicle
3
153