Page 78 of 296

Front Seats Seats and seat belts are part of the
Occupant Restraint System of the
vehicle. For further information, see
chapter “Occupant Restraint System”
in Section “Before Starting”.
WARNING!
Be sure everyone in your vehicle is in a
seat and using a seat belt properly.
Seat Adjustments The seats can only be adjusted with
the key in the ignition switch in MAR
(ON) position.
It is however possible, when the door
is closed, to operate the seat for
approx. 15 seconds after turning the
key to STOP (OFF) position and then
for other 15 seconds after the last
operation.
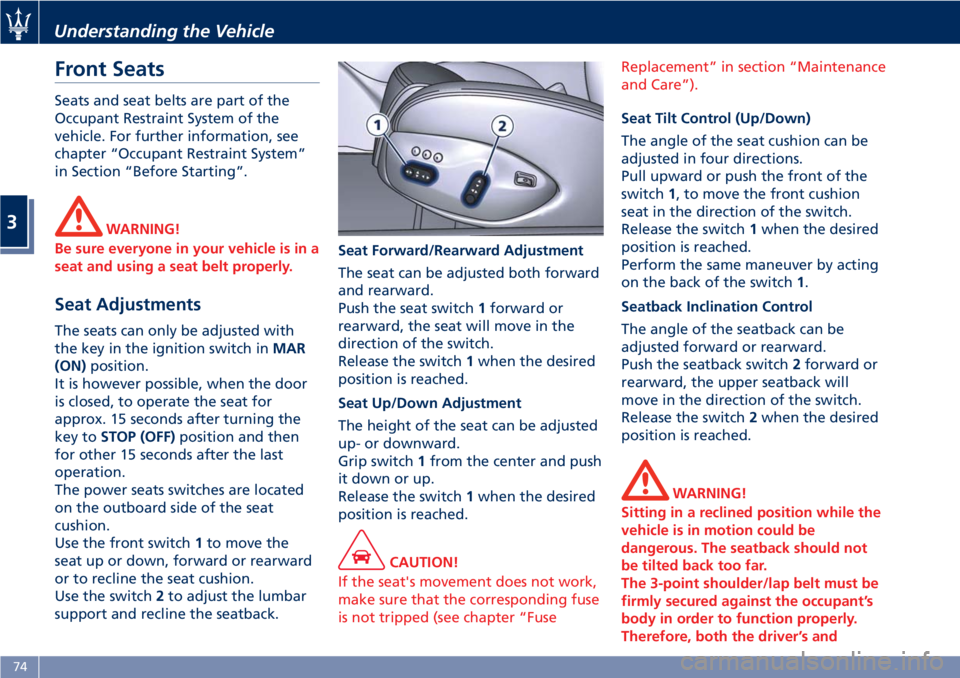
The power seats switches are located
on the outboard side of the seat
cushion.
Use the front switch 1 to move the
seat up or down, forward or rearward
or to recline the seat cushion.
Use the switch 2 to adjust the lumbar
support and recline the seatback. Seat Forward/Rearward Adjustment
The seat can be adjusted both forward
and rearward.
Push the seat switch 1 forward or
rearward, the seat will move in the
direction of the switch.
Release the switch 1 when the desired
position is reached.
Seat Up/Down Adjustment
The height of the seat can be adjusted
up- or downward.
Grip switch 1 from the center and push
it down or up.
Release the switch 1 when the desired
position is reached.
CAUTION!
If the seat's movement does not work,
make sure that the corresponding fuse
is not tripped (see chapter “Fuse Replacement” in section “Maintenance
and Care”).
Seat Tilt Control (Up/Down)
The
angle of the seat cushion can be
adjusted in four directions.
Pull upward or push the front of the
switch 1 , to move the front cushion
seat in the direction of the switch.
Release the switch 1 when the desired
position is reached.
Perform the same maneuver by acting
on the back of the switch 1 .
Seatback Inclination Control
The angle of the seatback can be
adjusted forward or rearward.
Push the seatback switch 2 forward or
rearward, the upper seatback will
move in the direction of the switch.
Release the switch 2 when the desired
position is reached.
WARNING!
Sitting in a reclined position while the
vehicle is in motion could be
dangerous. The seatback should not
be tilted back too far.
The 3-point shoulder/lap belt must be
firmly secured against the occupant’s
body in order to function properly.
Therefore, both the driver’s andUnderstanding the Vehicle
3
74
Page 81 of 296

• Once a heat setting is selected, heat
will be felt within 2 to 5 minutes.
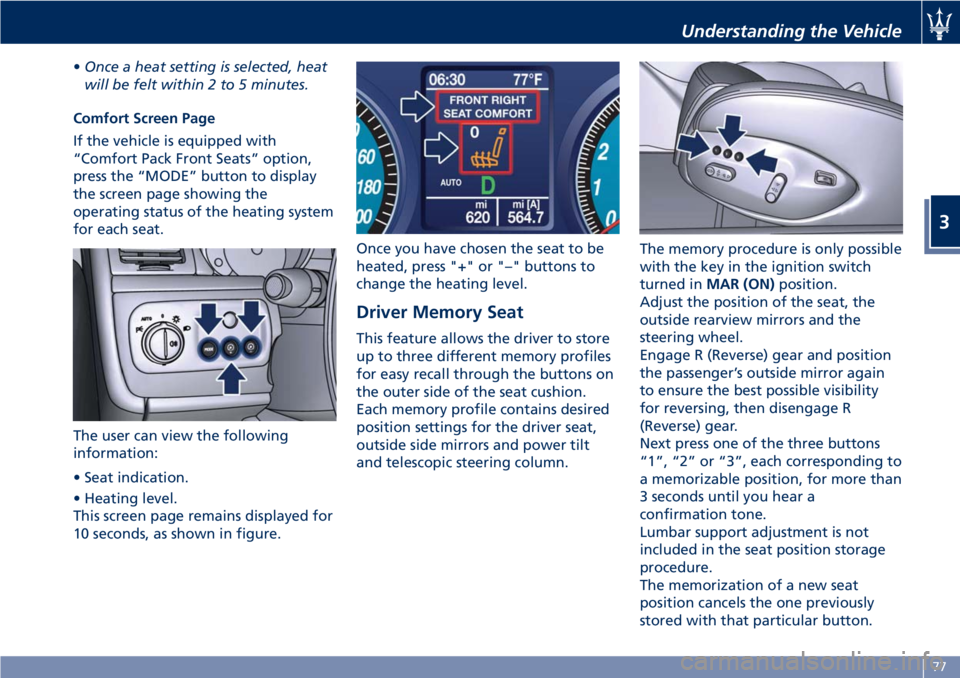
Comfort Screen Page
If the vehicle is equipped with
“Comfort Pack Front Seats” option,
press the “MODE” button to display
the screen page showing the
operating status of the heating system
for each seat.
The user can view the following
information:
• Seat indication.
• Heating level.
This screen page remains displayed for
10 seconds, as shown in figure. Once you have chosen the seat to be
heated, press "+" or "–" buttons to
change the heating level.
Driver Memory Seat This feature allows the driver to store
up to three different memory profiles
for easy recall through the buttons on
the outer side of the seat cushion.
Each memory profile contains desired
position settings for the driver seat,
outside side mirrors and power tilt
and telescopic steering column. The memory procedure is only possible
with the key in the ignition switch
turned in MAR (ON) position.
Adjust the position of the seat, the
outside rearview mirrors and the
steering wheel.
Engage R (Reverse) gear and position
the passenger’s outside mirror again
to ensure the best possible visibility
for reversing, then disengage R
(Reverse) gear.
Next press one of the three buttons
“1”, “2” or “3”, each corresponding to
a memorizable position, for more than
3 seconds until you hear a
confirmation tone.
Lumbar support adjustment is not
included in the seat position storage
procedure.
The memorization of a new seat
position cancels the one previously
stored with that particular button.Understanding the Vehicle
3
77
Page 83 of 296

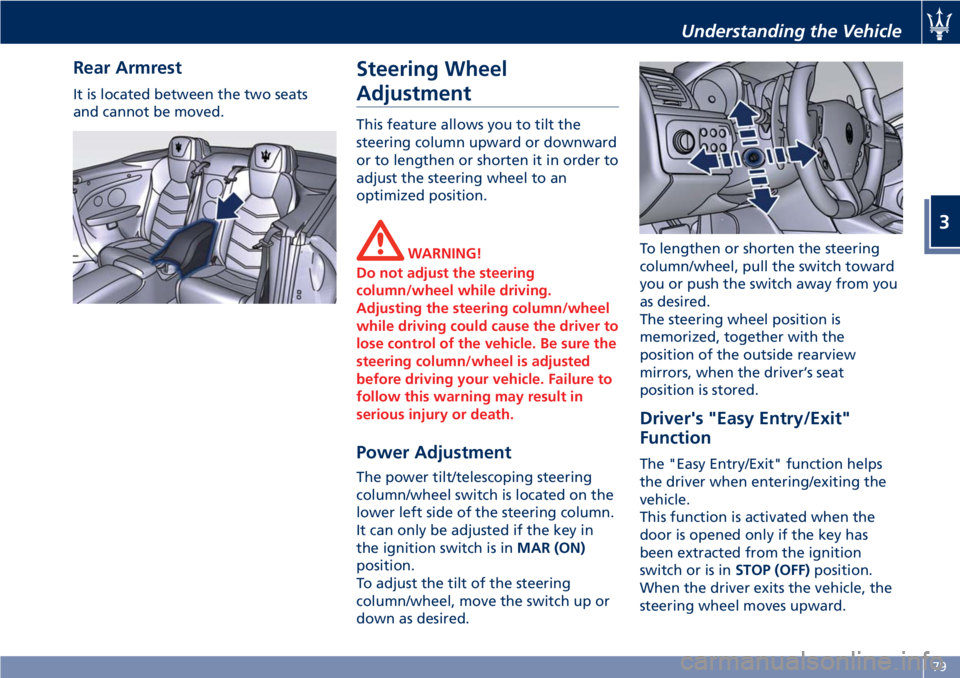
Rear Armrest It is located between the two seats
and cannot be moved.
Steering Wheel
Adjustment This feature allows you to tilt the
steering column upward or downward
or to lengthen or shorten it in order to
adjust the steering wheel to an
optimized position.
WARNING!
Do not adjust the steering
column/wheel while driving.
Adjusting the steering column/wheel
while driving could cause the driver to
lose control of the vehicle. Be sure the
steering column/wheel is adjusted
before driving your vehicle. Failure to
follow this warning may result in
serious injury or death.
Power Adjustment The power tilt/telescoping steering
column/wheel switch is located on the
lower left side of the steering column.
It can only be adjusted if the key in
the ignition switch is in MAR (ON)
position.
To adjust the tilt of the steering
column/wheel, move the switch up or
down as desired. To lengthen or shorten the steering
column/wheel, pull the switch toward
you or push the switch away from you
as desired.
The steering wheel position is
memorized, together with the
position of the outside rearview
mirrors, when the driver’s seat
position is stored.
Driver's "Easy Entry/Exit"
Function The "Easy Entry/Exit" function helps
the driver when entering/exiting the
vehicle.
This function is activated when the
door is opened only if the key has
been extracted from the ignition
switch or is in STOP (OFF) position.
When the driver exits the vehicle, the
steering wheel moves upward.Understanding the Vehicle
3
79