2019 MASERATI GRANTURISMO CONVERTIBLE warning light
[x] Cancel search: warning lightPage 66 of 296

the distance (maximum/average/
minimum) and the position
(front/rear/central/side) of the obstacle
detected.
The color represents the distance,
while the field represents the position.
The green color represents the
maximum distance detected, the
yellow color the medium distance and
the red color the minimum one. The
rear sensors are not shown in the
image on the instrument cluster
display if only the front sensors are
active.
WARNING!
For the system to operate correctly the
sensors positioned on the bumper
must be kept clean (remove any mud,
dirt, snow or ice). Sensor Range The sensors allow the system to
monitor the front and rear of the
vehicle; they are positioned so as to
monitor the central and lateral zones
at the front and at the rear of the
vehicle.
In the event of an obstacle located in a
central area, this will be detected at
distances of less than 35 in (0,9 m) at
the front and 59 in (1,50 m) at the rear,
depending on the type of obstacle and
its dimensions.
If the obstacle is located in a lateral
position, it will be detected at
distances of less than 31 in (0,8 m).
Failure Indicators The system ECU checks all the
components every time R (Reverse)
gear is engaged.
In the event that the parking sensors
fail, the relative
warning light and
message illuminate on the instrument
cluster display.
In the event of a failure signal, stop
the vehicle and turn the key in the
ignition switch to STOP (OFF) position.
Then try cleaning the sensors or
moving the vehicle away from any
possible ultrasound sources (e.g.
pneumatic truck brakes or pneumatic hammers) and rotate the key to the
MAR (ON) position. So, if the
operating failure cause has been
eliminated, system full operation will
be recovered. If however, the failure
beep continues, contact an Authorized
Maserati Dealer to have the system
checked.
Cleaning the Park Assist
Sensors When cleaning the sensors, take
special care not to scratch or damage
them; therefore, do not use dry, rough
or hard cloths.
The sensors must be washed with clean
water, possibly adding car shampoo.
Should you need to repaint the
bumper or in case of paint touch-ups
in the sensor area, please contact
exclusively the Authorized Maserati
Dealer . Incorrect paint application
could affect the parking sensors
operation.
Park Assist System Usage
Precautions NOTE:
• Jackhammers, large trucks, and other
vibrations could affect the
performance of Park Assist.Before Starting
2
62
Page 70 of 296

Vehicle Safety Checks Seat Belts
• Inspect the belt system periodically,
checking for cuts, frays, and loose
parts. Damaged parts must be
replaced immediately.
• Do not disassemble or modify the
system.
• If the belt has been sharply pulled,
for example as the result of an
accident, the safety belt, together
with the anchoring devices, the
anchoring device mounting screws
and the pretensioner must be
completely replaced. Even if the belt
does not present any exterior signs
of wear or damage, it may have lost
its restraining properties.
Air bag Warning Light
The
warning light should illuminate
and remain lit for a few seconds bulb
checking when the key in the ignition
switch is turned in MAR (ON) position
(see “Supplemental Restraint System
(SRS) — Air bags” chapter in this
section).
•Ifthe
warning light does not
illuminate while starting, contact an
Authorized Maserati Dealer . •Ifthe
warning light stays on,
flickers, or comes on while driving,
have the system checked by an
Authorized Maserati Dealer .
Defroster
Check operation by selecting the
defrost mode and place the fan system
on high speed (see “Air Conditioning
Controls” chapter in section
“Dashboard Instruments and
Controls”).
You should be able to feel the air
directed against the windshield and
front side windows. Contact an
Authorized Maserati Dealer for service
if your defroster is inoperable.
Floor Mat
Always use floor mats designed to fit
the footwell of your vehicle. Use only
floor mats that leave the pedal area
unobstructed and that are firmly
secured so that they cannot slip out of
position and interfere with the pedals
or impair safe operation of your
vehicle.
NOTE:
The Authorized Maserati Dealer can
provide you with any information
about the available Maserati floor
mats included in the “Genuine
Accessories” range. WARNING!
Pedals that cannot move freely can
cause loss of vehicle control and
increase the risk of serious personal
injury.
• Always make sure that floor mats
are properly attached to the proper
fasteners.
• Never place or install floor mats or
other floor coverings in the vehicle
that cannot be properly secured to
prevent them from moving and
interfering with the pedals.
• Never put floor mats or other floor
coverings on top of already installed
floor mats. Additional floor mats and
other coverings will reduce the size
of the pedal area and interfere with
the pedals.
• Check mounting of mats on a regular
basis. Always properly reinstall and
secure floor mats that have been
removed for cleaning.
• Always make sure that objects
cannot fall into the driver footwell
while the vehicle is moving. Objects
can become trapped under the brake
pedal and accelerator pedal causing
a loss of vehicle control.Before Starting
2
66
Page 71 of 296

• Mounting posts must be properly
installed, if not equipped from the
factory. Failure to properly follow
floor mat installation or mounting
can cause interference with the
brake pedal and accelerator pedal
operation causing loss of control of
the vehicle.
Tires
•
Examine tires for excessive tread
wear and uneven wear patterns.
• Check for stones, nails, glass, or
other objects lodged in the tread or
sidewall.
• Inspect the tread for cuts and cracks.
• Inspect sidewalls for cuts, cracks and
bulges.
• Check the wheel nuts for tightness.
• Check the tires (see “Tire Inflation
Pressure” chapter in section
“Features and Specifications”) for
proper cold inflation pressure.
Lights and Indicator Lights
• Have someone observe the
operation of exterior lights while
you operate the controls (see
“Lights” chapter in section
“Understanding the Vehicle”).
• Check turn signal and high beam
indicator lights on the instrument cluster (see “Instrument Cluster”
chapter in section “Dashboard
Instruments and Controls”).
Door Latches
• Check for positive closing, latching,
and locking of doors and trunk lid
(see chapter “Doors” and “Open and
Close the Trunk Lid” in this section).
Fluid Leaks
• Check area under vehicle after
overnight parking for recent fluid
leaks (oil, fuel, etc.).
• If gasoline fumes are detected or
fluid leaks are suspected, contact an
Authorized Maserati Dealer .
WARNING!
California Proposition 65
Operating, servicing and maintaining
a passenger vehicle or off-road vehicle
can expose you to chemicals including
such as, engine exhaust, carbon
monoxide, phthalates and lead, that
which are know to the State of
California to cause cancer and birth
defects or other reproductive harm. To
minimize exposure, avoid breathing
exhaust, do not idle the engine except
as necessary, service your vehicle in a
well-ventilated area and wear gloves or wash your hands frequently when
servicing your vehicle. For more
information go to:
www.P65Warnings.ca.gov/passenger-
vehicle
Before Starting
2
67
Page 79 of 296

passenger’s reclining seatbacks must
always be in an upright position while
the vehicle is in motion; otherwise the
3-point shoulder/lap belt would not
remain firmly positioned against the
occupant’s body. Serious injury could
result!
Power Lumbar
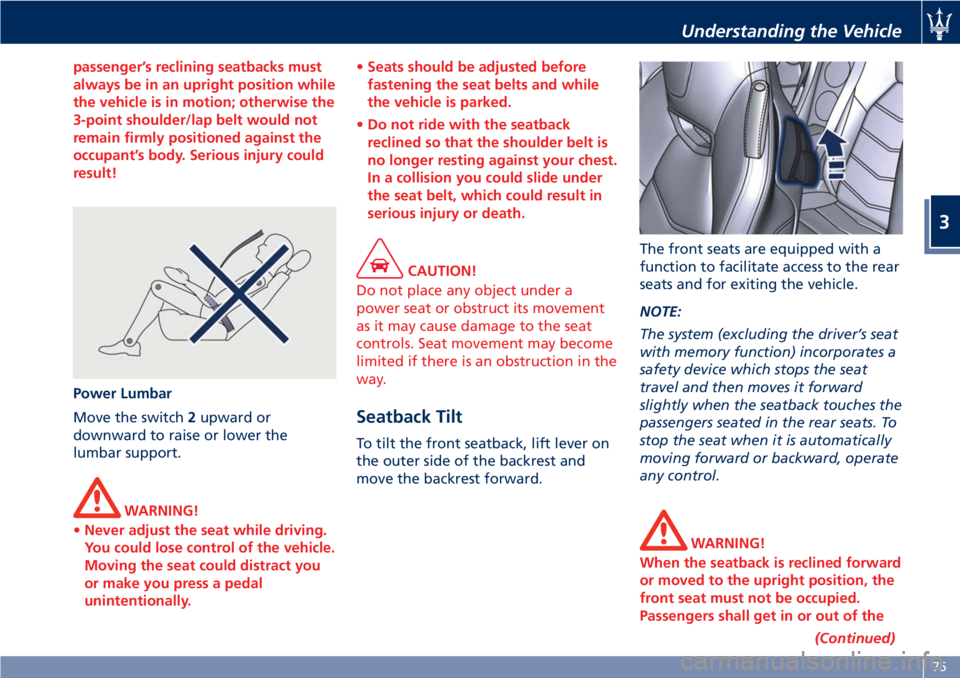
Move
the switch 2 upward or
downward to raise or lower the
lumbar support.
WARNING!
• Never adjust the seat while driving.
You could lose control of the vehicle.
Moving the seat could distract you
or make you press a pedal
unintentionally. • Seats should be adjusted before
fastening the seat belts and while
the vehicle is parked.
• Do not ride with the seatback
reclined so that the shoulder belt is
no longer resting against your chest.
In a collision you could slide under
the seat belt, which could result in
serious injury or death.
CAUTION!
Do not place any object under a
power seat or obstruct its movement
as it may cause damage to the seat
controls. Seat movement may become
limited if there is an obstruction in the
way.
Seatback Tilt To tilt the front seatback, lift lever on
the outer side of the backrest and
move the backrest forward. The front seats are equipped with a
function to facilitate access to the rear
seats and for exiting the vehicle.
NOTE:
The system (excluding the driver’s seat
with memory function) incorporates a
safety device which stops the seat
travel and then moves it forward
slightly when the seatback touches the
passengers seated in the rear seats. To
stop the seat when it is automatically
moving forward or backward, operate
any control.
WARNING!
When the seatback is reclined forward
or moved to the upright position, the
front seat must not be occupied.
Passengers shall get in or out of the
(Continued)Understanding the Vehicle
3
75
Page 80 of 296

(Continued)
rear seats only when the front seat is
stopped. Make sure that passengers in
the rear seats (especially children) do
not touch the seat or any of it's
components when it's moving.
Comfort Pack Front Seats This includes:
• heating of the front seats;
• driver seat, steering wheel and
outside rearview mirrors memory
position (see paragraph "Driver
Memory Seat" in this chapter).
Front Heated Seats The front seats are equipped with
heaters in both seat cushions and
seatbacks.
WARNING!
• Persons with low skin sensitivity
because of advanced age, chronic
illness, diabetes, spinal cord injury,
medication, alcohol use, exhaustion
or other physical conditions must be
careful when using the seat heater. It
may cause irritation even at low
temperatures, especially if used for
long periods of time.
• Do not place anything on the seat
that insulates against heat, such as a
blanket or cushion. This may cause
the seat heater to overheat. NOTE:
Seat
heating also works with engine
off and key in ignition switch in ACC
or MAR (ON) position. To avoid
discharging the battery, it is
recommended to activate the feature
with engine running.
The heating is activated by turning
control on the outer side of the seat
cushion.
When this function is active for one or
more seats, the relative warning light
will illuminate on the display. Using
this control, heating can be adjusted
to 3 different levels.
NOTE:
• Turn off the heating system when
not required, to prevent unnecessary
power wastage.Understanding the Vehicle
3
76
Page 85 of 296

WARNING!
Vehicles and other objects seen in the
outside convex mirror will look
smaller and farther away than they
really are. Relying too much on your
passenger side convex mirror could
cause you to collide with another
vehicle or object. Use the inside mirror
to judge the size or distance of a
vehicle seen in the outside convex
mirror.
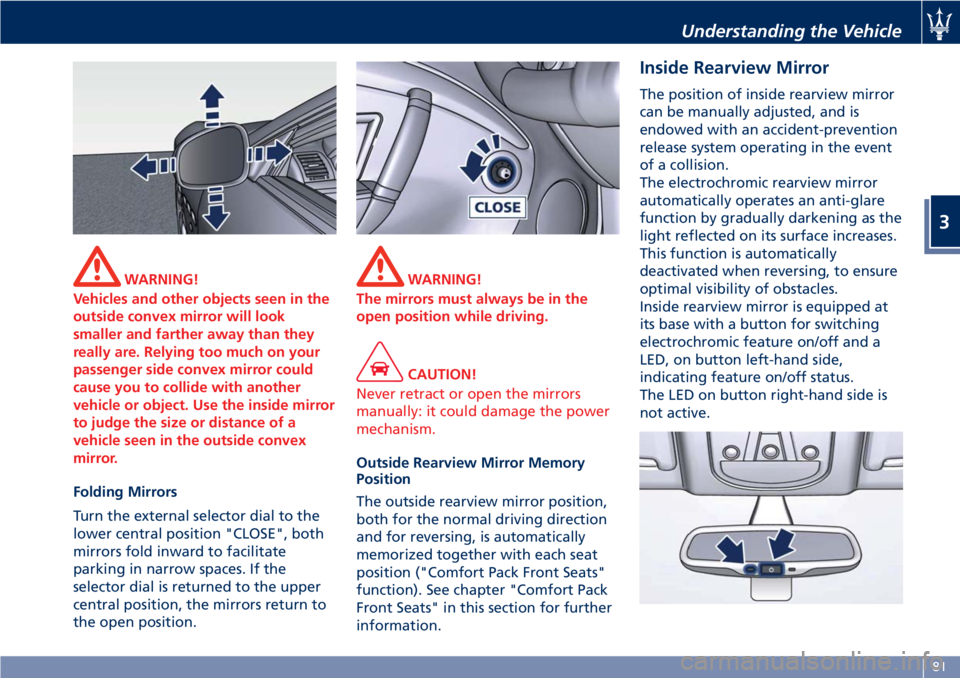
Folding Mirrors
T
urn the external selector dial to the
lower central position "CLOSE", both
mirrors fold inward to facilitate
parking in narrow spaces. If the
selector dial is returned to the upper
central position, the mirrors return to
the open position. WARNING!
The mirrors must always be in the
open position while driving.
CAUTION!
Never retract or open the mirrors
manually: it could damage the power
mechanism.
Outside Rearview Mirror Memory
Position
The
outside rearview mirror position,
both for the normal driving direction
and for reversing, is automatically
memorized together with each seat
position ("Comfort Pack Front Seats"
function). See chapter "Comfort Pack
Front Seats" in this section for further
information. Inside Rearview Mirror The position of inside rearview mirror
can be manually adjusted, and is
endowed with an accident-prevention
release system operating in the event
of a collision.
The electrochromic rearview mirror
automatically operates an anti-glare
function by gradually darkening as the
light reflected on its surface increases.
This function is automatically
deactivated when reversing, to ensure
optimal visibility of obstacles.
Inside rearview mirror is equipped at
its base with a button for switching
electrochromic feature on/off and a
LED, on button left-hand side,
indicating feature on/off status.
The LED on button right-hand side is
not active.Understanding the Vehicle
3
81
Page 88 of 296

Adaptive Bi-Xenon Headlights The gas-discharge (xenon) headlights
operate with an electric arc saturated
with Xenon gas under pressure,
instead of the incandescent filament.
The light produced is assuredly higher
compared to traditional light bulbs, in
terms of quality (brighter light) as well
as of the span and positioning of the
illuminated area.
In addition, the headlights are
equipped with an ALC system
(Adaptive Light Control).
This system combines the light beam
with the steering angle to assure
better visibility of the road surface
when driving in a curve, steering or in
the event of road deviations.
The advantages offered by improved
lighting system are perceived
especially in case of bad weather, fog
and/or insufficient road indications
providing broader illumination of the
side zones, which are normally left in
the dark, and for highway driving (see
comparison rendered below).
This surely increases driving safety as it
offers less eye strain and increased
orientation for the driver and better
detection of other persons on the road
sides (pedestrians, bicycle riders and
motorcycle drivers). The electric arc requires very high
voltage for activation, but afterward
power is supplied at a lower voltage.
The headlights reach maximum
brightness about 0,5 seconds after
being turned on.
The strong light produced by this type
of headlight requires the use of an
automatic system to keep the position
of the headlights constant and to
prevent dazzling approaching cars, in
the case of braking, acceleration or
load transport.
WARNING!
If xenon headlamp replacement is
necessary, contact the Authorized
Maserati Dealer only: DANGER - RISK
OF ELECTRICAL SHOCK.
Parking Lights The parking lights only work with the
key in the ignition switch turned to
STOP (OFF) or ACC position, or with
the key removed.
They are activated by turning the light
switch to
position.
It is harder to turn the switch to
position than to the other
positions. This is to avoid activating the parking lights unintentionally and
wasting power.
When the parking lights are on, the
warning light on the instrument
cluster illuminates.
With parking lights on, move down
left-hand multifunction lever to switch
on position lights on left-hand side,
and move it up to switch on only the
ones on right-hand side.
Automatic Headlights When the light switch is turned to
"AUTO" position and the key in the
ignition switch is in MAR (ON)
position, the position lights, low beam
lights and license plate lights turn on
and off automatically, depending on
the light outside.
NOTE:
The high beams can only be turned on
manually by pushing the left-hand
multifunction lever forward.
WARNING!
• If the low beams are activated, they
will come on automatically every
time the lights are turned on. You
are therefore advised to turn off the
high beams every time the twilightUnderstanding the Vehicle
3
84
Page 89 of 296

sensor deactivates the external
lights.
• In case of fog during the day,
position lights and low beam lights
are not turned on automatically. The
driver must always be ready to turn
the lights on manually, including
rear fog lights, if necessary.
• The driver is always responsible for
turning on the external lights,
depending on the light outside and
in compliance with the applicable
legislation in the country of use. The
automatic system for activating/
deactivating the external lights must
be considered an aid for the driver.
If necessary, turn the lights on and
off manually.
NOTE:
After
external lights turn on
automatically, driver can always
manually turn on rear fog lights.
When external lights turn off
automatically, rear fog lights will turn
off automatically too, if on. Upon the
following automatic switch-on driver
must manually turn on rear fog lights,
if necessary. Rear Fog Lights Press button on the light switch to
turn on the rear fog lights.
Fog lights only work when the low
beams are on by operating the light
switch in
(low beam) or "AUTO"
position.
The symbol on the button and the
dedicated indicator light in the
instrument cluster illuminate when
the lights are on.
WARNING!
Do not use the rear fog lights in
normal visibility conditions to avoid
dazzling vehicles behind.
Pressing again the
button will
deactivate the rear fog lights. Twilight Sensor This device consists of two sensors: a
global sensor, capable of measuring
the light intensity above and a
directional sensor, which measures the
light intensity in the vehicle’s traveling
direction, enabling it to recognize
tunnels and driveways.
You can adjust the sensing range of
the twilight sensor by means of the
MTC+, by selecting the “Settings”
menu and "Safety & Driving Assistant"
function (see chapter "MTC+ Settings"
in section "Dashboard instruments
and Controls").
In the event of a sensor failure, the
system will turn on the low beams and
the position lights, regardless of the
light outside, and a failure message
will appear on the instrument cluster
display.
The failure indication will be displayed
as long as the light switch is turned to
"AUTO" position.
In this case, we recommend that you
deactivate the automatic system and
turn on the external lights manually if
necessary; contact an Authorized
Maserati Dealer as soon as possible.Understanding the Vehicle
3
85