2019 LEXUS UX250H luggage
[x] Cancel search: luggagePage 357 of 476

3576-3. Do-it-yourself maintenance
6
Maintenance and care
1Pull the lever upwards and open the
deck board.
2
Unhook the string on the backside
of the deck board.
3
Attach the string to the luggage
cover hook on the back door. 4
Remove the Jack.
1
Unhook the rubber band.
2
Take out the jack.
When stowing the jack, close it by turning
the handle indicated by until it does not
move anymore, place the jack and fix it
with the rubber band.
1Chock the tires.
WARNING
●When lowering the vehicle, make sure
that there is no-one near the vehicle. If
there are people nearby, warn them
vocally before lowering.
Taking out the jack
Removing a tire
TireWheel chock positions
Front left-hand sideBehind the rear right-hand side tire
Front right-hand sideBehind the rear left-hand side tire
A
Page 362 of 476

3626-3. Do-it-yourself maintenance
more than 1 mile or 1.5 km, you will get an
accurate cold tire inflation pressure read-
ing.
●Always use a tire pressure gauge.
It is difficult to judge if a tire is properly
inflated based only on its appearance.
●It is normal for the tire inflation pressure
to be higher after driving as heat is gen-
erated in the tire. Do not reduce tire infla-
tion pressure after driving.
●Never exceed the vehicle capacity
weight.
Passengers and luggage weight should
be placed so that the vehicle is balanced.
WARNING
■Proper inflation is critical to save tire
performance
Keep your tires properly inflated.
If the tires are not properly inflated, the
following conditions may occur which
could lead to an accident resulting in
death or serious injury:
●Excessive wear
●Uneven wear
●Poor handling
●Possibility of blowouts resulting from
overheated tires
●Air leaking from between tire and
wheel
●Wheel deformation and/or tire dam-
age
●Greater possibility of tire damage
while driving (due to road hazards,
expansion joints, sharp edges in the
road, etc.)
NOTICE
■When inspecting and adjusting tire
inflation pressure
Be sure to put the tire valve caps back on.
If a valve cap is not installed, dirt or mois-
ture may get into the valve and cause an
air leak, resulting in decreased tire infla-
tion pressure.
Page 370 of 476

3706-3. Do-it-yourself maintenance
1Turn the power switch off.
2 Open the fuse box cover.
Engine compartment: type A fuse
box
Push the tab in and lift the lid off.
Engine compartment: type B fuse
box
Push the tab in and lift the lid off.
Left side instrument panel
Remove the lid.
Luggage compartment
Remove the 12-volt battery cover
( P.343) and push the tab in and lift the
lid off.
3 Remove the fuse.
Only type A fuse can be removed using the
pullout tool.
4Check if the fuse is blown.
Replace the blown fuse with a new fuse of
an appropriate amperage rating. The
amperage rating can be found on the fuse
box lid.
Checking and replacing
fuses
If any of the electrical components
do not operate, a fuse may have
blown. If this happens, check and
replace the fuses as necessary.
Checking and replacing fuses
Page 384 of 476

3847-2. Steps to take in an emergency
wheels, drivetrain, axles, steering and
brakes must be in good condition.
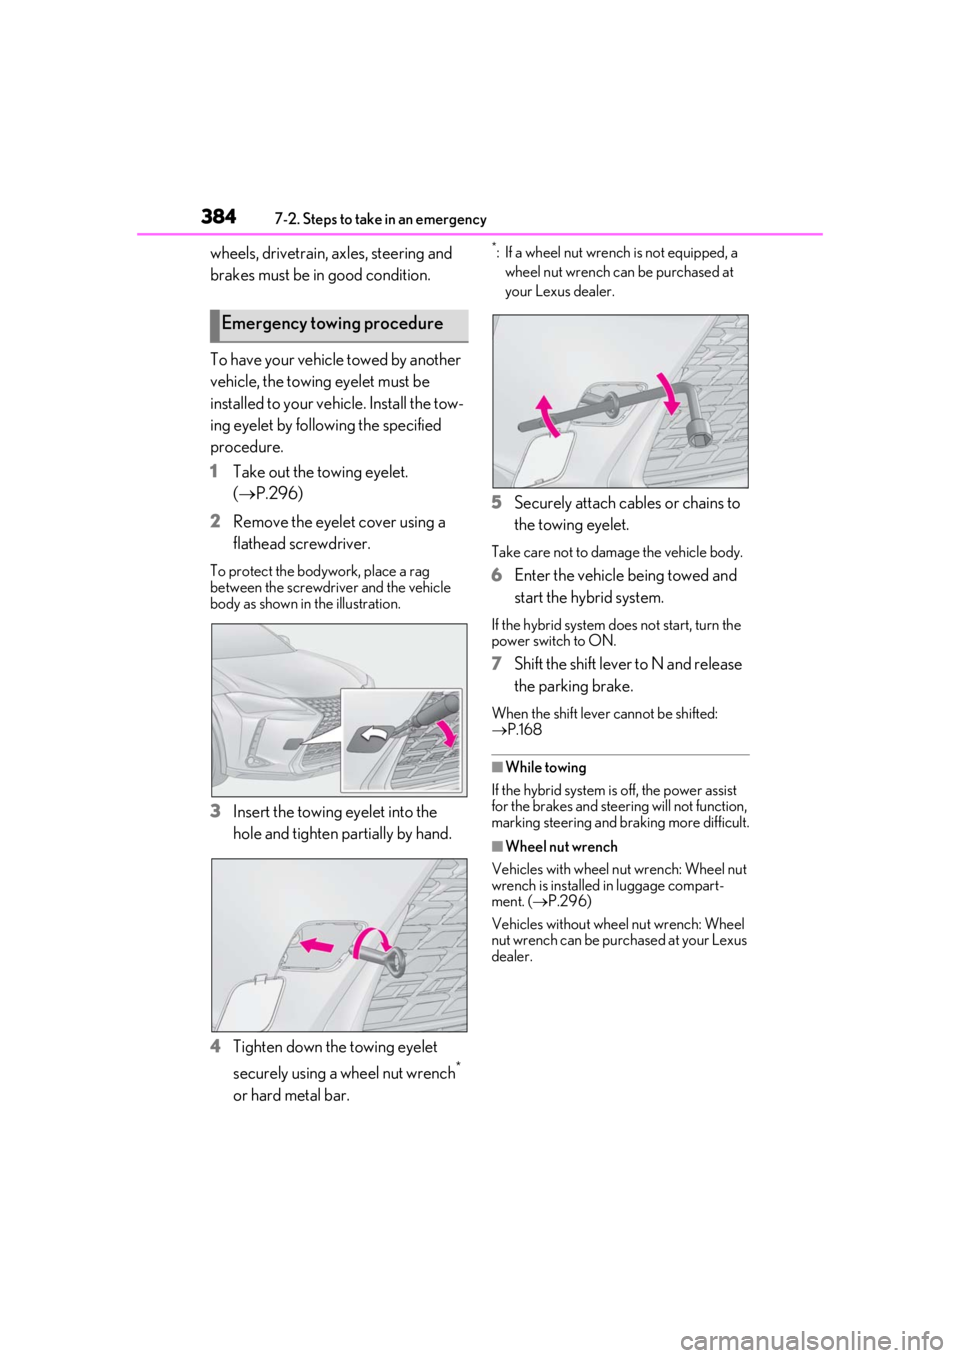
To have your vehicle towed by another
vehicle, the towing eyelet must be
installed to your vehicle. Install the tow-
ing eyelet by following the specified
procedure.
1 Take out the towing eyelet.
(P.296)
2 Remove the eyelet cover using a
flathead screwdriver.
To protect the bodywork, place a rag
between the screwdriver and the vehicle
body as shown in the illustration.
3Insert the towing eyelet into the
hole and tighten partially by hand.
4 Tighten down the towing eyelet
securely using a wheel nut wrench
*
or hard metal bar.
*: If a wheel nut wrench is not equipped, a wheel nut wrench can be purchased at
your Lexus dealer.
5 Securely attach cables or chains to
the towing eyelet.
Take care not to damage the vehicle body.
6Enter the vehicle being towed and
start the hybrid system.
If the hybrid system does not start, turn the
power switch to ON.
7Shift the shift lever to N and release
the parking brake.
When the shift lever cannot be shifted:
P.168
■While towing
If the hybrid system is off, the power assist
for the brakes and steering will not function,
marking steering and braking more difficult.
■Wheel nut wrench
Vehicles with wheel nut wrench: Wheel nut
wrench is installed in luggage compart-
ment. ( P.296)
Vehicles without wheel nut wrench: Wheel
nut wrench can be purchased at your Lexus
dealer.
Emergency towing procedure
Page 392 of 476

3927-2. Steps to take in an emergency
■PCS warning light (warning buzzer)
■Hybrid system overheat warning light* (warning buzzer)
*: This light illuminates on the multi-information display.
■Low traction battery charge warning light* (warning buzzer)
*: This light illuminates on the multi-information display.
■Warning buzzer
In some cases, the bu zzer may not be heard
due to being in a noisy location or audio
sound.
■Front passenger detection sensor, seat
belt reminder and warning buzzer
●If luggage is placed on the front passen-
ger seat, the front passenger detection sensor may cause the warning light to
flash and the warning buzzer to sound
even if a passenger is not sitting in the
seat.
●If a cushion is placed on the seat, the sen-
sor may not detect a passenger, and the
warning light may not operate properly.
■SRS warning light
This warning light system monitors the air-
Warning lightDetails/Actions
(flashes or illumi- nates)
When a buzzer sounds simultaneously:
Indicates a malfunction has occurred in the PCS (Pre-Collision System)
Have the vehicle inspected by your Lexus dealer immediately.
If a buzzer does not sound:
The PCS (Pre-Collision System) has become temporarily unavailable,
corrective action may be necessary.
Follow the instructions displayed on the multi-information display.
( P.196, 395)
If the PCS (Pre-Collision System) or VSC (Vehicle Stability Control)
system is disabled, the PCS warning light will illuminate.
P.204
Warning lightDetails/Actions
Indicates the hybrid system has overheated
This light may be displayed when dr iving under severe operating condi-
tions. (For example, when driving up a long steep hill.)
Stop the vehicle in a safe place.
Handling method ( P.410)
Warning lightDetails/Actions
(orange)
Indicates that the hybrid battery (traction battery) is low
Restart the hybrid system when starting the vehicle.
Page 416 of 476

4168-1. Specifications
8-1.Specifications
*1:Unladen vehicle
*2: Vehicles without shark fin antenna
*3: Vehicles with shark fin antenna
■Vehicle identification number
The vehicle identification number
(VIN) is the legal identifier for your
vehicle. This is the primary identifica-
tion number for your Lexus. It is used in
registering the ownership of your vehi-
cle.
This number is stamped on the top left
of the instrument panel. This number is also on the Certification
Label.
Maintenance data (fuel, oil level, etc.)
Dimensions and weight
Overall length177.0 in. (4495 mm)
Overall width72.4 in. (1840 mm)
Overall height*159.8 in. (1520 mm)*2
60.6 in. (1540 mm)*3
Wheelbase103.9 in. (2640 mm)
TreadFront61.0 in. (1550 mm)
Rear61.0 in. (1550 mm)
Vehicle capacity weight
(Occupants + luggage)890 lb. (405 kg)
Vehicle identification
Page 430 of 476

4308-1. Specifications
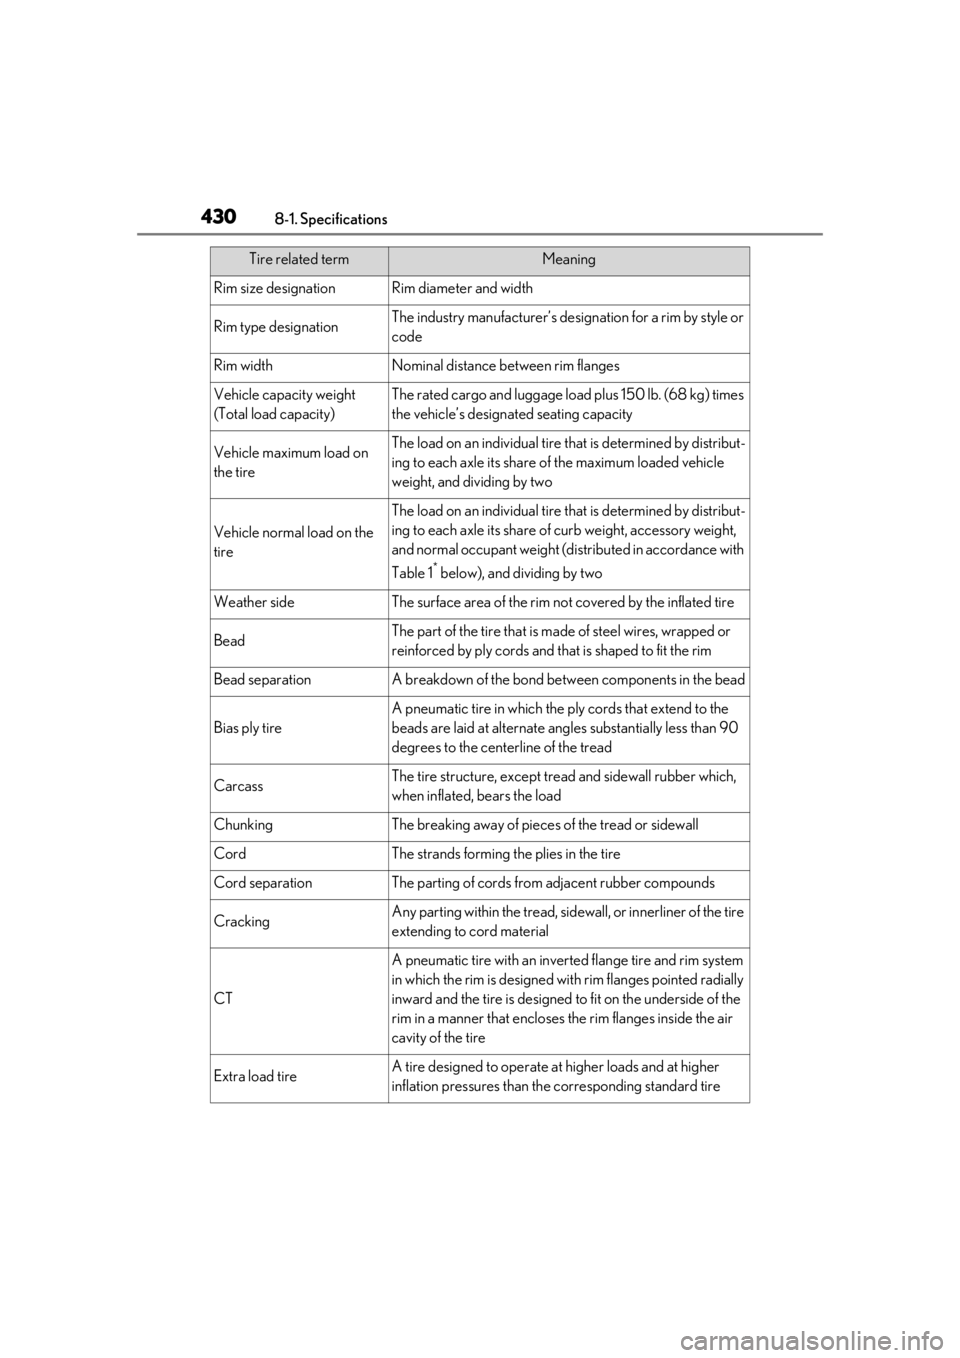
Rim size designationRim diameter and width
Rim type designationThe industry manufacturer’s designation for a rim by style or
code
Rim widthNominal distance between rim flanges
Vehicle capacity weight
(Total load capacity)The rated cargo and luggage load plus 150 lb. (68 kg) times
the vehicle’s designated seating capacity
Vehicle maximum load on
the tireThe load on an individual tire that is determined by distribut-
ing to each axle its share of the maximum loaded vehicle
weight, and dividing by two
Vehicle normal load on the
tire
The load on an individual tire that is determined by distribut-
ing to each axle its share of curb weight, accessory weight,
and normal occupant weight (distributed in accordance with
Table 1
* below), and dividing by two
Weather sideThe surface area of the rim not covered by the inflated tire
BeadThe part of the tire that is ma de of steel wires, wrapped or
reinforced by ply cords and th at is shaped to fit the rim
Bead separationA breakdown of the bond between components in the bead
Bias ply tire
A pneumatic tire in which the ply cords that extend to the
beads are laid at alternate angles substantially less than 90
degrees to the centerline of the tread
CarcassThe tire structure, except tread and sidewall rubber which,
when inflated, bears the load
ChunkingThe breaking away of pieces of the tread or sidewall
CordThe strands forming the plies in the tire
Cord separationThe parting of cords from adjacent rubber compounds
CrackingAny parting within the tread, side wall, or innerliner of the tire
extending to cord material
CT
A pneumatic tire with an inverted flange tire and rim system
in which the rim is designed wi th rim flanges pointed radially
inward and the tire is designed to fit on the underside of the
rim in a manner that encloses the rim flanges inside the air
cavity of the tire
Extra load tireA tire designed to operate at higher loads and at higher
inflation pressures than the corresponding standard tire
Tire related termMeaning
Page 468 of 476

468Alphabetical Index
J
JackPositioning a floor jack............................ 336
Jam protection function Moon roof ...................................................... 148
Power back door opener and closer. 119
Power windows............................................145
K
Keyless entrySmart access system with push-button start .................................................................. 124
Wireless remote control......................... 106
Keys.................................................................... 104 Battery-saving function ............................125
Electronic key ............................................... 104
If the electronic key does not operate properly.......................................................403
If you lose your keys................................. 402
Key number plate ....................................... 104
Keyless entry .............................. 108, 113, 124
Mechanical key............................................ 104
Power switch ................................................. 162
Replacing the battery...............................368
Warning buzzer ........................................... 124
Wireless remote control key ................ 106
Knee airbags ...................................................... 31
L
Lane Tracing Assist (LTA) ....................... 205 Operation......................................................205
Warning messages .................................... 213
Language (multi-informa tion display) ..... 91
LATCH anchors ............................................. 52
Lever Auxiliary catch lever .................................335
Hood lock release lever.........................335
Shift lever.......................................................... 167
Turn signal lever .............................................171
Wiper lever......................................... 184, 188 Lexus climate concierge ...........................274
Lexus Enform Safety Connect.................. 56
Lexus Safety System+2.0 ..........................192
Automatic High Beam ............................. 180
Dynamic radar cruise control with full-
speed range ................................................216
LTA (Lane Tracing Assist) ................... 205
PCS (Pre-Collision System) ................. 198
RSA (Road Sign Assist)............................214
License plate lights Light switch ..................................................... 177
Replacing light bulbs ................................ 374
Light bulbs Replacing ....................................................... 374
Wattage .......................................................... 422
Lights Automatic High Beam system .............180
Cornering lights ...........................................179
Fog light switch ............................................ 183
Front interior lights ......................................291
Headlight switch........................................... 177
Illuminated entry system ........................ 290
Interior light list ........................................... 290
Luggage compartment light ................... 114
Personal lights ............................................. 292
Rear interior lights .......................................291
Replacing light bulbs ................................ 374
Turn signal lever ............................................ 171
Vanity lights ................................................... 301
Wattage .......................................................... 422
Welcome light illumination control ... 178
Lock steering column ..................................163
LTA (Lane Tracing Assist) ....................... 205 Operation ..................................................... 205
Warning messages.....................................213
Luggage cover ............................................. 298
M
Maintenance Do-it-yourself maintenance .................333
General maintenance .............................329
Maintenance data ....................................... 416