2019 LEXUS UX250H oil
[x] Cancel search: oilPage 338 of 476

3386-3. Do-it-yourself maintenance
on the dipstick.
■Checking the engine oil
1 Park the vehicle on level ground.
After warming up the hybrid sys-
tem, and turning off the engine, wait
more than 5 minutes for the oil to
drain back into the bottom of the
engine.
2 Holding a rag under the end, pull
the dipstick out.
3 Wipe the dipstick clean.
4 Reinsert the dipstick fully.
5 Holding a rag under the end, pull
the dipstick out and check the oil
level.
Low
Normal
Excessive
6 Wipe the dipstick and reinsert it
fully.
■Checking the oil type and prepar-
ing the items needed
Make sure to check the oil type and
prepare the items needed before add-
ing oil.
Engine oil selection
P.418
Oil quantity (Low Full)
1.6 qt. (1.5 L, 1.3 Imp.qt.)
Items
Clean funnel
■Adding engine oil
If the oil level is below or near the low
level mark, add engine oil of the same
type as that already in the engine.
1 Remove the oil filler cap by turning
it counterclockwise.
2 Add engine oil slowly, checking the
dipstick.
3 Install the oil filler cap by turning it
clockwise.
■Engine oil consumption
A certain amount of engine oil will be con-
sumed while driving. In the following situa-
tions, oil consumption may increase, and
engine oil may need to be refilled in
between oil maintenance intervals.
●When the engine is new, for example
directly after purchasing the vehicle or
A
B
C
Page 339 of 476

3396-3. Do-it-yourself maintenance
6
Maintenance and care
after replacing the engine
●If low quality oil or oil of an inappropriate
viscosity is used
●When driving at high engine speeds or
with a heavy load, when towing, or when
driving while accelera ting or decelerat-
ing frequently
●When leaving the engine idling for a long
time, or when driving frequently through
heavy traffic
■After changing the engine oil
The engine oil maintenance data should be
reset. Perform the following procedures:
1
Press or of the meter control
switches and select .
2
Press or of the meter control
switches, select “Vehicle Settings” and
then press “OK”.
3
Press or of the meter control
switches, select “Oil Maintenance” and
then press and hold “OK”.
4
Select “Yes” and press “OK”.
“Reset Complete” will be displayed when
the reset procedure has been completed.
The coolant level is satisfactory if it is
between the “FULL/F” and “LOW/L”
lines on the reservoir when the hybrid
system is cold.
■Engine coolant reservoir
Reservoir cap
“FULL” line
“LOW” line
If the level is on or below the “LOW” line,
add coolant up to the “FULL” line.
( P.410)
WARNING
■Used engine oil
●Used engine oil contains potentially
harmful contaminants which may
cause skin disorders such as inflamma-
tion and skin cancer, so care should be
taken to avoid prolonged and
repeated contact. To remove used
engine oil from your skin, wash thor-
oughly with soap and water.
●Dispose of used oil and filters only in a
safe and acceptable manner. Do not
dispose of used oil and filters in house-
hold trash, in sewers or onto the
ground. Call your Lexus dealer, ser-
vice station or auto parts store for
information concerning recycling or
disposal.
●Do not leave used engine oil within the
reach of children.
NOTICE
■To prevent serious engine damage
Check the oil level on a regular basis.
■When replacing the engine oil
●Be careful not to spill engine oil on the
vehicle components.
●Avoid overfilling, or the engine could
be damaged.
●Check the oil level on the dipstick
every time you refill the vehicle.
●Be sure the engine o il filler cap is prop-
erly tightened.
Checking the coolant
A
B
C
Page 360 of 476

3606-3. Do-it-yourself maintenance
WARNING
■When installing the tire
Failure to follow these precautions could
cause the wheel nuts to loosen and the
tire to fall off, resulting in death or serious
injury.
●Never use oil or grease on the wheel
bolts or wheel nuts.
Oil and grease may cause the wheel
nuts to be excessively tightened, lead-
ing to bolt or disc wheel damage. In
addition, the oil or grease can cause
the wheel nuts to loosen and the wheel
may fall off, causing a serious accident.
Remove any oil or grease from the
wheel bolts or wheel nuts.
●Have the wheel nuts tightened with a
torque wrench to 76 ft•lbf (103 N•m,
10.5 kgf•m) as soon as possible after
changing wheels.
●Do not attach a heavily damaged
wheel ornament, as it may fly off the
wheel while the vehicle is moving.
●When installing a tire, only use wheel
nuts that have been specifically
designed for that wheel.
●If there are any cracks or deformations
in the bolt screws, nut threads or bolt
holes of the wheel, have the vehicle
inspected by your Lexus dealer.
●Do not attach a heavily damaged
wheel ornament, as it may fly off the
wheel while the vehicle is moving.
■After using the tools and jack (if
equipped)
Before driving, make sure all the tools
and jack are stored securely in place.
Failure to do so may cause injury in case
of a collision or sudden braking.
NOTICE
■Repairing or replac ing tires, wheels,
tire pressure warning valves, trans-
mitters and tire valve caps
P.350
Page 375 of 476

3756-3. Do-it-yourself maintenance
6
Maintenance and care
■Front turn signal lights (vehicles
with single-beam headlights)
1
Turn the bulb base counterclock-
wise.
2
Remove the light bulb.
3
When installing, reverse the steps
listed.
Replacing light bulb
WARNING
■Replacing light bulb
●Turn off the light. Do not attempt to
replace the bulb immediately after
turning off the light.
The bulb become very hot and may
cause burns.
●Do not touch the glass portion of the
light bulb with bare hands. When it is
unavoidable to hold the glass portion,
use and hold with a clean dry cloth to
avoid getting moisture and oils on the
bulb.
Also, if the bulb is scratched or
dropped, it may blow out or crack.
●Fully install light bulb and any parts
used to secure it. Failure to do so may
result in heat damage, fire, or water
entering the light unit. This may dam-
age the light or cause condensation to
build up on the lens.
■To prevent damage or fire
●Make sure bulb is fully seated and
locked.
●Check the wattage of the bulb before
installing to prevent heat damage.
Page 386 of 476

3867-2. Steps to take in an emergency
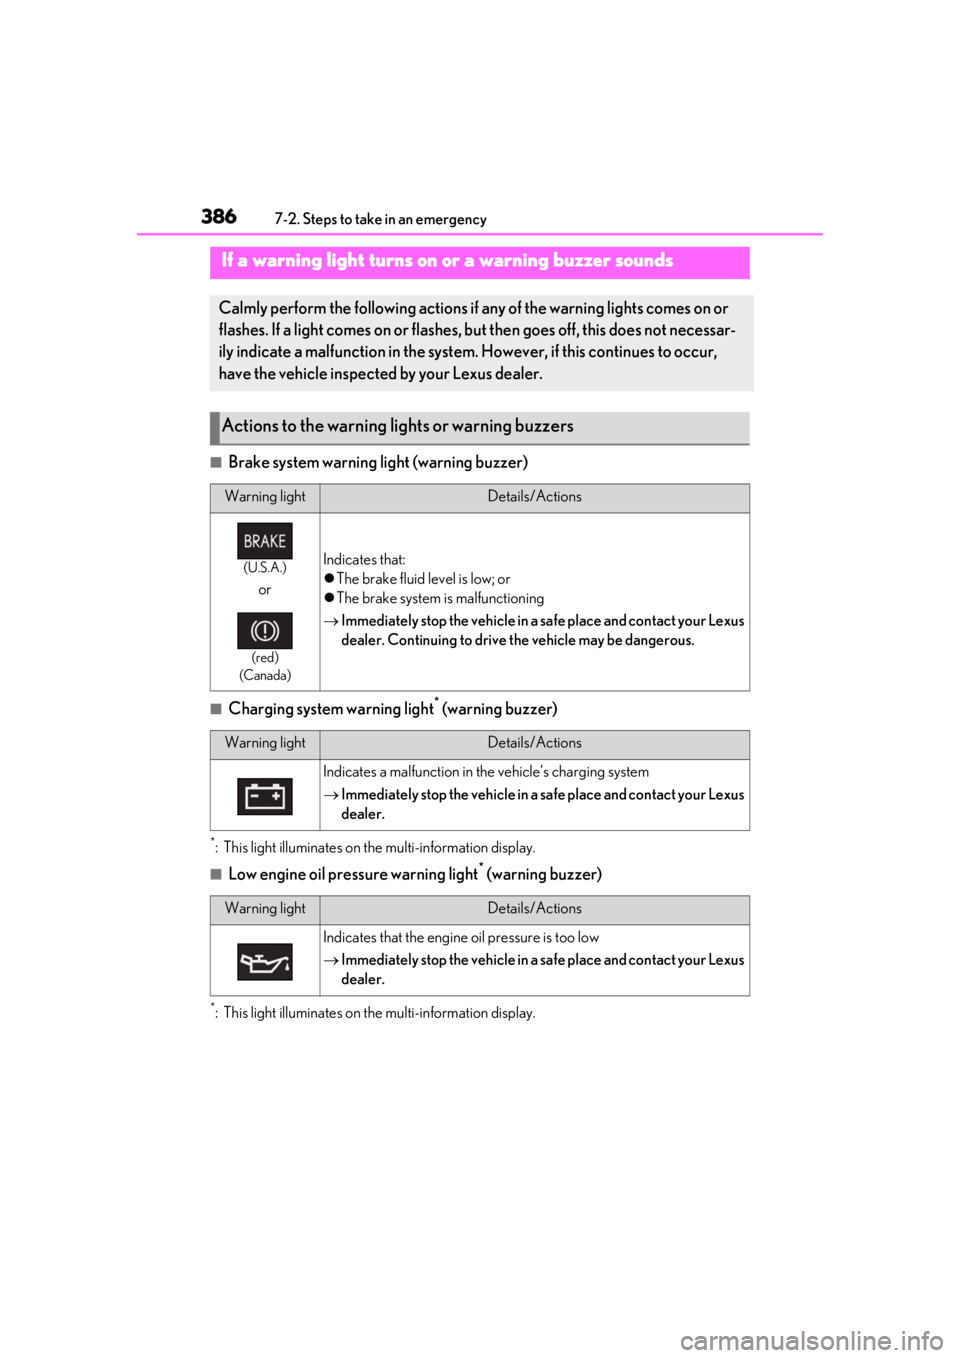
■Brake system warning light (warning buzzer)
■Charging system warning light* (warning buzzer)
*: This light illuminates on the multi-information display.
■Low engine oil pressure warning light* (warning buzzer)
*: This light illuminates on the multi-information display.
If a warning light turns on or a warning buzzer sounds
Calmly perform the following actions if any of the warning lights comes on or
flashes. If a light comes on or flashes, bu t then goes off, this does not necessar-
ily indicate a malfunction in the system. However, if this continues to occur,
have the vehicle inspected by your Lexus dealer.
Actions to the warning lights or warning buzzers
Warning lightDetails/Actions
(U.S.A.)
or
(red)
(Canada)
Indicates that:
The brake fluid level is low; or
The brake system is malfunctioning
Immediately stop the vehicle in a safe place and contact your Lexus
dealer. Continuing to drive the vehicle may be dangerous.
Warning lightDetails/Actions
Indicates a malfunction in the vehicle’s charging system
Immediately stop the vehicle in a safe place and contact your Lexus
dealer.
Warning lightDetails/Actions
Indicates that the engine oil pressure is too low
Immediately stop the vehicle in a safe place and contact your Lexus
dealer.
Page 396 of 476

3967-2. Steps to take in an emergency
The warning lights and warning buzzers operate as follows depending on the con-
tent of the message. If a message indicates the need for inspection by a dealer, have
the vehicle inspected by your Lexus dealer immediately.
*: A buzzer sounds the first time a message is shown on the multi-information display.
■Warning messages
The warning messages explained below
may differ from the actual messages
according to operation conditions and vehi-
cle specifications.
■Warning buzzer
In some cases, the bu zzer may not be heard
due to being in a noisy location or audio
sound.
■If “Engine Oil Level Low Add or
Replace” is displayed
The engine oil level is low. Check the level
of the engine oil, and add if necessary.
This message may appear if the vehicle is
stopped on a slope. Move the vehicle to a
level surface and check to see if the mes-
sage disappears.
■If “Hybrid System Stopped Steering
Power Low” is displayed
This message is displayed if the hybrid sys-
tem is stopped while driving.
When steering wheel operations are
heavier than usual, gr ip the steering wheel
firmly and operate it using more force than
usual.
■If “Hybrid system overheated Output
power reduced” is displayed
This message may be displayed when driv-
ing under severe operat ing conditions. (For
example, when driving up a long steep hill.)
Handling method: P.410
■If “Traction Battery Needs to be Pro-
tected Refrain From the Use of N Posi-
tion” is displayed
This message may be displayed when the
shift lever is in N.
As the hybrid battery (traction battery) can-
Messages and warnings
Warning lightWarning buzzer*Warning
Sounds
• Indicates an important situation, such as when a system related to drivin g is malfunctioning or
that danger may result if the correction proce-
dure is not performed
• Indicates a situation, such as when damage to the vehicle or danger may result
Comes onor flashesSounds
Indicates an important situation, such as when the
systems shown on the multi-information display
may be malfunctioning
Does not sound
• Indicates a condition, such as malfunction of electrical components, th eir condition, or indi-
cates the need for maintenance
• Indicates a situation, such as when an operation has been performed incorrectly, or indicates
how to perform an operation correctly
Page 398 of 476

3987-2. Steps to take in an emergency
reset. If necessary, perform maintenance.
Please reset the message after the mainte-
nance is performed. (P.328)
*: Refer to the separa te “Scheduled Main-
tenance” or “Owner’s Manual Supple-
ment” for the maintenance interval
applicable to your vehicle.
■If “Maintenance Required Visit Your
Dealer” is displayed
Indicates that all maintenance is required to
correspond to the driven distance on the
maintenance schedule
*.
Comes on approximately 5000 miles
(8000 km) after the message has been
reset. (The indicator will not work properly
unless the message ha s been reset.) Per-
form the necessary maintenance. Please
reset the message after the maintenance is
performed. ( P.328)
*: Refer to the separa te “Scheduled Main-
tenance” or “Owner’s Manual Supple-
ment” for the maintenance interval
applicable to your vehicle.
■If “Oil Maintenance Required Soon” is
displayed
Indicates that the engine oil should be
scheduled to be changed.
Check the engine oil and change it if neces-
sary. After changing the engine oil, make
sure to reset the message. ( P.339)
■If “Oil Maintenance Required” is dis-
played
Indicates that the engine oil should be
changed.
Check and change the en gine oil, and oil fil-
ter by your Lexus deal er. After changing the
engine oil, make sure to reset the message.
( P.339)
■If a message that in dicates the need for
visiting your Lexus dealer is displayed
The system or part shown on the multi-
information display is malfunctioning. Have
the vehicle inspected by your Lexus dealer
immediately.
■If a message that indicates the need for
referring to Owner’ s Manual is dis-
played
●If any of the following messages are
shown on the multi-information display,
follow the instructions.
• “Engine Coolant Temp High” ( P.410)
• “Front Camera Unavailable” ( P.196)
• “Radar Cruise Control Unavailable” ( P.196)
●If any of the following messages are
shown on the multi-info rmation display, it
may indicate a malf unction. Have the
vehicle inspected by your Lexus dealer
immediately.
• “Access System with Elec. Key Malfunc-
tion”
• “Hybrid system malfunction”
•“Check Engine”
• “Hybrid battery system malfunction”
• “Accelerator system malfunction”
●If any of the following messages are
shown on the multi-info rmation display, it
may indicate a malfun ction. Immediately
stop the vehicle and contact your Lexus
dealer.
• “Braking Power Low”
• “Charging System Malfunction”
• “Oil Pressure Low”
●If “Low Auxiliary Battery See Owner’s
Manual” is shown
• When the display goes off after several
seconds
*:
Maintain the hybrid system operation for
more than 15 minutes and charge the 12-
volt battery.
• When the display does not go off:
Start up the hybrid system using the proce-
dures for “If the 12-volt battery is dis-
charged” ( P.405)
*: Displays for about 6 seconds
●If “Maintenance required for Traction bat-
tery cooling parts See owner’s manual” is
shown, the filter may be clogged, the air
intake vent may be blocked, or there may
be a gap in the duct. Therefore, perform
the following correction procedure.
• If the air intake vent and filter of the hybrid battery (traction battery) are dirty, per-
Page 415 of 476

415
8
8
Vehicle specifications
Vehicle specifications
8-1. SpecificationsMaintenance data (fuel, oil level, etc.) ............................................... 416
Fuel information ......................... 423
Tire information.......................... 425
8-2. Customization Customizable features............ 434
8-3. Initialization Items to initialize ........................ 446