2019 LEXUS UX200 water
[x] Cancel search: waterPage 326 of 452

3266-3. Do-it-yourself maintenance
the cell.
3Put the vent plug back on and close
it securely.
■Before recharging
When recharging, the battery produces
hydrogen gas which is flammable and
explosive. Therefore, observe the following
precautions before recharging:
●If recharging with the battery installed on
the vehicle, be sure to disconnect the
ground cable.
●Make sure the power switch on the char-
ger is off when connecting and discon-
necting the charger cables to the battery.
■After recharging/reconnecting the bat-
tery
●The engine may not start. Follow the pro-
cedure below to initialize the system.
1
Shift the shift lever to P.
2
Open and close any of the doors.
3
Restart the engine.
●Unlocking the doors using the smart
access system with pu sh-button start may
not be possible immediately after recon-
necting the battery. If this happens, use
the wireless remote control or the
mechanical key to lock/unlock the doors.
●Start the engine with the engine switch in
ACC. The engine may not start with the
engine switch turned off. However, the
engine will operate normally from the
second attempt.
●The engine switch mode is recorded by
the vehicle. If the battery is reconnected,
the vehicle will return the engine switch
mode to the status it was in before the battery was disconnected. Make sure to
turn off the power before disconnect the
battery. Take extra care when connecting
the battery if the engine switch mode
prior to discharge is unknown.
If the system will not start even after multiple
attempts at all methods above, contact your
Lexus dealer.
WARNING
■Chemicals in the battery
Battery contains poisonous and corro-
sive sulfuric acid and may produce
hydrogen gas which is flammable and
explosive. To reduce the risk of death or
serious injury, take the following precau-
tions while working on or near the bat-
tery:
●Do not cause sparks by touching the
battery terminals with tools.
●Do not smoke or light a match near the
battery.
●Avoid contact with eyes, skin and
clothes.
●Never inhale or swallow electrolyte.
●Wear protective sa fety glasses when
working near the battery.
●Keep children away from the battery.
■Where to safely charge the battery
Always charge the battery in an open
area. Do not charge the battery in a
garage or closed room where there is
insufficient ventilation.
■Emergency measures regarding
electrolyte
●If electrolyte gets in your eyes
Flush your eyes with clean water for at
least 15 minutes and get immediate
medical attention. If possible, continue
to apply water with a sponge or cloth
while traveling to the nearest medical
facility.
Page 327 of 452

3276-3. Do-it-yourself maintenance
6
Maintenance and care
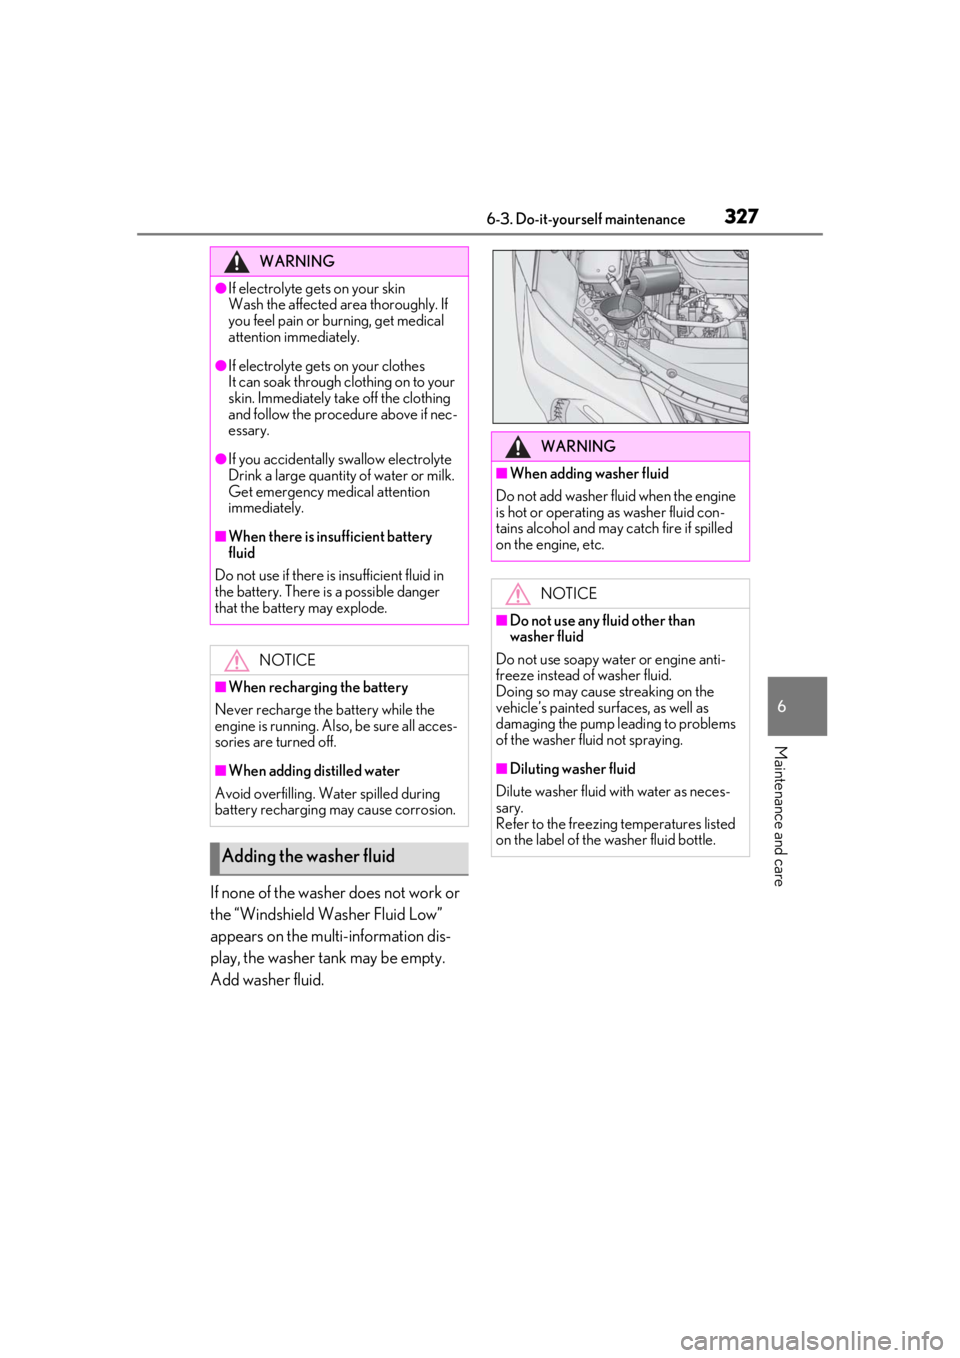
If none of the washer does not work or
the “Windshield Washer Fluid Low”
appears on the multi-information dis-
play, the washer tank may be empty.
Add washer fluid.
WARNING
●If electrolyte gets on your skin
Wash the affected area thoroughly. If
you feel pain or burning, get medical
attention immediately.
●If electrolyte gets on your clothes
It can soak through clothing on to your
skin. Immediately take off the clothing
and follow the procedure above if nec-
essary.
●If you accidentally swallow electrolyte
Drink a large quantity of water or milk.
Get emergency medical attention
immediately.
■When there is insufficient battery
fluid
Do not use if there is insufficient fluid in
the battery. There is a possible danger
that the battery may explode.
NOTICE
■When recharging the battery
Never recharge the battery while the
engine is running. Also, be sure all acces-
sories are turned off.
■When adding distilled water
Avoid overfilling. Water spilled during
battery recharging may cause corrosion.
Adding the washer fluid
WARNING
■When adding washer fluid
Do not add washer fluid when the engine
is hot or operating as washer fluid con-
tains alcohol and may catch fire if spilled
on the engine, etc.
NOTICE
■Do not use any fluid other than
washer fluid
Do not use soapy water or engine anti-
freeze instead of washer fluid.
Doing so may cause streaking on the
vehicle’s painted surfaces, as well as
damaging the pump leading to problems
of the washer fluid not spraying.
■Diluting washer fluid
Dilute washer fluid with water as neces-
sary.
Refer to the freezing temperatures listed
on the label of the washer fluid bottle.
Page 333 of 452

3336-3. Do-it-yourself maintenance
6
Maintenance and care
■When replacing the tires and wheels
If the ID code of the tire pressure warning
valve and transmitter is not registered, the
tire pressure warning system will not work
properly. After driving for about 20 min-
utes, the tire pressure warning light blinks
for 1 minute and stays on to indicate a sys-
tem malfunction.
■The tire pressure warning system
must be initialized in the following
circumstances:
When rotating the tires.
When the tire inflation pressure is
changed such as when changing tire
size. (When there are multiple spec-
ified pressures)
After registering the ID codes.
( P.335)
When the tire pressure warning system
is initialized, the current tire inflation
pressure is set as the benchmark pres-
sure.
■How to initialize the tire pressure
warning system
1
Park the vehicle in a safe place and
stop the engine for 20 minutes or
more.
Initialization cannot be performed while
the vehicle is moving.
2Adjust the tire inflation pressure to
the specified cold tire inflation pres-
sure level.
Make sure to adjust the tire pressure to the
specified cold tire inflation pressure level.
The tire pressure warning system will oper-
ate based on this pressure level.
3Start the engine ( P.152)
4
Press or of the meter con-
trol switches and select .
5
Press or of the meter con-
trol switches and select “Vehicle
Settings”, then press “OK”.
NOTICE
■Repairing or replacing tires, wheels,
tire pressure warning valves, trans-
mitters and tire valve caps
●When removing or fitting the wheels,
tires or the tire pressure warning
valves and transmitters, contact your
Lexus dealer as the tire pressure warn-
ing valves and transmitters may be
damaged if not handled correctly.
●Make sure to install the tire valve caps.
If the tire valve caps are not installed,
water could enter the tire pressure
warning valves and the tire pressure
warning valves could be bound.
●When replacing tire valve caps, do not
use tire valve caps other than those
specified. The cap may become stuck.
■To avoid damage to the tire pressure
warning valves and transmitters
When a tire is repaired with liquid seal-
ants, the tire pressure warning valve and
transmitter may not operate properly. If a
liquid sealant is used , contact your Lexus
dealer or other qualified service shop as
soon as possible. After use of liquid seal-
ant, make sure to re place the tire pres-
sure warning valve and transmitter when
repairing or replacing the tire.
Initializing the tire pressure
warning system
Page 337 of 452

3376-3. Do-it-yourself maintenance
6
Maintenance and care
The recommended cold tire inflation
pressure and tire size are displayed on
the tire and loading information label.
( P.395)
Tire valve Tire pressure gauge
1 Remove the tire valve cap.
2 Press the tip of the tire pressure
gauge onto the tire valve.
3 Read the pressure using the gauge
gradations.
4 If the tire inflation pressure is not at
the recommended level, adjust the
pressure.
If you add too much air, press the
center of the valve to deflate.
5 After completing the tire inflation
pressure measurement and adjust-
ment, apply soapy water to the
valve and check for leakage.
6 Put the tire valve cap back on.
■Tire inflation pressure check interval
You should check tire inflation pressure
every two weeks, or at least once a month.
Do not forget to check the spare.
■Effects of incorrect tire inflation pres-
sure
Driving with incorrect ti re inflation pressure
may result in the following:
●Reduced fuel economy
●Reduced driving comfort and poor han-
dling
●Reduced tire life due to wear
●Reduced safety
●Damage to the drive train
If a tire needs frequent inflating, have it
checked by your Lexus dealer.
■Instructions for checking tire inflation
pressure
When checking tire inflation pressure,
observe the following:
●Check only when the tires are cold.
If your vehicle has been parked for at
least 3 hours or has not been driven for
Tire inflation pressure
Checking the specified tire infla-
tion pressure
Inspection and adjustment pro-
cedure
A
B
Page 347 of 452

3476-3. Do-it-yourself maintenance
6
Maintenance and care
Tail lights
Stop lights
Tail lights/stop lights
Rear turn signal lights
Back-up lights
High mounted stoplight
License plate lights
■LED lights
Vehicles with single-beam headlights:
The lights other than the front turn signal
light each consist of a number of LEDs. If
any of the LEDs burn out, take your vehicle
to your Lexus dealer to have the light
replaced.
Vehicles with triple-beam headlights:
The lights consist of a number of LEDs. If
any of the LEDs burn out, take your vehicle
to your Lexus dealer to have the light
replaced.
■Condensation build-up on the inside of
the lens
Temporary condensation build-up on the
inside of the headlight lens does not indi-
cate a malfunction. Contact your Lexus
dealer for more information in the following
situations:
●Large drops of water ha ve built up on the
inside of the lens.
●Water has built up inside the headlight.
■When replacing light bulbs
P.344
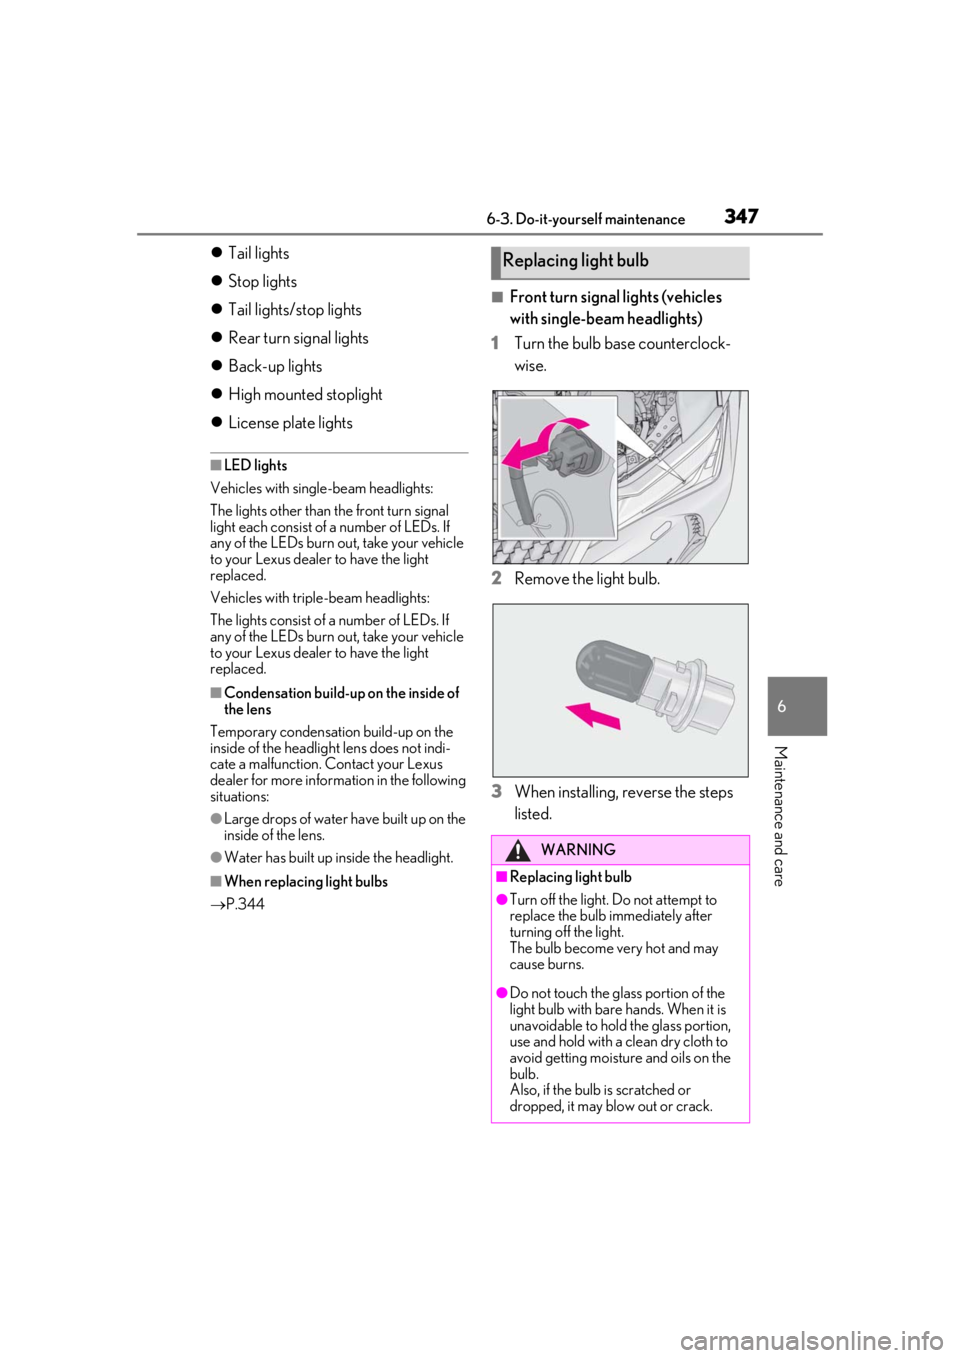
■Front turn signal lights (vehicles
with single-beam headlights)
1
Turn the bulb base counterclock-
wise.
2
Remove the light bulb.
3
When installing, reverse the steps
listed.
Replacing light bulb
WARNING
■Replacing light bulb
●Turn off the light. Do not attempt to
replace the bulb immediately after
turning off the light.
The bulb become very hot and may
cause burns.
●Do not touch the glass portion of the
light bulb with bare hands. When it is
unavoidable to hold the glass portion,
use and hold with a clean dry cloth to
avoid getting moisture and oils on the
bulb.
Also, if the bulb is scratched or
dropped, it may blow out or crack.
Page 348 of 452

3486-3. Do-it-yourself maintenance
WARNING
●Fully install light bulb and any parts
used to secure it. Failure to do so may
result in heat damage, fire, or water
entering the light unit. This may dam-
age the light or cause condensation to
build up on the lens.
■To prevent damage or fire
●Make sure bulb is fully seated and
locked.
●Check the wattage of the bulb before
installing to prevent heat damage.
Page 349 of 452

349
7
7
When trouble arises
When trouble arises
7-1. Essential informationEmergency flashers.................. 350
If your vehicle has to be stopped in an emergency .......................... 350
If the vehicle is trapped in rising water............................................. 351
7-2. Steps to take in an emergency If your vehicle needs to be towed........................................................ 353
If you think something is wrong ........................................................ 356
Fuel pump shut off system ..... 357
If a warning light turns on or a warning buzzer sounds ....... 358
If a warning message is displayed ........................................................ 367
If you have a flat tire (vehicles with spare tire) .................................. 370
If you have a flat tire (vehicles without spare tire) .................. 377
If the engine wi ll not start .......378
If you lose your keys ................. 379
If the fuel filler door cannot be opened........................................ 380
If the electronic key does not operate properly .................... 380
If the vehicle battery is discharged ........................................................ 382
If your vehicle overheats ........ 386
If the vehicle becomes stuck 388
Page 351 of 452

3517-1. Essential information
7
When trouble arises
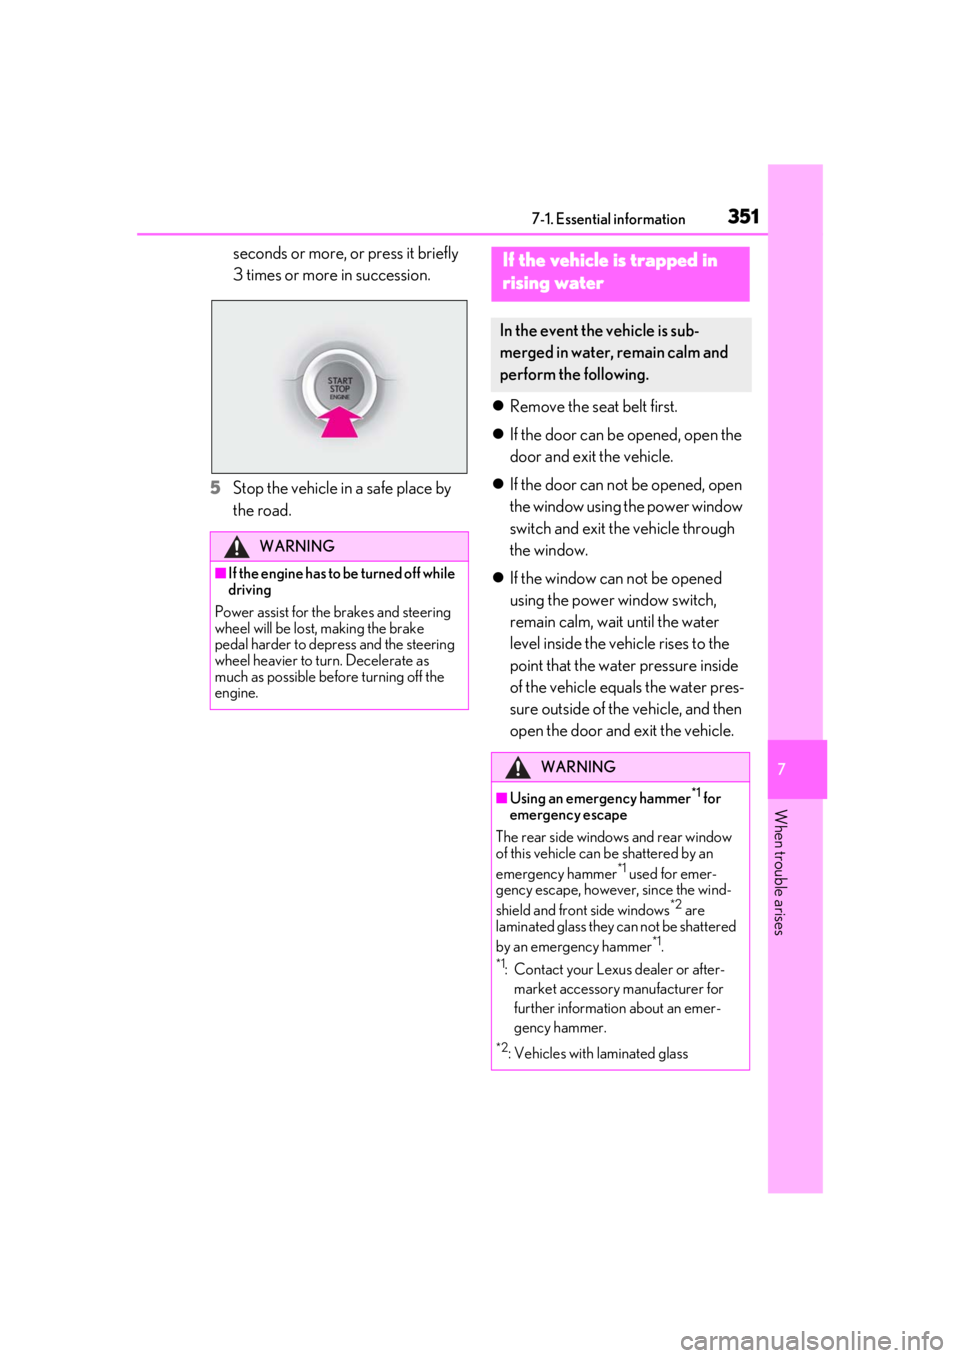
seconds or more, or press it briefly
3 times or more in succession.
5
Stop the vehicle in a safe place by
the road.
Remove the seat belt first.
If the door can be opened, open the
door and exit the vehicle.
If the door can not be opened, open
the window using the power window
switch and exit the vehicle through
the window.
If the window can not be opened
using the power window switch,
remain calm, wait until the water
level inside the vehicle rises to the
point that the water pressure inside
of the vehicle equals the water pres-
sure outside of the vehicle, and then
open the door and exit the vehicle.
WARNING
■If the engine has to be turned off while
driving
Power assist for the brakes and steering
wheel will be lost, making the brake
pedal harder to depress and the steering
wheel heavier to turn. Decelerate as
much as possible before turning off the
engine.
If the vehicle is trapped in
r
ising water
In the event the vehicle is sub-
merged in water, remain calm and
perform the following.
WARNING
■Using an emergency hammer*1 for
emergency escape
The rear side windows and rear window
of this vehicle can be shattered by an
emergency hammer
*1 used for emer-
gency escape, however, since the wind-
shield and front side windows
*2 are
laminated glass they can not be shattered
by an emergency hammer
*1.
*1: Contact your Lexus dealer or after-
market accessory manufacturer for
further information about an emer-
gency hammer.
*2: Vehicles with laminated glass