2019 LEXUS UX200 interior lights
[x] Cancel search: interior lightsPage 285 of 452

2855-6. Using the other interior features
5
Interior features
5-6.Using the other interior features
1To set the visor in the forward posi-
tion, flip it down.
2
To set the visor in the side position,
flip down, unhook, and swing it to
the side.
3
To use the side extender, place the
visor in the side position, then slide
it backward.
■When adjusting the inside rear view mir-
ror
Adjust the inside rear view mirror to enable
sufficient confirmation of the rear view with-
out interfering with the sun visor.
Slide the cover to open.
The light turns on when the cover is
opened.
■Vanity lights
If the vanity lights remain on when the
engine switch is turned off, the lights will go
off automatically after 20 minutes.
The GPS clock’s time is automatically
adjusted by utilizing GPS time infor-
mation.
For details, refer to the “NAVIGA-
TION AND MULTIMEDIA SYSTEM
OWNER’S MANUAL”.
Other interior features
Sun visors
NOTICE
■To prevent damage to the sun visors
When using the side extender, do not
swing the visor to the front.
Vanity mirrors
NOTICE
■To prevent battery discharge
Do not leave the vanity lights on for
extended periods while the engine is off.
Clock
Page 286 of 452

2865-6. Using the other interior features
Please use a power supply for elec-
tronic goods that use less than 12
VDC/10 A (power consumption of
120 W).
When using electronic goods, make
sure that the power consumption of all
the connected power outlets is less
than 120 W.
Front
Press down the lid to open it.
Rear
Open the lid.
■The power outlet can be used when
The engine switch is in ACC or ON.
The USB charging ports are used to
supply 2.1 A of electricity at 5 V to
Power outlet
NOTICE
■When power outlet is not in use
To avoid damaging the power outlet,
close the power outlet lid when the
power outlet is not in use.
Foreign objects or li quids that enter the
power outlet may cause a short circuit.
■To prevent battery discharge
Do not use the power outlet longer than
necessary when the engine is off.
■To prevent incorrect operation of the
vehicle
When turning the engine switch off,
make sure to disc onnect accessories
designed for charging , such as portable
chargers, power banks, etc. from the
power outlets.
If such an accessory is left connected, the
following may occur:
●The doors will not be able to be locked.
●The opening screen will be displayed
on the multi-information display.
●The interior lights, instrument panel
lights, etc. will illuminate.
USB charging ports
Page 289 of 452

2895-6. Using the other interior features
5
Interior features
■Operation indicator light status
*: Depending on the portable device, the operation indicator light may stay illumi-
nated (orange) after charging has com-
pleted.
If the operation indicator light blinks
If an error is detected, the operation indi-
cator light will blink (orange). Take the
appropriate measures according to the
table below.
• Blinks (orange) at a one second interval continuously
• Blinks (orange) 3 times repeatedly • Blinks (orange) 4 times repeatedly
■The wireless charger can be operated
when
The engine switch is in ACC or ON.
■Portable devices that can be charged
●Portable devices compatible with the Qi
wireless charging standard can be
charged by the wireless charger. How-
ever, compatibility with all devices which
meet the Qi wireless charging standard is
not guaranteed.
●The wireless charger is designed to sup-
ply low power electricity (5 W or less) to
a cellular phone, smartphone, or other
portable device.
■If a cover or accessory is attached to the
portable device
Do not charge a portable device if a cover
or accessory which is not Qi compatible is
attached. Depending on the type of cover
and/or accessory attached, it may not be
possible to charge the portable device. If
the portable device is placed on the
charging area and does not charge, remove
the cover and/or accessories.
■If interference is heard in AM radio
broadcasts while charging
Turn off the wireless charger and check if
Operation indicator lightState
OffThe Wireless char-
ger is off
Green (illuminated)
Standby (charging is
possible)
Charging is com-
plete
*
Orange (illumi-
nated)
A portable device
has been placed on
the charging area
(identifying the por-
table device)
Charging in prog-
ress
Suspected causesMeasure
Vehicle to charger
communication fail-
ure.Contact your Lexus
dealer.
Suspected causesMeasure
A foreign object
exists between the
portable device and
charging area.
Remove the foreign
object.
Portable device is
not positioned prop-
erly on the charging
area.Move the portable
device toward the
center of the
charging area.
Suspected causesMeasure
The temperature of
the wireless charger
is excessively high.Stop charging
immediately and
continue charging
after a while.
Page 314 of 452

3146-2. Maintenance
Radiator/con-
denser
The radiator and con-
denser should be free
from foreign objects.
( P.324)
Washer fluidIs there sufficient washer
fluid? ( P.327)
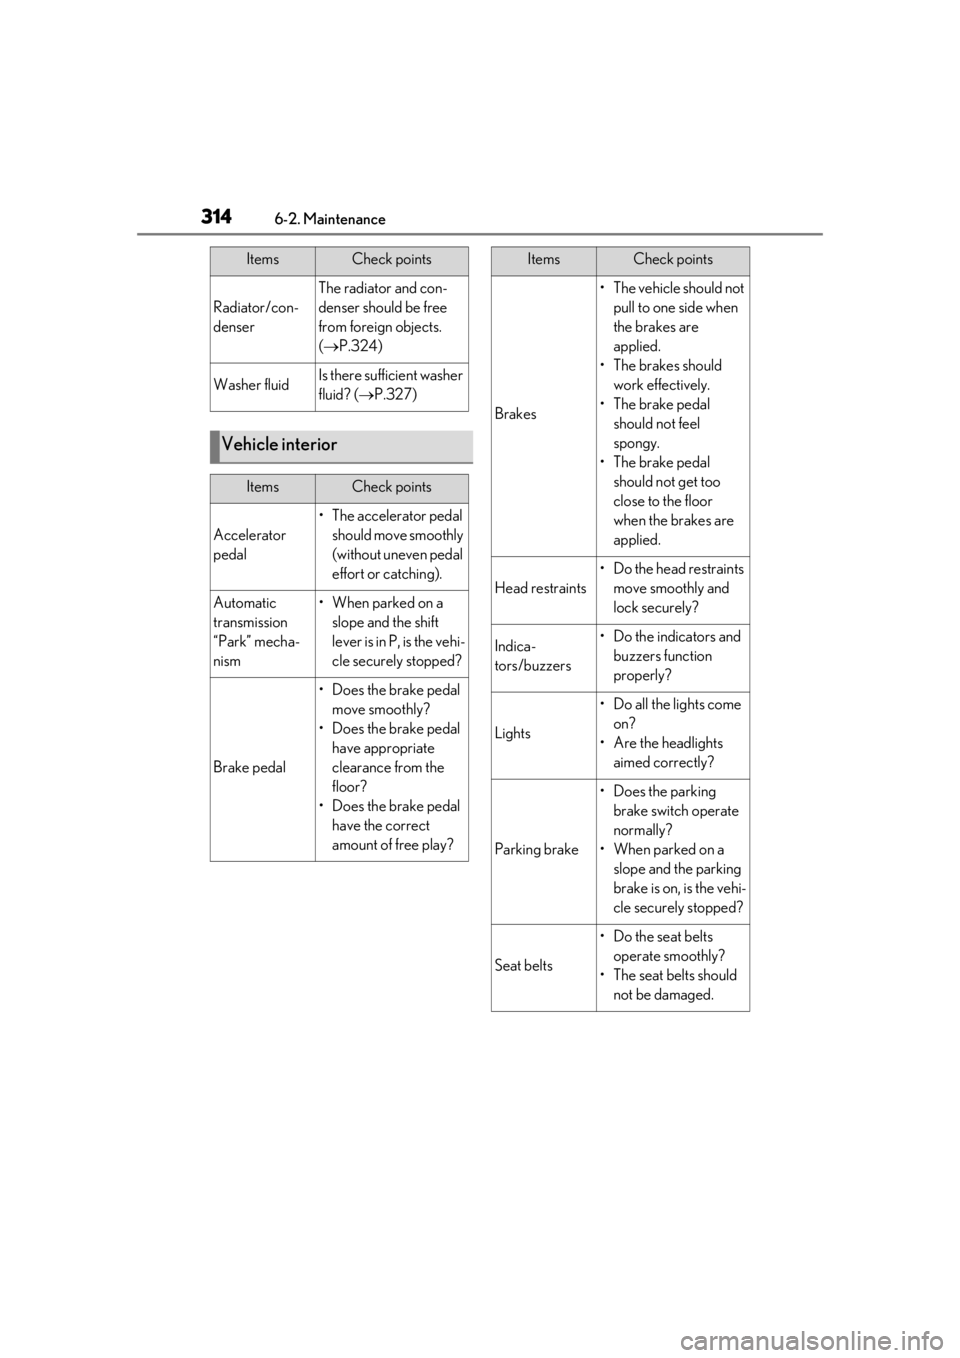
Vehicle interior
ItemsCheck points
Accelerator
pedal
• The accelerator pedal
should move smoothly
(without uneven pedal
effort or catching).
Automatic
transmission
“Park” mecha-
nism•When parked on a slope and the shift
lever is in P, is the vehi-
cle securely stopped?
Brake pedal
• Does the brake pedal move smoothly?
• Does the brake pedal have appropriate
clearance from the
floor?
• Does the brake pedal have the correct
amount of free play?
ItemsCheck points
Brakes
• The vehicle should not pull to one side when
the brakes are
applied.
• The brakes should work effectively.
• The brake pedal should not feel
spongy.
• The brake pedal should not get too
close to the floor
when the brakes are
applied.
Head restraints
•Do the head restraints move smoothly and
lock securely?
Indica-
tors/buzzers• Do the indicators and buzzers function
properly?
Lights
• Do all the lights come on?
• Are the headlights aimed correctly?
Parking brake
• Does the parking brake switch operate
normally?
• When parked on a slope and the parking
brake is on, is the vehi-
cle securely stopped?
Seat belts
•Do the seat belts operate smoothly?
• The seat belts should not be damaged.
ItemsCheck points
Page 378 of 452

3787-2. Steps to take in an emergency
One of the following may be the cause
of the problem:
There may not be sufficient fuel in
the vehicle’s tank.
Refuel the vehicle.
The engine may be flooded.
Try to restart the engine again fol-
lowing correct starting proce-
dures.( P.152)
There may be a malfunction in the
engine immobilizer system.
( P.62)
One of the following may be the cause
of the problem:
The battery terminal connections
may be loose or corroded.
The battery may be discharged.
( P.382) The engine starting system may be
malfunctioning due to an electrical
problem such as electronic key battery
depletion or a blown fuse. However, an
interim measure is available to start the
engine. (
P.378)
One of the following may be the cause
of the problem:
One or both of the battery terminals
may be disconnected.
The battery may be discharged.
( P.382)
There may be a malfunction in the
steering lock system.
Contact your Lexus dealer if the problem
cannot be repaired, or if repair procedures
are unknown.
When the engine does not start, the
following steps can be used as an
interim measure to start the engine if
the engine switch is functioning nor-
mally:
1 Press the parking brake switch to
check that the parking brake is set.
(P.160)
Parking brake indicator will come on.
If the engine will not start
If the engine will not start even
though correct starting procedures
are being followed ( P.152), con-
sider each of the following points:
The engine will not start even
though the starter motor oper-
ates normally.
The starter motor turns over
slowly, the interior lights and
headlights are dim, or the horn
does not sound or sounds at a low
volume.
The starter motor does not turn
over
The starter motor does not turn
over, the interior lights and head-
lights do not turn on, or the horn
does not sound.
Starting the engine in an emer-
gency
Page 396 of 452

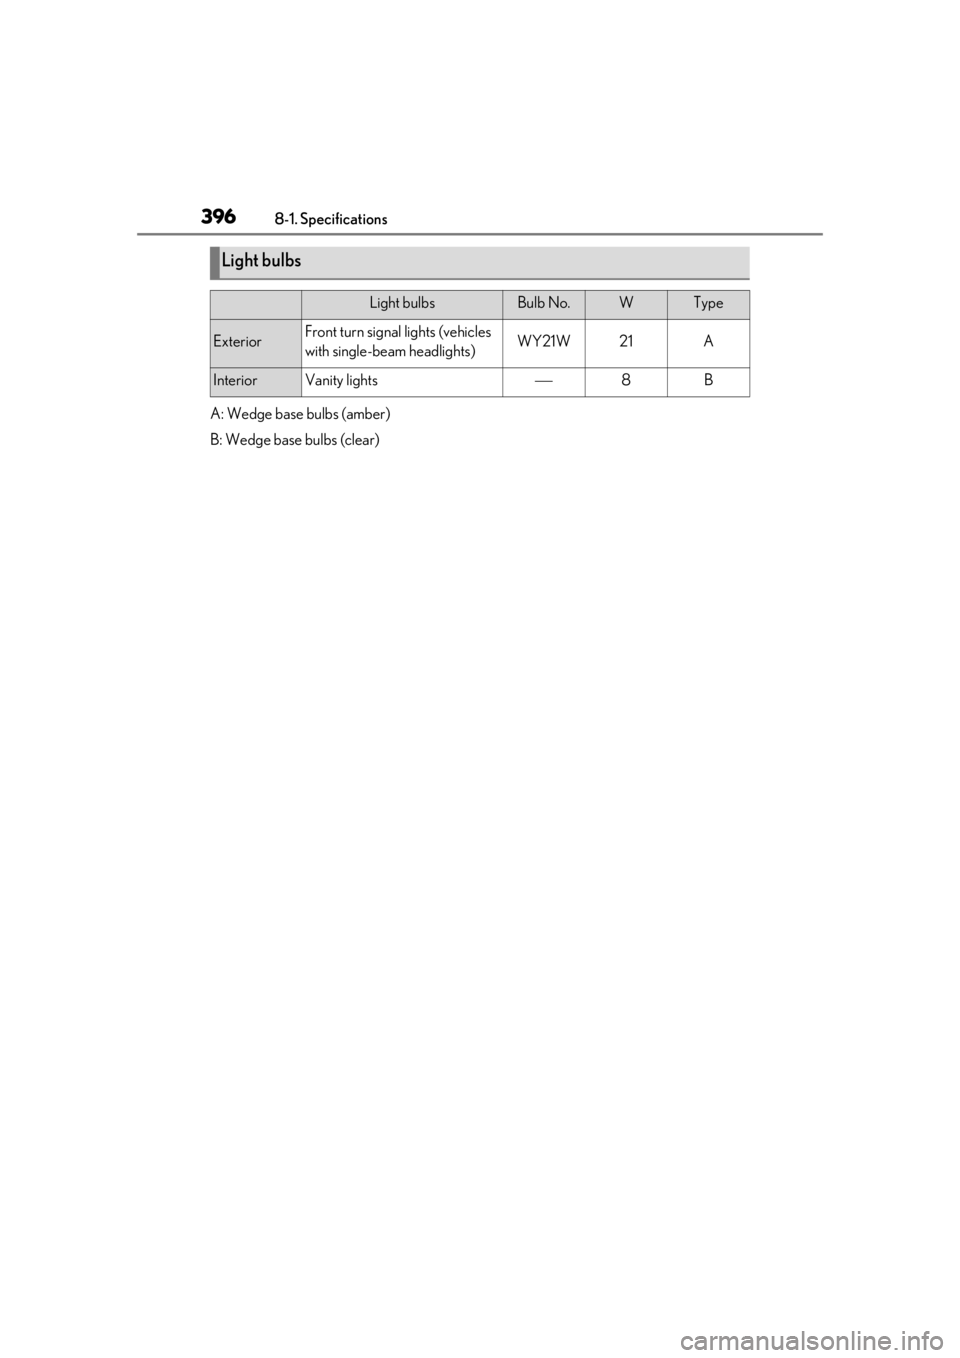
3968-1. Specifications
A: Wedge base bulbs (amber)
B: Wedge base bulbs (clear)
Light bulbs
Light bulbsBulb No.WType
ExteriorFront turn signal lights (vehicles
with single-beam headlights)WY21W21A
InteriorVanity lights8B
Page 418 of 452

4188-2. Customization
■Vehicle customization
●When the smart access system with
push-button start is off, the entry unlock
function cannot be customized.
●When the doors remain closed after
unlocking the doors and the timer acti-
vated automatic door lock function acti-
vates, signals will be generated in
accordance with the operation buzzer
volume and operational signal (Emer-
gency flashers) function settings.
●Some settings can be changed using a
switch or the Center Display. If a setting is
changed using a switch, the changed set-
ting will not be reflected on the Center
Display until the engine switch is turned
off and then to ON.
■Clock settings screen
If the clock adjustment screen is displayed
continuously when attempting to change
the clock settings, the system may be mal-
functioning. Have the vehicle inspected by your Lexus dealer.
Time elapsed before the out-
side door handle lights turn
off
15 seconds
Off
OO7.5 seconds
30 seconds
Operation of the outside
door handle lights when you
approach the vehicle with the
electronic key on your person
OnOffO
Operation of the outside
door handle lights when the
doors are unlocked
OnOffO
Operation of the outside
door handle lights when a
door is opened
OnOffO
Rear interior light and foot-
well lightsOnOffO
Fading out of the outside door
handle lights when they turn
off
LongShortO
FunctionDefault settingCustomized settingABC
Page 438 of 452

438Alphabetical Index
C
Card key ............................................................ 94
CareAluminum wheels ......................................306
Exterior ...........................................................306
Interior .............................................................309
Seat belts........................................................309
Cargo capacity............................................... 147
Cargo hooks .................................................280
Center Display ............................................. 256
Chains ................................................................251
Child-protectors............................................. 101
Child restraint system................................... 44 Fixed with a LATCH system .................. 52
Fixed with a seat belt................................... 48
Front passenger occupant classification system ............................................................. 39
Points to remember .................................... 44
Riding with children ..................................... 44
Types of child restraint system installation method ........................................................... 46
Using an anchor bracket .......................... 54
Child safety ....................................................... 44 Airbag precautions...................................... 35
Back door precautions.............................102
Battery precautions ..................... 326, 385
Child restraint system................................. 44
Heated steering wheel and seat heater precautions.................................................. 271
How your child should wear the seat belt .............................................................................27
Moon roof precautions ............................139
Power window lock switch.....................136
Power window precautions ...................136
Rear door child-protectors ..................... 101
Removed key battery precautions ... 342
Seat belt extender precautions ..............27
Seat belt precautions .................................. 52
Cleaning.............................................. 306, 309 Aluminum wheels ......................................306
Exterior ...........................................................306 Interior ............................................................ 309
Radar sensor ...................................... 180, 215
Seat belts ....................................................... 309
Clock ................................................72, 75, 285
Coat hooks..................................................... 294
Compass .......................................................... 301
Condenser ..................................................... 324
Console box .................................................. 278
Consumption screen .................................... 90
Continuously variable transmission...... 155
Coolant Capacity .........................................................393
Checking ....................................................... 323
Preparing and checking before winter.......................................................................... 249
Cooling system............................................. 323 Engine overheating.................................. 386
Cornering lights ............................................. 167 Replacing light bulbs ................................346
Cruise control Dynamic radar cruise control with full-
speed range ..............................................204
Cup holders ................................................... 278
Current fuel consumption ............................81
Curtain shield airbags .................................. 30
Customizable features ..............................408
D
Daytime running light system ...................165
Deck board ......................................................281
Deck under tray ...........................................280
Defogger Outside rear view mirrors.....................263
Rear window ................................................263
Windshield ....................................................263
Dimension ...................................................... 390
Dinghy towing.................................................. 151
Display BSM (Blind Spot Monitor)......................214
Dynamic radar cruise control with full-
speed range ..............................................204
Head-up display............................................86