Page 95 of 792
952. Instrument cluster
2
Instrument cluster
RX450h_RX450hL_U
*3: This light illuminates on the outside rear view mirrors.
*4: This light flashes to indicate that the system is operating.
*5: The light comes on when the system is turned off.
*6: This light illuminates on the center panel.
*7: When the outside temperature is approximately 37 F (3 C) or lower, this indicator
will flash for approximately 10 seconds, then stay on.
WARNING
■If a safety system warnin g light does not come on
Should a safety system light such as the ABS and SRS warning lights not come on when
you start the hybrid system, this could mean that these systems are not available to help
protect you in an accident, which could result in death or serious injury. Have the vehi-
cle inspected by your Lexus dealer immediately if this occurs.
Page 131 of 792
131
3
Operation of
each component
RX450h_RX450hL_U
3-1. Key information
Keys .................................................. 132
3-2. Opening, closing and locking the doors
Side doors ...................................... 136
Power back door .........................142
Smart access system with push-button start ...................... 158
3-3. Adjusting the seats Front seats.......................................167
Rear seats....................................... 168
Driving position memory ...........181
Head restraints ............................ 186
3-4. Adjusting the steering wheel and mirrors
Steering wheel ............................. 189
Inside rear view mirror ............... 191
Outside rear view mirrors....... 193
3-5. Opening, closing the windows and moon roof
Power windows ........................... 196
Moon roof .....................................200
Panoramic moon roof .............. 204
Page 181 of 792

1813-3. Adjusting the seats
3
Operation of each component
RX450h_RX450hL_U
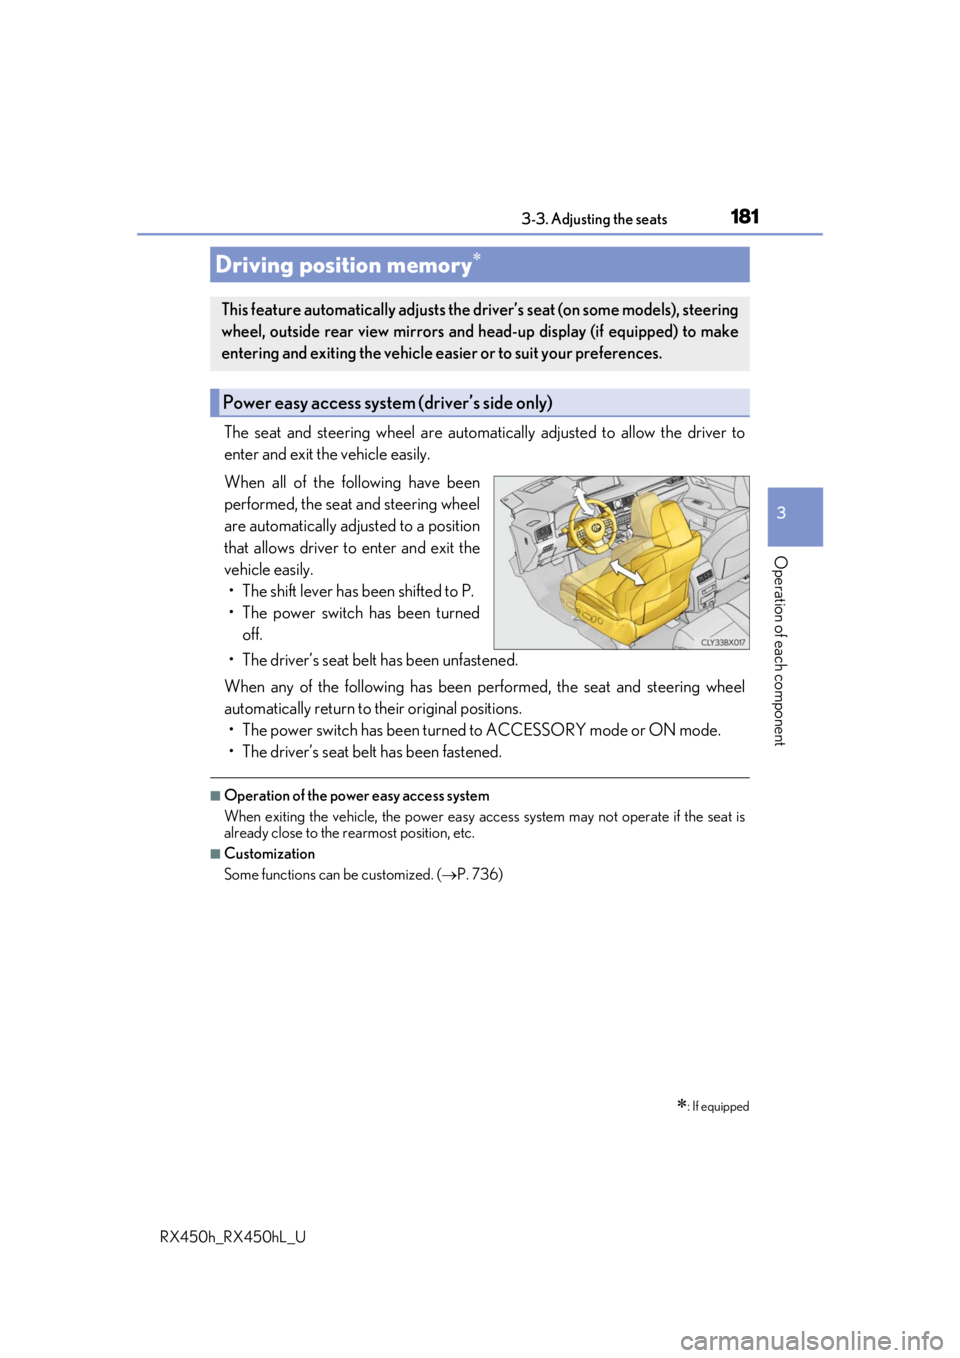
The seat and steering wheel are automatically adjusted to allow the driver to
enter and exit the vehicle easily.
When all of the following have been
performed, the seat and steering wheel
are automatically adjusted to a position
that allows driver to enter and exit the
vehicle easily. • The shift lever has been shifted to P.
• The power switch has been turned off.
• The driver’s seat belt has been unfastened.
When any of the following has been performed, the seat and steering wheel
automatically return to their original positions. • The power switch has been turned to ACCESSORY mode or ON mode.
• The driver’s seat belt has been fastened.
■Operation of the power easy access system
When exiting the vehicle, the power easy ac cess system may not operate if the seat is
already close to the rearmost position, etc.
■Customization
Some functions can be customized. ( P. 736)
Driving position memory
: If equipped
This feature automatically adjusts the driver’s seat (on some models), steering
wheel, outside rear view mirrors and head-up display (if equipped) to make
entering and exiting the vehicle easi er or to suit your preferences.
Power easy access system (driver’s side only)
Page 182 of 792
1823-3. Adjusting the seats
RX450h_RX450hL_U
Your preferred driving position (the positi on of the driver’s seat, steering wheel,
outside rear view mirrors and head-up display
*) can be recorded and recalled
by pressing a button.
Three different driving positions can be recorded into memory.
*: If equipped
■Recording procedure
Check that the shift lever is in P.
Turn the power switch to ON mode.
Adjust the driver’s seat, steering wh eel, outside rear view mirrors and
head-up display (if equipped) to the desired positions.
While pressing the “SET” button,
or within 3 seconds after the
“SET” button is pressed, press
button “1”, “2” or “3” until the
buzzer sounds.
If the selected button has already
been preset, the previously recorded
position will be overwritten.
Driving position memory
1
2
3
4
Page 184 of 792

1843-3. Adjusting the seats
RX450h_RX450hL_U
Each electronic key can be registered to recall your preferred driving position.
■Registering procedure
Record your driving position to button “1”, “2” or “3” before performing the
following:
Carry only the key you want to regist er, and then close the driver’s door.
If 2 or more keys are in the vehicle, the driving position cannot be recorded
properly.
Check that the shift lever is in P.
Turn the power switch to ON mode.
Recall the driving position that you want to record.
While pressing the recalled but-
ton, press and hold the door lock
switch (either lock or unlock) until
the buzzer sounds.
If the button could not be registered,
the buzzer sounds continuously for
approximately 3 seconds.
■Recall procedureMake sure that the doors are locked before recalling the driving position.
Carry the electronic key that has been registered to the driving position,
and then unlock and open the driver’s door using the smart access system
with push-button start or wireless remote control.
The driving position will move to the recorded position (not including the steering
wheel and head-up display
*). However, the seat will move to a position slightly
behind the recorded position in order to make entering the vehicle easier.
If the driving position is in a position th at has already been recorded, the seat and
outside rear view mirrors will not move.
*: If equipped
Turn the power switch to ACCESSORY mode or ON mode, or fasten a
seat belt.
The seat, steering wheel and head-up display (if equipped) will move to the
recorded position.
Memory recall function (driver’s side only)
1
2
3
4
1
2
Page 191 of 792
1913-4. Adjusting the steering wheel and mirrors
3
Operation of each component
RX450h_RX450hL_U
The height of the rear view mirror can be adjusted to suit your driving posture.
Adjust the height of the rear view mir-
ror by moving it up and down.
Responding to the level of brightness of the headlights of vehicles behind, the
reflected light is automatically reduced.
Changing automatic anti-glare func-
tion mode
ON/OFF
When the automatic anti-glare function
is in ON mode, the indicator illuminates.
The function will set to ON mode each
time the power switch is turned to ON
mode.
Pressing the button turns the function to
OFF mode. (The indicator also turns
off.)
Inside rear view mirror
The rear view mirror’s position can be adjusted to enable sufficient confirma-
tion of the rear view.
Adjusting the height of rear view mirror
Auto anti-glare function
Indicator
Page 193 of 792
1933-4. Adjusting the steering wheel and mirrors
3
Operation of each component
RX450h_RX450hL_U
To select a mirror to adjust, press the
switch.Left
Right
Pressing the same switch again will
put the switch in neutral.
To adjust the mirror, press the switch.Up
Right
Down
Left
Push the mirror back in the direction of
the vehicle’s rear.
Outside rear view mirrors
Adjustment procedure
1
1
2
2
1
2
3
4
Folding the mirrors (manual type)
Page 194 of 792

1943-4. Adjusting the steering wheel and mirrors
RX450h_RX450hL_U
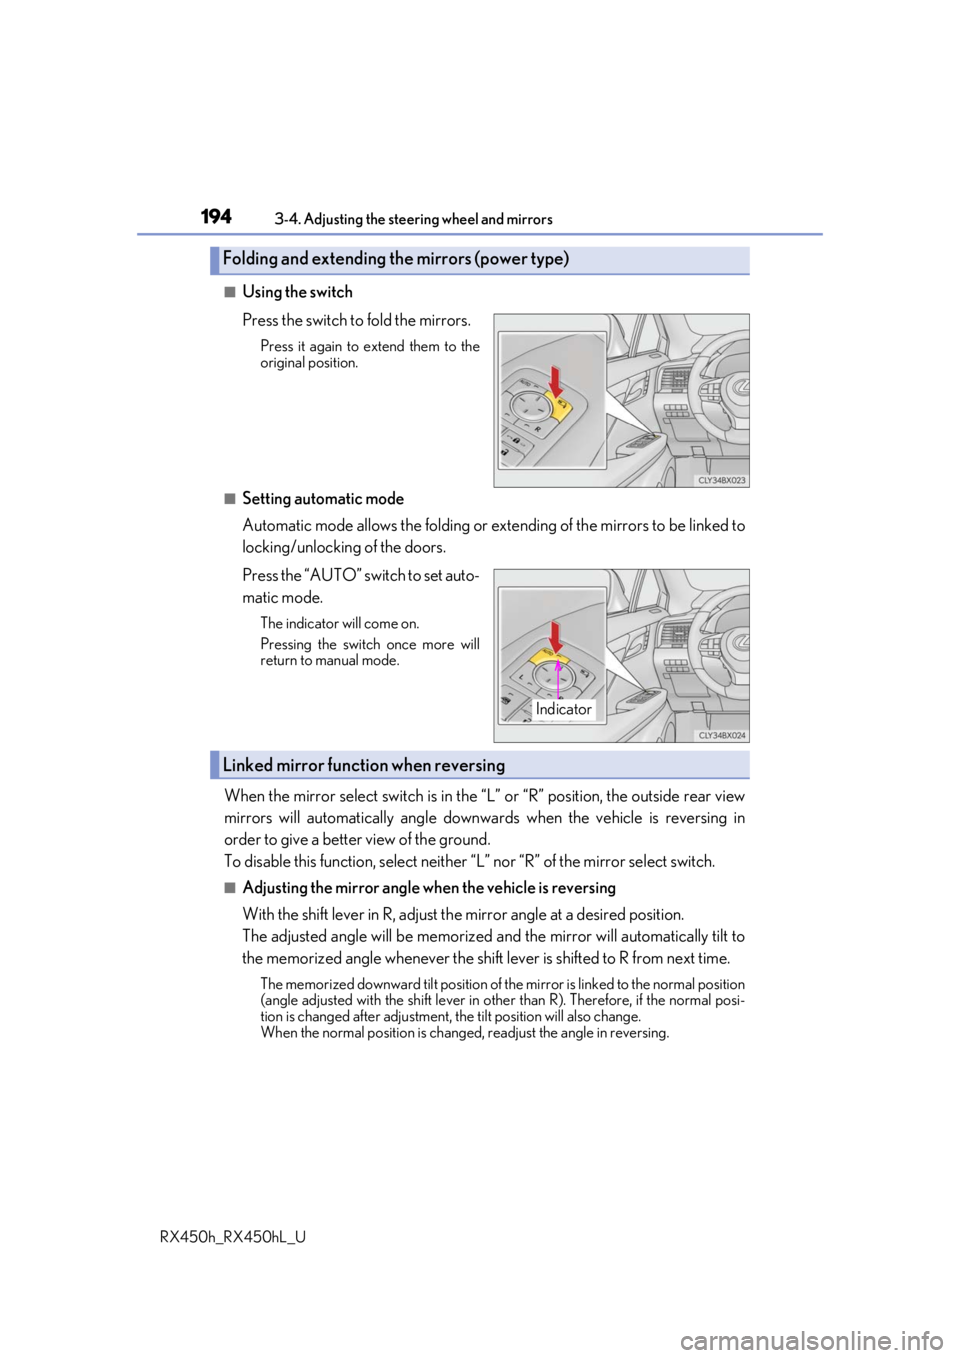
■Using the switch
Press the switch to fold the mirrors.
Press it again to extend them to the
original position.
■Setting automatic mode
Automatic mode allows the folding or ex tending of the mirrors to be linked to
locking/unlocking of the doors.
Press the “AUTO” switch to set auto-
matic mode.
The indicator will come on.
Pressing the switch once more will
return to manual mode.
When the mirror select switch is in the “L” or “R” position, the outside rear view
mirrors will automatically angle downwa rds when the vehicle is reversing in
order to give a better view of the ground.
To disable this function, select neither “L” nor “R” of the mirror select switch.
■Adjusting the mirror angle when the vehicle is reversing
With the shift lever in R, adjust the mirror angle at a desired position.
The adjusted angle will be memorized and the mirror will automatically tilt to
the memorized angle whenever the shift lever is shifted to R from next t\
ime.
The memorized downward tilt position of th e mirror is linked to the normal position
(angle adjusted with the shif t lever in other than R). Ther efore, if the normal posi-
tion is changed after adjustment, the tilt position will also change.
When the normal position is chang ed, readjust the angle in reversing.
Folding and extending the mirrors (power type)
Indicator
Linked mirror function when reversing