2019 Lexus LC500h change wheel
[x] Cancel search: change wheelPage 233 of 432
2334-5. Using the driving support systems
4
Driving
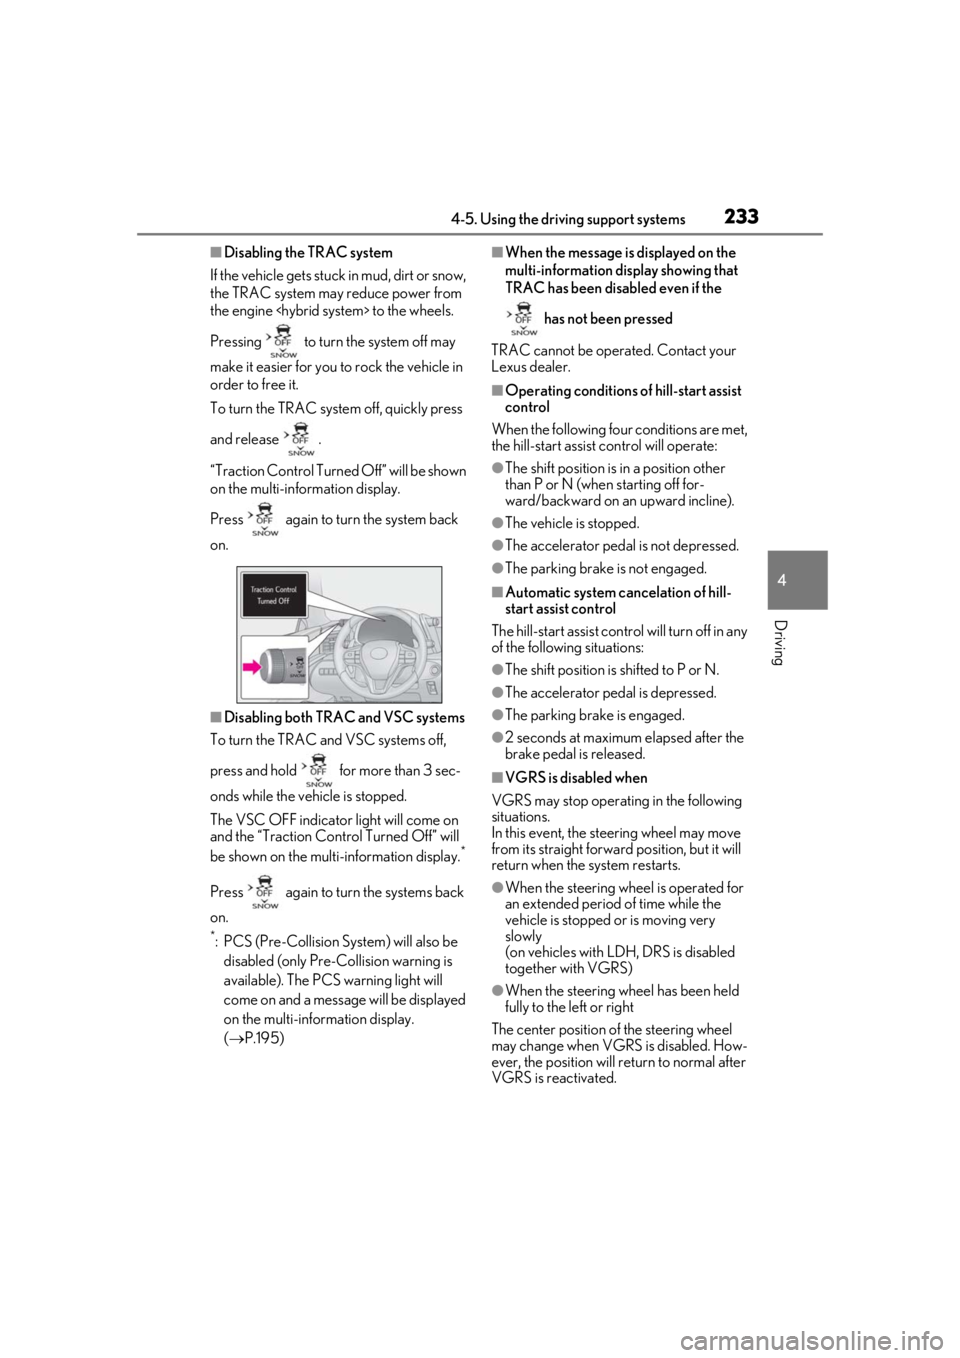
■Disabling the TRAC system
If the vehicle gets stuck in mud, dirt or snow,
the TRAC system may reduce power from
the engine
Pressing to turn the system off may
make it easier for you to rock the vehicle in
order to free it.
To turn the TRAC system off, quickly press
and release .
“Traction Control Turned Off” will be shown
on the multi-information display.
Press again to turn the system back
on.
■Disabling both TRAC and VSC systems
To turn the TRAC and VSC systems off,
press and hold for more than 3 sec-
onds while the vehicle is stopped.
The VSC OFF indicator light will come on
and the “Traction Cont rol Turned Off” will
be shown on the multi-information display.
*
Press again to turn the systems back
on.
*: PCS (Pre-Collision System) will also be disabled (only Pre-Collision warning is
available). The PCS warning light will
come on and a message will be displayed
on the multi-information display.
( P.195)
■When the message is displayed on the
multi-information display showing that
TRAC has been disabled even if the
has not been pressed
TRAC cannot be oper ated. Contact your
Lexus dealer.
■Operating conditions of hill-start assist
control
When the following four conditions are met,
the hill-start assist control will operate:
●The shift position is in a position other
than P or N (when starting off for-
ward/backward on an upward incline).
●The vehicle is stopped.
●The accelerator pedal is not depressed.
●The parking brake is not engaged.
■Automatic system cancelation of hill-
start assist control
The hill-start assist control will turn off in any
of the following situations:
●The shift position is shifted to P or N.
●The accelerator pedal is depressed.
●The parking brake is engaged.
●2 seconds at maximum elapsed after the
brake pedal is released.
■VGRS is disabled when
VGRS may stop operat ing in the following
situations.
In this event, the steering wheel may move
from its straight forward position, but it will
return when the system restarts.
●When the steering wheel is operated for
an extended period of time while the
vehicle is stopped or is moving very
slowly
(on vehicles with LDH, DRS is disabled
together with VGRS)
●When the steering wheel has been held
fully to the left or right
The center position of the steering wheel
may change when VGRS is disabled. How-
ever, the position will return to normal after
VGRS is reactivated.
Page 235 of 432
2354-5. Using the driving support systems
4
Driving
WARNING
■The ABS does not operate effectively
when
●The limits of tire gripping performance
have been exceeded (such as exces-
sively worn tires on a snow covered
road).
●The vehicle hydroplanes while driving
at high speed on wet or slick roads.
■Stopping distance when the ABS is
operating may exceed that of normal
conditions
The ABS is not designed to shorten the
vehicle’s stopping di stance. Always main-
tain a safe distance from the vehicle in
front of you, especially in the following
situations:
●When driving on dirt, gravel or snow-
covered roads
●When driving over bumps in the road
●When driving over roads with potholes
or uneven surfaces
■TRAC/VSC may not operate effec-
tively when
Directional control and power may not
be achievable while driving on slippery
road surfaces, even if the TRAC/VSC
system is operating.
Drive the vehicle carefully in conditions
where stability and power may be lost.
■Hill- start assist control does not
operate effectively when
●Do not overly rely on hill-start assist
control. Hill-start assist control may
not operate effectively on steep
inclines and roads covered with ice.
●Unlike the parking brake, hill-start
assist control is not intended to hold
the vehicle stationary for an extended
period of time. Do not attempt to use
hill-start assist control to hold the vehi-
cle on an incline, as doing so may lead
to an accident.
■When the TRAC/VSC/ABS is acti-
vated
The slip indicator light flashes. Always
drive carefully. Reckless driving may
cause an accident. Exercise particular
care when the indicator light flashes.
■When the TRAC/VSC systems are
turned off
Be especially careful and drive at a speed
appropriate to the road conditions. As
these are the systems to help ensure
vehicle stability and driving force, do not
turn the TRAC/VSC systems off unless
necessary.
■Secondary Collision Brake
Do not overly rely on the Secondary Col-
lision Brake. This system is designed to
help reduce the possibility of further
damage due to a secondary collision,
however, that effect changes according
to various conditions. Overly relying on
the system may result in death or serious
injury.
■Replacing tires
Make sure that all ti res are of the speci-
fied size, brand, tread pattern and total
load capacity. In addition, make sure that
the tires are inflated to the recom-
mended tire inflation pressure level.
The ABS, TRAC and VSC systems will
not function correctly if different tires are
installed on the vehicle.
Contact your Lexus dealer for further
information when replacing tires or
wheels.
■Handling of tires and the suspension
Using tires with any kind of problem or
modifying the suspensi on will affect the
driving assist systems, and may cause a
system to malfunction.
Page 239 of 432
2394-6. Driving tips
4
Driving
any snow that has accumulated on
the air inlet vents in front of the
windshield.
Check for and remove any excess
ice or snow that may have accumu-
lated on the exterior lights, vehicle’s
roof, chassis, around the tires or on
the brakes.
Remove any snow or mud from the
bottom of your shoes before getting
in the vehicle.
■To protect the windshield wipers
P.180
Accelerate the vehicle slowly, keep a
safe distance between you and the
vehicle ahead, and drive at a reduced
speed suitable to road conditions.
Park the vehicle and shift the shift posi-
tion to P without setting the parking
brake. The parking brake may freeze
up, preventing it from being released. If
the vehicle is parked without setting
the parking brake, make sure to block
the wheels.
Failure to do so may be dangerous
because it may cause the vehicle to
move unexpectedly, possibly leading to
an accident.
Tire chains cannot be mounted.
Snow tires should be used instead.
To enable the windshield wipers to be
lifted when heavy snow or icy condi-
tions are expected, change the rest
position of the windshield wipers from
the retracted position below the hood
to the service position using the wiper
lever. ( P.180)
When driving the vehicle
When parking the vehicle
Selecting tire chains
Windshield wipers
Page 257 of 432

2575-3. Using the air conditioning system
5
Interior features
Display the air conditioning control
screen (P.251)
Adjust the seat heater temperature
level
Each time the switch is selected, the tem-
perature level and leve l indicator (orange)
change as follows:
AUTO Hi Mid Lo Off
Adjust the seat ventilator fan speed
level
Each time the switch is selected, the fan
speed level and leve l indicator (blue)
change as follows:
AUTO Hi Mid Lo Off
Adjust the heated steering wheel
temperature level
Each time the switch is selected, the tem-
perature level and le vel indicator change
as follows:
AUTO Hi Lo Off
■The heated steering wheel, seat heaters
and seat ventilators wheel can be used
when
The engine switch
IGNITION ON mode
■Air conditioning system-linked control
mode
When the seat ventilato r fan speed level is
Hi, the seat ventilator fan speed may
become higher according to the fan speed
of the air conditioning system.
■Customization
Steering wheel heating preference in auto-
matic mode and the automatic mode set-
tings for the seat heat ers and ventilators can
be changed. (Customizable features:
P.391)
A
B
C
D
WARNING
■To prevent overheating and minor
burn injuries
Observe the following precautions when
using the seat heaters.
●Do not cover the seat with a blanket or
cushion when using the seat heater.
●Do not use seat heater more than nec-
essary.
Page 274 of 432

2746-1. Maintenance and care
6-1.Maintenance and care
Working from top to bottom, liber-
ally apply water to the vehicle body,
wheel wells and underside of the
vehicle to remove any dirt and dust.
Wash the vehicle body using a
sponge or soft cloth, such as a
chamois.
For hard-to-remove marks, use car
wash soap and rinse thoroughly with
water.
Wipe away any water.
Wax the vehicle when the water-
proof coating deteriorates.
If water does not bead on a clean surface,
apply wax when the vehicle body is cool.
■CFRP (Carbon Fiber Reinforced Plas-
tic) part (if equipped)
●As the CFRP parts ma y change color if
they are exposed to ultraviolet rays for
extended periods of time, Lexus recom-
mends that your vehicle be stored in a
place where it will not be exposed to
direct sunlight.
●Do not use wax that contains abrasives.
●Do not use automatic car washes as they
may scratch the CFRP parts and damage
the paint.
■Self-restoring coat*
The vehicle body has a self-restoring coat-
ing that is resistant to small surface scratches caused in
a car wash etc.
●The coating lasts for 5 to 8 years from
when the vehicle is delivered from the
plant.
●The restoration time differs depending on
the depth of the scratch and outside tem-
perature.
The restoration time may become
shorter when the coating is warmed by
applying warm water.
●Deep scratches caused by keys, coins,
etc. cannot be restored.
●Do not use wax that contain abrasives.*: CFRP parts (if equipp ed) do not have a
self-restoring coat.
■Cleaning the areas with metal accents
Do not use baking soda (sodium bicarbon-
ate) and wax that contains abrasives.
■Automatic car washes (vehicles without
CFRP parts)
●Fold the mirrors befo re washing the vehi-
cle. Start washing from the front of the
vehicle. Make sure to extend the mirrors
before driving.
●Wash the vehicle with the active rear
wing retracted. If the vehicle is washed
with the active rear wing raised, depend-
ing on the type of automatic car wash, the
brushes of the automatic car wash may
become stuck on the active rear wing. In
this case, the active rear wing may not be
washed very well or may even be
scratched or damaged.
●Brushes used in automatic car washes
may scratch the vehicle body and dam-
age the paint.
■High pressure car washes
●Do not allow the nozzles of the car wash
to come within close proximity of the win-
dows.
●Before using the car wash, check that the
fuel filler door on your vehicle is closed
properly.
■Notes for the smart access system with
push-button start
If the door handle becomes wet while the
electronic key is within the effective range,
Cleaning and protecting the
vehicle exterior
Perform cleaning in a manner
appropriate to each component
and its material.
Cleaning instructions
Page 306 of 432

3066-3. Do-it-yourself maintenance
properly. After driving for about 20 min-
utes, the tire pressure warning light blinks
for 1 minute and stays on to indicate a sys-
tem malfunction.
■The tire pressure warning system
must be initialized in the following
circumstances:
When rotating the tires.
When the tire inflation pressure is
changed when changing traveling
speed.
When the tire inflation pressure is
changed such as when changing tire
size. (When there are multiple spec-
ified pressures)
After registering the ID codes.
( P.308)
When the tire pressure warning system
is initialized, the cu rrent tire inflation pressure is set as the benchmark pres-
sure.
■How to initialize the tire pressure
warning system
1 Park the vehicle in a safe place and
turn the engine switch
Initialization cannot be performed while
the vehicle is moving.
2 Adjust the tire inflation pressure to
the specified cold tire inflation pres-
sure level.
Make sure to adjust the tire pressure to the
specified cold tire infl ation pressure level.
The tire pressure warning system will oper-
ate based on this pressure level.
3 Turn the engine switch
4 Press or of the meter con-
trol switches and select .
5 Press or of the meter con-
trol switches and select “Vehicle
Settings”, then press “OK”.
6 Press or of the meter con-
trol switches and select “TPWS
SET”, then press “OK”.
7 Press or of the meter con-
trol switches and select “Set tire
pressure”. Then press and hold
“OK” until the tire pressure warning
light starts blinking.
A message is displayed on the multi-infor-
mation display. Also, “--” is displayed for
inflation pressure of each tire on the multi-
information display while the tire pressure
NOTICE
■Repairing or replacing tires, wheels,
tire pressure warning valves, trans-
mitters and tire valve caps
●When removing or fitting the wheels,
tires or the tire pressure warning
valves and transmitters, contact your
Lexus dealer as the tire pressure warn-
ing valves and transmitters may be
damaged if not handled correctly.
●Make sure to install the tire valve caps.
If the tire valve caps are not installed,
water could enter the tire pressure
warning valves and the tire pressure
warning valves could be bound.
●When replacing tire valve caps, do not
use tire valve caps other than those
specified. The cap may become stuck.
Initializing the tire pressure
warning system
Page 308 of 432
3086-3. Do-it-yourself maintenance
The tire pressure warning valve and
transmitter is equipped with a unique
ID code. When replacing a tire pres-
sure warning valve and transmitter, it is
necessary to register the ID code.
When registering the ID codes, per-
form the following procedure.
1Turn the engine switch
2 Press or of the meter con-
trol switches and select .
3 Press or of the meter con-
trol switches and select “Vehicle
Settings”, then press “OK”.
4 Press or of the meter con-
trol switches and select “TPWS
SET”, then press “OK”.
5 Press or of the meter con-
trol switches and select “Change
wheel set”. Then press and hold
“OK” until the tire pressure warning
light starts blinking.
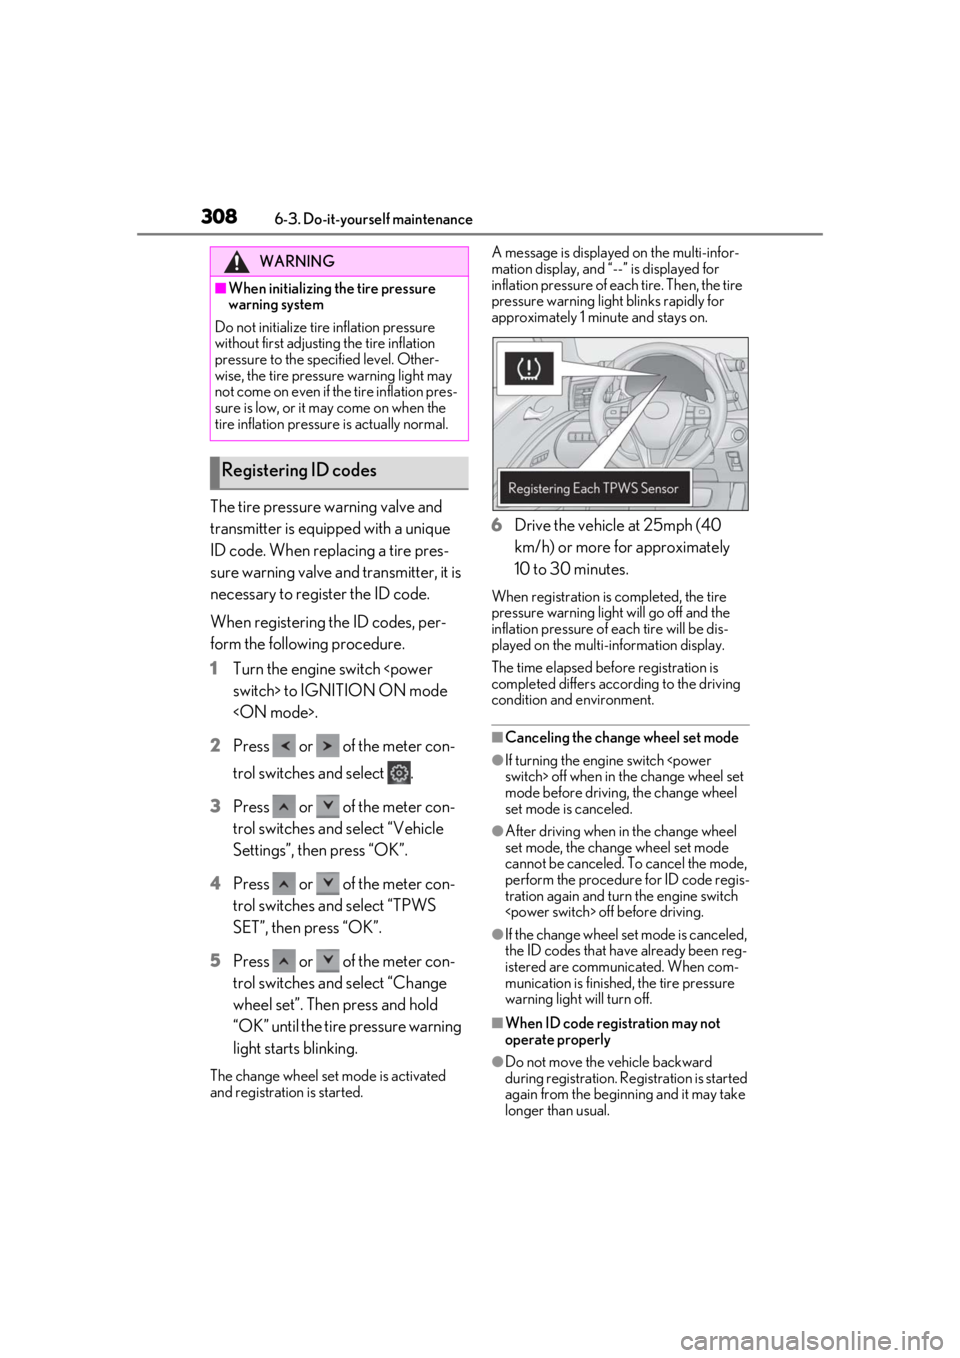
The change wheel set mode is activated
and registration is started. A message is displayed on the multi-infor-
mation display, and “--” is displayed for
inflation pressure of each tire. Then, the tire
pressure warning light blinks rapidly for
approximately 1 minute and stays on.
6
Drive the vehicle at 25mph (40
km/h) or more for approximately
10 to 30 minutes.
When registration is completed, the tire
pressure warning light will go off and the
inflation pressure of each tire will be dis-
played on the multi-information display.
The time elapsed before registration is
completed differs according to the driving
condition and environment.
■Canceling the change wheel set mode
●If turning the engine switch
mode before driving, the change wheel
set mode is canceled.
●After driving when in the change wheel
set mode, the change wheel set mode
cannot be canceled. To cancel the mode,
perform the procedure for ID code regis-
tration again and turn the engine switch
●If the change wheel set mode is canceled,
the ID codes that have already been reg-
istered are communicated. When com-
munication is finished, the tire pressure
warning light will turn off.
■When ID code registration may not
operate properly
●Do not move the vehicle backward
during registration. Re gistration is started
again from the beginning and it may take
longer than usual.
WARNING
■When initializing the tire pressure
warning system
Do not initialize tire inflation pressure
without first adjusting the tire inflation
pressure to the spec ified level. Other-
wise, the tire pressure warning light may
not come on even if the tire inflation pres-
sure is low, or it may come on when the
tire inflation pressure is actually normal.
Registering ID codes
Page 316 of 432
3166-3. Do-it-yourself maintenance
Use only Lexus wheel nuts and
wrenches designed for use with
your aluminum wheels.
When rotating, repairing or chang-
ing your tires, check that the wheel
nuts are still tight after driving 1000
miles (1600 km).
Use only Lexus genuine balance
weights or equivalent and a plastic
or rubber hammer when balancing
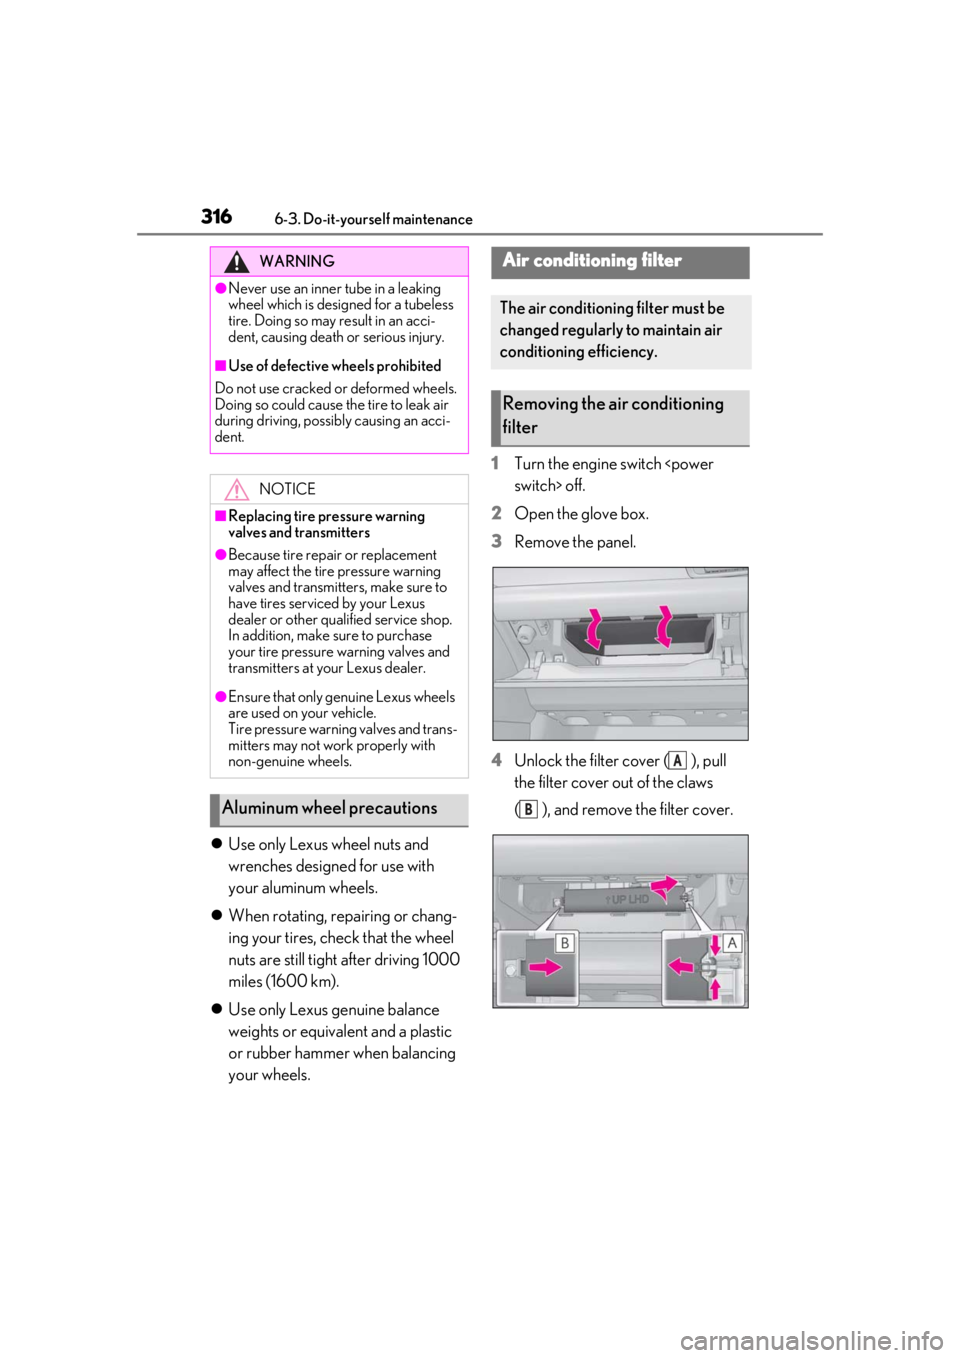
your wheels. 1
Turn the engine switch
2 Open the glove box.
3 Remove the panel.
4 Unlock the filter cover ( ), pull
the filter cover out of the claws
( ), and remove the filter cover.
WARNING
●Never use an inner tube in a leaking
wheel which is designed for a tubeless
tire. Doing so may result in an acci-
dent, causing death or serious injury.
■Use of defective wheels prohibited
Do not use cracked or deformed wheels.
Doing so could cause the tire to leak air
during driving, possibly causing an acci-
dent.
NOTICE
■Replacing tire pressure warning
valves and transmitters
●Because tire repair or replacement
may affect the tire pressure warning
valves and transmitters, make sure to
have tires serviced by your Lexus
dealer or other qualified service shop.
In addition, make sure to purchase
your tire pressure warning valves and
transmitters at your Lexus dealer.
●Ensure that only ge nuine Lexus wheels
are used on your vehicle.
Tire pressure warning valves and trans-
mitters may not work properly with
non-genuine wheels.
Aluminum wheel precautions
Air conditioning filter
The air conditioning filter must be
changed regularly to maintain air
conditioning efficiency.
Removing the air conditioning
filter
A
B