2019 Lexus LC500h brakes
[x] Cancel search: brakesPage 285 of 432
2856-2. Maintenance
6
Maintenance and care
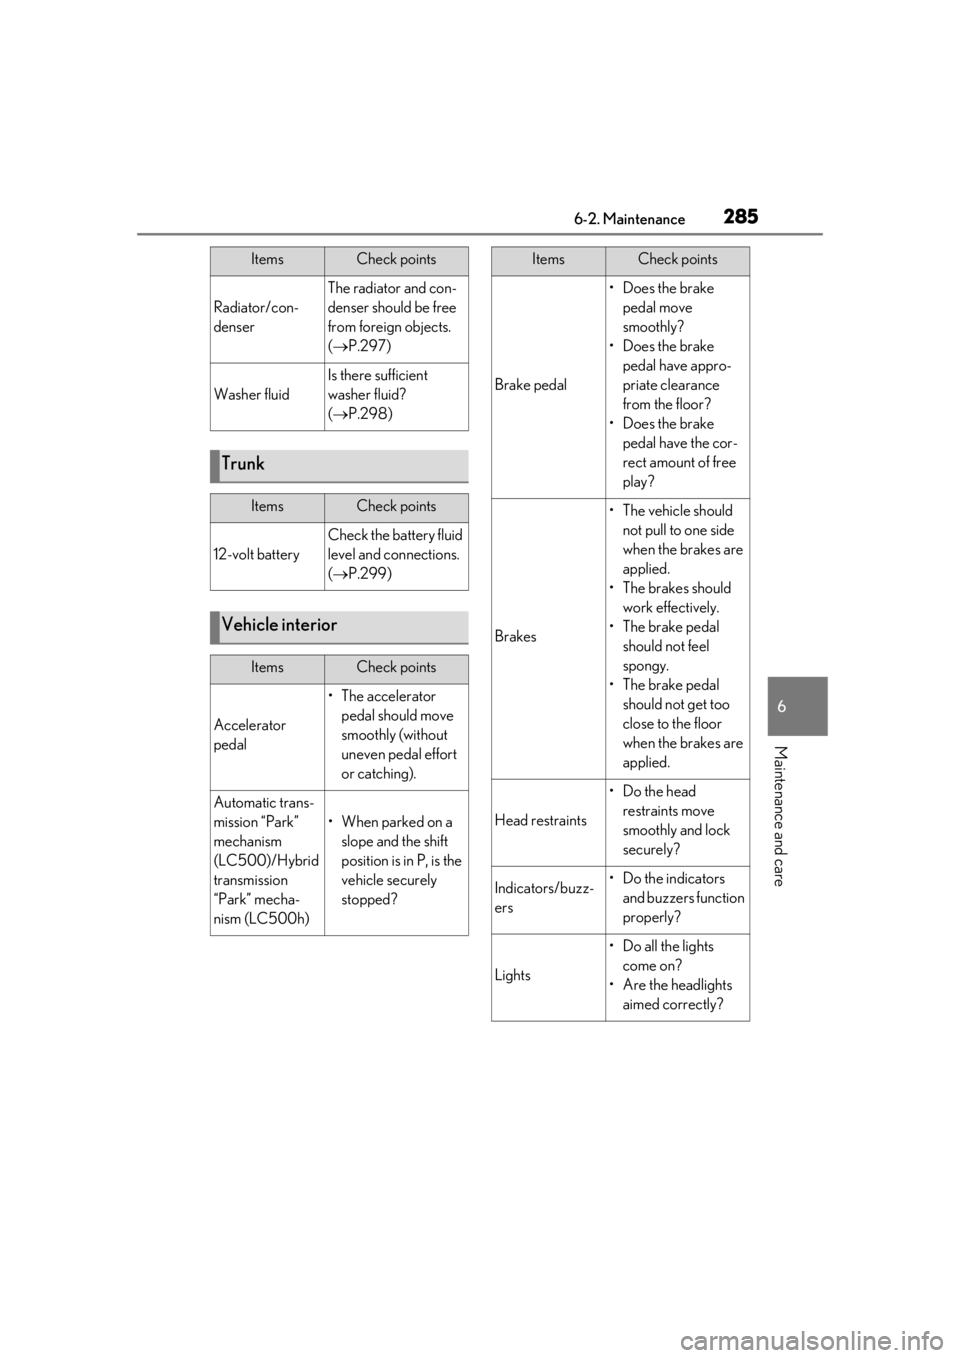
Radiator/con-
denser
The radiator and con-
denser should be free
from foreign objects.
( P.297)
Washer fluid
Is there sufficient
washer fluid?
( P.298)
Trunk
ItemsCheck points
12-volt battery
Check the battery fluid
level and connections.
( P.299)
Vehicle interior
ItemsCheck points
Accelerator
pedal
• The accelerator
pedal should move
smoothly (without
uneven pedal effort
or catching).
Automatic trans-
mission “Park”
mechanism
(LC500)/Hybrid
transmission
“Park” mecha-
nism (LC500h)
•When parked on a slope and the shift
position is in P, is the
vehicle securely
stopped?
ItemsCheck points
Brake pedal
•Does the brake pedal move
smoothly?
•Does the brake pedal have appro-
priate clearance
from the floor?
•Does the brake pedal have the cor-
rect amount of free
play?
Brakes
•The vehicle should not pull to one side
when the brakes are
applied.
• The brakes should work effectively.
• The brake pedal should not feel
spongy.
• The brake pedal should not get too
close to the floor
when the brakes are
applied.
Head restraints
•Do the head restraints move
smoothly and lock
securely?
Indicators/buzz-
ers•Do the indicators and buzzers function
properly?
Lights
• Do all the lights come on?
• Are the headlights aimed correctly?
ItemsCheck points
Page 312 of 432
3126-3. Do-it-yourself maintenance
avoid scratching the wheel surface.
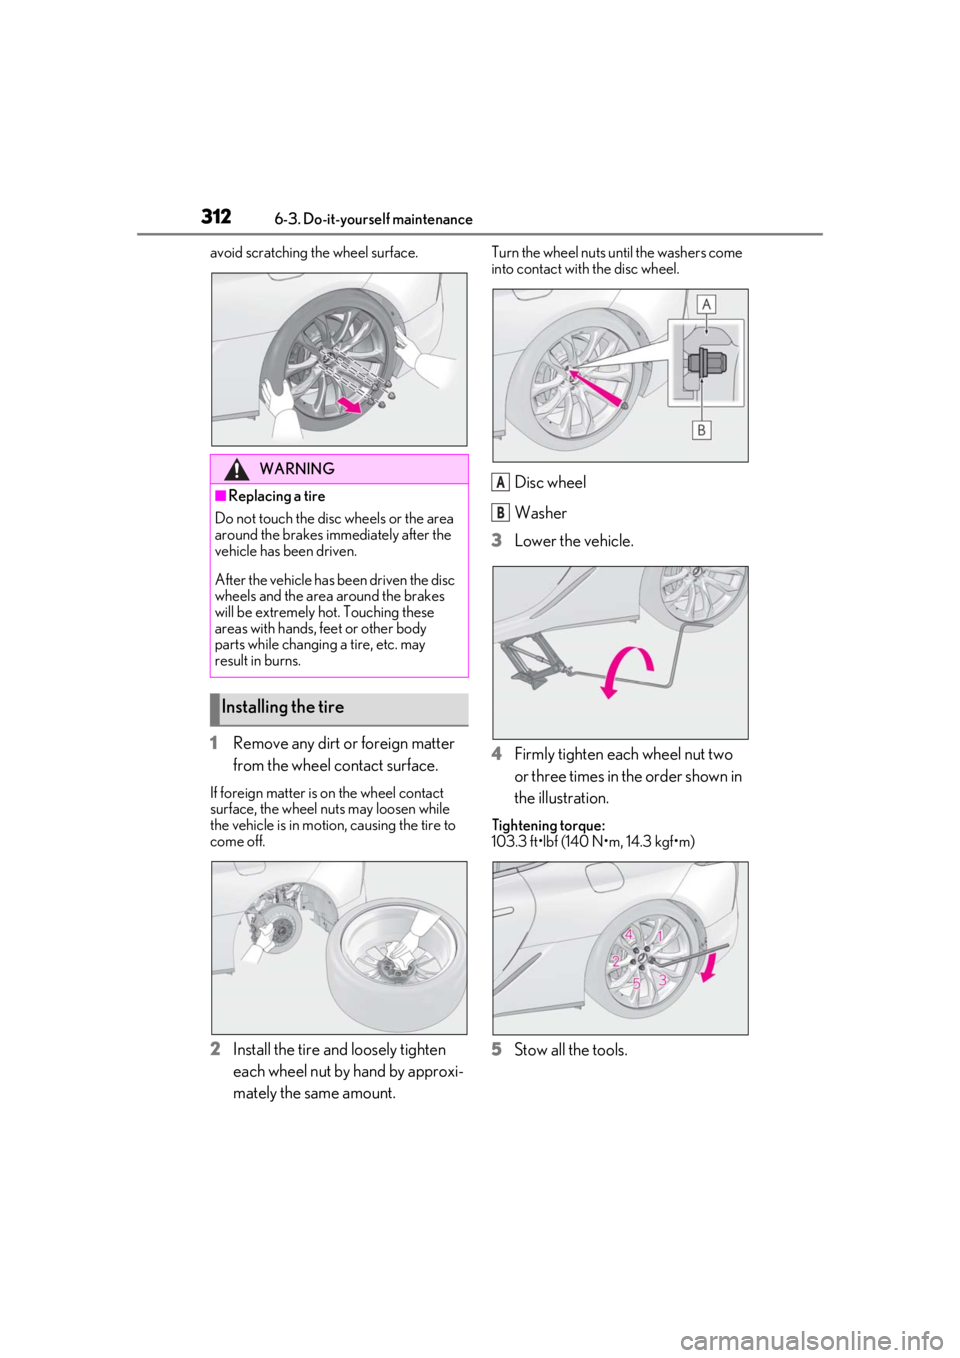
1Remove any dirt or foreign matter
from the wheel contact surface.
If foreign matter is on the wheel contact
surface, the wheel nuts may loosen while
the vehicle is in motion, causing the tire to
come off.
2Install the tire and loosely tighten
each wheel nut by hand by approxi-
mately the same amount.
Turn the wheel nuts until the washers come
into contact with the disc wheel.
Disc wheel
Washer
3 Lower the vehicle.
4 Firmly tighten each wheel nut two
or three times in the order shown in
the illustration.
Tightening torque:
103.3 ft•lbf (140 N•m, 14.3 kgf•m)
5Stow all the tools.
WARNING
■Replacing a tire
Do not touch the disc wheels or the area
around the brakes immediately after the
vehicle has been driven.
After the vehicle has been driven the disc
wheels and the area around the brakes
will be extremely hot. Touching these
areas with hands, feet or other body
parts while changing a tire, etc. may
result in burns.
Installing the tire
A
B
Page 331 of 432
3317-2. Steps to take in an emergency
7
When trouble arises
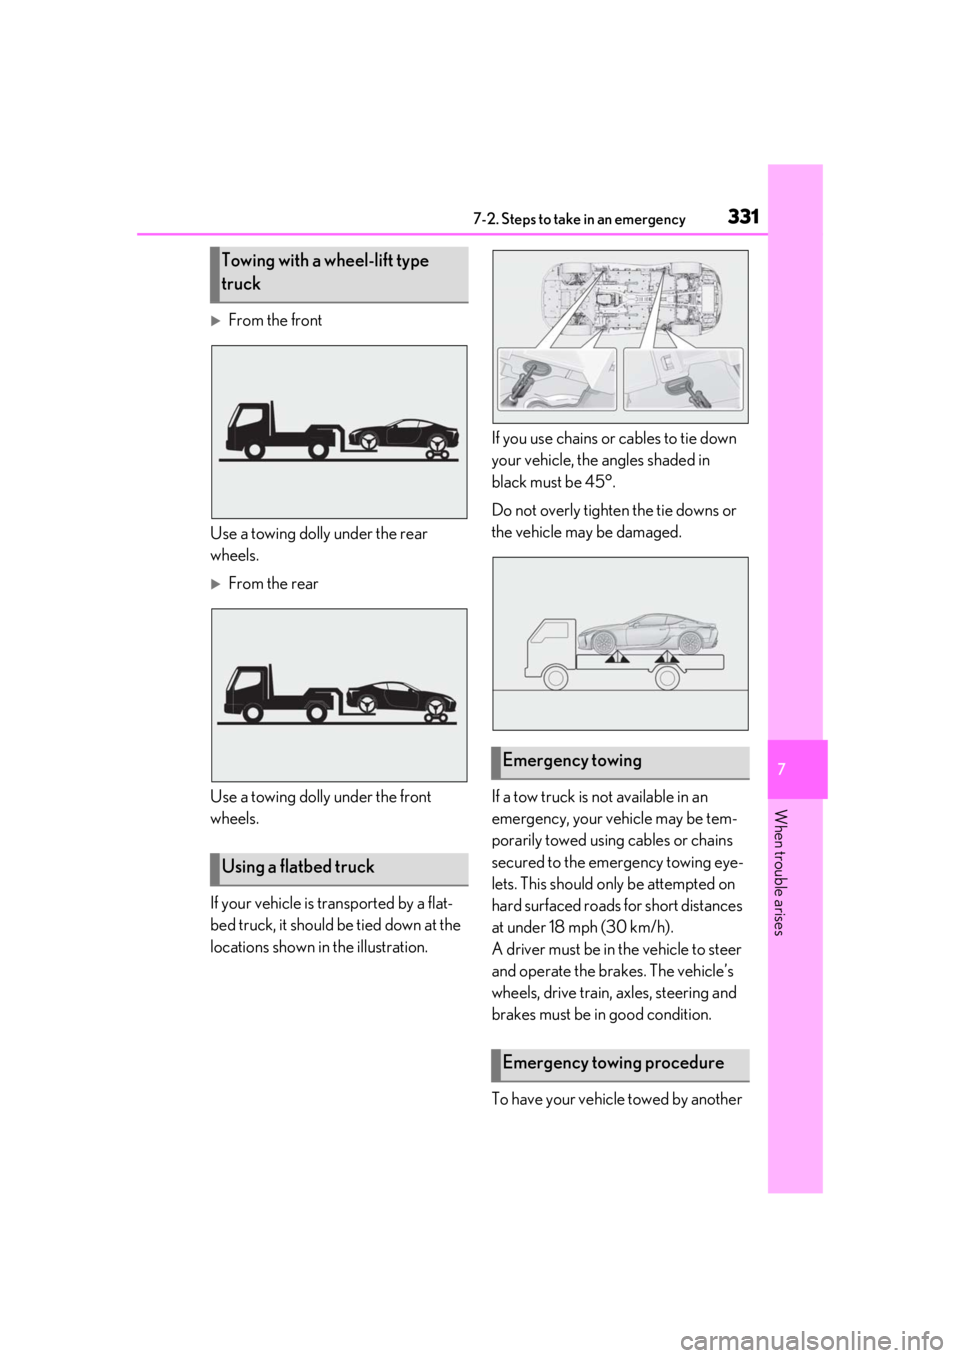
From the front
Use a towing dolly under the rear
wheels.
From the rear
Use a towing dolly under the front
wheels.
If your vehicle is transported by a flat-
bed truck, it should be tied down at the
locations shown in the illustration. If you use chains or cables to tie down
your vehicle, the angles shaded in
black must be 45°.
Do not overly tighten the tie downs or
the vehicle may be damaged.
If a tow truck is not available in an
emergency, your vehicle may be tem-
porarily towed using cables or chains
secured to the emergency towing eye-
lets. This should only be attempted on
hard surfaced roads for short distances
at under 18 mph (30 km/h).
A driver must be in the vehicle to steer
and operate the brakes. The vehicle’s
wheels, drive train, axles, steering and
brakes must be in good condition.
To have your vehicle towed by another
Towing with a wheel-lift type
truck
Using a flatbed truck
Emergency towing
Emergency towing procedure
Page 332 of 432
3327-2. Steps to take in an emergency
vehicle, the towing eyelet must be
installed to your vehicle. Install the tow-
ing eyelet using the following proce-
dure.
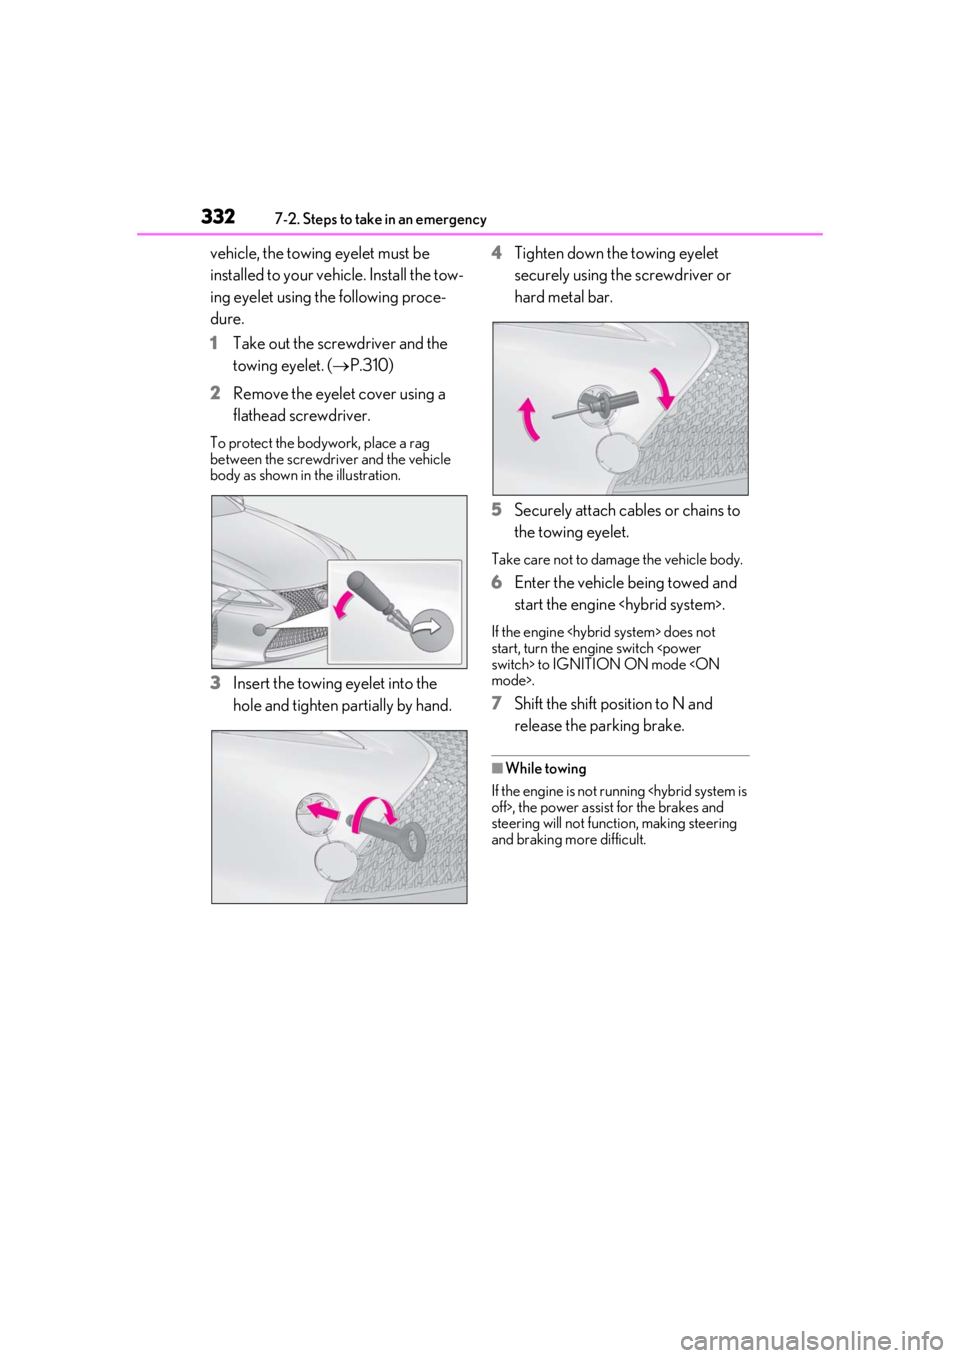
1Take out the screwdriver and the
towing eyelet. ( P.310)
2 Remove the eyelet cover using a
flathead screwdriver.
To protect the bodywork, place a rag
between the screwdriver and the vehicle
body as shown in the illustration.
3Insert the towing eyelet into the
hole and tighten partially by hand. 4
Tighten down the towing eyelet
securely using the screwdriver or
hard metal bar.
5 Securely attach cables or chains to
the towing eyelet.
Take care not to damage the vehicle body.
6Enter the vehicle being towed and
start the engine
If the engine
start, turn the engine switch
7Shift the shift position to N and
release the parking brake.
■While towing
If the engine is not running
steering will not function, making steering
and braking more difficult.
Page 342 of 432
3427-2. Steps to take in an emergency
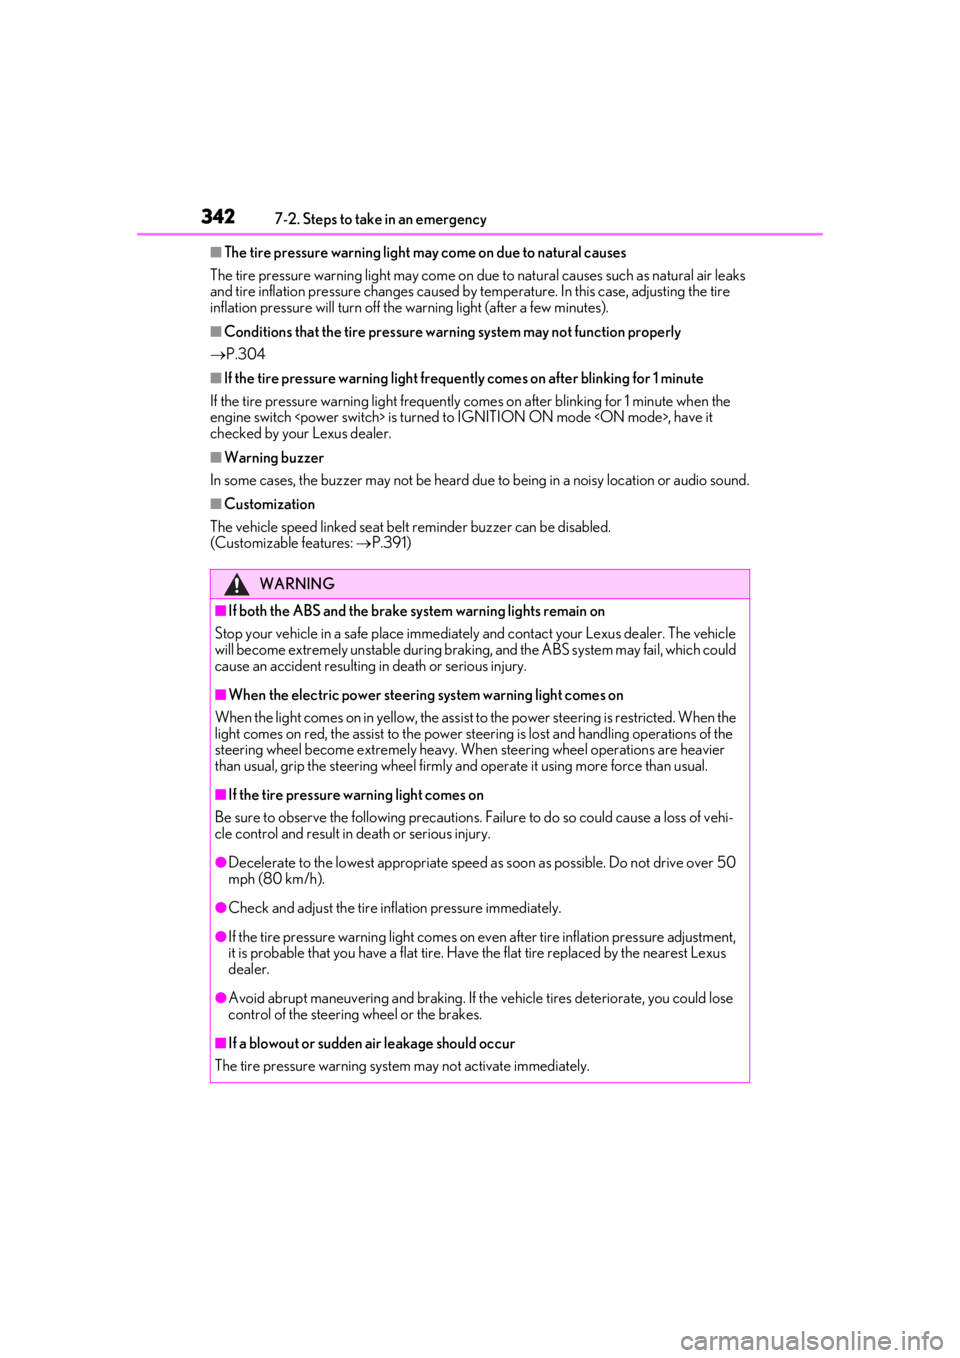
■The tire pressure warning light may come on due to natural causes
The tire pressure warnin g light may come on due to natural causes such as natural air leaks
and tire inflation pressure chan ges caused by temperature. In this case, adjusting the tire
inflation pressure will turn off the warning light (after a few minutes).
■Conditions that the tire pressure wa rning system may not function properly
P.304
■If the tire pressure warning light freque ntly comes on after blinking for 1 minute
If the tire pressure warning lig ht frequently comes on after blinking for 1 minute when the
engine switch
checked by your Lexus dealer.
■Warning buzzer
In some cases, the buzzer may not be heard du e to being in a noisy location or audio sound.
■Customization
The vehicle speed linked seat belt reminder buzzer can be disabled.
(Customizable features: P.391)
WARNING
■If both the ABS and the brake sy stem warning lights remain on
Stop your vehicle in a safe place immediately and contact your Lexus dealer. The vehicle
will become extremely unstable during brakin g, and the ABS system may fail, which could
cause an accident resulting in death or serious injury.
■When the electric power steering system warning light comes on
When the light comes on in yellow, the assist to the power steering is restricted. When the
light comes on red, the assist to the power steering is lost and handling operations of the
steering wheel become extremely heavy. When steering wheel operations are heavier
than usual, grip the steering wheel firmly and operate it using more force than usual.
■If the tire pressure warning light comes on
Be sure to observe the following precautions. Failure to do so could cause a loss of vehi-
cle control and result in death or serious injury.
●Decelerate to the lowest appr opriate speed as soon as possible. Do not drive over 50
mph (80 km/h).
●Check and adjust the tire in flation pressure immediately.
●If the tire pressure warning lig ht comes on even after tire inflation pressure adjustment,
it is probable that you have a flat tire. Have the flat tire replaced by the nearest Lexus
dealer.
●Avoid abrupt maneuvering and braking. If th e vehicle tires deteriorate, you could lose
control of the steering wheel or the brakes.
■If a blowout or sudden air leakage should occur
The tire pressure warning system may not activate immediately.
Page 378 of 432
3788-1. Specifications
*: The fluid capacity is a reference quantity.If replacement is necessary, contact your Lexus dealer.
*: Your Lexus vehicle is filled with “Toyota Genu ine Differential Gear Oil” at the factory.
Use Lexus approved “Toyota Genu ine Differential Gear Oil” or an equivalent of match-
ing quality to satisfy the above specification. Please contact your Lexus dealer for further
details.
*1: Minimum pedal clearance when depressed with a force of 112.4 lbf (500 N, 51.0 kgf)
while the engine is running
When performing the brake pedal inspection, also be sure to check that the brake sys-
tem warning light is not illumin ated when the engine is running
NOTICE
■Hybrid transmission fluid type
Using transmission fluid other than “Toyota Genuine ATF WS” may cause deterioration in
shift quality and ultimately damage the transmission of your vehicle.
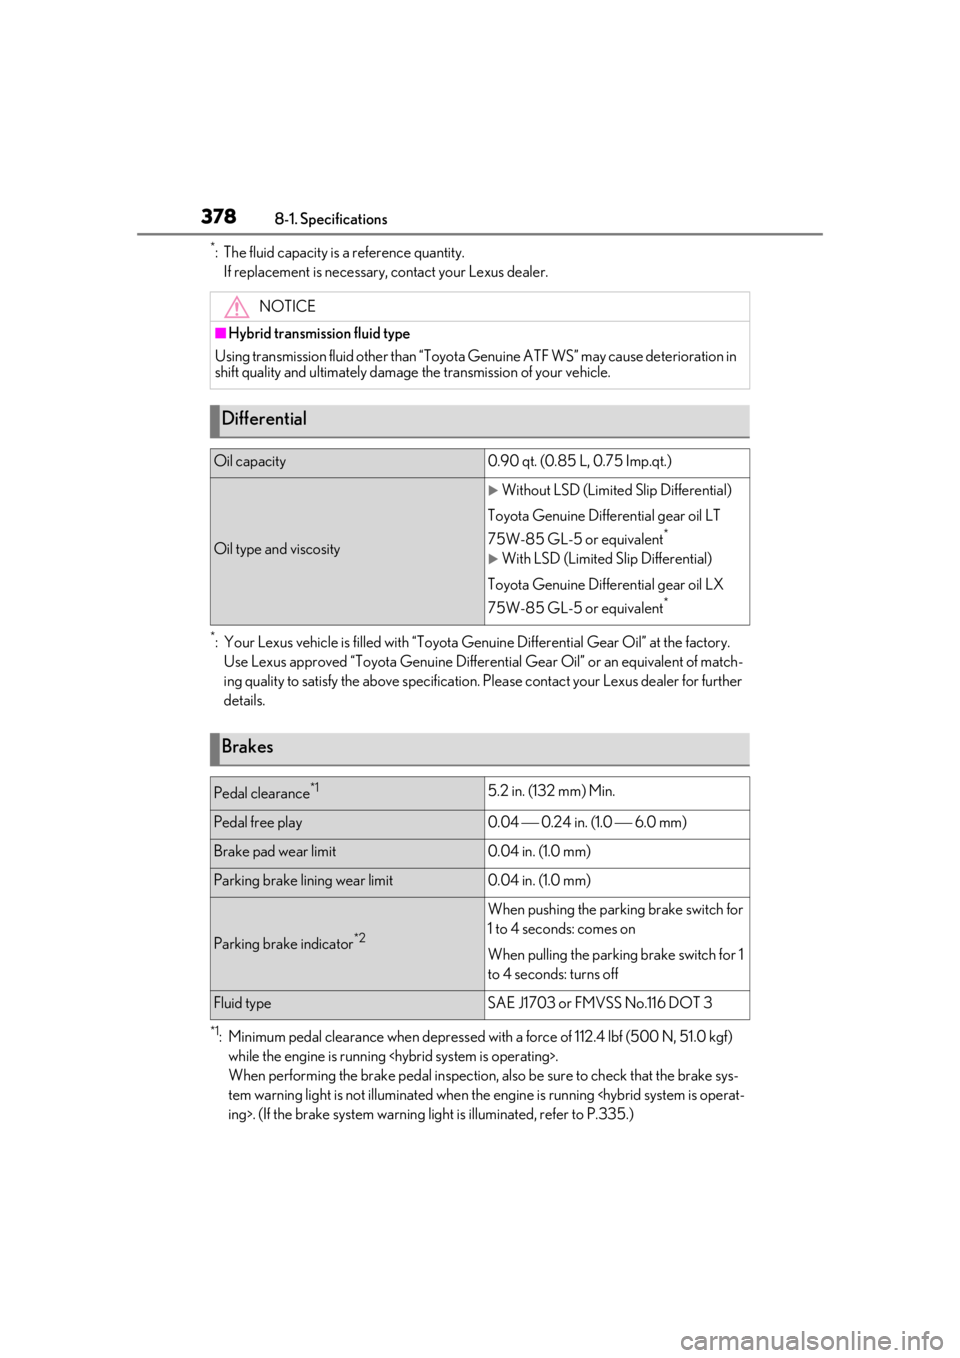
Differential
Oil capacity0.90 qt. (0.85 L, 0.75 Imp.qt.)
Oil type and viscosity
Without LSD (Limited Slip Differential)
Toyota Genuine Differential gear oil LT
75W-85 GL-5 or equivalent
*
With LSD (Limited Slip Differential)
Toyota Genuine Differential gear oil LX
75W-85 GL-5 or equivalent
*
Brakes
Pedal clearance*15.2 in. (132 mm) Min.
Pedal free play0.04 0.24 in. (1.0 6.0 mm)
Brake pad wear limit0.04 in. (1.0 mm)
Parking brake lining wear limit0.04 in. (1.0 mm)
Parking brake indicator*2
When pushing the parking brake switch for
1 to 4 seconds: comes on
When pulling the parking brake switch for 1
to 4 seconds: turns off
Fluid typeSAE J1703 or FMVSS No.116 DOT 3
Page 387 of 432
3878-1. Specifications
8
Vehicle specifications
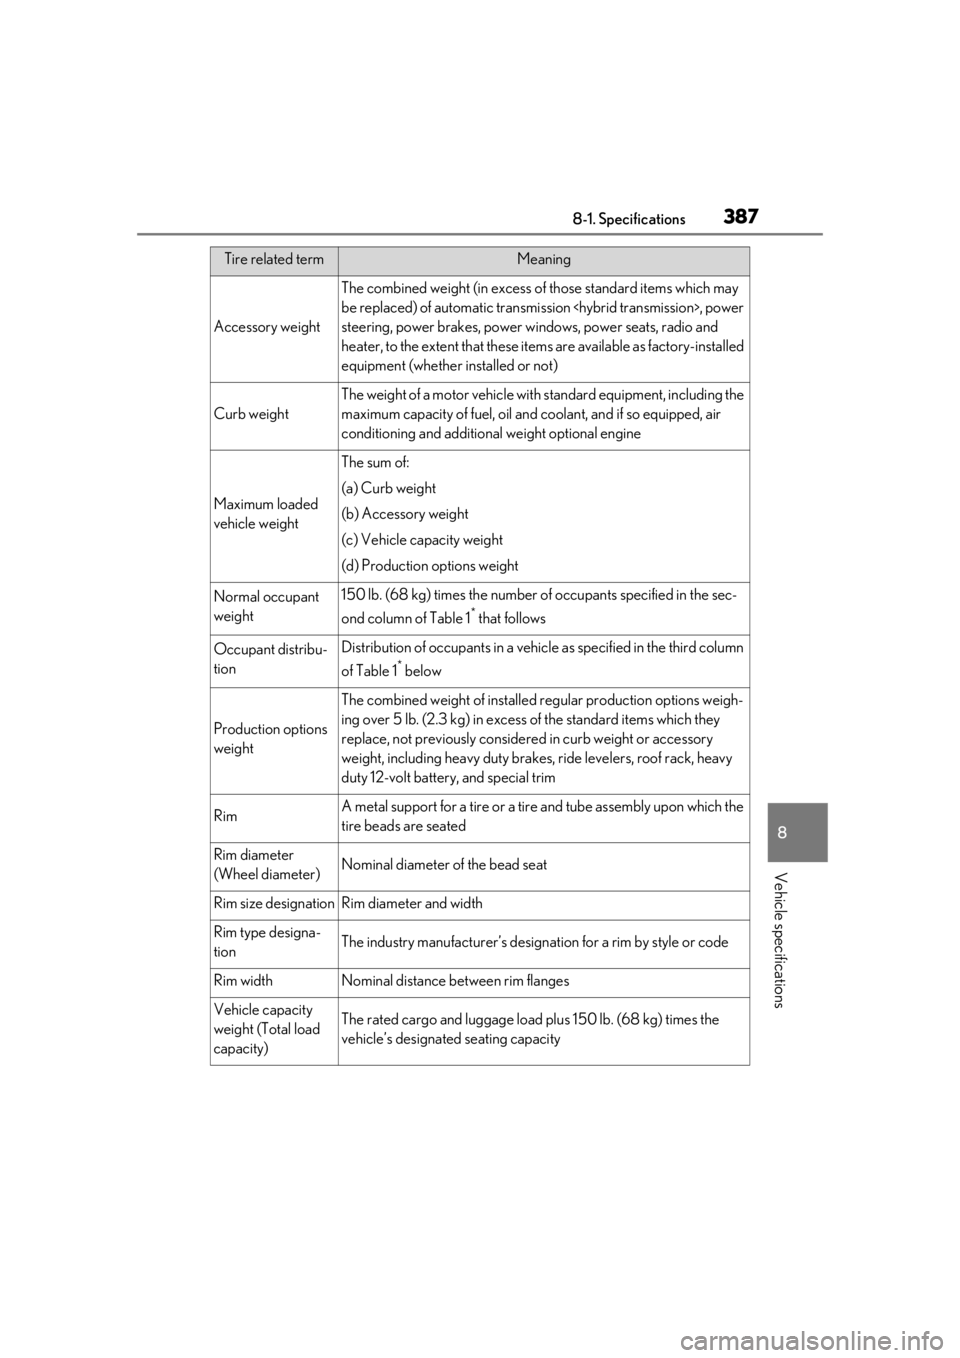
Accessory weight
The combined weight (in excess of those standard items which may
be replaced) of automatic transmission
steering, power brakes, power wi ndows, power seats, radio and
heater, to the extent that these item s are available as factory-installed
equipment (whether installed or not)
Curb weight
The weight of a motor vehicle with standard equipment, including the
maximum capacity of fuel, oil and coolant, and if so equipped, air
conditioning and additional weight optional engine
Maximum loaded
vehicle weight
The sum of:
(a) Curb weight
(b) Accessory weight
(c) Vehicle capacity weight
(d) Production options weight
Normal occupant
weight150 lb. (68 kg) times the number of occupants specified in the sec-
ond column of Table 1
* that follows
Occupant distribu-
tionDistribution of occupants in a vehicl e as specified in the third column
of Table 1
* below
Production options
weight
The combined weight of installed regular production options weigh-
ing over 5 lb. (2.3 kg) in excess of the standard items which they
replace, not previously considered in curb weight or accessory
weight, including heavy duty brakes , ride levelers, roof rack, heavy
duty 12-volt battery, and special trim
RimA metal support for a tire or a tire and tube assembly upon which the
tire beads are seated
Rim diameter
(Wheel diameter)Nominal diameter of the bead seat
Rim size designationRim diameter and width
Rim type designa-
tionThe industry manufacturer’s designation for a rim by style or code
Rim widthNominal distance between rim flanges
Vehicle capacity
weight (Total load
capacity)The rated cargo and luggage load plus 150 lb. (68 kg) times the
vehicle’s designated seating capacity
Tire related termMeaning