2019 Lexus LC500h check engine
[x] Cancel search: check enginePage 83 of 432
832-1. Instrument cluster
2
Vehicle status information and indicators
■Liquid crystal display
Small spots or light spots may appear on the
display. This phenomenon is characteristic
of liquid crystal displays, and there is no
problem continuing to use the display.
■Customization
The meter display can be customized on
the multi-information display. ( P.391)
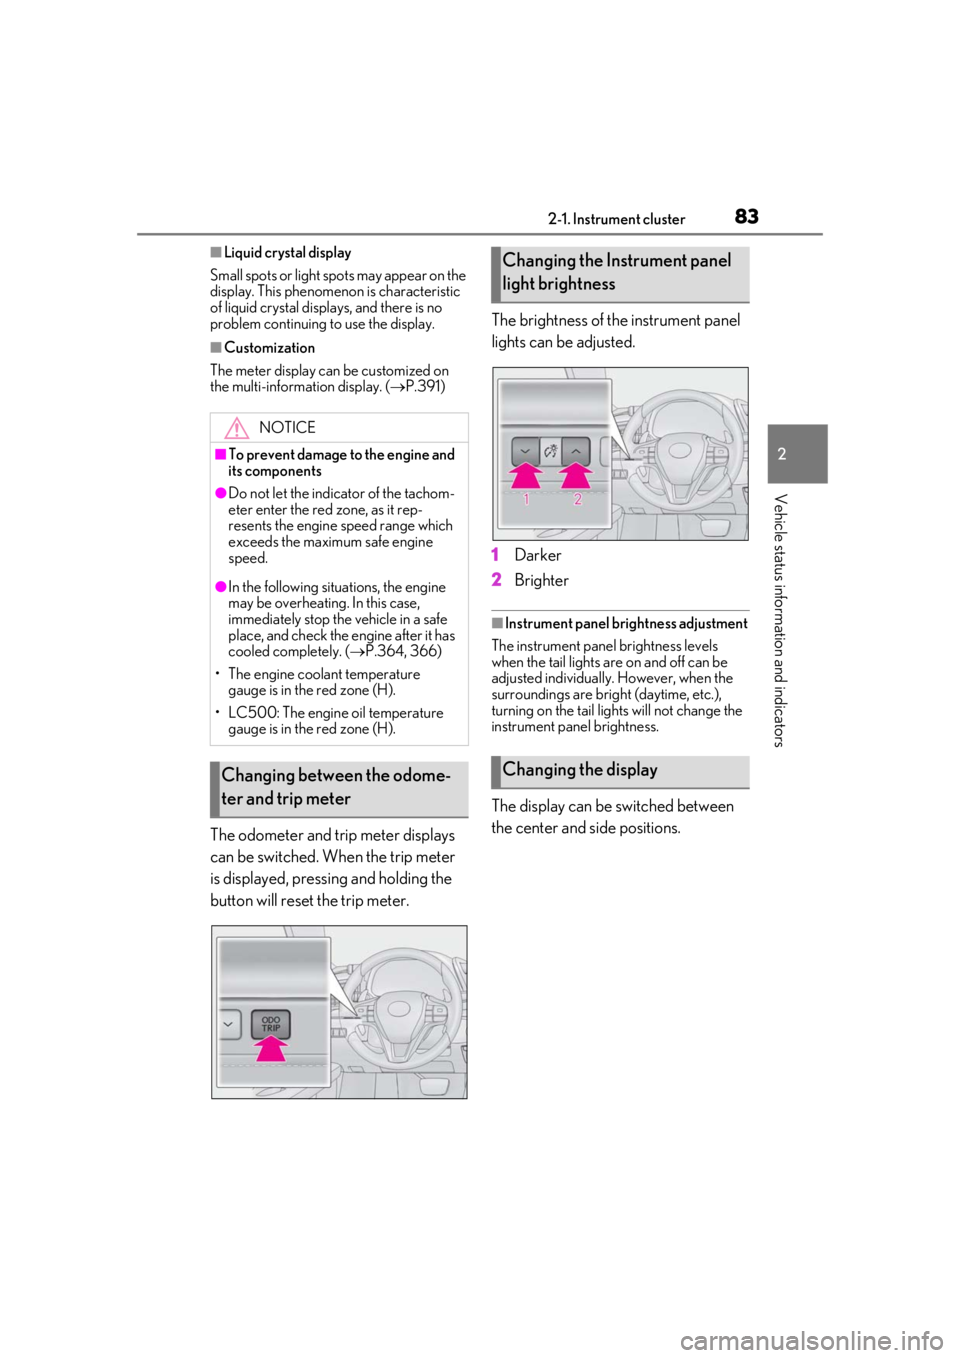
The odometer and trip meter displays
can be switched. When the trip meter
is displayed, pressing and holding the
button will reset the trip meter. The brightness of the instrument panel
lights can be adjusted.
1
Darker
2 Brighter
■Instrument panel brightness adjustment
The instrument panel brightness levels
when the tail lights are on and off can be
adjusted individually. However, when the
surroundings are bright (daytime, etc.),
turning on the tail lights will not change the
instrument pa nel brightness.
The display can be switched between
the center and side positions.
NOTICE
■To prevent damage to the engine and
its components
●Do not let the indicator of the tachom-
eter enter the red zone, as it rep-
resents the engine speed range which
exceeds the maximum safe engine
speed.
●In the following situations, the engine
may be overheating. In this case,
immediately stop the vehicle in a safe
place, and check the engine after it has
cooled completely. ( P.364, 366)
• The engine coolant temperature gauge is in the red zone (H).
• LC500: The engine oil temperature gauge is in the red zone (H).
Changing between the odome-
ter and trip meter
Changing the Instrument panel
light brightness
Changing the display
Page 92 of 432
922-1. Instrument cluster
Select to adjust the angle of the head-up
display.
■Head-up display
●The head-up display may seem dark and
hard to see when viewed through sun-
glasses, especially polarized sunglasses.
Adjust the brightness of the head-up dis-
play or remove your sunglasses.
●When the head-up display is turned off, it
will remain off even if the engine switch
SORY mode or IGNITION ON mode
●The startup image will be displayed on
the head-up display after the engine
switch
IGNITION ON mode
the head-up display switch is set to on.
■Display brightness
The brightness of the head-up display can
be adjusted on of the multi-information
display. Also, it is automatically adjusted
according to the ambient brightness.
■Head-up display automatic position
adjustment
If the display position is recorded into mem-
ory, the head-up display will be automati-
cally adjusted to the desired position.
( P.122)
■When the 12-volt battery is discon-
nected
The customize settings of the head-up dis-
play will be reset.
■Customization
Settings (e.g. display) can be changed.
(Customizable features: P.391)
WARNING
■Before using the head-up display
●Check that the position and brightness
of the head-up display image does not
interfere with safe driving. Incorrect
adjustment of the image’s position or
brightness may obstruct the driver’s
view and lead to an accident, resulting
in death or serious injury.
●Do not continuously look at the head-
up display while driving as you may fail
to see pedestrians, objects on the
road, etc. ahead of the vehicle.
■Caution for changing settings of the
head-up display
As the engine needs to be running
while changing the settings of the head-
up display, ensure that the vehicle is
parked in a place with adequate ventila-
tion. In a closed area such as a garage,
exhaust gases including harmful carbon
monoxide (CO) may collect and enter
the vehicle. This may lead to death or a
serious health hazard.
NOTICE
■To prevent damage to components
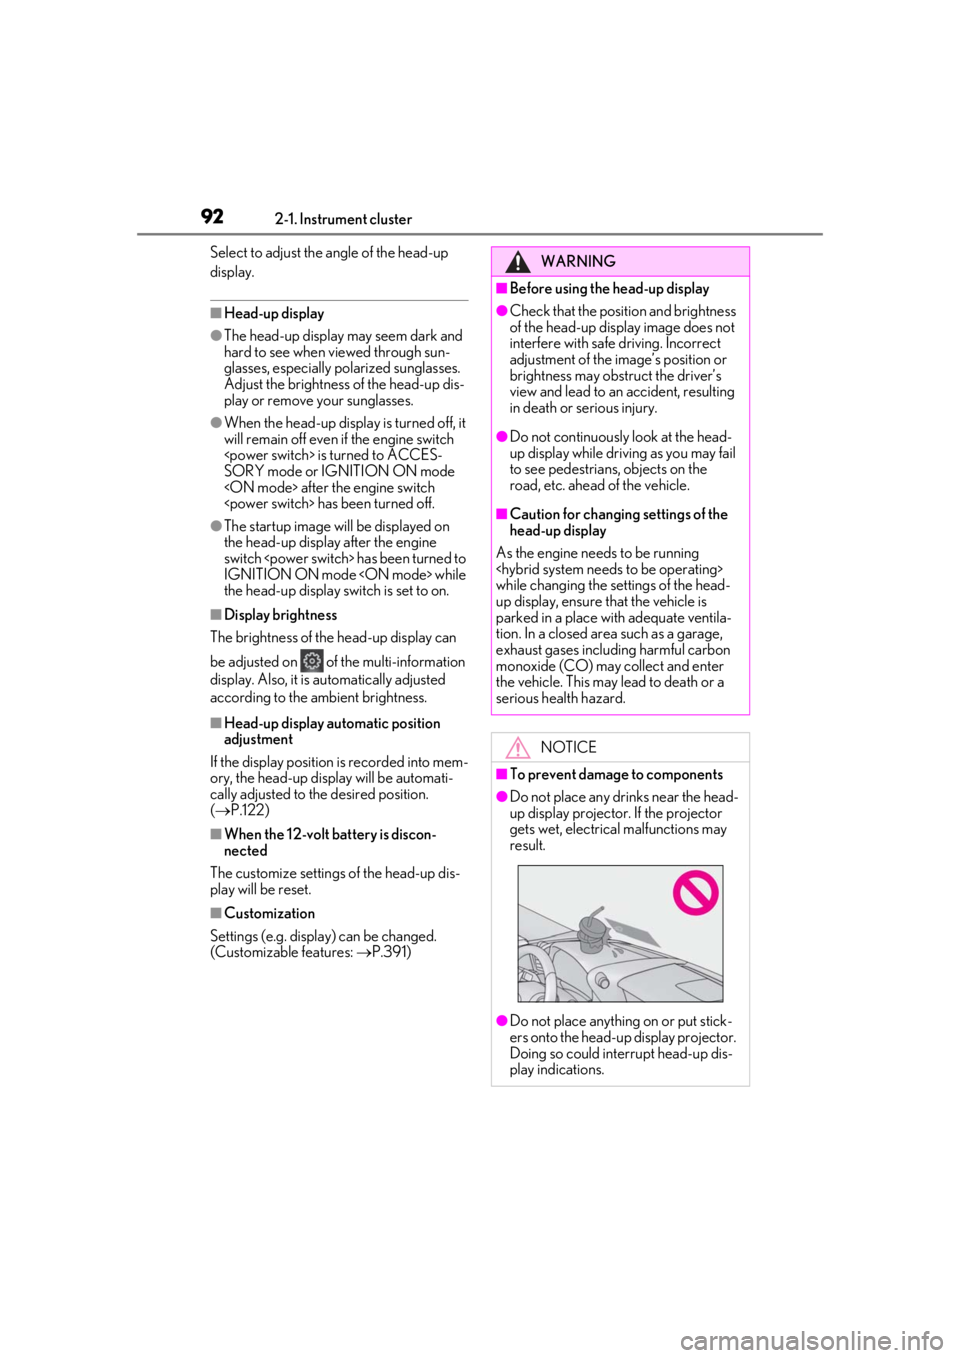
●Do not place any drinks near the head-
up display projector. If the projector
gets wet, electrical malfunctions may
result.
●Do not place anything on or put stick-
ers onto the head-up display projector.
Doing so could interrupt head-up dis-
play indications.
Page 116 of 432

1163-2. Opening, closing and locking the doors and trunk
• The electronic key is near the ground or in a high place, or too close to the rear
bumper center when the trunk is opened.
• The electronic key is on the instrument panel, rear package tray or floor, or in the
door pockets or glove box when the
engine
engine switch
changed.
●Do not leave the electronic key on top of
the instrument panel or near the door
pockets when exiting the vehicle.
Depending on the radio wave reception
conditions, it may be detected by the
antenna outside the cabin and the doors
will become lockable from the outside,
possibly trapping the electronic key
inside the vehicle.
●As long as the electron ic key is within the
effective range, the doors may be locked
or unlocked by anyone. However, only
the doors detecting the electronic key
can be used to unlock the vehicle.
●Even if the electronic key is not inside the
vehicle, it may be possible to start the
engine
key is near the window.
●The doors may unlock or lock if a large
amount of water spla shes on the door
handle, such as in the rain or in a car
wash, when the electronic key is within
the effective range. (The doors will auto-
matically be locked after approximately
60 seconds if the d oors are not opened
and closed.)
●If the wireless remote control is used to
lock the doors when the electronic key is
near the vehicle, there is a possibility that
the door may not be unlocked by the
entry function. (Use the wireless remote
control to unlock the doors.)
●When the lock operation is performed
using the lock sensor, recognition signals
will be shown up to two consecutive
times. After this, no recognition signals
will be given.
●If the door handle becomes wet while the
electronic key is within the effective
range, the door may lock and unlock
repeatedly. In this case, follow the follow-
ing correction procedures to wash the vehicle:
• Place the electronic key in a location 6 ft. (2 m) or more away from the vehicle.
(Take care to ensure that the key is not
stolen.)
• Set the electronic key to battery-saving
mode to disable the smart access system
with push-button start. ( P.115)
●If the electronic key is inside the vehicle
and a door handle becomes wet during a
car wash, a message may be shown on
the multi-information display and a
buzzer will sound outside the vehicle. To
turn off the alarm, lock both side doors.
●If an outside door handle is not retracted
during a car wash, a door may be opened
or an outside door handle may be dam-
aged. Make sure that the outside door
handles are retracted before using the
car wash.
●A sudden handle operation or a handle
operation immediately after entering the
effective range may prevent the doors
from being unlocked. Touch the door
unlock sensor and check that the doors
are unlocked before pulling the door
handle again.
●Unlocking the vehicle may take more
time if another electronic key is within the
effective range.
■When the vehicle is not driven for
extended periods
●To prevent theft of the vehicle, do not
leave the electronic key within 6 ft. (2 m)
of the vehicle.
●The smart access system with push-but-
ton start can be deactivated in advance.
■To operate the system properly
●Make sure to carry the electronic key
when operating the system. Do not get
the electronic key too close to the vehicle
when operating the system from the out-
side of the vehicle.
Depending on the position and holding
condition of the elec tronic key, the key
may not be detected correctly and the
system may not operate properly. (The
alarm may go off accidentally, or the door
lock prevention function may not oper-
ate.)
Page 122 of 432
1223-3. Adjusting the seats
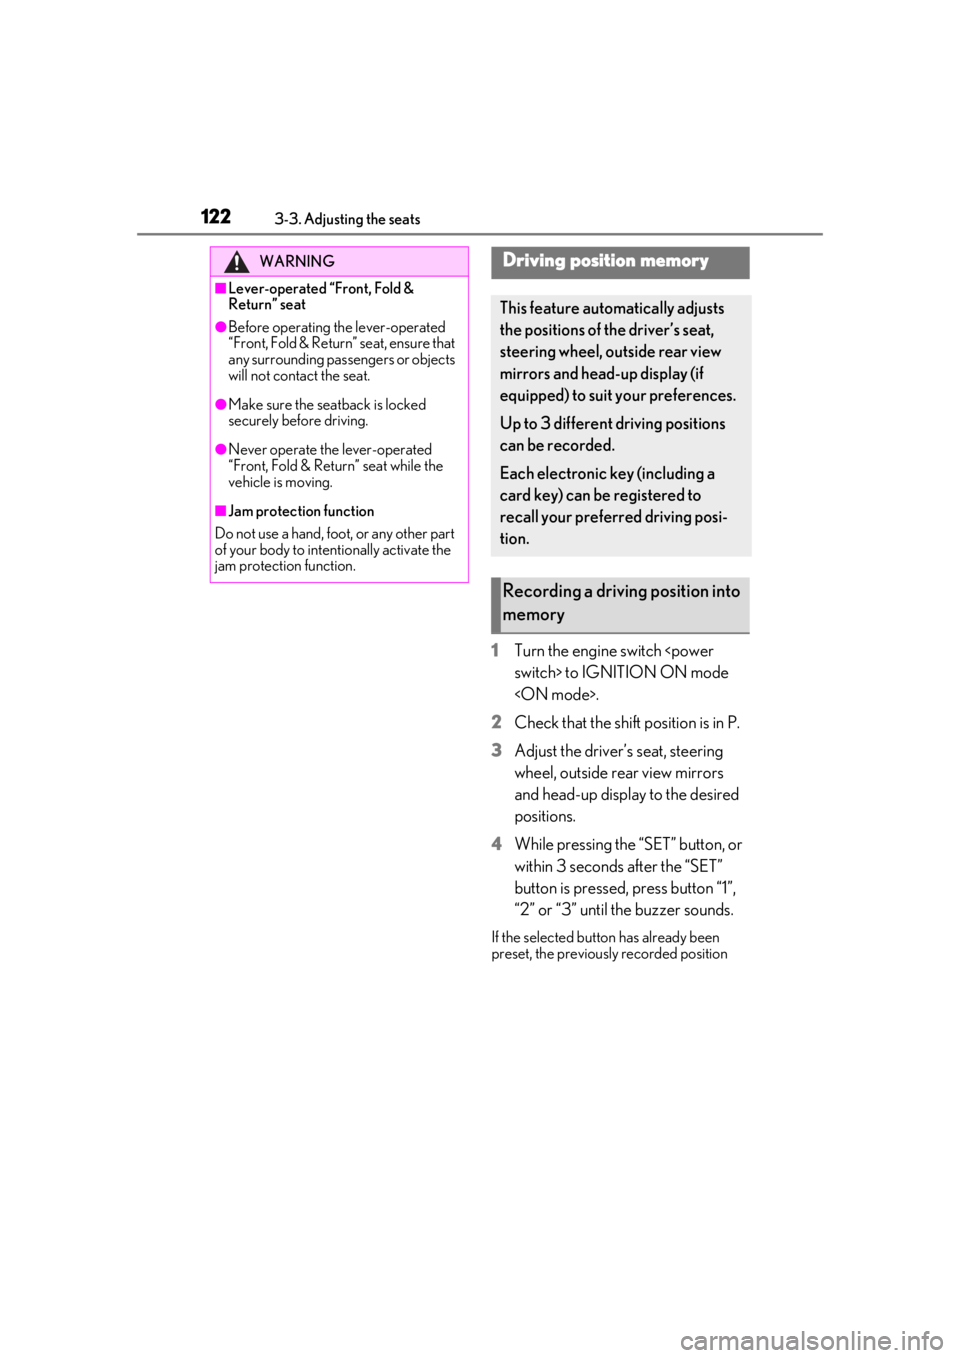
1Turn the engine switch
2 Check that the shift position is in P.
3 Adjust the driver’s seat, steering
wheel, outside rear view mirrors
and head-up display to the desired
positions.
4 While pressing the “SET” button, or
within 3 seconds after the “SET”
button is pressed, press button “1”,
“2” or “3” until the buzzer sounds.
If the selected button has already been
preset, the previously recorded position
WARNING
■Lever-operated “Front, Fold &
Return” seat
●Before operating the lever-operated
“Front, Fold & Return” seat, ensure that
any surrounding passengers or objects
will not contact the seat.
●Make sure the seat back is locked
securely before driving.
●Never operate the lever-operated
“Front, Fold & Retu rn” seat while the
vehicle is moving.
■Jam protection function
Do not use a hand, foot, or any other part
of your body to intentionally activate the
jam protection function.
Driving position memory
This feature automatically adjusts
the positions of the driver’s seat,
steering wheel, outside rear view
mirrors and head-up display (if
equipped) to suit your preferences.
Up to 3 different driving positions
can be recorded.
Each electronic key (including a
card key) can be registered to
recall your preferred driving posi-
tion.
Recording a driving position into
memory
Page 123 of 432
1233-3. Adjusting the seats
3
Before driving
will be overwritten.
■Seat positions that can be memorized
( P.120)
The adjusted positions other than the posi-
tion adjusted by lumbar support switch can
be recorded.
■In order to correctly use the driving
position memory function
If a seat position is already in the furthest
possible position and the seat is operated in
the same direction, the recorded position
may be slightly differen t when it is recalled.
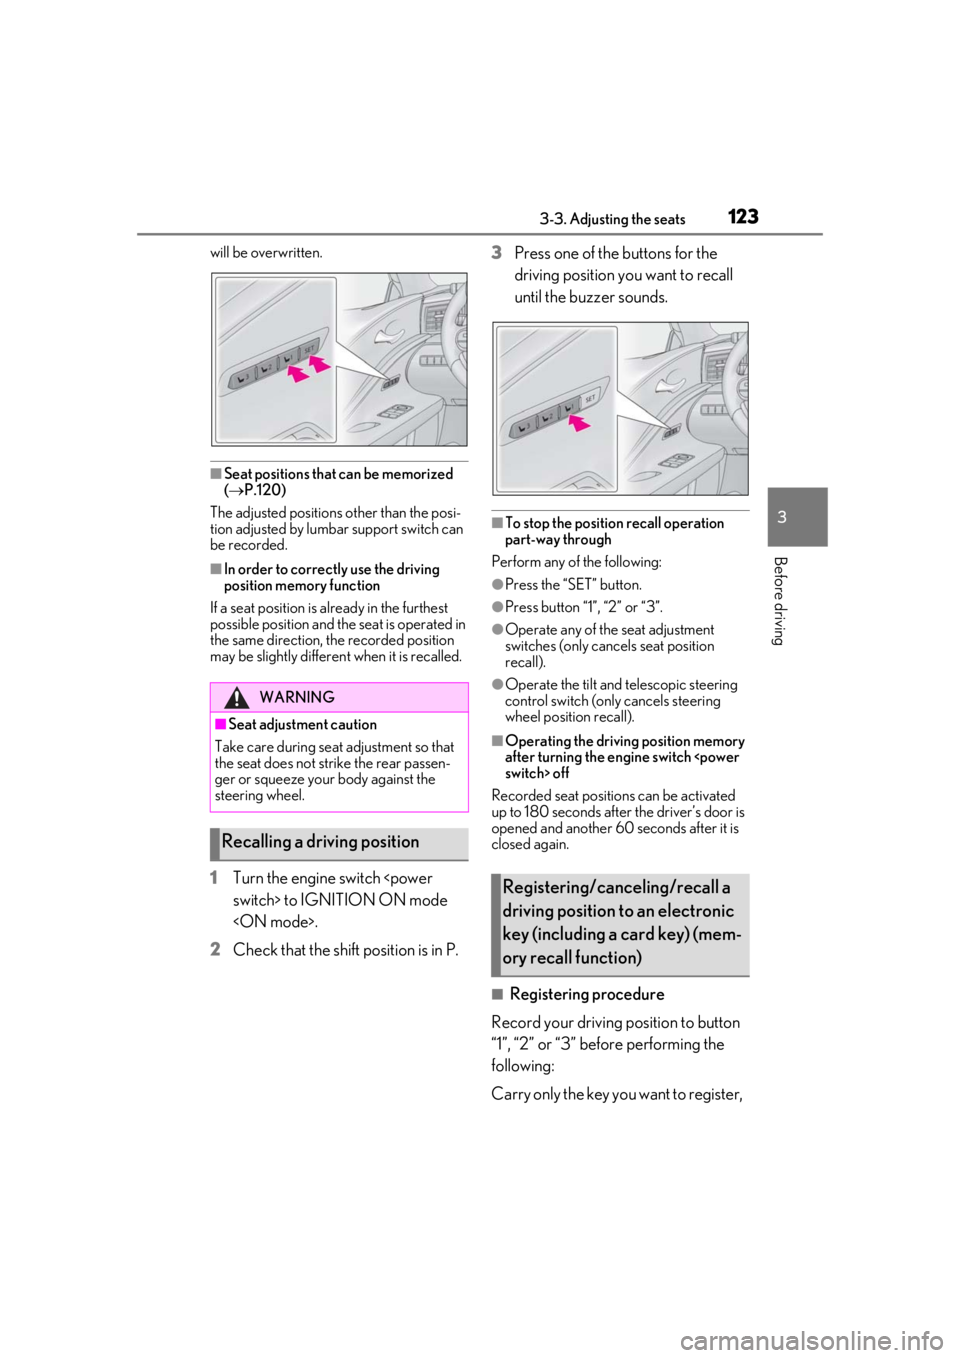
1Turn the engine switch
2 Check that the shift position is in P. 3
Press one of the buttons for the
driving position you want to recall
until the buzzer sounds.
■To stop the position recall operation
part-way through
Perform any of the following:
●Press the “SET” button.
●Press button “1”, “2” or “3”.
●Operate any of the seat adjustment
switches (only cancels seat position
recall).
●Operate the tilt and telescopic steering
control switch (onl y cancels steering
wheel position recall).
■Operating the driving position memory
after turning the engine switch
Recorded seat positions can be activated
up to 180 seconds after the driver’s door is
opened and another 60 seconds after it is
closed again.
■Registering procedure
Record your driving position to button
“1”, “2” or “3” before performing the
following:
Carry only the key yo u want to register,
WARNING
■Seat adjustment caution
Take care during seat adjustment so that
the seat does not strike the rear passen-
ger or squeeze your body against the
steering wheel.
Recalling a driving position
Registering/canceling/recall a
driving position to an electronic
key (including a card key) (mem-
ory recall function)
Page 124 of 432
1243-3. Adjusting the seats
and then close the driver’s door.
If 2 or more keys are in the vehicle, the
driving position cannot be recorded
properly.
1Turn the engine switch
2 Check that the shift position is in P.
3 Recall the driving position that you
want to record.
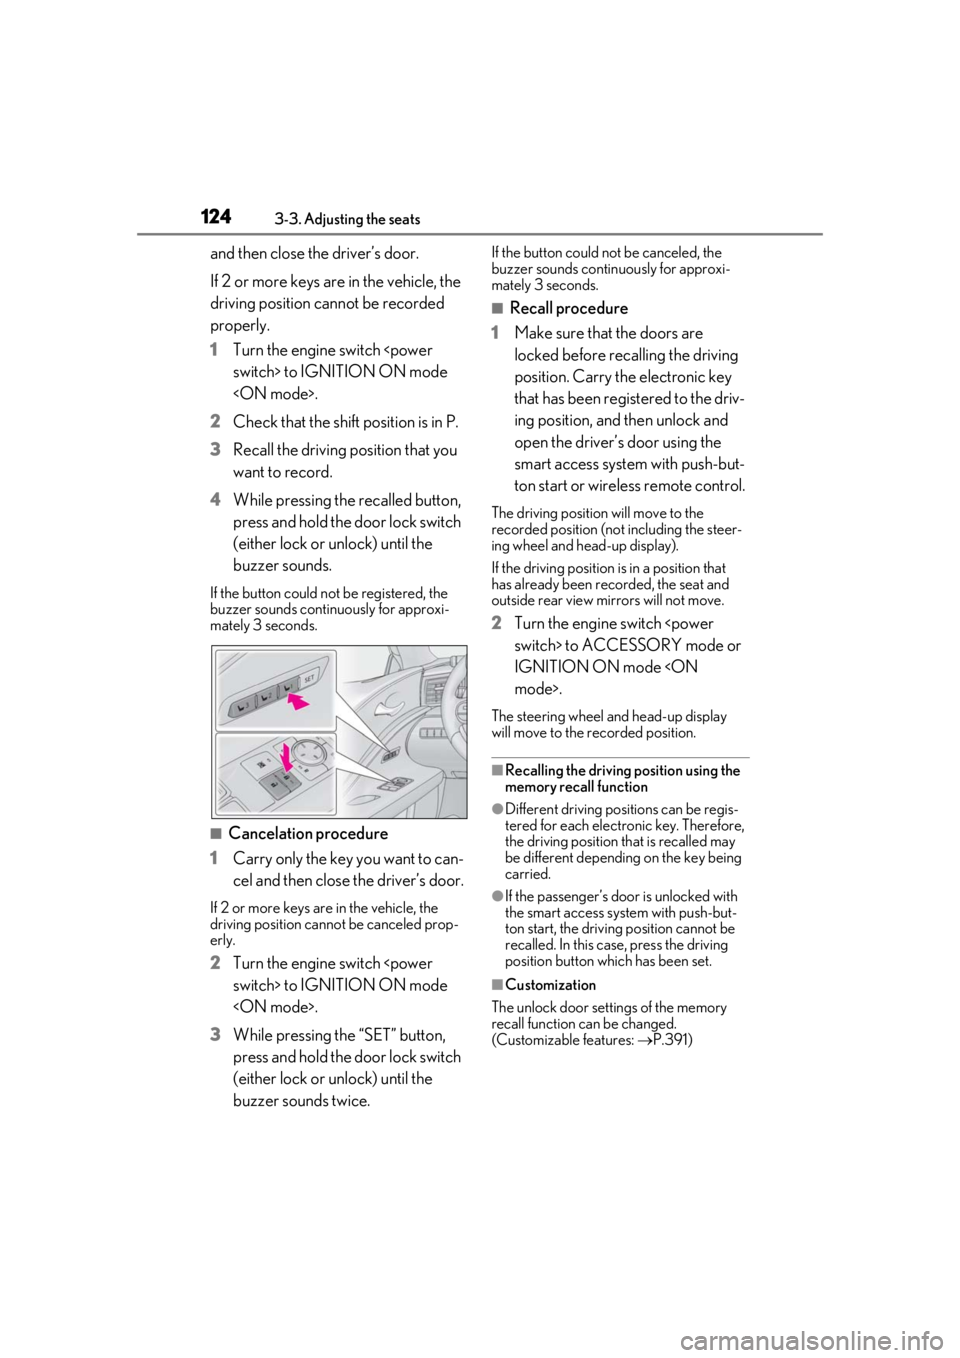
4 While pressing the recalled button,
press and hold the door lock switch
(either lock or unlock) until the
buzzer sounds.
If the button could not be registered, the
buzzer sounds continuously for approxi-
mately 3 seconds.
■Cancelation procedure
1 Carry only the key you want to can-
cel and then close the driver’s door.
If 2 or more keys are in the vehicle, the
driving position cannot be canceled prop-
erly.
2Turn the engine switch
3 While pressing the “SET” button,
press and hold the door lock switch
(either lock or unlock) until the
buzzer sounds twice.
If the button could not be canceled, the
buzzer sounds continuously for approxi-
mately 3 seconds.
■Recall procedure
1 Make sure that the doors are
locked before recalling the driving
position. Carry the electronic key
that has been registered to the driv-
ing position, and then unlock and
open the driver’s door using the
smart access system with push-but-
ton start or wireless remote control.
The driving position will move to the
recorded position (not including the steer-
ing wheel and head-up display).
If the driving position is in a position that
has already been recorded, the seat and
outside rear view mirrors will not move.
2Turn the engine switch
IGNITION ON mode
The steering wheel and head-up display
will move to the recorded position.
■Recalling the driving position using the
memory recall function
●Different driving positions can be regis-
tered for each electronic key. Therefore,
the driving position that is recalled may
be different depending on the key being
carried.
●If the passenger’s door is unlocked with
the smart access system with push-but-
ton start, the driving position cannot be
recalled. In this case, press the driving
position button which has been set.
■Customization
The unlock door sett ings of the memory
recall function can be changed.
(Customizable features: P.391)
Page 133 of 432
1333-5. Opening and closing the windows
3
Before driving
pletely closed, continue holding the
switch for a further 1 second or more.
If you release the switch while the window is
moving, start again from the beginning.
If the window reverses and cannot be fully
closed or opened, have the vehicle
inspected by your Lexus dealer.
■Door lock linked window operation
●The power windows can be opened and
closed using the mechanical key.*
( P.355)
●The power windows can be opened using
the wireless remote control.* ( P.106)
*: These settings must be customized at
your Lexus dealer.
■Power windows open warning buzzer
The buzzer sounds and “Window Open” is
shown on the multi-information display in
the instrument cluster when the engine
switch
driver’s door is opened with the power win-
dows open.
■Customization
Settings (e.g. linked door lock operation)
can be changed.
(Customizable features: P.391)
This function can be used to prevent
children from accidentally opening or
WARNING
Observe the following precautions.
Failure to do so may result in death or
serious injury.
■Closing the windows
●The driver is responsible for all the
power window operations, including
the operation for the passengers. In
order to prevent accidental operation,
especially by a child, do not let a child
operate the power windows. It is possi-
ble for children and other passengers
to have body parts caught in the power
window. Also, when riding with a child,
it is recommended to use the window
lock switch. ( P.133)
●Check to make sure that all passen-
gers do not have any part of their body
in a position where it could be caught
when a window is being operated.
●When using the wireless remote con-
trol or mechanical key and operating
the power windows, operate the
power window after checking to make
sure that there is no possibility of any
passenger having any of their body
parts caught in the window. Also do
not let a child operate window by the
wireless remote control or mechanical
key. It is possible for children and other
passengers to get caught in the power
window.
●When exiting the vehicle, turn the
engine switch
the key and exit the vehicle along with
the child. There may be accidental
operation, due to mischief, etc., that
may possibly lead to an accident.
■Jam protection function
●Never use any part of your body to
intentionally activa te the jam protec-
tion function.
●The jam protection function may not
work if something gets jammed just
before the window is fully closed. Be
careful not to get any part of your body
jammed in the window.
■Catch protection function
●Never use any part of your body or
clothing to intentionally activate the
catch protection function.
●The catch protection function may not
work if something gets caught just
before the window is fully opened. Be
careful not to get any part of your body
or clothing caught in the window.
Preventing accidental operation
(window lock switch)
Page 136 of 432
1364-1. Before driving
4-1.Before driving
■Starting the engine
P.146, 149
■Driving
1 With the brake pedal depressed,
shift the shift position to D. ( P.157,
163)
Check that the shift position indicator
shows D.
2 If the parking brake is in manual
mode, release the parking brake.
(P.168)
3 Gradually release the brake pedal
and gently depress the accelerator
pedal to accelerate the vehicle.
■Stopping
1 With the shift position in D, depress
the brake pedal.
2 If necessary, set the parking brake.
If the vehicle is to be stopped for an
extended period of time, shift the shift posi-
tion to P. ( P.157, 163)
■Parking the vehicle
1 Stop the vehicle completely.
2 If the parking brake is in manual
mode, set the parking brake.
(P.168)
3 Shift the shift position to P.
(P.158, 164)
Check that the shift position indicator shows P.
4
Press the engine switch
5 Slowly release the brake pedal.
6 Lock the door, making sure that you
have the electronic key on your
person.
If parking on a hill, block the wheels as
needed.
■Starting off on a steep uphill
1 Make sure that the parking brake is
set with the brake pedal depressed,
and then shift the shift position to D.
The hill-start assist control will be activated.
( P.232)
2 Release the brake pedal and gently
depress the accelerator pedal.
3 Release the parking brake.
■For fuel-efficient driving (LC500h)
Keep in mind that hybr id vehicles are similar
to conventional vehicles, and it is necessary
to refrain from activi ties such as sudden
acceleration. ( P.236)
■Driving in the rain
●Drive carefully when it is raining, because
visibility will be reduced, the windows
may become fogged-up, and the road
will be slippery.
●Drive carefully when it starts to rain,
because the road surface will be espe-
cially slippery.
●Refrain from high speeds when driving on
an expressway in the rain, because there
may be a layer of wa ter between the tires
and the road surface, preventing the
steering and brakes from operating prop-
erly.
■Engine speed while driving
In the following conditions, the engine
speed may become high while driving. This
Driving the vehicle
The following procedures should be
observed to ensure safe driving:
Driving procedure