Page 266 of 456

2665-4. Using the interior lights
■Turning the door position on
Press the door-linked interior light
switch
The lights are turned on and off according
to whether the doors are opened/closed.
■Turning the lights on/off
Turns the lights on/off (touch the light)
The rear interior light turns on/off
together with the front interior light.
When a door is opened while the door
position is on, the lights turn on.
■Turning the lights on/off
Front
Turns the lights on/off (touch the light)
When a door is opened while the door
position is on, the lights turn on.
Rear
Turns the lights on/off
When a door is opened while the door
position is on, the lights turn on.
■Illuminated entry system
The lights automatically turn on/off accord-
ing to the power switch mode, the presence
of the electronic key, whether the doors are
locked/unlocked, and whether the doors
are open/closed.
■To prevent the 12-volt battery from
being discharged
If the interior lights remain on when the
power switch is turned off, the lights will go
off automatically after 20 minutes.
■When front interior light or front per-
sonal lights do not respond as normal
●When water, dirt, etc., have adhered to
the lens surface
●When operated with a wet hand
●When wearing gloves, etc.
■Automatic turning on of the interior
lights
If any of the SRS airbag s deploy (inflate) or
Operating the interior lights
Operating the personal lights
Page 267 of 456
2675-4. Using the interior lights
5
Interior features
in the event of a strong rear impact, the inte-
rior lights will turn on automatically.
The interior lights will turn off automatically
after approximately 20 minutes. The inte-
rior lights can be turned off manually. How-
ever, in order to help prevent further
collisions, it is recommended that they be
left on until safety can be ensured. (The inte-
rior lights may not turn on automatically
depending on the force of the impact and
conditions of the collision.)
■Customization
Some functions can be customized.
( P.412)
NOTICE
■To prevent 12-volt battery discharge
Do not leave the lights on longer than
necessary when the hy brid system is off.
■Removing light lenses
Never remove the lens for the front inte-
rior light and front personal lights. Other-
wise, the lights will be damaged. If a lens
needs to be removed, contact your Lexus
dealer.
Page 272 of 456
2725-6. Using the other interior features
5-6.Using the other interior features
1To set the visor in the forward posi-
tion, flip it down.
2 To set the visor in the side position,
flip down, unhook, and swing it to
the side.
3 To use the side extender, place the
visor in the side position, then slide
it backward.
Slide the cover to open.
The light turns on when the cover is
opened.
The GPS clock’s time is automatically
adjusted by utilizing GPS time infor-
mation.
For details, refer to the “NAVIGATION
AND MULTIMEDIA SYSTEM OWNER’S
MANUAL”.
Please use as a power supply for elec-
tronic goods that use less than 12
VDC/10 A (power consumption of
120 W).
Front
Open the lid.
Rear
Open the lid.
Other interior features
Sun visors
Vanity mirrors
NOTICE
■To prevent 12-volt battery discharge
Do not leave the lights on longer than
necessary when the hy brid system is off.
Clock
Power outlets
Page 273 of 456

2735-6. Using the other interior features
5
Interior features
■The power outlet can be used when
The power switch is in ACCESSORY or
ON mode.
■When stopping the hybrid system
Disconnect electrical devices such as
mobile battery packs.
■Using the power outlet
The shape of the console box partition
allows power cables to be passed through
when the console box lid is partially closed.
The USB charging ports are used to
supply 2.1 A of electricity at 5 V to external devices.
The USB charging ports are for
charging only. They are not designed
for data transfer or other purposes.
Depending on the external device, it
may not charge properly. Refer to the
manual included with the device
before using a USB charging port.
■Using the USB charging ports
Open the lid.
■The USB charging ports can be used
when
The power switch is in ACCESSORY or
ON mode.
■Situations in whic h the USB charging
ports may not operate correctly
●If a device which consumes more than 2.1
A at 5 V is connected
●If a device designed to communicate with
a personal computer, such as a USB
memory device, is connected
●If the connected external device is turned
off (depending on device)
●If the temperature inside the vehicle is
high, such as after the vehicle has been
parked in the sun
■About connected external devices
Depending on the connected external
device, charging may occasionally be sus-
pended and then start again. This is not a
malfunction.
NOTICE
■When the power outlet is not in use
To avoid damaging the power outlet,
close the power outlet lid when the
power outlet is not in use. Foreign objects
or liquids that enter the power outlet may
cause a short circuit.
■To prevent 12-volt battery discharge
Do not use the power outlet longer than
necessary when the hy brid system is off.
USB charging ports
Page 274 of 456

2745-6. Using the other interior features
A portable device can be charged by
just placing Qi standard wireless
charge compatible portable devices
according to the Wireless Power Con-
sortium, such as smart phones and
mobile batteries, etc., on the charge
area.
This function cannot be used with por-
table devices that are larger than the charging area. Also, depending on the
portable device, it may not operate as
normal. Please read the operation
manual for portable devices to be
used.
■The “Qi” symbol
The “Qi” symbol is a trademark of the
Wireless Power Consortium.
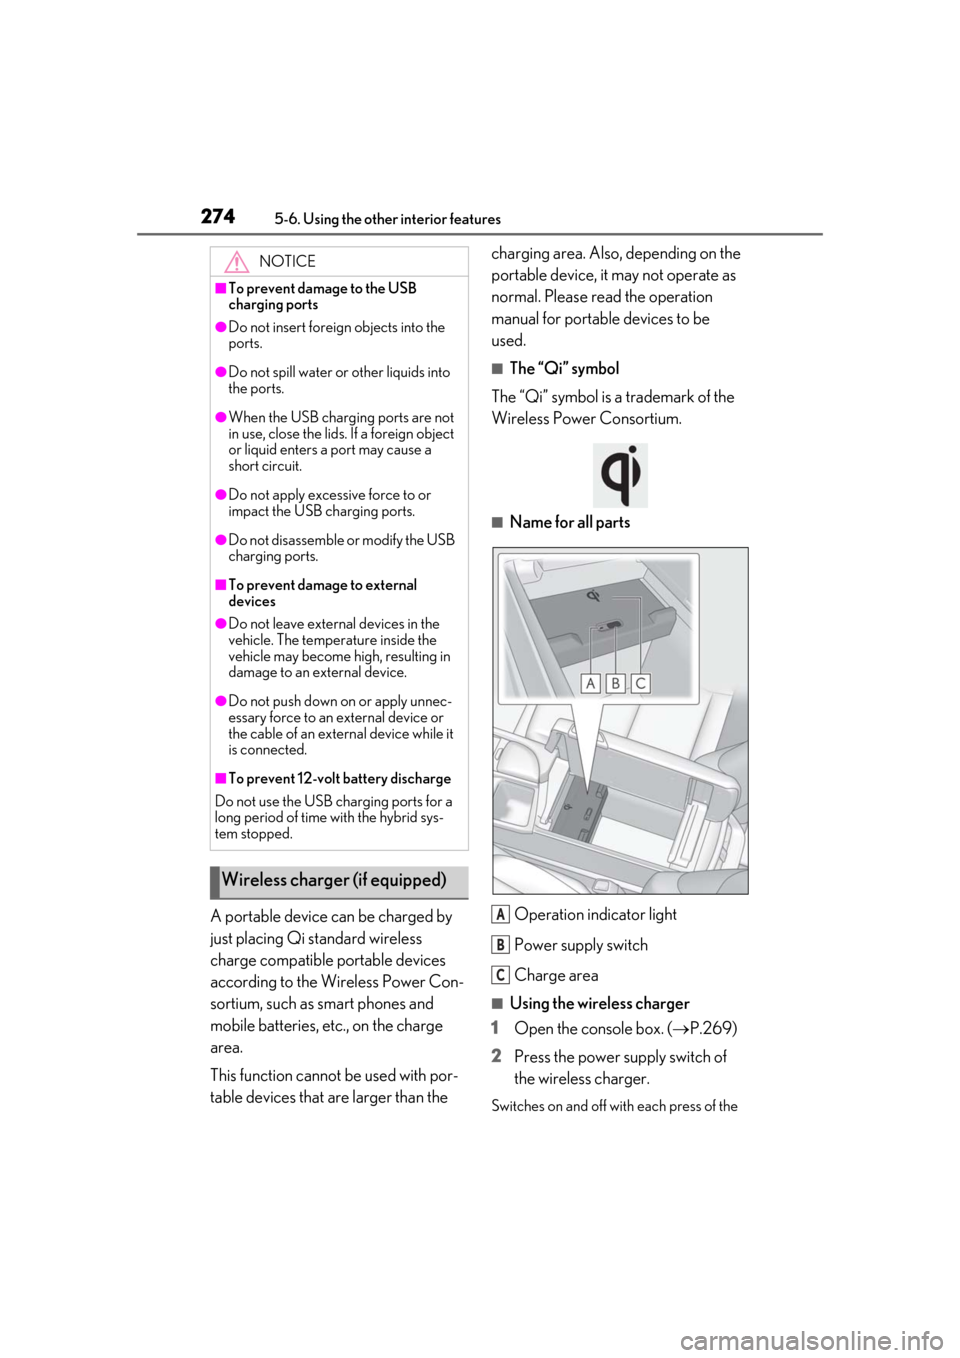
■Name for all parts
Operation indicator light
Power supply switch
Charge area
■Using the wireless charger
1 Open the console box. ( P.269)
2 Press the power supply switch of
the wireless charger.
Switches on and off wi th each press of the
NOTICE
■To prevent damage to the USB
charging ports
●Do not insert foreign objects into the
ports.
●Do not spill water or other liquids into
the ports.
●When the USB charging ports are not
in use, close the lids. If a foreign object
or liquid enters a port may cause a
short circuit.
●Do not apply excessive force to or
impact the USB charging ports.
●Do not disassemble or modify the USB
charging ports.
■To prevent damage to external
devices
●Do not leave external devices in the
vehicle. The temperature inside the
vehicle may become high, resulting in
damage to an external device.
●Do not push down on or apply unnec-
essary force to an external device or
the cable of an external device while it
is connected.
■To prevent 12-volt battery discharge
Do not use the USB charging ports for a
long period of time with the hybrid sys-
tem stopped.
Wireless charger (if equipped)
A
B
C
Page 281 of 456

2815-6. Using the other interior features
5
Interior features
Fold down the armrest for use.
An assist grip installed on the ceiling
can be used to support your body
while sitting on the seat.
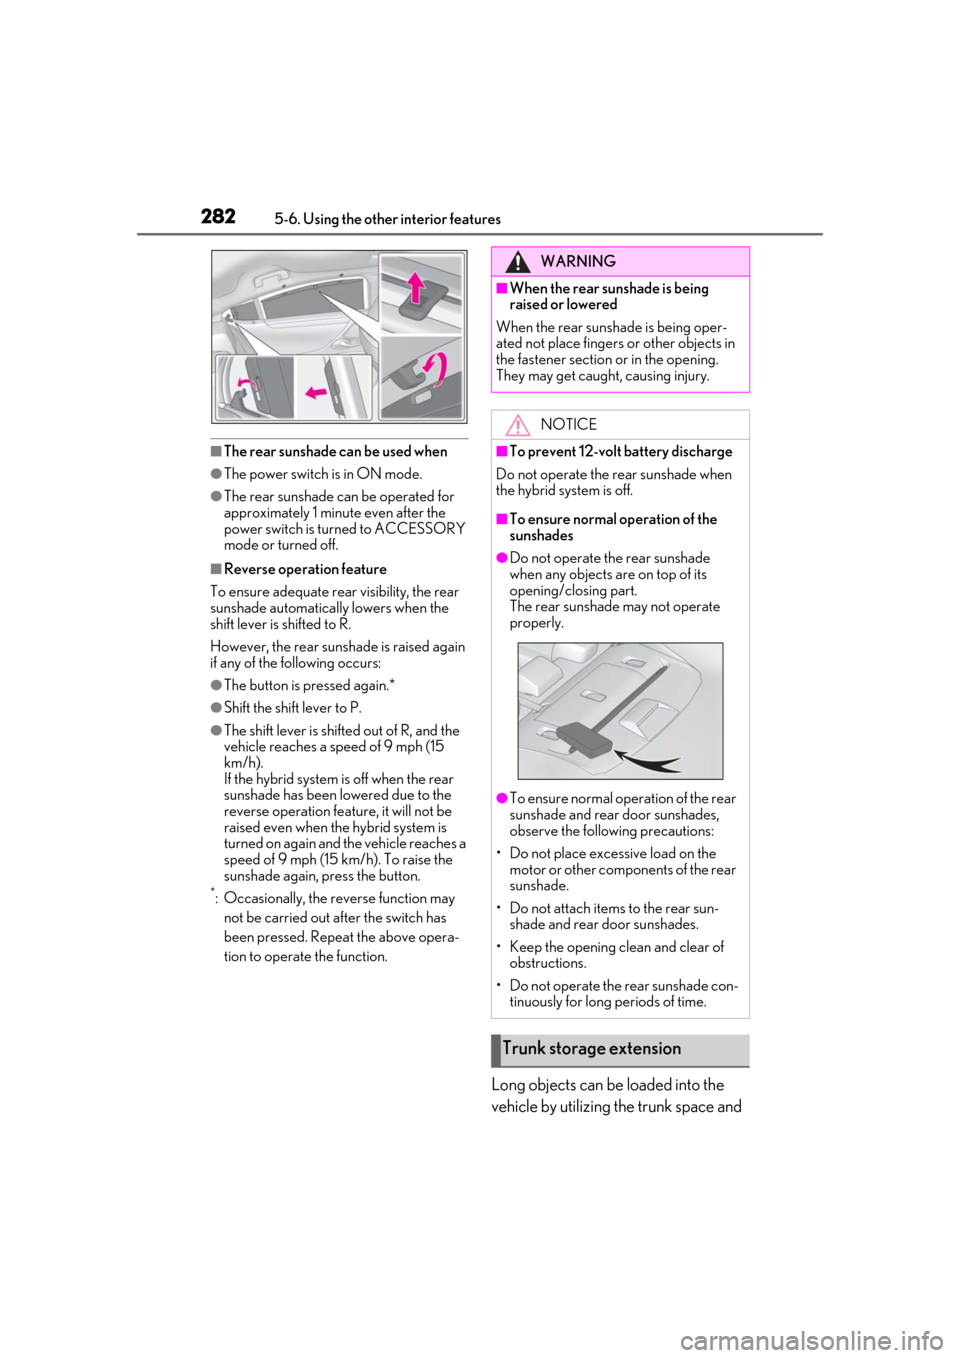
■Rear sunshade
The rear sunshade can be raised and
lowered by operating the button shown
below.
Press the switch. (Raise/lower)
■Rear door sunshades
Pull the tab of the rear door sunshade
and hook the sunshade on the anchors.
To retract the rear door sunshade, unhook
the sunshade and retract it slowly.
NOTICE
■To prevent battery discharge
When the engine is stopped, do not use
the wireless charger for a long time.
Armrest
NOTICE
■To prevent damage to the armrest
Do not apply too much load on the arm-
rest.
Assist grips
WARNING
■Assist grips
Do not use the assist grip when getting in
or out of the vehicle or rising from your
seat.
NOTICE
■To prevent damage to the assist grip
Do not hang any heavy object or put a
heavy load on the assist grip.
Rear sunshade (if
equipped)/rear door sunshades
(if equipped)
Page 282 of 456

2825-6. Using the other interior features
■The rear sunshade can be used when
●The power switch is in ON mode.
●The rear sunshade can be operated for
approximately 1 minute even after the
power switch is turned to ACCESSORY
mode or turned off.
■Reverse operation feature
To ensure adequate rear visibility, the rear
sunshade automatically lowers when the
shift lever is shifted to R.
However, the rear suns hade is raised again
if any of the following occurs:
●The button is pressed again.*
●Shift the shift lever to P.
●The shift lever is shifted out of R, and the
vehicle reaches a speed of 9 mph (15
km/h).
If the hybrid system is off when the rear
sunshade has been lowered due to the
reverse operation feature, it will not be
raised even when the hybrid system is
turned on again and the vehicle reaches a
speed of 9 mph (15 km/h). To raise the
sunshade again, press the button.
*: Occasionally, the reverse function may
not be carried out after the switch has
been pressed. Repeat the above opera-
tion to operate the function.
Long objects can be loaded into the
vehicle by utilizing the trunk space and
WARNING
■When the rear sunshade is being
raised or lowered
When the rear sunshade is being oper-
ated not place fingers or other objects in
the fastener section or in the opening.
They may get caught, causing injury.
NOTICE
■To prevent 12-volt battery discharge
Do not operate the rear sunshade when
the hybrid system is off.
■To ensure normal operation of the
sunshades
●Do not operate the rear sunshade
when any objects ar e on top of its
opening/closing part.
The rear sunshade may not operate
properly.
●To ensure normal operation of the rear
sunshade and rear door sunshades,
observe the following precautions:
• Do not place excessive load on the motor or other components of the rear
sunshade.
• Do not attach items to the rear sun- shade and rear door sunshades.
• Keep the opening clean and clear of obstructions.
• Do not operate the rear sunshade con- tinuously for long periods of time.
Trunk storage extension
Page 284 of 456
2845-6. Using the other interior features
The HomeLink® wireless control sys-
tem in your vehicle has 3 buttons which
can be programmed to operate 3 dif-
ferent devices. Refer to the program-
ming methods on the following pages
to determine the method which is
appropriate for the device. HomeLink
® indicator light
Garage door operation indicators
HomeLink
® icon
Illuminates while HomeLink® is operating.
Buttons
■Codes stored in the HomeLink® mem-
ory
●The registered codes are not erased even
if the 12-volt battery cable is discon-
nected.
●If learning failed when registering a dif-
ferent code to a HomeLink® button that
already has a code registered to it, the
already registered code will not be
erased.
■Certification for the garage door opener
Garage door opener
The garage door opener can be
programmed using the Home-
Link
® to operate garage doors,
gates, entry doors, door locks,
home lighting systems, security sys-
tems, and other devices.
System components
A
B
C
D