Page 193 of 555
Features of your vehicle
106
4
Head Up Display ON/OFF
The HUD display will be activated or
deactivated in user setting mode
while engine is ON.
Head Up Display Information
1. Turn By Turn navigation information
2. Road signs
3. Speedometer
4. Cruise setting speed
5. Smart Cruise Control (SCC) infor-
mation
6. Blind-spot Collision Warning (BCW) system information
7. Warning lights (Low fuel)
8. AV mode information
Head Up Display Setting
On the LCD display, you can change
the head up display settings as fol-
lows.
1. Display height
2. Rotation
3. Brightness
4. Content select
5. Speedometer size
6. Speedometer color
❈ For more details, refer to “LCD
window” in this chapter.
OCK047151LOYG046158L
Page 203 of 555
Features of your vehicle
116
4
High beam operation
To turn on the high beam headlamp,
push the lever away from you. The
lever will return to its original posi-
tion. The high beam indicator will
light when the headlight high beams
are switched on.
To prevent the battery from being
discharged, do not leave the lights
on for a prolonged time while the
engine is not running.
WARNING - High beams
Do not use high beam when
there are other vehicles in front
of your vehicle. Using high
beam could obstruct the other
driver's vision.
OCK047414C
CAUTION
Never place anything over the sensor (1) located on theinstrument panel, this willensure better auto-light sys-tem control.
Don’t clean the sensor using a window cleaner, the cleanermay leave a light film whichcould interfere with sensoroperation.
If your vehicle has window tint or other types of metallic coat-ing on the front windshield,the Auto light system may notwork properly.
Page 205 of 555

Features of your vehicle
118
4
The high beam switches to low beam
in the following conditions:
- When the High Beam Assist is off.
- When the light switch is not in the
AUTO position.
- When the headlamp is detected from the on-coming vehicle.
- When the tail lamp is detected from the front vehicle.
- When the surrounding is bright enough that high beams are not
needed.
- When streetlights or other lights are detected.
- When vehicle speed is below 24 km/h (15 mph).
- When headlamp / taillamp of bicy- cle/motorcycle is detected The system may not operate in the
following conditions:
When the light from a vehicle is not
detected because of lamp dam-
age, or because it is hidden from
sight, etc.
When the lamp of a vehicle is cov- ered with dust, snow or water.
When the light from a vehicle is not detected because of exhaust fume,
smoke, fog, snow, etc.
When the front window is covered with foreign matters such as ice,
dust, fog, or is damaged.
When there is a similar shape lamp with the front vehicle’s lamps.
When it is hard to see because of fog, heavy rain or snow.
When the headlamp is not repaired or replaced at an authorized deal-
er.
When headlamp aiming is not properly adjusted.
When driving on a narrow curved road or rough road. When driving downhill or uphill.
When only part of the vehicle in
front is visible on a crossroad or
curved road.
When there is a traffic light, reflect- ing sign, flashing sign or mirror.
When the road conditions are bad such as being wet or covered with
snow.
When the front vehicle’s head- lamps are off but the fog lamps on.
When a vehicle suddenly appears from a curve.
When the vehicle is tilted from a flat tire or being towed.
When the LKA (Lane Keeping Assist) system warning light illumi-
nates. (if equipped)
Page 218 of 555

4131
Features of your vehicle
If you want to defrost and defog the
front windshield, refer to “Windshield
defrosting and defogging” in this sec-
tion.
Rear window defroster
The defroster heats the window to
remove frost, fog and thin ice from
the rear window, while the engine is
running.
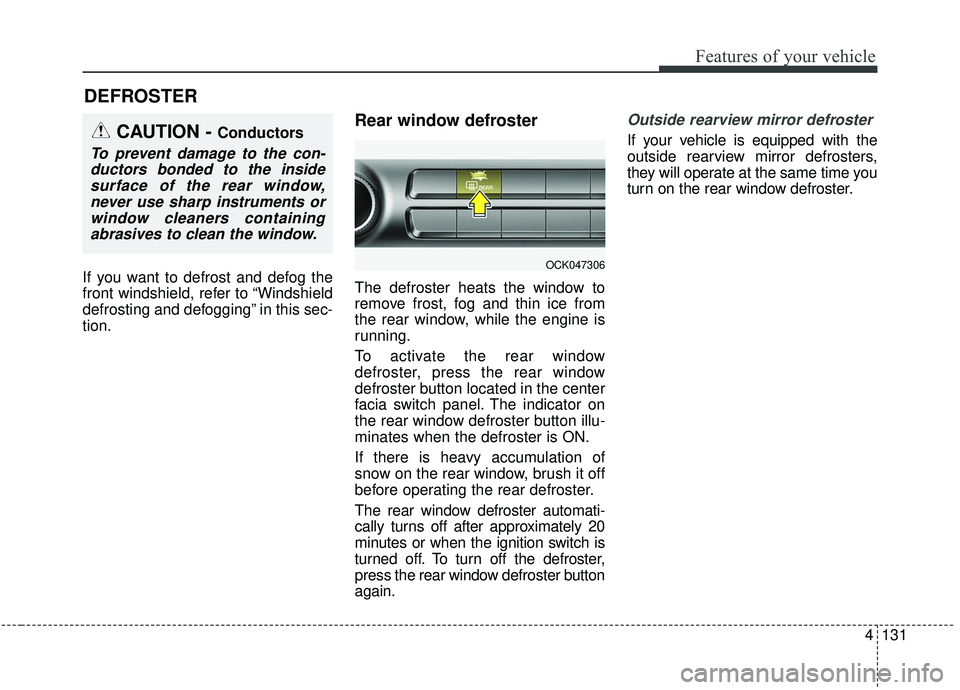
To activate the rear window
defroster, press the rear window
defroster button located in the center
facia switch panel. The indicator on
the rear window defroster button illu-
minates when the defroster is ON.
If there is heavy accumulation of
snow on the rear window, brush it off
before operating the rear defroster.
The rear window defroster automati-
cally turns off after approximately 20
minutes or when the ignition switch is
turned off. To turn off the defroster,
press the rear window defroster button
again.
Outside rearview mirror defroster
If your vehicle is equipped with the
outside rearview mirror defrosters,
they will operate at the same time you
turn on the rear window defroster.
DEFROSTER
CAUTION - Conductors
To prevent damage to the con-ductors bonded to the insidesurface of the rear window,never use sharp instruments orwindow cleaners containingabrasives to clean the window.
OCK047306
Page 219 of 555
Features of your vehicle
132
4
AUTOMATIC CLIMATE CONTROL SYSTEM
OCK047300/OCK047322
1. Driver’s temperature control knob
2. AUTO (automatic control) button
3. Front windshield defroster button
4. Rear window/mirrors defroster button
5. Air conditioning button
6. Air intake control buttons
7. OFF button
8. Fan speed control buttons
9. Mode selection button
10. Passenger's temperature control knob
11. SYNC temperature control selection but-
ton
12. Climate control display
13. Rear temperature control knob
■ ■ Rear seat
■ ■Front seat
CAUTION
Operating the blower when the
ignition switch is in the ON posi-tion could cause the battery todischarge. Operate the blowerwhen the engine is running.
Page 223 of 555
Features of your vehicle
136
4
The mode selection button controls
the direction of the air flow through
the ventilation system.
The air flow outlet port is converted
as follows: Face-Level (B, D, F)
Air flow is directed toward the upper
body and face. Additionally, each
outlet can be controlled to direct the
air discharged from the outlet.
Bi-Level (B, C, D, E, F)
Air flow is directed towards the face
and the floor. Floor-Level (A, C, E, F)
Most of the air flow is directed to the
floor, with a small amount of the air
being directed to the windshield and
side window defrosters.
Floor/Defrost-Level
(A, C, D, E, F)
Most of the air flow is directed to the
floor and the windshield with a small
amount directed to the side window
defrosters.
OCK047308
Page 224 of 555
4137
Features of your vehicle
Defrost-Level
Most of the air flow is directed to the
windshield with a small amount of air
directed to the side window defrosters.Instrument panel vents
The outlet vents can be opened or
closed separately using the thumb-
wheel (if equipped).
Also, you can adjust the direction of
air delivery from these vents using
the vent control lever as shown.
Temperature control
The temperature will increase to the
maximum (HI) by turning the knob to
the extreme right.
OCK047310OCK048321NOCK047311
OCK047323
■ Rear seat
■ Front seat
Page 226 of 555
4139
Features of your vehicle
Air intake control
This is used to select the outside
(fresh) air position or recirculated air
position.
To change the air intake control posi-
tion, push the control button.Outside (fresh) air position
With the outside (fresh)air position selected, air
enters the vehicle from
outside and is heated or
cooled according to the
function selected.
Recirculated air position With the recirculated airposition selected, air
from the passenger
compartment will be
drawn through the heat-
ing system and heated
or cooled according to
the function selected. Prolonged operation of the heater in
the recirculated air position (without
air conditioning selected) may cause
fogging of the windshield and side
windows and the air within the pas-
senger compartment may become
stale.
In addition, prolonged use of the air
conditioning with the recirculated air
position selected will result in exces-
sively dry air in the passenger com-
partment.
OCK047313