Page 140 of 555
453
Features of your vehicle
Electric type (if equipped)
Adjust the steering wheel angle (2)
and position (3) with the switch (1) on
the steering column. Move the steer-
ing wheel, so it points toward your
chest, not toward your face. Make
sure you can see the instrument
panel warning lights and gauges.
After adjusting, push the steering
wheel both up and down to be cer-
tain it is locked in position. Always
adjust the position of the steering
wheel before driving.
✽ ✽ NOTICE
To prevent discharge of the battery,
do not operate when the engine is
stopped.
Heated steering wheel
With the Engine Start/Stop Button in
the ON position, pressing the heat-
ed steering wheel button warms the
steering wheel. The indicator on the
button will illuminate.
To turn the heated steering wheel off,
press the button once again. The
indicator on the button will turn off.
▼
OCK047038N
OCK047039N
Page 141 of 555

Features of your vehicle
54
4
✽ ✽
NOTICE
The heated steering wheel will turn
off automatically approximately 30
minutes after the heated steering
wheel is turned on.
Horn
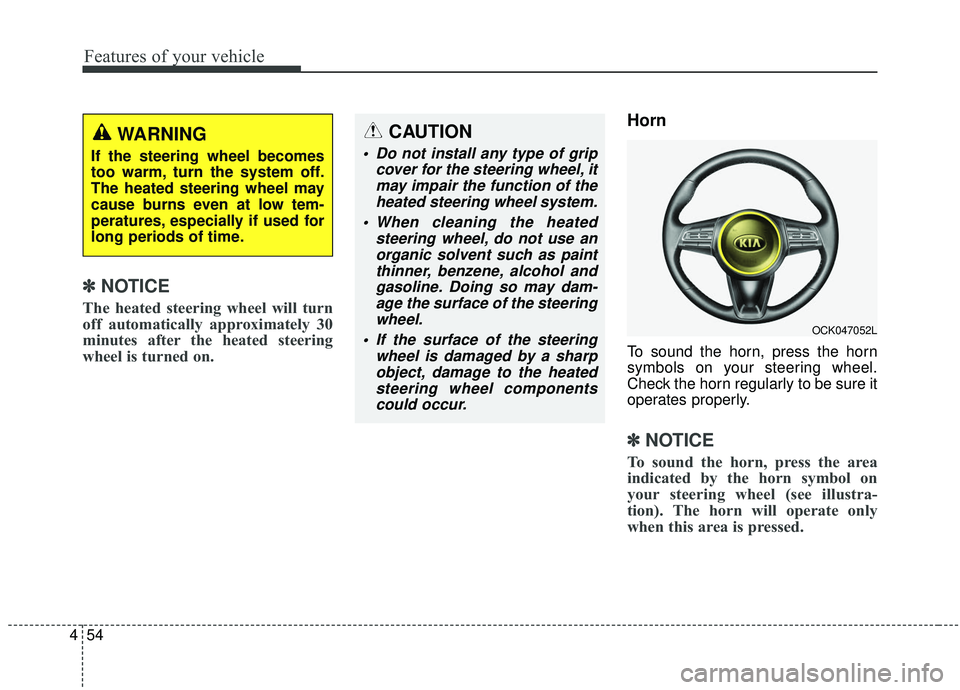
To sound the horn, press the horn
symbols on your steering wheel.
Check the horn regularly to be sure it
operates properly.
✽ ✽NOTICE
To sound the horn, press the area
indicated by the horn symbol on
your steering wheel (see illustra-
tion). The horn will operate only
when this area is pressed.
CAUTION
Do not install any type of grip
cover for the steering wheel, itmay impair the function of theheated steering wheel system.
When cleaning the heated steering wheel, do not use anorganic solvent such as paintthinner, benzene, alcohol andgasoline. Doing so may dam-age the surface of the steeringwheel.
If the surface of the steering wheel is damaged by a sharpobject, damage to the heatedsteering wheel componentscould occur.
WARNING
If the steering wheel becomes
too warm, turn the system off.
The heated steering wheel may
cause burns even at low tem-
peratures, especially if used for
long periods of time.
OCK047052L
Page 155 of 555
Features of your vehicle
68
4
Instrument Cluster Control
Adjusting Instrument Cluster
Illumination
The brightness of the instrument
panel illumination is changed by
pressing the illumination control button
(“+” or “-”) when the Engine Start/Stop
button is ON, or the taillights are
turned on. If you hold the illumination control
button (“+” or “-”), the brightness
will be changed continuously.
If the brightness reaches to the maximum or minimum level, an
alarm will sound.
LCD Display Control
The LCD display modes can be
changed by using the control buttons
on the steering wheel.
OCK047047L
OCK047138LOCK047048L
OCK047049L
■Type A
■Type B
Page 161 of 555
Features of your vehicle
74
4
Trip Modes Fuel Economy
Average Fuel Economy (1)
The average fuel economy is calcu-
lated by the total driving distance
and fuel consumption since the last
average fuel economy reset.
- Fuel economy range: 0.0 ~ 99.9L/100km or MPG
The average fuel economy can be reset both manually and automati-
cally.
✽ ✽ NOTICE
The fuel economy may vary signifi-
cantly based on driving conditions,
driving habits, and condition of the
vehicle.
Manual reset
To clear the average fuel economy
manually, press the OK button
(reset) on the steering wheel for
more than 1 second when the aver-
age fuel economy is displayed.
OCK047141C
Accumulated Info
Digital speedometer
Drive Info
TRIP
Drive Mode
Page 169 of 555

Features of your vehicle
82
4
If the estimated distance is below
1 km (1 mi.), the trip computer will
display “---” as distance to empty.
✽ ✽ NOTICE
• If the vehicle is not on level ground
or the battery power has been
interrupted, the distance to empty
function may not operate correct-
ly.
• The distance to empty may differ from the actual driving distance as
it is an estimate of the available
driving distance.
• The trip computer may not regis- ter additional fuel if less than 6
liters (1.6 gallons) of fuel are
added to the vehicle.
• The fuel economy and distance to empty may vary significantly
based on driving conditions, driv-
ing habits, and condition of the
vehicle.
User Settings Mode
Description
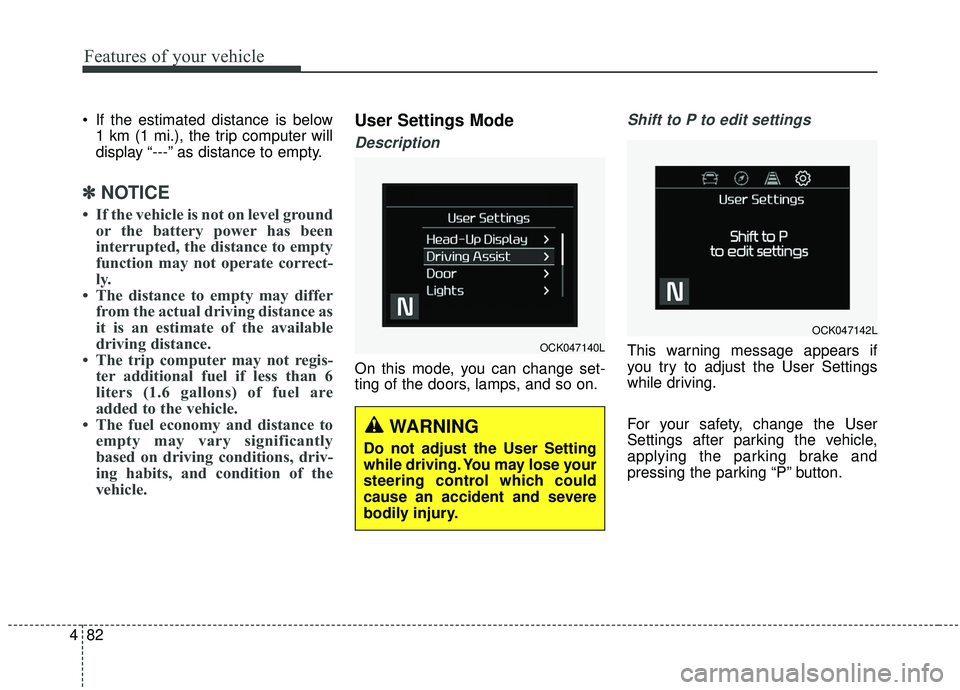
On this mode, you can change set-
ting of the doors, lamps, and so on.
Shift to P to edit settings
This warning message appears if
you try to adjust the User Settings
while driving.
For your safety, change the User
Settings after parking the vehicle,
applying the parking brake and
pressing the parking “P” button.OCK047140L
WARNING
Do not adjust the User Setting
while driving. You may lose your
steering control which could
cause an accident and severe
bodily injury.
OCK047142L
Page 173 of 555

Features of your vehicle
86
4
Steering Easy Access (if
equipped)
- On (checked) : The steeringwheel will automatically move to
the top of Steering column when
leaving the vehicle and move to
the last saved position when
entering the vehicle for the driver
to enter or exit the vehicle com-
fortably.
- Off (unchecked) : The steering easy access function will be
deactivated.
❈ For more details, refer to “Driver
Position Memory System” in chap-
ter 3.
Welcome Mirror/Light (if equipped) : - If this item is checked, the wel-come Mirror/light function will be
activated.
Wiper/Light Display (if equipped) : If this item is checked, the
Wiper/Light Display will be activat-
ed. Gear Position Pop-up (if equipped)
: If this item is checked, the gear
position pop-up display will be acti-
vated.
Icy road warning (if equipped) : If this item is checked, the Icy road
warning display will be activated.
Service interval
Service Interval To activate or deactivate the serv-
ice interval function.
Adjust Interval To adjust the interval by mileage-
and period.
Reset To reset the service interval func-
tion. Other features
Fuel Economy Auto Reset
- Off : The average fuel economywill not reset automatically when-
ever refueling.
- After Ignition : The average fuel economy will reset automatically
whenever it has passed 4 hours
after turning OFF the engine.
- After Refueling : The average fuel economy will reset automatically
when refueling.
❈ For more details, refer to “Trip
Computer” in this chapter.
Fuel Economy Unit - Choose the fuel economy unit.(L/100km, US gallon, UK gallon)
Temperature Unit - Choose the temperature unit.(°C,°F)
Page 182 of 555

495
Features of your vehicle
✽ ✽NOTICE- Electronic Brake
force Distribution (EBD)
System Warning Light
When the ABS Warning Light is on
or both the ABS and the Parking
Brake & Brake Fluid Warning
Lights are on, the speedometer,
odometer, or tripmeter may not
work. Also, the EPS Warning Light
may illuminate and the steering
effort may increase or decrease.
In this case, have the vehicle inspect-
ed by an authorized Kia dealer.
Electronic Power Steering (EPS) WarningLight (if equipped)
This warning light illuminates:
Once you set the Engine Start/Stop Button to the ON position.
- It remains on until the engine isstarted.
When there is a malfunction with the EPS.
In this case, have the vehicle
inspected by an authorized Kia
dealer.
Malfunction Indicator
Lamp (MIL)
This warning light illuminates:
Once you set the Engine Start/Stop Button to the ON position.
- It remains on until the engine isstarted.
When there is a malfunction with the emission control system.
In this case, have the vehicle
inspected by an authorized Kia
dealer.
Page 201 of 555

Features of your vehicle
114
4
Battery saver function
The purpose of this feature is to
prevent the battery from being dis-
charged if the lights are left in the
ON position. The system automati-
cally shuts off the parking lights 30
seconds after the ignition key is
removed and the driver’s door is
opened and closed.
With this feature, the parking lights will turn off automatically if the driver
parks on the side of the road at night
and opens the driver’s side door.
If necessary, to keep the parking
lights on when the ignition key is
removed, perform the following:
1) Open the driver-side door.
2) Turn the parking lights OFF and ON again using the light switch
on the steering column.
Daytime running light
The Daytime Running Lights (DRL)
can make it easier for others to see the
front of your vehicle during the day.
DRL can be helpful in many different
driving conditions, and it is especially
helpful after dawn and before sunset.
The DRL system will turn the dedi-
cated lamp OFF when :
1.The headlight switch is on
- It includes that the headlight is onin the dark when the headlight
switch is in the auto light position.
2.The engine is off
3.Engaging the Parking Brake
Lighting control
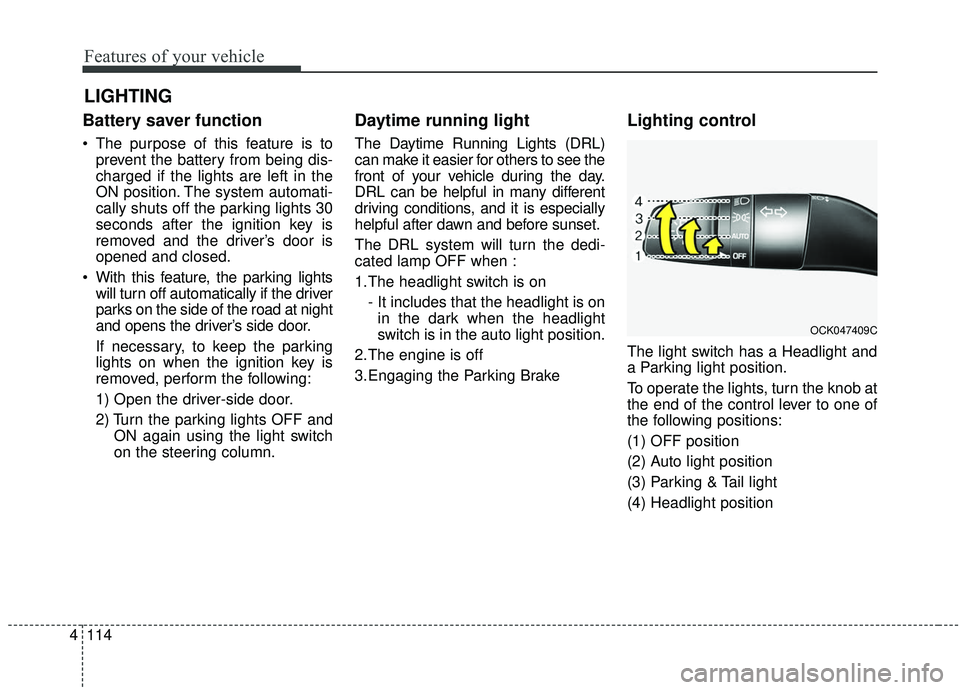
The light switch has a Headlight and
a Parking light position.
To operate the lights, turn the knob at
the end of the control lever to one of
the following positions:
(1) OFF position
(2) Auto light position
(3) Parking & Tail light
(4) Headlight position
LIGHTING
OCK047409C