2019 KIA STINGER brake light
[x] Cancel search: brake lightPage 190 of 555
4103
Features of your vehicle
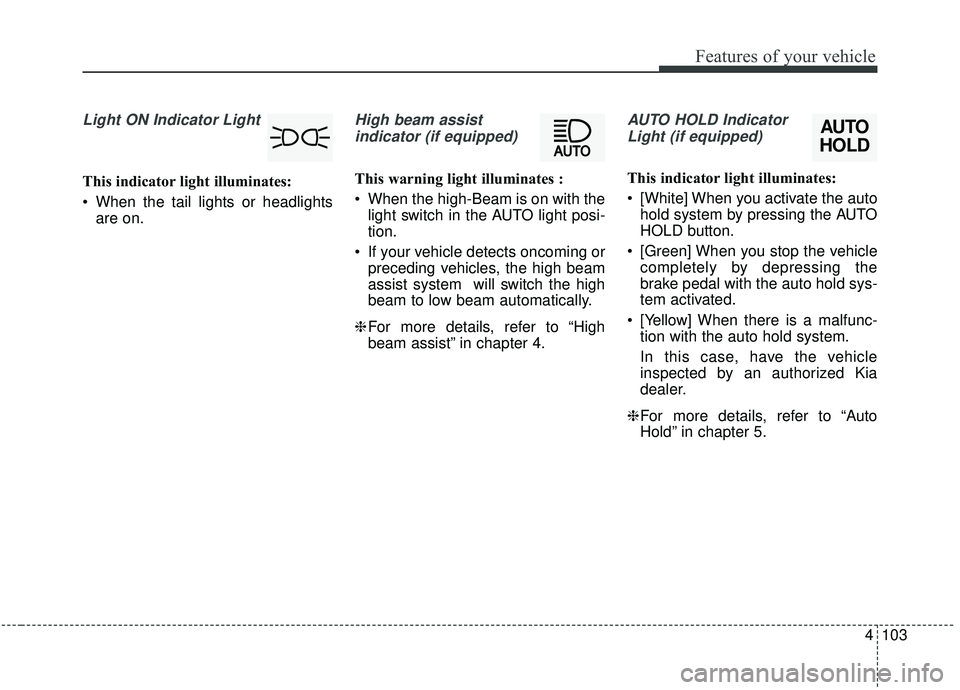
Light ON Indicator Light
This indicator light illuminates:
When the tail lights or headlightsare on.
High beam assist
indicator (if equipped)
This warning light illuminates :
When the high-Beam is on with the light switch in the AUTO light posi-
tion.
If your vehicle detects oncoming or preceding vehicles, the high beam
assist system will switch the high
beam to low beam automatically.
❈ For more details, refer to “High
beam assist” in chapter 4.
AUTO HOLD Indicator
Light (if equipped)
This indicator light illuminates:
[White] When you activate the auto hold system by pressing the AUTO
HOLD button.
[Green] When you stop the vehicle completely by depressing the
brake pedal with the auto hold sys-
tem activated.
[Yellow] When there is a malfunc- tion with the auto hold system.
In this case, have the vehicle
inspected by an authorized Kia
dealer.
❈ For more details, refer to “Auto
Hold” in chapter 5.
AUTO
HOLD
Page 201 of 555
Features of your vehicle
114
4
Battery saver function
The purpose of this feature is to
prevent the battery from being dis-
charged if the lights are left in the
ON position. The system automati-
cally shuts off the parking lights 30
seconds after the ignition key is
removed and the driver’s door is
opened and closed.
With this feature, the parking lights will turn off automatically if the driver
parks on the side of the road at night
and opens the driver’s side door.
If necessary, to keep the parking
lights on when the ignition key is
removed, perform the following:
1) Open the driver-side door.
2) Turn the parking lights OFF and ON again using the light switch
on the steering column.
Daytime running light
The Daytime Running Lights (DRL)
can make it easier for others to see the
front of your vehicle during the day.
DRL can be helpful in many different
driving conditions, and it is especially
helpful after dawn and before sunset.
The DRL system will turn the dedi-
cated lamp OFF when :
1.The headlight switch is on
- It includes that the headlight is onin the dark when the headlight
switch is in the auto light position.
2.The engine is off
3.Engaging the Parking Brake
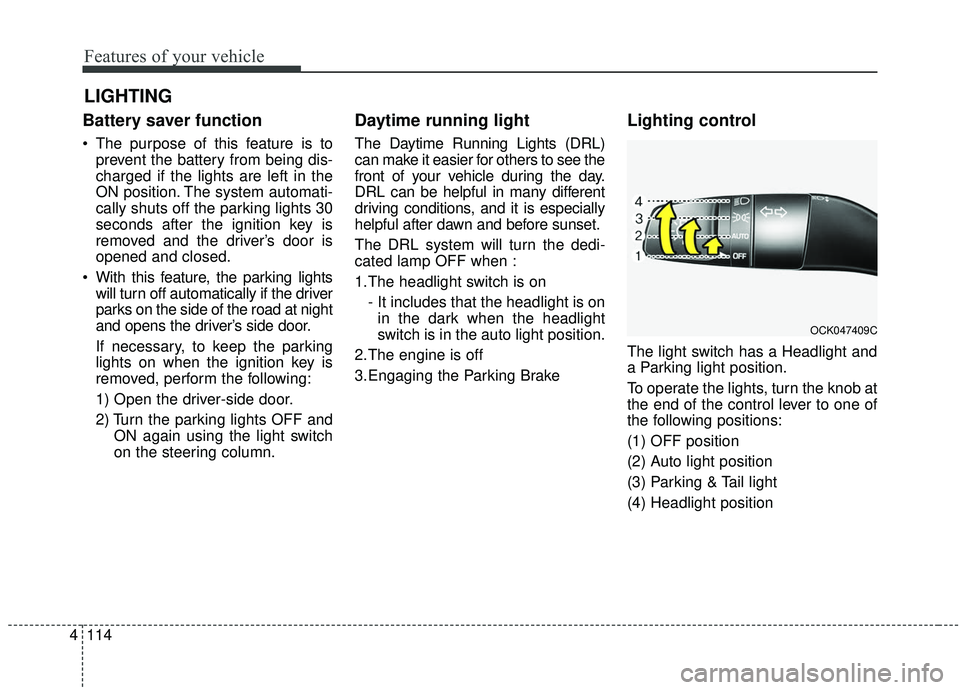
Lighting control
The light switch has a Headlight and
a Parking light position.
To operate the lights, turn the knob at
the end of the control lever to one of
the following positions:
(1) OFF position
(2) Auto light position
(3) Parking & Tail light
(4) Headlight position
LIGHTING
OCK047409C
Page 258 of 555

55
Driving your vehicle
Before entering vehicle
• Be sure that all windows, outsidemirror(s), and outside lights are
clean.
Check the condition of the tires.
Check under the vehicle for any sign of leaks.
Be sure there are no obstacles behind you if you intend to back up.
Necessary inspections
Fluid levels, such as engine oil,
engine coolant, brake fluid, and
washer fluid should be checked on a
regular basis, at the exact interval
depending on the fluid. Further
details are provided in chapter 7,
“Maintenance”.
Before starting
Close and lock all doors.
Position the seat so that all con-trols are easily reached.
Buckle your seat belt.
Adjust the inside and outside rearview mirrors.
Be sure that all lights work.
Check all gauges.
Check the operation of warning lights when the ignition switch is
turned to the ON position.
Release the parking brake and make sure the brake warning light
goes out.
For safe operation, be sure you are
familiar with your vehicle and its
equipment.
BEFORE DRIVING
WARNING - Distracted driving
Focus on the road while driving.
The driver's primary responsi-
bility is in the safe and legal
operation of the vehicle. Use of
any handled devices, other
equipment or vehicle systems
that distract the driver should
not be used during vehicle
operation.
Page 260 of 555

57
Driving your vehicle
Illuminated engine start/stop
button
Whenever the front door is opened,
the engine start/stop button will illu-
minate for your convenience. The
light will go off after about 30 sec-
onds when the door is closed.
When all doors are closed and you
lock the vehicle by using the trans-
mitter or the smart key, the light will
go off immediately.
Engine start/stop button posi-
tion
OFF
To turn off the engine (START/RUN
position) or vehicle power (ON posi-
tion), press the engine start/stop but-
ton with the shift lever in the P (Park)
position. When you press the engine
start/stop button without the shift
lever in the P (Park) position, the
engine start/stop button will not
change to the OFF position but to the
ACC position.
In an emergency situation while the
vehicle is in motion, you are able to
turn the engine off and to the ACC
position by pressing the engine
start/stop button for more than 2 sec-
onds or 3 times successively within 3
seconds. If the vehicle is still moving,
you can restart the engine without
depressing the brake pedal by press-
ing the engine start/stop button with
the shift lever in the N (Neutral) posi-
tion.
ACC(Accessory)
Press the engine start/stop button
while it is in the OFF position without
depressing the brake pedal.
If the engine start/stop button is in the
ACC position for more than 1 hour,
the button is turned off automatically
to prevent battery discharge.
Accessory is displayed on the LCD
of the cluster.
ENGINE START/STOP BUTTON
OCK057001
OCK057163
Page 261 of 555

Driving your vehicle
85
ON
Press the engine start/stop button
while it is in the ACC position without
depressing the brake pedal.
The warning lights can be checked
before the engine is started. Do not
leave the engine start/stop button in
the ON position for an extended peri-
od of time. The battery may dis-
charge, because the engine is not
running.
START/RUN
To start the engine, depress the
brake pedal and press the ENGINE
START/STOP button with the shift
lever in the P (Park) or the N
(Neutral) position. For your safety,
start the engine with the shift lever in
the P (Park) position.
If you press the engine start/stop but-
ton without depressing the brake
pedal, the engine will not start and the
engine start/stop button changes as
follow:
OFF ➔ACC ➔ON ➔OFF or ACC
✽ ✽
NOTICE
If you leave the ENGINE
START/STOP button in the ACC or
ON position for an extended period
of time, the battery will discharge.
WARNING- Starting
vehicle
Never press the engine
start/stop button while the vehi-
cle is in motion except in an
emergency. This would result in
loss of directional control and
braking function, which could
cause an accident.
Page 265 of 555
Driving your vehicle
12
5
When stopped on an incline, do not
hold the vehicle with the engine
power. Use the service brake or the
parking brake.
Transmission ranges
The indicator in the instrument clus-
ter displays the shift lever position
when the ignition switch is in the ON
position.
P (Park)
Always come to a complete stop
before shifting into P (Park). This
position locks the transmission and
prevents the drive wheels from rotat-
ing.
Shifting into P (Park) while the vehi-
cle is in motion will cause the drive
wheels to lock which will cause you
to lose control of the vehicle. R (Reverse)
Use this position to drive the vehicle
backward.
N (Neutral)
The wheels and transmission are not
engaged. The vehicle will roll freely
even on the slightest incline unless
the parking brake or service brakes
are applied.
WARNING- Leaving
Vehicle
Before leaving the driver’s seat,
always make sure the shift lever
is in the P (Park) position; then
set the parking brake fully and
shut the engine off. Do not use
the P position in place of the
parking brake. Always make
sure the shift lever is locked in
the P position and set the park-
ing brake fully. Unexpected and
sudden vehicle movement can
occur if these precautions are
not followed.
CAUTION- Transmission
To avoid damage to your trans- mission, do not accelerate theengine in R (Reverse) or any for-ward gear position with thebrakes on. The transmissionmay be damaged if you shiftinto P (Park) while the vehicle isin motion.
CAUTION- Shifting
Always come to a complete stopbefore shifting into or out of R(Reverse); you may damage thetransmission if you shift into R(Reverse) while the vehicle is inmotion, except when “Rockingthe vehicle” explained in thischapter.
Page 283 of 555
Driving your vehicle
30
5
NEUTRAL engaged
The message appears on the LCD
display, when the N (Neutral) posi-
tion is engaged.
Good driving practices
Never move the shift lever from P
(Park) or N (Neutral) to any other
position with the accelerator pedal
depressed.
Never move the shift lever into P (Park) when the vehicle is in
motion.
Be sure the vehicle is completely
stopped before you attempt to shift
into R (Reverse) or D (Drive).
Do not move the shift lever to N (Neutral) when driving. Doing so
may result in an accident because
of a loss of engine braking and the
transmission could be damaged.
Do not drive with your foot resting on the brake pedal. Even light, but
consistent pedal pressure can
result in the brakes overheating,
brake wear and possibly even
brake failure. Depressing both accelerator and
brake pedals at the same time can
trigger logic for engine power
reduction to assure vehicle decel-
eration. Vehicle acceleration will
resume after the brake pedal is
released.
When driving in Sports Mode, slow down before shifting to a lower
gear. Otherwise, the lower gear
may not be engaged if the engine
rpms are outside of the allowable
range.
Always apply the parking brake when leaving the vehicle. Do not
depend on placing the transmis-
sion in P (Park) to keep the vehicle
from moving.
Page 294 of 555
541
Driving your vehicle
LIMITED SLIP
DIFFERENTIAL (LSD)
(IF EQUIPPED)
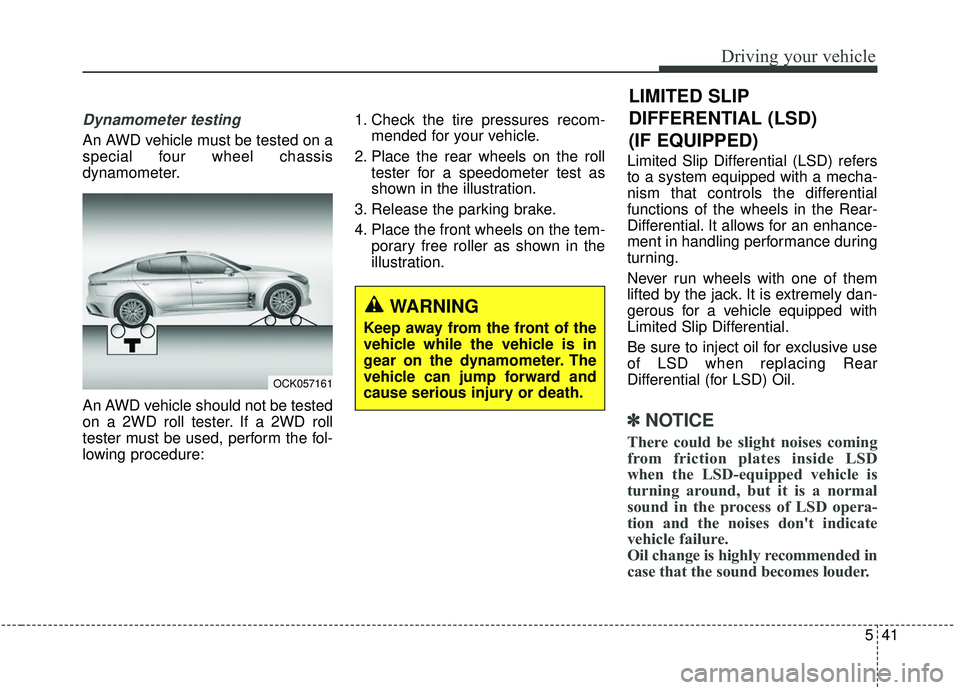
Dynamometer testing
An AWD vehicle must be tested on a
special four wheel chassis
dynamometer.
An AWD vehicle should not be tested
on a 2WD roll tester. If a 2WD roll
tester must be used, perform the fol-
lowing procedure:1. Check the tire pressures recom-
mended for your vehicle.
2. Place the rear wheels on the roll tester for a speedometer test as
shown in the illustration.
3. Release the parking brake.
4. Place the front wheels on the tem- porary free roller as shown in the
illustration. Limited Slip Differential (LSD) refers
to a system equipped with a mecha-
nism that controls the differential
functions of the wheels in the Rear-
Differential. It allows for an enhance-
ment in handling performance during
turning.
Never run wheels with one of them
lifted by the jack. It is extremely dan-
gerous for a vehicle equipped with
Limited Slip Differential.
Be sure to inject oil for exclusive use
of LSD when replacing Rear
Differential (for LSD) Oil.
✽ ✽
NOTICE
There could be slight noises coming
from friction plates inside LSD
when the LSD-equipped vehicle is
turning around, but it is a normal
sound in the process of LSD opera-
tion and the noises don't indicate
vehicle failure.
Oil change is highly recommended in
case that the sound becomes louder.
WARNING
Keep away from the front of the
vehicle while the vehicle is in
gear on the dynamometer. The
vehicle can jump forward and
cause serious injury or death.
OCK057161