Page 356 of 555

5103
Driving your vehicle
Your vehicle may be equipped with
the ISG system, which reduces fuel
consumption by automatically shut-
ting down the engine, when the vehi-
cle is at a standstill. (For example :
red light, stop sign and traffic jam)
The engine starts automatically as
soon as the starting conditions are
met.
The ISG system is ON whenever the
engine is running.
✽ ✽NOTICE
When the engine automatically
starts by the ISG system, some
warning lights (ABS, ESC, ESC
OFF, EPS or Parking brake warn-
ing light) may turn on for a few sec-
onds.
This happens because of low battery
voltage. It does not mean the system
has malfunctioned.
Auto stop
To stop the engine in idle stop
mode
Stop the vehicle completely by
pressing the brake pedal when the
shift lever is in the D (Drive) or N
(Neutral) position.
The engine will stop and the green
AUTO STOP( ) indicator on the
instrument cluster will illuminate.
✽ ✽ NOTICE
If you open the engine hood in auto
stop mode, the following will hap-
pen:
• The ISG system will deactivate
(the light on the ISG OFF button
will illuminate).
• A message will appear on the LCD display. (Continued)
ISG (IDLE STOP AND GO) SYSTEM
OCK057144
OCK057095L
Page 391 of 555

Driving your vehicle
138
5
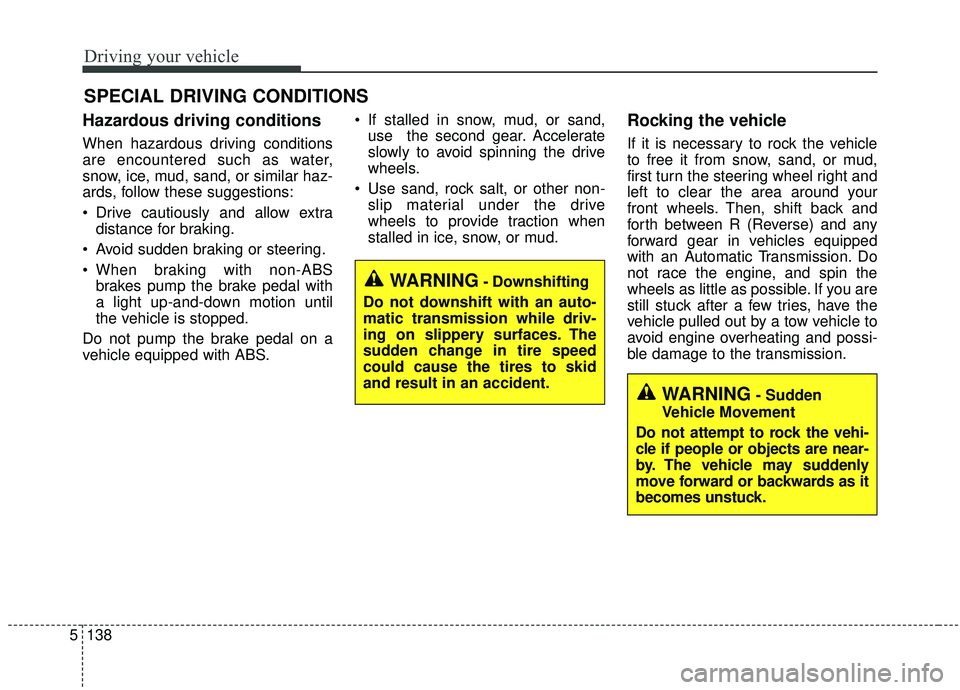
Hazardous driving conditions
When hazardous driving conditions
are encountered such as water,
snow, ice, mud, sand, or similar haz-
ards, follow these suggestions:
Drive cautiously and allow extra
distance for braking.
Avoid sudden braking or steering.
When braking with non-ABS brakes pump the brake pedal with
a light up-and-down motion until
the vehicle is stopped.
Do not pump the brake pedal on a
vehicle equipped with ABS. If stalled in snow, mud, or sand,
use the second gear. Accelerate
slowly to avoid spinning the drive
wheels.
Use sand, rock salt, or other non- slip material under the drive
wheels to provide traction when
stalled in ice, snow, or mud.
Rocking the vehicle
If it is necessary to rock the vehicle
to free it from snow, sand, or mud,
first turn the steering wheel right and
left to clear the area around your
front wheels. Then, shift back and
forth between R (Reverse) and any
forward gear in vehicles equipped
with an Automatic Transmission. Do
not race the engine, and spin the
wheels as little as possible. If you are
still stuck after a few tries, have the
vehicle pulled out by a tow vehicle to
avoid engine overheating and possi-
ble damage to the transmission.
SPECIAL DRIVING CONDITIONS
WARNING- Downshifting
Do not downshift with an auto-
matic transmission while driv-
ing on slippery surfaces. The
sudden change in tire speed
could cause the tires to skid
and result in an accident.
WARNING- Sudden
Vehicle Movement
Do not attempt to rock the vehi-
cle if people or objects are near-
by. The vehicle may suddenly
move forward or backwards as it
becomes unstuck.
Page 420 of 555
617
What to do in an emergency
6. Loosen the wheel lug nuts coun-terclockwise one turn each, but do
not remove any nut until the tire
has been raised off the ground.
7. Place the jack at the front (1) orrear (2) jacking position closest to
the tire you are changing. Place
the jack at the designated loca-
tions under the frame. The jacking
positions are plates welded to the
frame with two tabs and a raised
dot to line up with the jack. 8. Insert the wheel lug nut wrench
into the jack and turn it clockwise,
raising the vehicle until the tire just
clears the ground. This measure-
ment is approximately 30 mm (1
in.).
Before removing the wheel lug
nuts, make sure the vehicle is sta-
ble and that there is no chance for
movement or slippage.
OCK067029LOCK067026L
OCK067027L
OCK067028L
Page 474 of 555

743
Maintenance
Flat Spots
If a vehicle is parked/not operated for
a long period of time, tires may
develop “flat spots”. Once the vehi-
cle is driven again, these flat spots
may cause a vibration which typical-
ly disappears gradually as the tires
warm up and regain their original
shape. To minimize tire flat spots
developing during periods of extend-
ed storage, inflate the tires to the
maximum pressure as indicated on
the tire’s sidewall. When the vehicle
is made ready to drive again, lower
the tire pressure to the recommend-
ed levels as shown on the Tire and
Loading Information label in the dri-
ver’s side center pillar for your vehi-
cle (Refer to “Tire specification and
pressure label” in chapter 8).
Tire replacement
If the tire is worn evenly, a tread wear
Indicator (A) will appear as a solid
band across the tread. This shows
there is less than 1.6 mm (1/16 inch)
of tread left on the tire. Replace the
tire when this happens.
Do not wait for the band to appear
across the entire tread before replac-
ing the tire.The ABS (Anti-lock Brake System)
works by comparing the speed of the
wheels. The tire size affects wheel
speed. When replacing tires, all 4
tires must use the same size origi-
nally supplied with the vehicle. Using
tires of a different size can cause the
ABS and ESC (Electronic Stability
Control) to work irregularly.
✽ ✽
NOTICE
We recommend that when replacing
tires, use the same which were origi-
nally supplied with the vehicle. If
not, driving performance could be
altered.
OUM076204L
Page 513 of 555

Maintenance
82
7
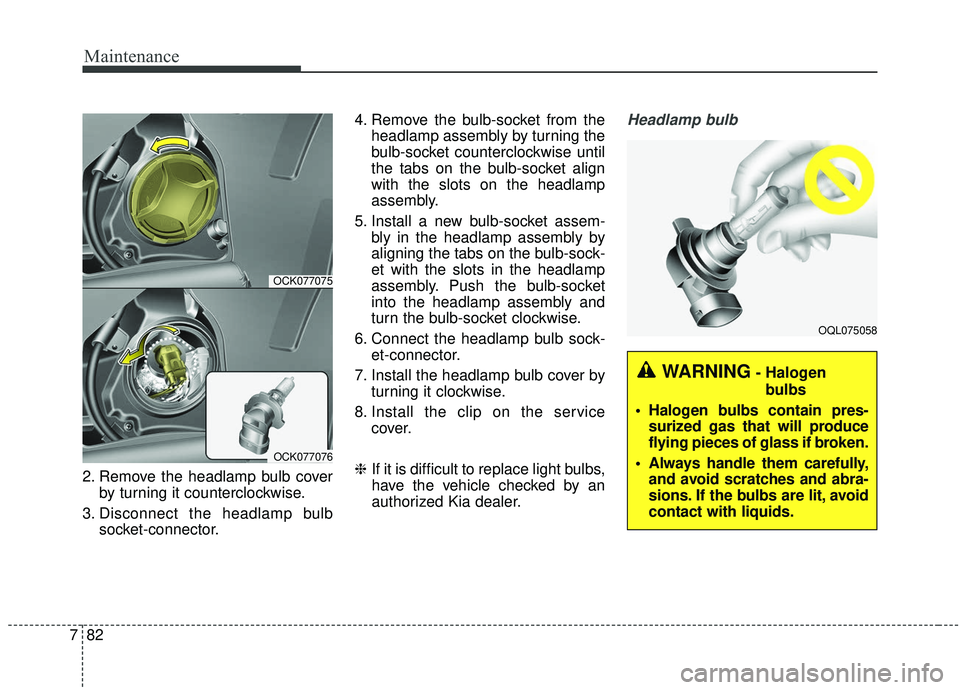
2. Remove the headlamp bulb cover
by turning it counterclockwise.
3. Disconnect the headlamp bulb socket-connector. 4. Remove the bulb-socket from the
headlamp assembly by turning the
bulb-socket counterclockwise until
the tabs on the bulb-socket align
with the slots on the headlamp
assembly.
5. Install a new bulb-socket assem- bly in the headlamp assembly by
aligning the tabs on the bulb-sock-
et with the slots in the headlamp
assembly. Push the bulb-socket
into the headlamp assembly and
turn the bulb-socket clockwise.
6. Connect the headlamp bulb sock- et-connector.
7. Install the headlamp bulb cover by turning it clockwise.
8. Install the clip on the service cover.
❈ If it is difficult to replace light bulbs,
have the vehicle checked by an
authorized Kia dealer.
Headlamp bulb
OCK077075
OCK077076
OQL075058
WARNING- Halogen
bulbs
Halogen bulbs contain pres- surized gas that will produce
flying pieces of glass if broken.
Always handle them carefully, and avoid scratches and abra-
sions. If the bulbs are lit, avoid
contact with liquids.
Page 514 of 555

783
Maintenance
Never touch the glass with barehands. Residual oil may cause the
bulb to overheat and burst when lit.
A bulb should be operated only
when installed in a headlight.
If a bulb becomes damaged or cracked, replace it immediately
and carefully dispose of it.
Wear eye protection when chang- ing a bulb. Allow the bulb to cool
down before handling it.Front turn signal lamp bulb
replacement (Headlamp Type A)
1. Open the hood.
2. Remove the strut bar and the air cleaner assembly. 3. Remove the bulb-socket from the
headlamp assembly by turning the
bulb-socket counterclockwise until
the tabs on the bulb-socket align
with the slots on the headlamp
assembly.
4. Remove the bulb from the bulb- socket by pressing it in and rotat-
ing it counterclockwise until the
tabs on the bulb align with the
slots in the bulb-socket. Pull the
bulb out of the bulb-socket.
5. Insert a new bulb by inserting it into the bulb-socket and rotating it
until it locks into place.
OCK077077
OCK077078
OCK077079
Page 515 of 555

Maintenance
84
7
6. Install the socket in the headlamp
assembly by aligning the tabs on
the bulb-socket with the slots in
the assembly. Push the bulb-sock-
et into the headlamp assembly
and turn the socket clockwise.
7. Install the strut bar and the air cleaner assembly.
❈ If it is difficult to replace light bulbs,
have the vehicle checked by an
authorized Kia dealer.Stop and tail lamp (LED type)
bulb replacement
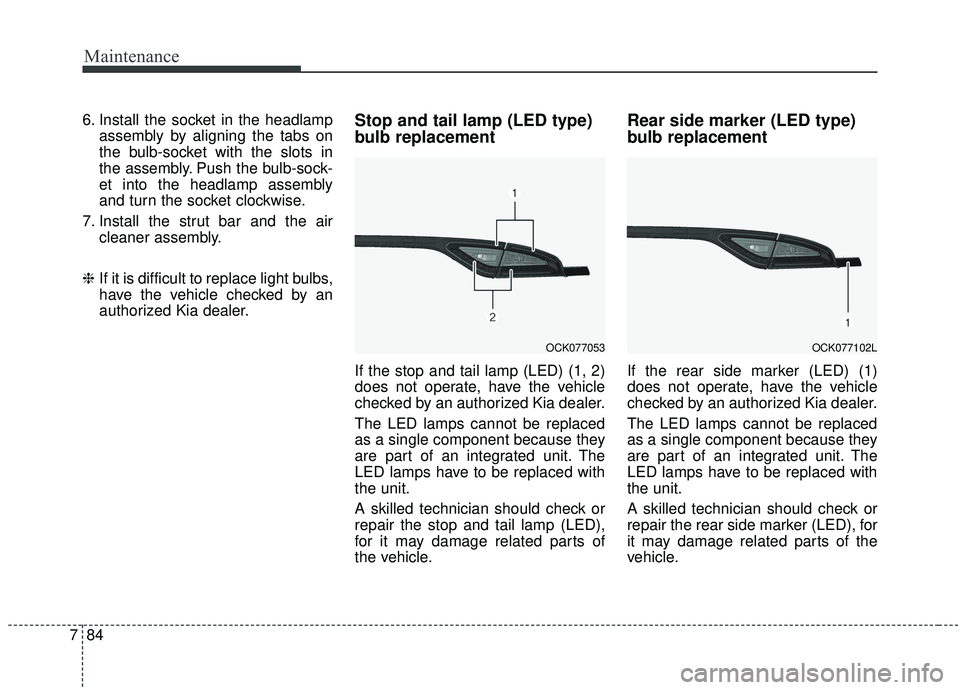
If the stop and tail lamp (LED) (1, 2)
does not operate, have the vehicle
checked by an authorized Kia dealer.
The LED lamps cannot be replaced
as a single component because they
are part of an integrated unit. The
LED lamps have to be replaced with
the unit.
A skilled technician should check or
repair the stop and tail lamp (LED),
for it may damage related parts of
the vehicle.
Rear side marker (LED type)
bulb replacement
If the rear side marker (LED) (1)
does not operate, have the vehicle
checked by an authorized Kia dealer.
The LED lamps cannot be replaced
as a single component because they
are part of an integrated unit. The
LED lamps have to be replaced with
the unit.
A skilled technician should check or
repair the rear side marker (LED), for
it may damage related parts of the
vehicle.
OCK077053OCK077102L
Page 517 of 555
Maintenance
86
7
3. Loosen the light assembly retain-
ing screws with a cross-tip screw-
driver or spanner.
4. Remove the rear combination lamp assembly from the body of
the vehicle.
5. Disconnect the rear combination lamp connector.
6. Remove the socket from theassembly by turning the socket
counterclockwise until the tabs on
the socket align with the slots on
the assembly.
7. Remove the bulb from the socket by pressing it in and rotating it
counterclockwise until the tabs on
the bulb align with the slots in the
socket. Pull the bulb out of the
socket.
8. Insert a new bulb by inserting it into the socket and rotating it until
it locks into place. 9. Install the socket in the assembly
by aligning the tabs on the socket
with the slots in the assembly.
Push the socket into the assembly
and turn the socket clockwise.
10. Install the rear combination lamp assembly to the body of the vehi-
cle.
11. Install the service cover.
OCK077056