2019 KIA SPORTAGE wheel
[x] Cancel search: wheelPage 88 of 607
Features of your vehicle
Folding key . . . . . . . . . . . . . . . . . . . . . . . . . . . . . . . . 4-5
• Record your key number . . . . . . . . . . . . . . . . . . . . . . . 4-5
• Key operations . . . . . . . . . . . . . . . . . . . . . . . . . . . . . . . . 4-5
• Transmitter precautions . . . . . . . . . . . . . . . . . . . . . . . . 4-7
• Battery replacement . . . . . . . . . . . . . . . . . . . . . . . . . . . 4-8
• Immobilizer system . . . . . . . . . . . . . . . . . . . . . . . . . . . . 4-9
Smart key . . . . . . . . . . . . . . . . . . . . . . . . . . . . . . . . 4-12
• Record your key number . . . . . . . . . . . . . . . . . . . . . . 4-12
• Smart key function . . . . . . . . . . . . . . . . . . . . . . . . . . . 4-12
• Loss of the smart key . . . . . . . . . . . . . . . . . . . . . . . . . 4-16
• Smart key precautions . . . . . . . . . . . . . . . . . . . . . . . . 4-16
• Battery replacement . . . . . . . . . . . . . . . . . . . . . . . . . . 4-17
• Smart key immobilizer system . . . . . . . . . . . . . . . . . . 4-17
Theft-alarm system . . . . . . . . . . . . . . . . . . . . . . . . 4-19
• Armed stage . . . . . . . . . . . . . . . . . . . . . . . . . . . . . . . . . 4-19
• Theft-alarm stage . . . . . . . . . . . . . . . . . . . . . . . . . . . . 4-20
• Disarmed stage. . . . . . . . . . . . . . . . . . . . . . . . . . . . . . . 4-20
Door locks . . . . . . . . . . . . . . . . . . . . . . . . . . . . . . . . 4-22
• Operating door locks from outside the vehicle . . . . 4-22
• Operating door locks from inside the vehicle . . . . . . 4-23
• Impact sensing door unlock system . . . . . . . . . . . . . . 4-25
• Child-protector rear door lock. . . . . . . . . . . . . . . . . . 4-26
Liftgate (for manual liftgate) . . . . . . . . . . . . . . . . 4-27
• Opening the liftgate . . . . . . . . . . . . . . . . . . . . . . . . . . . 4-27
• Closing the liftgate. . . . . . . . . . . . . . . . . . . . . . . . . . . . 4-27• Emergency liftgate safety release. . . . . . . . . . . . . . . . 4-28
Power liftgate . . . . . . . . . . . . . . . . . . . . . . . . . . . . . 4-29
• Opening the liftgate . . . . . . . . . . . . . . . . . . . . . . . . . . . 4-30
• Closing the liftgate. . . . . . . . . . . . . . . . . . . . . . . . . . . . 4-31
• Smart power liftgate . . . . . . . . . . . . . . . . . . . . . . . . . . 4-34
Windows . . . . . . . . . . . . . . . . . . . . . . . . . . . . . . . . . 4-38
• Power windows . . . . . . . . . . . . . . . . . . . . . . . . . . . . . . 4-39
Hood. . . . . . . . . . . . . . . . . . . . . . . . . . . . . . . . . . . . \
. 4-43
• Opening the hood . . . . . . . . . . . . . . . . . . . . . . . . . . . . 4-43
• Closing the hood . . . . . . . . . . . . . . . . . . . . . . . . . . . . . 4-44
Fuel filler lid . . . . . . . . . . . . . . . . . . . . . . . . . . . . . . 4-45
• Opening the fuel filler lid . . . . . . . . . . . . . . . . . . . . . . 4-45
• Closing the fuel filler lid . . . . . . . . . . . . . . . . . . . . . . . 4-45
Panoramic sunroof . . . . . . . . . . . . . . . . . . . . . . . . . 4-48
• Sunroof open warning. . . . . . . . . . . . . . . . . . . . . . . . . 4-49
• Sunshade . . . . . . . . . . . . . . . . . . . . . . . . . . . . . . . . . . . 4-\
49
• Sliding the sunroof . . . . . . . . . . . . . . . . . . . . . . . . . . . 4-50
• Tilting the sunroof . . . . . . . . . . . . . . . . . . . . . . . . . . . . 4-52
• Closing the sunroof . . . . . . . . . . . . . . . . . . . . . . . . . . . 4-52
• Resetting the sunroof . . . . . . . . . . . . . . . . . . . . . . . . . 4-52
Steering wheel . . . . . . . . . . . . . . . . . . . . . . . . . . . . . 4-54
• Electronic power steering (EPS) . . . . . . . . . . . . . . . . 4-54
• Tilt and telescopic steering . . . . . . . . . . . . . . . . . . . . 4-55
• Heated steering wheel . . . . . . . . . . . . . . . . . . . . . . . . . 4-56
• Horn . . . . . . . . . . . . . . . . . . . . . . . . . . . . . . . . . . . . \
. . . 4-57
4
Page 141 of 607
Features of your vehicle
54
4
Electronic power steering
(EPS)
The power steering uses a motor to
assist you in steering the vehicle. If
the engine is off or if the power steer-
ing system becomes inoperative, the
vehicle may still be steered, but it will
require increased steering effort.
Electronic power steering is con-
trolled by a power steering control
unit which senses the steering wheel
torque and vehicle speed to com-
mand the motor.
The steering becomes heavier as the
vehicle’s speed increases and
becomes lighter as the vehicle’s
speed decreases for optimum steer-
ing control.
Should you notice any change in the
effort required to steer during normal
vehicle operation, have the power
steering checked by an authorized
Kia dealer. If the Electronic Power Steering
System does not operate normally,
the warning light will illuminate on
the instrument cluster. The steering
wheel may require increased
steering effort. Take your vehicle to
an authorized Kia dealer and have
the vehicle checked as soon as
possible.
When you operate the steering wheel in low temperature, the steer-
ing effort may be high or abnormal
noise may occur. If temperature
rises, the noise will likely disappear.
This is a normal condition.
When the vehicle is stationary, and the steering wheel is turned all the
way to the left or right continuous-
ly, the steering wheel becomes
harder to turn. The power assist is
limited to protect the motor from
overheating.
As time passes, the steering wheel
will return to its normal condition.
✽ ✽ NOTICE
The following symptoms may occur
during normal vehicle operation:
• The EPS warning light does not
illuminate.
• The steering gets heavy immedi- ately after turning the ignition
switch on. This happens as the sys-
tem performs the EPS system
diagnostics. When the diagnostics
are completed, the steering wheel
will return to its normal condition.
• A click noise may be heard from the EPS relay after the ignition
switch is turned to the ON or
LOCK (OFF) position.
• A motor noise may be heard when the vehicle is at a stop or at a low
driving speed.
• If the Electronic Power Steering System does not operate normally,
the warning light will illuminate on
the instrument cluster. The steer-
ing wheel may become difficult to
control or operate abnormally.
Take your vehicle to an authorized
Kia dealer and have the vehicle
checked as soon as possible. (Continued)
STEERING WHEEL
Page 142 of 607
455
Features of your vehicle
(Continued)
• When the charging system warninglight comes on due to the low volt-
age (When the alternator or bat-
tery) does not operate normally or
malfunctions), the steering wheel
may require increased steering
effort.Tilt and telescopic steering
Tilt and telescopic steering allows
you to adjust the steering wheel
before you drive. You can also raise it
to give your legs more room when
you exit and enter the vehicle.
The steering wheel should be posi-
tioned so that it is comfortable for
you to drive, while permitting you to
see the instrument panel warning
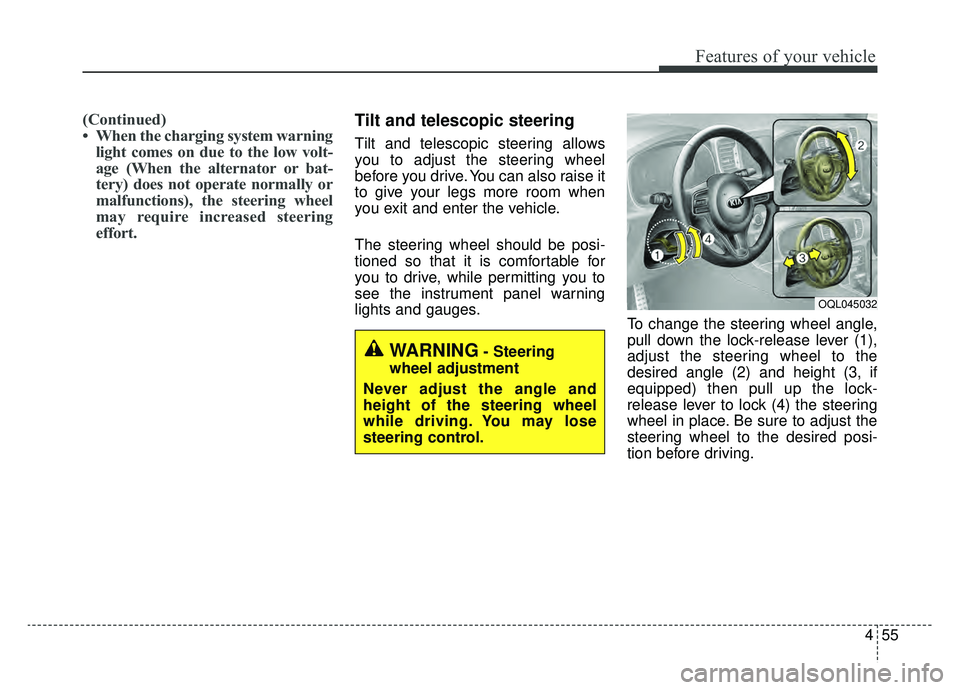
lights and gauges. To change the steering wheel angle,
pull down the lock-release lever (1),
adjust the steering wheel to the
desired angle (2) and height (3, if
equipped) then pull up the lock-
release lever to lock (4) the steering
wheel in place. Be sure to adjust the
steering wheel to the desired posi-
tion before driving.
WARNING- Steering
wheel adjustment
Never adjust the angle and
height of the steering wheel
while driving. You may lose
steering control.
OQL045032
Page 143 of 607
Features of your vehicle
56
4
✽ ✽
NOTICE
After adjustment, sometimes the
lock release lever may not lock the
steering wheel. It is not a malfunc-
tion. This occurs when two gears are
not engaged correctly. In this case,
adjust the steering wheel again and
then lock the steering wheel.
Heated steering wheel
(if equipped)
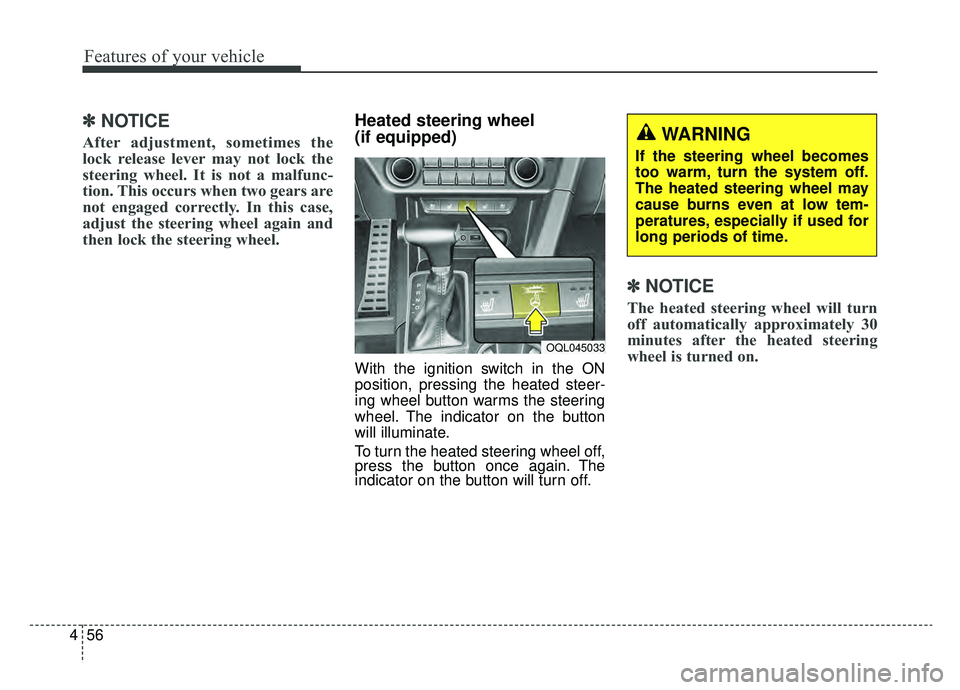
With the ignition switch in the ON
position, pressing the heated steer-
ing wheel button warms the steering
wheel. The indicator on the button
will illuminate.
To turn the heated steering wheel off,
press the button once again. The
indicator on the button will turn off.
✽ ✽NOTICE
The heated steering wheel will turn
off automatically approximately 30
minutes after the heated steering
wheel is turned on.
WARNING
If the steering wheel becomes
too warm, turn the system off.
The heated steering wheel may
cause burns even at low tem-
peratures, especially if used for
long periods of time.
OQL045033
Page 144 of 607
457
Features of your vehicle
Horn
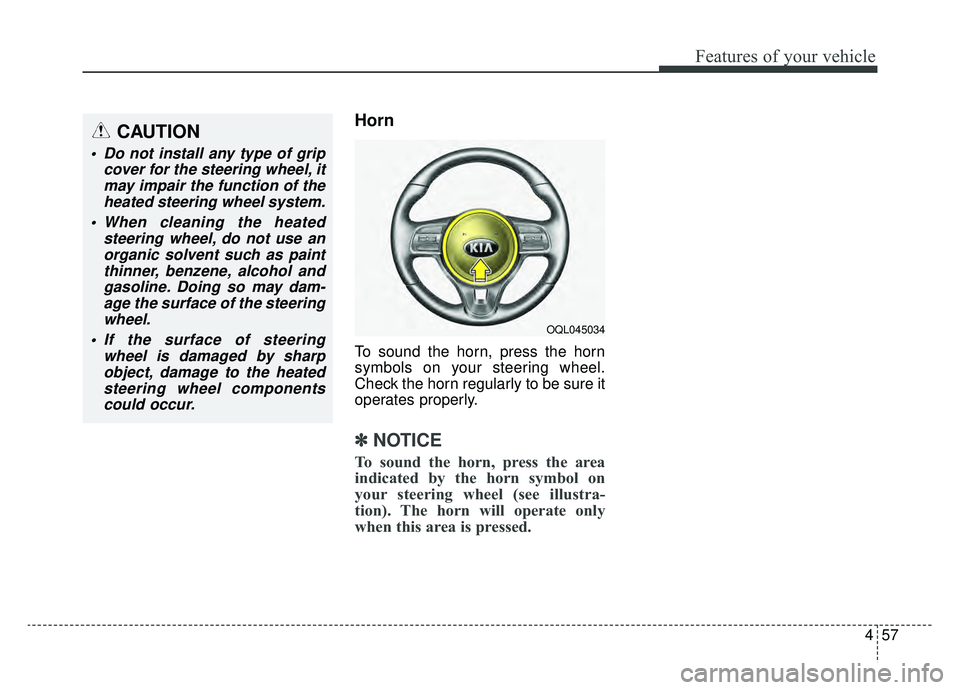
To sound the horn, press the horn
symbols on your steering wheel.
Check the horn regularly to be sure it
operates properly.
✽ ✽NOTICE
To sound the horn, press the area
indicated by the horn symbol on
your steering wheel (see illustra-
tion). The horn will operate only
when this area is pressed.
CAUTION
Do not install any type of grip
cover for the steering wheel, itmay impair the function of theheated steering wheel system.
When cleaning the heated steering wheel, do not use anorganic solvent such as paintthinner, benzene, alcohol andgasoline. Doing so may dam-age the surface of the steeringwheel.
If the surface of steering wheel is damaged by sharpobject, damage to the heatedsteering wheel componentscould occur.
OQL045034
Page 156 of 607
469
Features of your vehicle
Instrument Cluster Control
Adjusting Instrument ClusterIllumination
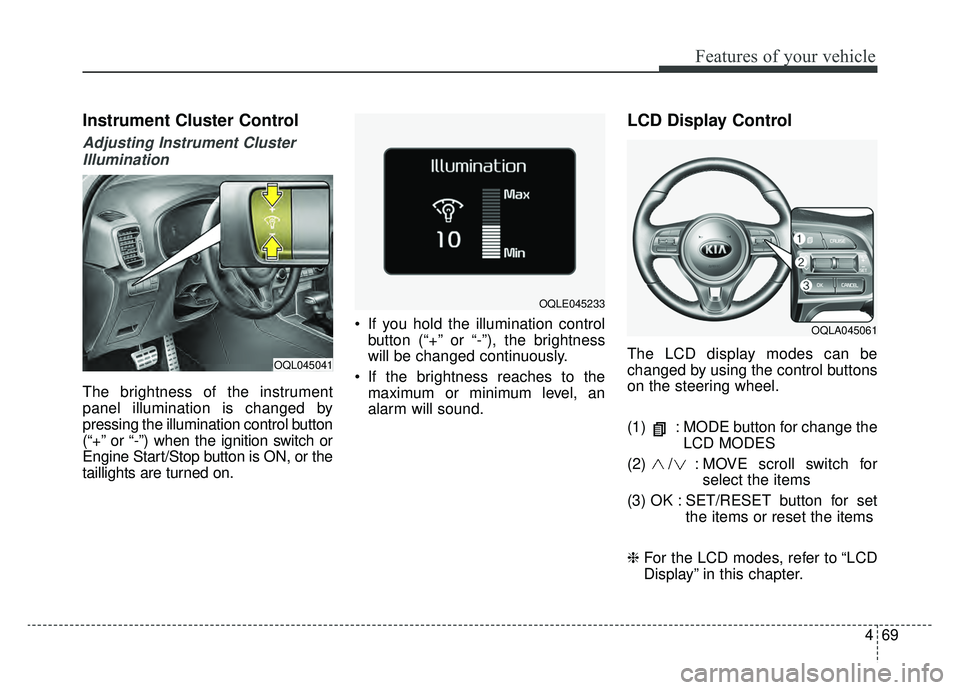
The brightness of the instrument
panel illumination is changed by
pressing the illumination control button
(“+” or “-”) when the ignition switch or
Engine Start/Stop button is ON, or the
taillights are turned on. If you hold the illumination control
button (“+” or “-”), the brightness
will be changed continuously.
If the brightness reaches to the maximum or minimum level, an
alarm will sound.
LCD Display Control
The LCD display modes can be
changed by using the control buttons
on the steering wheel.
(1) : MODE button for change the LCD MODES
(2) / : MO VE scroll switch for
select the items
(3) OK : SET/RESET button for set the items or reset the items
❈ For the LCD modes, refer to “LCD
Display” in this chapter.OQL045041
OQLA045061
OQLE045233
Page 168 of 607
481
Features of your vehicle
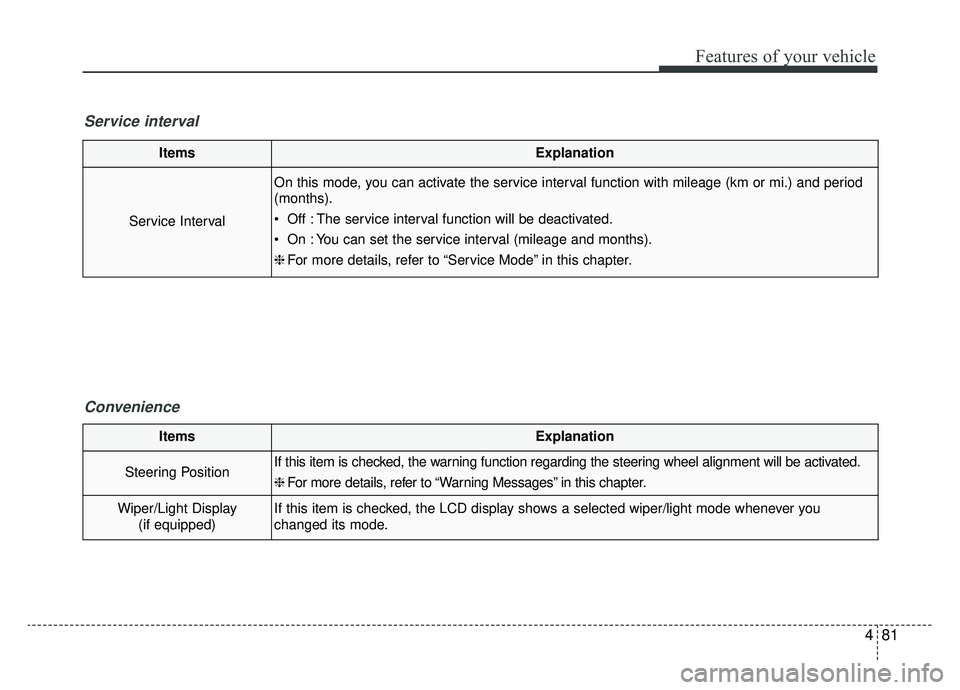
ItemsExplanation
Service Interval
On this mode, you can activate the service interval function with mileage (km or mi.) and period
(months).
Off : The service interval function will be deactivated.
On : You can set the service interval (mileage and months).
❈For more details, refer to “Service Mode” in this chapter.
Service interval
Convenience
ItemsExplanation
Steering PositionIf this item is checked, the warning function regarding the steering wheel alignment will be activated.
❈For more details, refer to “Warning Messages” in this chapter.
Wiper/Light Display
(if equipped)If this item is checked, the LCD display shows a selected wiper/light mode whenever you
changed its mode.
Page 171 of 607
Features of your vehicle
84
4
The range may differ from the actu-
al driving distance as it is an esti-
mate of the available driving dis-
tance.
The trip computer may not register additional fuel if less than 1.6 gal-
lons(6 liters) of fuel are added to
the vehicle.
The fuel economy and range may vary significantly based on driving
conditions, driving habits, and con-
dition of the vehicle. Average Fuel Economy (2)
The average fuel economy is calcu-
lated by the total driving distance
and fuel consumption since the last
average fuel economy reset.
- Fuel economy range : 1 ~ 99.9MPG or L/100km
The average fuel economy can be reset both manually and automati-
cally.
Manual reset
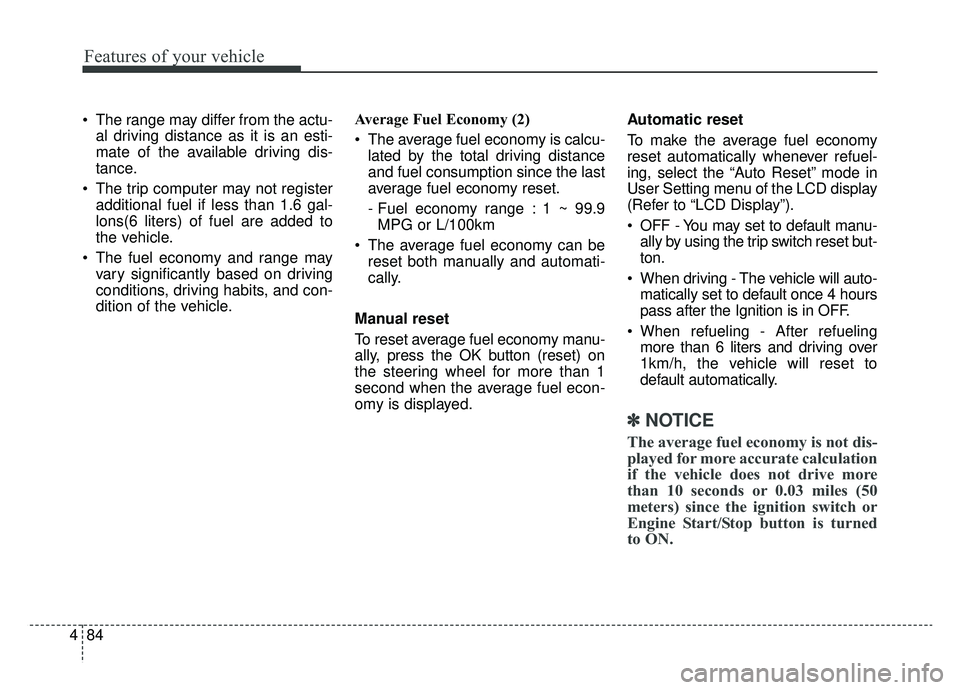
To reset average fuel economy manu-
ally, press the OK button (reset) on
the steering wheel for more than 1
second when the average fuel econ-
omy is displayed. Automatic reset
To make the average fuel economy
reset automatically whenever refuel-
ing, select the “Auto Reset” mode in
User Setting menu of the LCD display
(Refer to “LCD Display”).
OFF - You may set to default manu-
ally by using the trip switch reset but-
ton.
When driving - The vehicle will auto- matically set to default once 4 hours
pass after the Ignition is in OFF.
When refueling - After refueling more than 6 liters and driving over
1km/h, the vehicle will reset to
default automatically.
✽ ✽ NOTICE
The average fuel economy is not dis-
played for more accurate calculation
if the vehicle does not drive more
than 10 seconds or 0.03 miles (50
meters) since the ignition switch or
Engine Start/Stop button is turned
to ON.