2019 KIA SORENTO ECU
[x] Cancel search: ECUPage 268 of 573
Features of your vehicle
180
4
Wireless smart phone charging
1. Remove any object on the smart
phone charging pad including the
smart key. If there is any foreign
object on the pad other than a
smart phone, the wireless charging
function may not operate properly.
2. Place the smart phone on the cen- ter of the wireless charging pad.
3. The indicator light will change to orange once the wireless charging
begins. After the charging is com-
plete, the orange light will change
to green.
4. You can choose to turn the wireless charging function to either ON or
OFF by selecting the USM on the
instrument cluster. (Please refer to
“Instrument Cluster” for details).
If the wireless charging is not func-
tioning properly, the orange light will
blink and flash for ten seconds then
turn off. In such cases, remove the
smart phone from the pad and
replace it on the pad again, or double
check the charging status. If you leave the smart phone on the
charging pad when the vehicle igni-
tion is in OFF, the vehicle will alert
you through warning messages and
sound (applicable for vehicles with
voice guidance function).
✽ ✽
NOTICE
• Securely close the tray cover when
using the wireless smart phone
charge function.
• Close the tray cover when the smart phone is placed in it at all
times. If the vehicle is in motion
without the tray cover closed, it is
more likely that the driver may
use the smart phone. The use of
smart phones while driving may
lead to possible injuries and acci-
dents.
• If it is not possible to close the tray cover due to the size of the smart
phone, do not use the wireless smart
phone charging function at all.
• When the tray cover is broken, do not use the wireless charging func-
tion before the tray cover is
repaired. (Continued)(Continued)
• When the interior temperature of
the wireless charging system rises
above a set temperature, the wire-
less charging will cease to func-
tion. After the interior tempera-
ture drops below the threshold,
the wireless charging function will
resume.
• The wireless charging may not function properly when there is a
heavy accessory cover on the
smart phone.
The wireless charging will stop
when the smart phone is not in
complete contact with the wireless
charging pad.
• The smart key detection feature in operation could temporarily stop
charging.
(When turning on ignition, open-
ing doors, or closing doors)
• The wireless charging will stop when the vehicle is turned OFF. (Continued)
Page 270 of 573
Features of your vehicle
182
4
Coat hook
❈ This actual feature may differ from the illus-
tration.
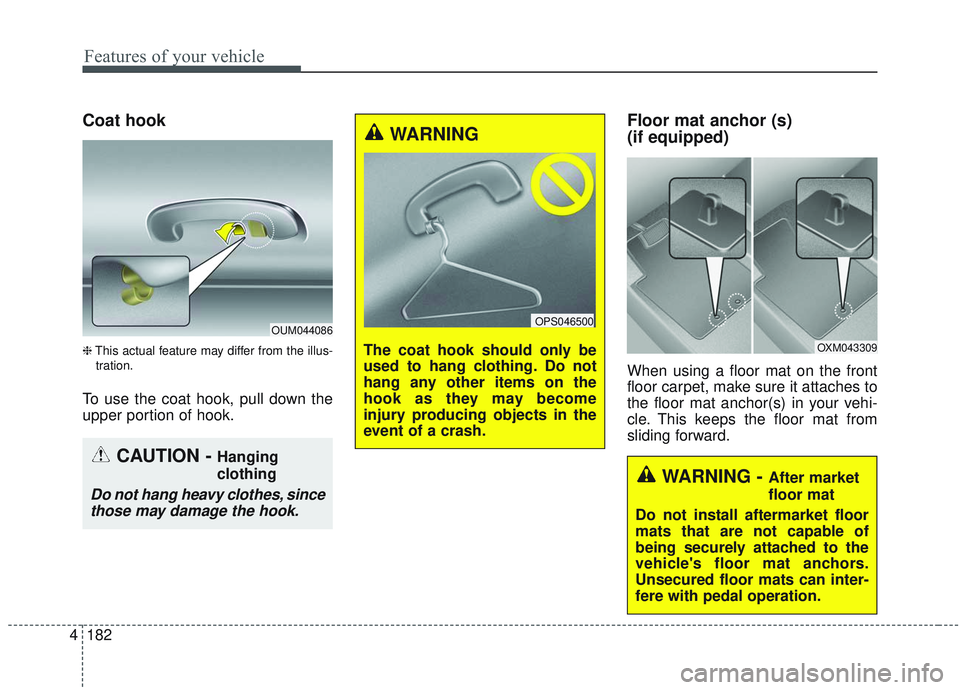
To use the coat hook, pull down the
upper portion of hook.
Floor mat anchor (s)
(if equipped)
When using a floor mat on the front
floor carpet, make sure it attaches to
the floor mat anchor(s) in your vehi-
cle. This keeps the floor mat from
sliding forward.
OUM044086
CAUTION - Hanging
clothing
Do not hang heavy clothes, since those may damage the hook.
WARNING
The coat hook should only be
used to hang clothing. Do not
hang any other items on the
hook as they may become
injury producing objects in the
event of a crash.
OPS046500
OXM043309
WARNING - After market
floor mat
Do not install aftermarket floor
mats that are not capable of
being securely attached to the
vehicle's floor mat anchors.
Unsecured floor mats can inter-
fere with pedal operation.
Page 271 of 573
4183
Features of your vehicle
The following must be observed
when installing ANY floor mat to the
vehicle.
Ensure that the floor mats aresecurely attached to the vehicle's
floor mat anchor(s) before driving
the vehicle.
Do not use ANY floor mat that can- not be firmly attached to the vehi-
cle's floor mat anchors.
Do not stack floor mats on top of one another (e.g. all-weather rub-
ber mat on top of a carpeted floor
mat). Only a single floor mat should
be installed in each position.
IMPORTANT – Your vehicle was
manufactured with driver's side floor
mat anchors that are designed to
securely hold the floor mat in place.
To avoid any interference with pedal
operation, Kia recommends that only
the Kia floor mat designed for use in
your vehicle be installed.Side curtain (if equipped)
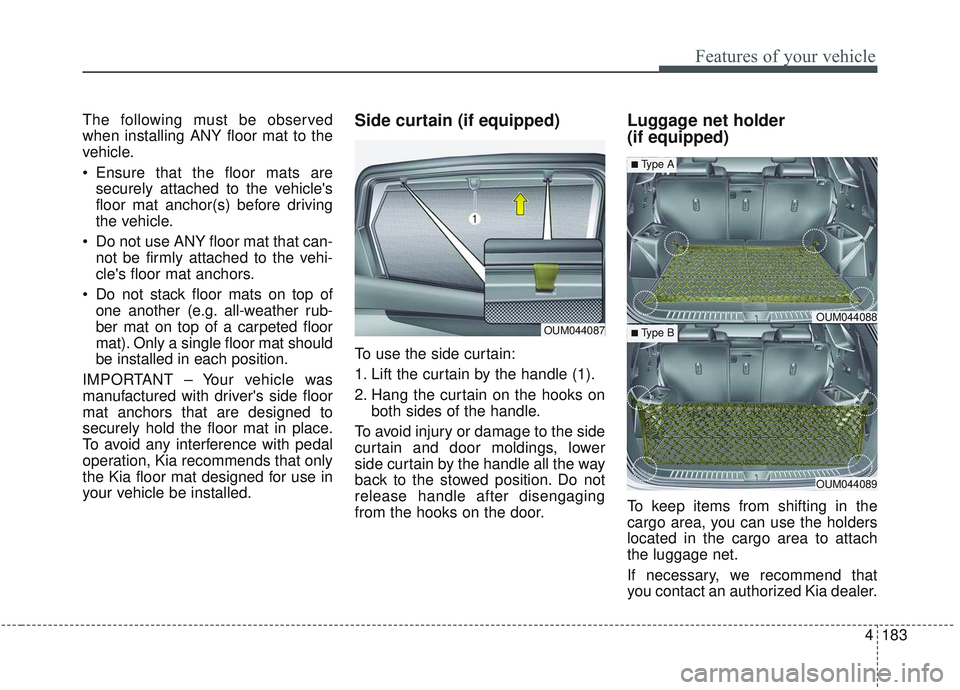
To use the side curtain:
1. Lift the curtain by the handle (1).
2. Hang the curtain on the hooks on both sides of the handle.
To avoid injury or damage to the side
curtain and door moldings, lower
side curtain by the handle all the way
back to the stowed position. Do not
release handle after disengaging
from the hooks on the door.
Luggage net holder
(if equipped)
To keep items from shifting in the
cargo area, you can use the holders
located in the cargo area to attach
the luggage net.
If necessary, we recommend that
you contact an authorized Kia dealer.
OUM044087OUM044088
OUM044089
■Type A
■ Type B
Page 273 of 573

4185
Features of your vehicle
EXTERIOR FEATURES
Roof rack (if equipped)
If the vehicle has a roof rack, you can
load cargo on top of your vehicle.
✽ ✽NOTICE
If the vehicle is equipped with a sun-
roof, be sure not to position cargo
onto the roof rack in such a way that
it could interfere with sunroof oper-
ation.
The following specification is the
maximum weight that can be
loaded onto the roof rack.
Distribute the load as evenly as
possible on the roof rack and
secure the load firmly.
Loading cargo or luggage in
excess of the specified weight limit
on the roof rack may damage your
vehicle. Always drive slowly and turn corners
carefully when carrying items on the
roof rack. Severe wind updrafts,
caused by passing vehicles or natu-
ral causes, can cause sudden
upward pressure on items loaded on
the roof rack. This is especially true
when carrying large, flat items such
as wood panels or mattresses. This
could cause the items to fall off the
roof rack and cause damage to your
vehicle or others around you.
To prevent damage or loss of cargo while driving, check frequently
before or while driving to make
sure the items on the roof rack are
securely fastened.
OUM044095
CAUTION - Loading Roof
Rack
When carrying large objects on the roof rack, make surethey do not exceed the overallroof length or width.
When you are carrying cargo on the roof rack, do not operatethe sunroof (if equipped).
When carrying cargo on the roof rack, take the necessaryprecautions to make sure thecargo does not damage theroof of the vehicle.
WARNING- Driving with
roof load
Always drive slow and turn cor-
ners carefully when carrying
items on the roof rack. The vehi-
cle center of gravity will be
higher when items are loaded
onto the roof rack.
ROOF 100 kg (220 lbs.)
RACK EVENLY DISTRIBUTED
Page 283 of 573
Driving your vehicle
65
WARNING- Check sur-roundings
Always check the surrounding
areas near your vehicle for peo-
ple, especially children, before
putting a vehicle into D (Drive)
or R (Reverse).
WARNING- Fire risk
When you intend to park or stop
the vehicle with the engine on,
be careful not to depress the
accelerator pedal for a long
period of time. It may overheat
the engine or exhaust system
and cause fire.WARNING- Loose objects
Securely store items in your
vehicle. When you make a sud-
den stop or turn the steering
wheel rapidly, loose objects
may drop on the floor and it
could interfere with the opera-
tion of the foot pedals, possibly
causing an accident.WARNING- Driving while intoxicated
Do not drive while intoxicated.
Drinking and driving is danger-
ous. Even a small amount of
alcohol will affect your reflexes,
perceptions and judgment.
Driving while under the influ-
ence of drugs is as dangerous
as or more dangerous than driv-
ing drunk.
Page 295 of 573
Driving your vehicle
18
5
In manual mode, the driver must
execute upshifts in accordance
with road conditions, taking care to
keep the engine speed below the
red zone.
In manual mode, only the 6 or 8 forward gears can be selected. To
reverse or park the vehicle, move
the shift lever to the R (Reverse) or
P (Park) position as required.
In manual mode, downshifts are made automatically when the vehi-
cle slows down. When the vehicle
stops, 1st gear is automatically
selected.
In manual mode, when the engine rpm approaches the red zone shift
points are varied to upshift auto-
matically. To maintain the required levels of
vehicle performance and safety,
the system may not execute cer-
tain gearshifts when the shift lever
is operated.
When driving on a slippery road, push the shift lever forward into the
+(up) position. This causes the
transmission to shift into the 2nd
gear which is better for smooth
driving on a slippery road. Push
the shift lever to the -(down) side to
shift back to the 1st gear.Shift lock system
For your safety, the automatic trans-
mission has a shift lock system
which prevents shifting the transmis-
sion from P (Park) into R (Reverse)
unless the brake pedal is depressed.
To shift the transmission from P
(Park) into R (Reverse):
1.Depress and hold the brake pedal.
2.Start the engine or turn the ignitionswitch to the ON position.
3.Move the shift lever.
If the brake pedal is repeatedly
depressed and released with the
shift lever in the P (Park) position, a
chattering noise near the shift lever
may be heard. It is a normal condi-
tion.
Page 405 of 573

Driving your vehicle
128
5
Driving with a trailer
Towing a trailer requires a certain
amount of experience. Before setting
out for the open road, you must get
to know your trailer. Acquaint your-
self with the feel of handling and
braking with the added weight of the
trailer. And always keep in mind that
the vehicle you are driving is now a
good deal longer and not nearly so
responsive as your vehicle is by
itself.
Before you start, check the trailer
hitch and platform, safety chains,
electrical connector(s), lights, tires
and mirror adjustment. If the trailer
has electric brakes, start your vehicle
and trailer moving and then apply the
trailer brake controller by hand to be
sure the brakes are working. This lets
you check your electrical connection
at the same time.
During your trip, check occasionally
to be sure that the load is secure,
and that the lights and any trailer
brakes are still working.
Following distance
Stay at least twice as far behind the
vehicle ahead as you would when
driving your vehicle without a trailer.
This can help you avoid situations
that require heavy braking and sud-
den turns.
Passing
You’ll need more passing distance
up ahead when you’re towing a trail-
er. And, because of the increased
vehicle length, you’ll need to go
much farther beyond the passed
vehicle before you can return to your
lane. Due to the added load to the
engine when going uphill the vehicle
may also take longer to pass than it
would on flat ground.
Backing up
Hold the bottom of the steering
wheel with one hand. Then, to move
the trailer to the left, just move your
hand to the left. To move the trailer to
the right, move your hand to the
right. Always back up slowly and, if
possible, have someone guide you.
Making turns
When you’re turning with a trailer,
make wider turns than normal. Do
this so your trailer won’t strike soft
shoulders, curbs, road signs, trees,
or other objects near the edge of the
road. Avoid jerky or sudden maneu-
vers. Signal well in advance before
turning or lane changes.
Page 415 of 573
Driving your vehicle
138
5
Certification label
The certification label is located on
the driver's door sill at the center pil-
lar.
This label shows the maximum
allowable weight of the fully loaded
vehicle. This is called the GVWR
(Gross Vehicle Weight Rating). The
GVWR includes the weight of the
vehicle, all occupants, fuel and
cargo.
This label also tells you the maxi-
mum weight that can be supported
by the front and rear axles, called
Gross Axle Weight Rating (GAWR).
To find out the actual loads on your
front and rear axles, you need to go
to a weigh station and weigh your
vehicle. Your dealer can help you with
this. Be sure to spread out your load
equally on both sides of the center-
line. The label will help you decide how
much cargo and installed equipment
your vehicle can carry.
If you carry items inside your vehicle
- like suitcases, tools, packages, or
anything else - they are moving as
fast as the vehicle. If you have to stop
or turn quickly, or if there is a crash,
the items will keep going and can
cause an injury if they strike the driv-
er or a passenger.
✽ ✽
NOTICE
Overloading your vehicle may cause
damage. Repairs would not be cov-
ered by your warranty. Do not over-
load your vehicle.
WARNING- Over loading
Never exceed the GVWR for
your vehicle, the GAWR for
either the front or rear axle and
vehicle capacity weight.
Exceeding these ratings can
affect your vehicle’s handling
and braking ability.WARNING- Over loading
Do not overload your vehicle.
Overloading your vehicle can
cause heat buildup in your vehi-
cle's tires and possible tire fail-
ure, increased stopping dis-
tances and poor vehicle han-
dling all of which may result in a
crash.
WARNING- Loose cargo
Do not travel with unsecured
blunt objects in the passenger
compartment of your vehicle
(e.g. suit cases or unsecured
child seats). These items may
strike occupant during a sud-
den stop or crash.