Page 83 of 573

Safety features of your vehicle
66
3
Problems may arise if the sensor
installation angles are changed due
to the deformation of the front
bumper, front end module, body or
front doors where side collision sen-
sors are installed. Have the vehicle
checked and repaired by an author-
ized Kia dealer.
Installing bumper guards (or side
step or running board) or replacing a
bumper (or front door module) with
non-genuine parts may adversely
affect your vehicle’s collision and air
bag deployment performance.Air bag inflation conditions
Front air bags
Front air bags are designed to inflate
in a frontal collision depending on
the intensity, speed or angles of
impact of the front collision.
OUM034052
WARNING- Air bag sen-
sors
Do not hit or allow any objects to impact the locations where
air bags or sensors are
installed.
This may cause unexpected
air bag deployment, which
could result in serious per-
sonal injury or death.
If the installation location or angle of the sensors is altered
in any way, the air bags may
deploy when they should not
or they may not deploy when
they should.
Therefore, do not try to per-
form maintenance on or
around the air bag sensors.
Have the vehicle checked and
repaired by an authorized Kia
dealer.
Page 86 of 573
369
Safety features of your vehicle
In an angled collision, the force ofimpact may direct the occupants in
a direction where the air bags
would not be able to provide any
additional benefit, and thus the
sensors may not deploy any air
bags. Just before impact, drivers often
brake heavily. Such heavy braking
lowers the front portion of the vehi-
cle causing it to “ride” under a vehi-
cle with a higher ground clearance.
Air bags may not inflate in this
“under-ride” situation because
deceleration forces that are detect-
ed by sensors may be significantly
reduced by such “under-ride” colli-
sions. Front air bags may not inflate in all
rollover accidents where the
SRSCM indicates that the front air
bag deployment would not provide
additional occupant protection.
OUM034058OUM034059OUMA038207
Page 95 of 573
47
Features of your vehicle
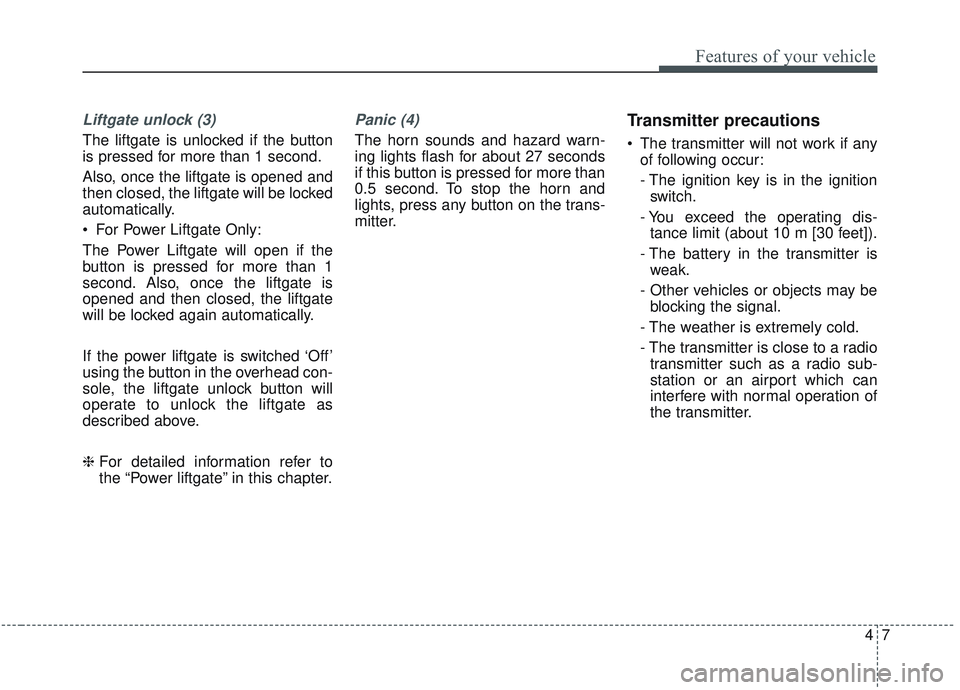
Liftgate unlock (3)
The liftgate is unlocked if the button
is pressed for more than 1 second.
Also, once the liftgate is opened and
then closed, the liftgate will be locked
automatically.
For Power Liftgate Only:
The Power Liftgate will open if the
button is pressed for more than 1
second. Also, once the liftgate is
opened and then closed, the liftgate
will be locked again automatically.
If the power liftgate is switched ‘Off’
using the button in the overhead con-
sole, the liftgate unlock button will
operate to unlock the liftgate as
described above.
❈For detailed information refer to
the “Power liftgate” in this chapter.
Panic (4)
The horn sounds and hazard warn-
ing lights flash for about 27 seconds
if this button is pressed for more than
0.5 second. To stop the horn and
lights, press any button on the trans-
mitter.
Transmitter precautions
The transmitter will not work if any
of following occur:
- The ignition key is in the ignitionswitch.
- You exceed the operating dis- tance limit (about 10 m [30 feet]).
- The battery in the transmitter is weak.
- Other vehicles or objects may be blocking the signal.
- The weather is extremely cold.
- The transmitter is close to a radio transmitter such as a radio sub-
station or an airport which can
interfere with normal operation of
the transmitter.
Page 103 of 573
415
Features of your vehicle
Using the button on the smart key
1. Press the liftgate unlock button (3)for more than 1 second.
2. When all doors are locked, the hazard warning lights will blink two
times.
For Power Liftgate Only:
The Power Liftgate will open if the
button is pressed for more than 1
second. Also, once the liftgate is
opened and then closed, the liftgate
will be locked again automatically.
❈ For detailed information refer to the
“Power liftgate” in this chapter.Panic
1. Press the panic button (4) for more
than 1 second.
2. The horn sounds and hazard warning light flash for about 27
seconds.
✽ ✽NOTICE
To stop the horn and lights, press
any button on the smart key.
Start-up
You can start the engine without
inserting the key. For detailed infor-
mation refer to the “Engine start/stop
button” in chapter 5.
Loss of the smart key
A maximum of 2 smart keys can be
registered to a single vehicle.
If you happen to lose your smart key,
you will not be able to start the
engine. You should immediately take
the vehicle and remaining key to your
authorized Kia dealer(tow the vehi-
cle, if necessary) to protect it from
potential theft.
Page 109 of 573
421
Features of your vehicle
✽ ✽NOTICE
• Avoid trying to start the engine
while the alarm is activated. The
vehicle starting motor is disabled
during the theft-alarm stage.
- If the system is not disarmed withthe transmitter, insert the key
into the ignition switch, turn the
ignition switch to the ON position
and wait for 30 seconds. Then the
system will be disarmed.
- If the system is not disarmed with the smart key, press the engine
start/stop button with smart key.
The side with the lock button
should contact the engine
start/stop button directly.
• If you lose your keys, consult your authorized Kia dealer.
✽ ✽ NOTICE
Malfunctions caused by improper
alterations, adjustments or modifi-
cations to the theft-alarm system are
not covered by your vehicle manu-
facturer warranty.
CAUTION - Adjusting
alarm system
Do not change, alter or adjust
the theft-alarm system becauseit could cause the theft-alarmsystem to malfunction andshould only be serviced by anauthorized Kia dealer.
Page 111 of 573
423
Features of your vehicle
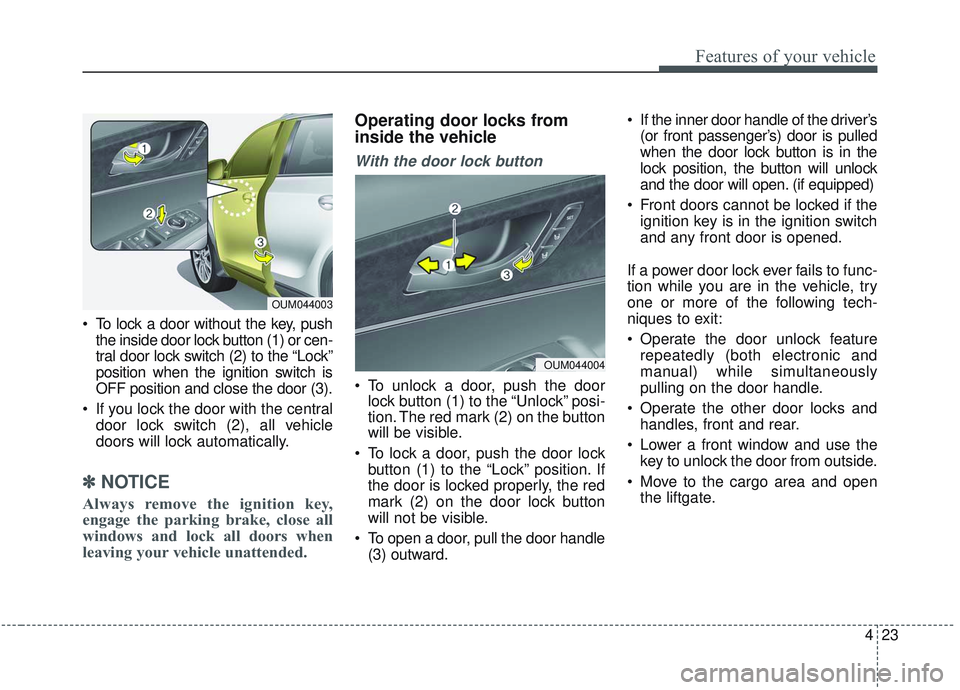
To lock a door without the key, pushthe inside door lock button (1) or cen-
tral door lock switch (2) to the “Lock”
position when the ignition switch is
OFF position and close the door (3).
If you lock the door with the central door lock switch (2), all vehicle
doors will lock automatically.
✽ ✽ NOTICE
Always remove the ignition key,
engage the parking brake, close all
windows and lock all doors when
leaving your vehicle unattended.
Operating door locks from
inside the vehicle
With the door lock button
To unlock a door, push the door
lock button (1) to the “Unlock” posi-
tion. The red mark (2) on the button
will be visible.
To lock a door, push the door lock button (1) to the “Lock” position. If
the door is locked properly, the red
mark (2) on the door lock button
will not be visible.
To open a door, pull the door handle (3) outward. If the inner door handle of the driver’s
(or front passenger’s) door is pulled
when the door lock button is in the
lock position, the button will unlock
and the door will open. (if equipped)
Front doors cannot be locked if the ignition key is in the ignition switch
and any front door is opened.
If a power door lock ever fails to func-
tion while you are in the vehicle, try
one or more of the following tech-
niques to exit:
Operate the door unlock feature repeatedly (both electronic and
manual) while simultaneously
pulling on the door handle.
Operate the other door locks and handles, front and rear.
Lower a front window and use the key to unlock the door from outside.
Move to the cargo area and open the liftgate.
OUM044004
OUM044003
Page 113 of 573
425
Features of your vehicle
Door lock/unlock features
Impact sensing door unlock sys-tem
All doors will automatically unlock
when an impact causes the air bags
to deploy.
Speed sensing door lock system
All doors will automatically lock after
the vehicle speed exceeds 15 km/h
(10 mph).
Shift lever door lock/unlock sys-tem
All doors will automatically lock when the shift lever is moved out of
P (Park).
All doors will automatically unlock when the shift lever is moved into P
(Park).
✽ ✽ NOTICE
You can select some auto door
lock/unlock features in “User Settings”
For more information, refer to
“User Settings” in this chapter.
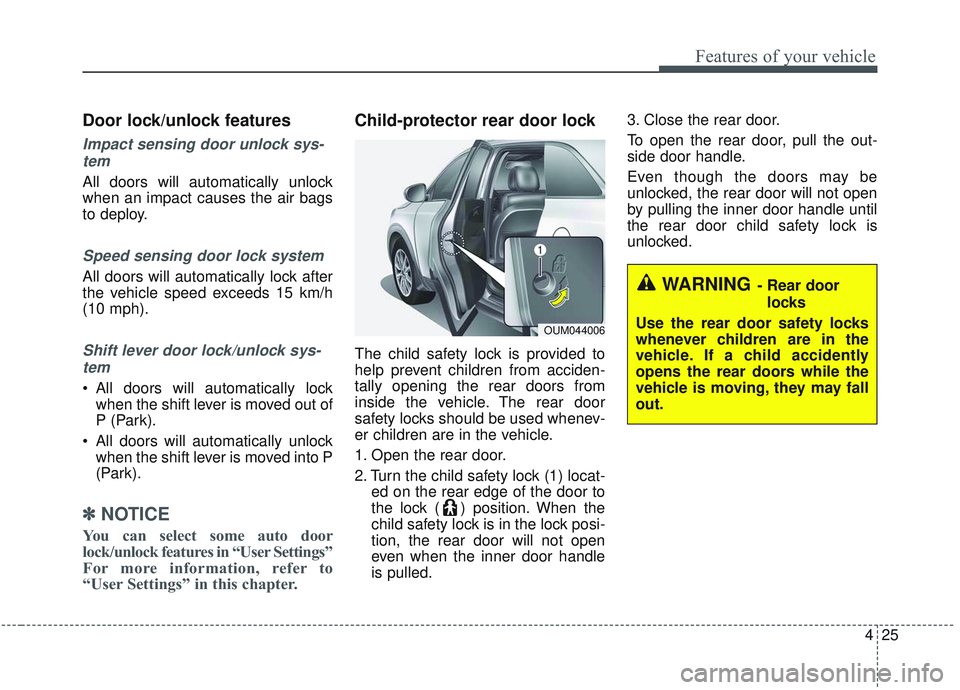
Child-protector rear door lock
The child safety lock is provided to
help prevent children from acciden-
tally opening the rear doors from
inside the vehicle. The rear door
safety locks should be used whenev-
er children are in the vehicle.
1. Open the rear door.
2. Turn the child safety lock (1) locat-
ed on the rear edge of the door to
the lock ( ) position. When the
child safety lock is in the lock posi-
tion, the rear door will not open
even when the inner door handle
is pulled. 3. Close the rear door.
To open the rear door, pull the out-
side door handle.
Even though the doors may be
unlocked, the rear door will not open
by pulling the inner door handle until
the rear door child safety lock is
unlocked.
OUM044006
WARNING- Rear door
locks
Use the rear door safety locks
whenever children are in the
vehicle. If a child accidently
opens the rear doors while the
vehicle is moving, they may fall
out.
Page 130 of 573
Features of your vehicle
42
4
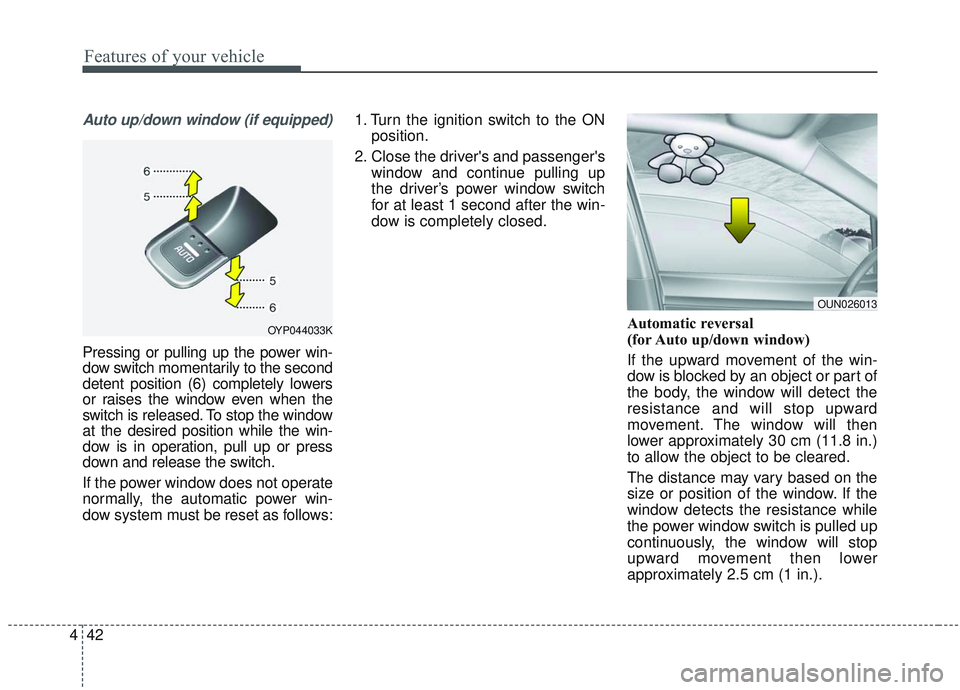
Auto up/down window (if equipped)
Pressing or pulling up the power win-
dow switch momentarily to the second
detent position (6) completely lowers
or raises the window even when the
switch is released. To stop the window
at the desired position while the win-
dow is in operation, pull up or press
down and release the switch.
If the power window does not operate
normally, the automatic power win-
dow system must be reset as follows: 1. Turn the ignition switch to the ON
position.
2. Close the driver's and passenger's window and continue pulling up
the driver’s power window switch
for at least 1 second after the win-
dow is completely closed.
Automatic reversal
(for Auto up/down window)
If the upward movement of the win-
dow is blocked by an object or part of
the body, the window will detect the
resistance and will stop upward
movement. The window will then
lower approximately 30 cm (11.8 in.)
to allow the object to be cleared.
The distance may vary based on the
size or position of the window. If the
window detects the resistance while
the power window switch is pulled up
continuously, the window will stop
upward movement then lower
approximately 2.5 cm (1 in.).
OYP044033K
OUN026013