Page 433 of 573
617
What to do in an emergency
Removing and storing the
spare tire
Your spare tire is stored underneath
your vehicle, directly below the cargo
area.
To remove the spare tire:
1. Open the liftgate.
2. Find the spare tire fixing bolt coverand remove the cover (1).
If necessary, separate the tool
case only after removing the
clamp (2). 3. Connect the socket and wheel lug
nut wrench.
4. Use the wheel lug nut wrench to loosen the bolt enough to lower
the spare tire.
Turn the wrench counterclockwise until the spare tire is resting on the
ground.
WARNING
- Running vehicle on jack
Do not start or run the engine of
the vehicle while the vehicle is
on the jack as this may cause
the vehicle to fall off the jack.
OUM064004
OUM064005
Page 434 of 573
What to do in an emergency
18
6
5. After the spare tire is resting on
the ground, continue to turn the
wrench counterclockwise to cre-
ate more slack in the line, and pull
the tire out from underneath the
vehicle. Do not continue rotating
the wrench after feeling increased
resistance from completely lower-
ing the cable, otherwise the spare
tire carrier may be damaged.
6. Remove the retainer (1) from the center of the spare tire. To store the spare tire:
1. Lay the tire on the ground with the
valve stem facing up.
2. Place the wheel under the vehicle and install the retainer (1) through
the wheel center.
3. Turn the wrench clockwise until you feel or hear a click from the
spare tire being fully seated in the
stowed position.
.
OUM064007
WARNING
Ensure the spare tire retainer is
properly aligned with the center
of the spare tire to prevent the
spare tire from “rattling”.
Otherwise, it may cause the
spare tire to fall off the carrier
and lead to an accident.
OUM064006
Page 435 of 573
619
What to do in an emergency
Changing tires
1. Park on a level surface and applythe parking brake firmly.
2. Place the transmission shift lever in P (Park) with automatic trans-
mission.
3. Activate the hazard warning flash- ers. 4. Remove the wheel lug nut wrench,
jack and spare tire from the vehi-
cle.
5. Block both the front and rear of the wheel that is diagonally opposite
from the jack position. To prevent vehicle movement while
changing a tire, always set the
parking brake fully, and always
block the wheel diagonally oppo-
site the wheel being changed.
We recommend that the wheels of the vehicle be blocked, and that no
person remain in a vehicle that is
being jacked.
OUMA068035
OUMA064034
Page 436 of 573
What to do in an emergency
20
6
6. Loosen the wheel lug nuts coun-
terclockwise one turn each, but do
not remove any nut until the tire
has been raised off the ground.
7. Place the jack at the front (1) orrear (2) jacking position closest to
the tire you are changing. Place
the jack at the designated loca-
tions under the frame. The jacking
positions are plates welded to the
frame with two tabs and a raised
dot to index with the jack. 8. Insert the wheel lug nut wrench
into the jack and turn it clockwise,
raising the vehicle until the tire just
clears the ground. This measure-
ment is approximately 1 in. (30
mm).
Before removing the wheel lug
nuts, make sure the vehicle is sta-
ble and that there is no chance for
movement or slippage.
OUM064008
OUM064021
OUM064009
OUM064010
Page 437 of 573

621
What to do in an emergency
9. Loosen the wheel nuts andremove them with your fingers.
Slide the wheel off the studs and
lay it flat so it cannot roll away. To
put the wheel on the hub, pick up
the spare tire, line up the holes
with the studs and slide the wheel
onto them. If this is difficult, tip the
wheel slightly and get the top hole
in the wheel lined up with the top
stud. Then jiggle the wheel back
and forth until the wheel can slide
over the other studs. Wheels may have sharp edges.
Handle them carefully to avoid possi-
ble severe injury. Before putting the
wheel into place, be sure that there
is nothing on the hub or wheel (such
as mud, tar, gravel, etc.) that pre-
vents the wheel from fitting solidly
against the hub.
10. To install the wheel, hold it on the
studs, put the wheel nuts on the
studs and tighten them finger
tight. Jiggle the tire to be sure it is
completely seated, then tighten
the nuts as much as possible
with your fingers again.
11. Insert the wrench into the jack and lower the vehicle to the
ground by turning the wheel nut
wrench counterclockwise.
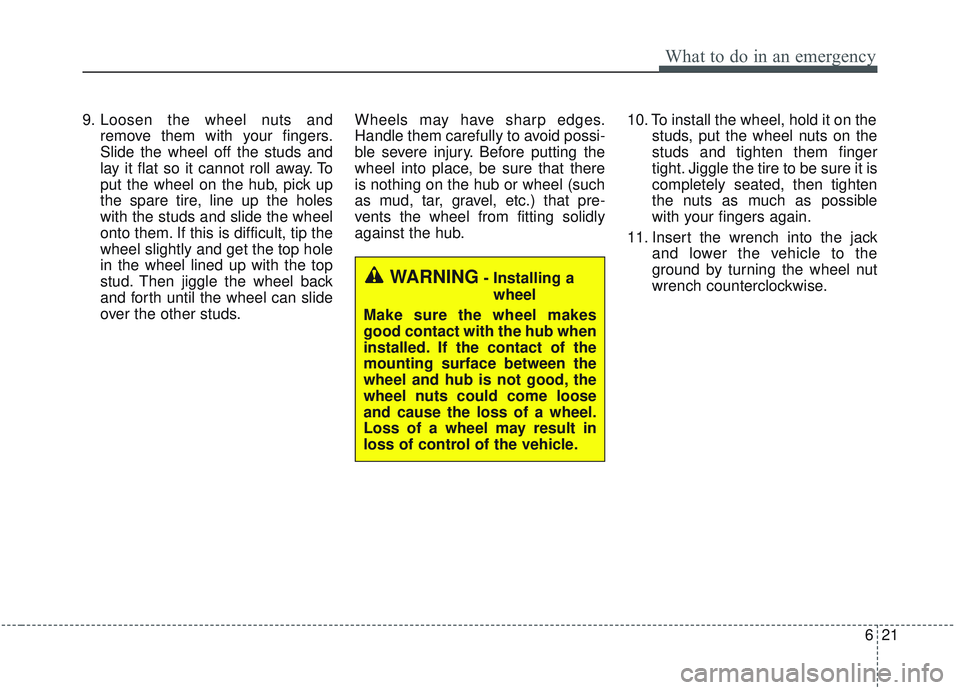
WARNING- Installing a
wheel
Make sure the wheel makes
good contact with the hub when
installed. If the contact of the
mounting surface between the
wheel and hub is not good, the
wheel nuts could come loose
and cause the loss of a wheel.
Loss of a wheel may result in
loss of control of the vehicle.
Page 451 of 573

Maintenance
87
At least monthly:
Check the coolant level in theengine coolant reservoir.
Check the operation of all exterior lights, including the stoplights, turn
signals and hazard warning flash-
ers.
Check the inflation pressures of all tires including the spare.
At least twice a year
(i.e., every Spring and Fall):
Check the radiator, heater and air conditioning hoses for leaks or
damage.
Check the windshield washer spray and wiper operation. Clean
the wiper blades with clean cloth
dampened with washer fluid.
Check the headlight alignment.
Check the muffler, exhaust pipes, shields and clamps.
Check the lap/shoulder belts for wear and function.
Check for worn tires and loose wheel lug nuts.
At least once a year:
Clean the body and door drainholes.
Lubricate the door hinges and checks, and hood hinges.
Lubricate the door and hood locks and latches.
Lubricate the door rubber weather- strips.
Check the air conditioning system.
Inspect and lubricate the automat- ic transmission linkage and con-
trols.
Clean the battery and terminals.
Check the brake fluid level.
Page 484 of 573

741
Maintenance
Tire replacement
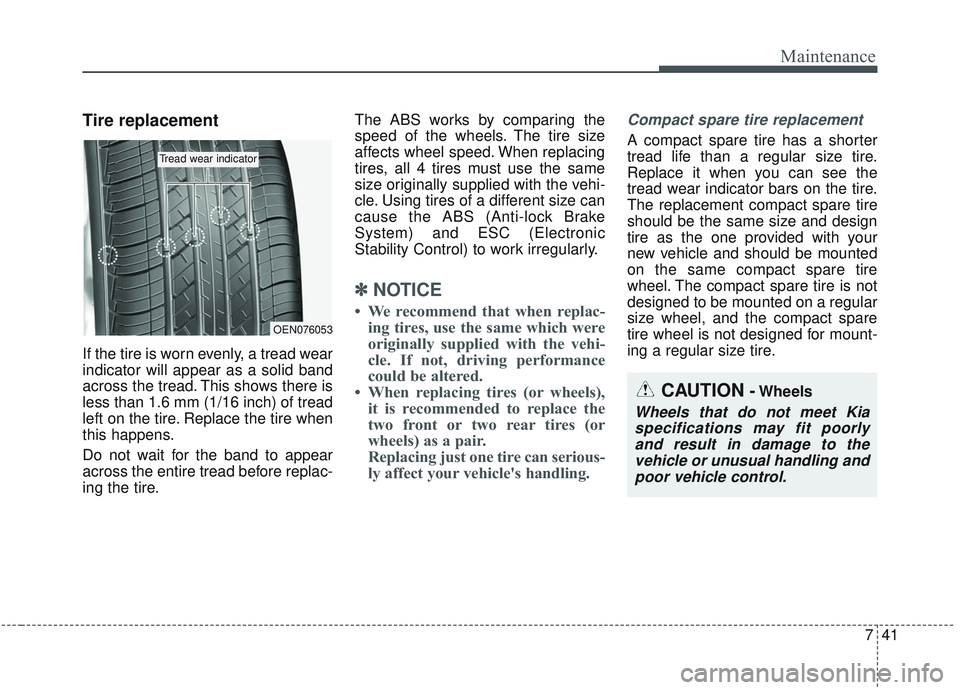
If the tire is worn evenly, a tread wear
indicator will appear as a solid band
across the tread. This shows there is
less than 1.6 mm (1/16 inch) of tread
left on the tire. Replace the tire when
this happens.
Do not wait for the band to appear
across the entire tread before replac-
ing the tire.The ABS works by comparing the
speed of the wheels. The tire size
affects wheel speed. When replacing
tires, all 4 tires must use the same
size originally supplied with the vehi-
cle. Using tires of a different size can
cause the ABS (Anti-lock Brake
System) and ESC (Electronic
Stability Control) to work irregularly.
✽ ✽
NOTICE
• We recommend that when replac-
ing tires, use the same which were
originally supplied with the vehi-
cle. If not, driving performance
could be altered.
• When replacing tires (or wheels), it is recommended to replace the
two front or two rear tires (or
wheels) as a pair.
Replacing just one tire can serious-
ly affect your vehicle's handling.
Compact spare tire replacement
A compact spare tire has a shorter
tread life than a regular size tire.
Replace it when you can see the
tread wear indicator bars on the tire.
The replacement compact spare tire
should be the same size and design
tire as the one provided with your
new vehicle and should be mounted
on the same compact spare tire
wheel. The compact spare tire is not
designed to be mounted on a regular
size wheel, and the compact spare
tire wheel is not designed for mount-
ing a regular size tire.
OEN076053
Tread wear indicator
CAUTION-Wheels
Wheels that do not meet Kia
specifications may fit poorlyand result in damage to thevehicle or unusual handling andpoor vehicle control.
Page 502 of 573

759
Maintenance
DescriptionFuse ratingProtected component
AIR BAG IND.10ACluster, A/C Control Module
A/CON 3 30ABlower Motor
A/CON 2 7.5AA/C Control Module (Auto)
START 7.5AE/R Junction Block (Start Relay), Transmission Range Switch
AIR BAG 15ASRS Control Module, Passenger Occupant Detection Sensor
MODULE 2 10A
Crash Pad Switch, Tire Pressure Monitoring Module, 4WD ECM, Lane Departure Warning Module, Console
Switch, Rear Parking Assist Sensor LH/RH, Rear Parking Assist Buzzer, Rear Parking Assist Sensor LH/RH
(Center), Blind Spot Detection Radar LH/RH, Electronic Parking Brake Module, Front Parking Assist Sensor
LH/RH, Front Parking Assist Sensor LH/RH
ACC 10APower Outlet Relay, BCM, Audio, A/V & Navigation Head Unit, Surround View Monitoring Unit, Smart Key
Control Module, AMP, USB Charger, Phone Wireless Charger
MODULE 4 10AHead Lamp Leveling Device Actuator LH/RH, MUT
BRAKE SWITCH 7.5ASmart Key Control Module, Stop Lamp Switch
MODULE 3 10AA/C Control Module, A/V & Navigation Head Unit, Electro Chromic Mirror, Driver IMS Control Module, ATM
Shift Lever Indicator, Rear Seat Warmer LH, Front Air Ventilation Control Module, Front Seat Warmer
Control Module, Dynamic Bending Light Unit
MODULE 1 10ABCM, Stop Lamp Switch, Driver/Passenger Doormodule, Sport Mode Switch
MODULE 815ASmart Key Control Module, Immobilizer Module