2019 KIA SORENTO transmission
[x] Cancel search: transmissionPage 90 of 573

• Tilting the sunroof . . . . . . . . . . . . . . . . . . . . . . . . . . . 4-55
• Closing the sunroof . . . . . . . . . . . . . . . . . . . . . . . . . . . 4-55
• Resetting the sunroof . . . . . . . . . . . . . . . . . . . . . . . . . 4-56
Steering wheel . . . . . . . . . . . . . . . . . . . . . . . . . . . . . 4-57
• Electric Power Steering (EPS) . . . . . . . . . . . . . . . . . . 4-57
• Tilt and telescopic steering . . . . . . . . . . . . . . . . . . . . . 4-58
• Heated steering wheel . . . . . . . . . . . . . . . . . . . . . . . . . 4-59
• Horn . . . . . . . . . . . . . . . . . . . . . . . . . . . . . . . . . . . . \
. . . 4-60
Mirrors . . . . . . . . . . . . . . . . . . . . . . . . . . . . . . . . . . 4-61\
• Inside rearview mirror . . . . . . . . . . . . . . . . . . . . . . . . 4-61
• Outside rearview mirror. . . . . . . . . . . . . . . . . . . . . . . 4-71
Instrument cluster . . . . . . . . . . . . . . . . . . . . . . . . . 4-75
• Instrument cluster control . . . . . . . . . . . . . . . . . . . . . 4-76
• LCD display control . . . . . . . . . . . . . . . . . . . . . . . . . . 4-76
• Gauges . . . . . . . . . . . . . . . . . . . . . . . . . . . . . . . . . . . . \
. 4-77
• Transmission shift indicator . . . . . . . . . . . . . . . . . . . . 4-80
LCD display . . . . . . . . . . . . . . . . . . . . . . . . . . . . . . 4-82
• LCD modes. . . . . . . . . . . . . . . . . . . . . . . . . . . . . . . . . . 4-82\
Trip modes (Trip computer) . . . . . . . . . . . . . . . . . 4-83
• Trip modes . . . . . . . . . . . . . . . . . . . . . . . . . . . . . . . . . . 4-83\
• Fuel economy . . . . . . . . . . . . . . . . . . . . . . . . . . . . . . . . 4-83
• Accumulated driving information mode . . . . . . . . . . 4-85
• One time driving information mode . . . . . . . . . . . . . 4-85
• Digital speedometer . . . . . . . . . . . . . . . . . . . . . . . . . . . 4-86
• Smart shift . . . . . . . . . . . . . . . . . . . . . . . . . . . . . . . . . . 4-86\
• Turn by turn mode . . . . . . . . . . . . . . . . . . . . . . . . . . . 4-86
• Assist mode . . . . . . . . . . . . . . . . . . . . . . . . . . . . . . . . . . 4-87\
• Distance to empty . . . . . . . . . . . . . . . . . . . . . . . . . . . . 4-89
• User settings mode. . . . . . . . . . . . . . . . . . . . . . . . . . . . 4-89
• Warning messages . . . . . . . . . . . . . . . . . . . . . . . . . . . . 4-94
Warning and indicator lights . . . . . . . . . . . . . . . . 4-99
• Warning lights . . . . . . . . . . . . . . . . . . . . . . . . . . . . . . . 4-99
• Indicator lights. . . . . . . . . . . . . . . . . . . . . . . . . . . . . . 4-106
Rear parking assist system . . . . . . . . . . . . . . . . . 4-111
• Operation of the rear parking assist system . . . . . . 4-111
• Non-operational conditions of rear parking assist
system . . . . . . . . . . . . . . . . . . . . . . . . . . . . . . . . . . . . \
4-112
• Rear parking assist system precautions . . . . . . . . . 4-113
Parking assist system . . . . . . . . . . . . . . . . . . . . . . 4-115
• Operation of the parking assist system . . . . . . . . . . 4-115
• Non-operational conditions of parking assist system . . . . . . . . . . . . . . . . . . . . . . . . . . . . . . . . . . . . \
4-117
Rearview camera . . . . . . . . . . . . . . . . . . . . . . . . . 4-120
360° camera monitoring system . . . . . . . . . . . . . 4-121
• Automatic car wash entry support guidelines . . . . 4-122
Lighting . . . . . . . . . . . . . . . . . . . . . . . . . . . . . . . . . 4-123
• Battery saver function. . . . . . . . . . . . . . . . . . . . . . . . 4-123
• Daytime running light . . . . . . . . . . . . . . . . . . . . . . . . 4-123
• Lighting control . . . . . . . . . . . . . . . . . . . . . . . . . . . . . 4-123
• High beam operation. . . . . . . . . . . . . . . . . . . . . . . . . 4-125
4
Page 168 of 573

Features of your vehicle
80
4
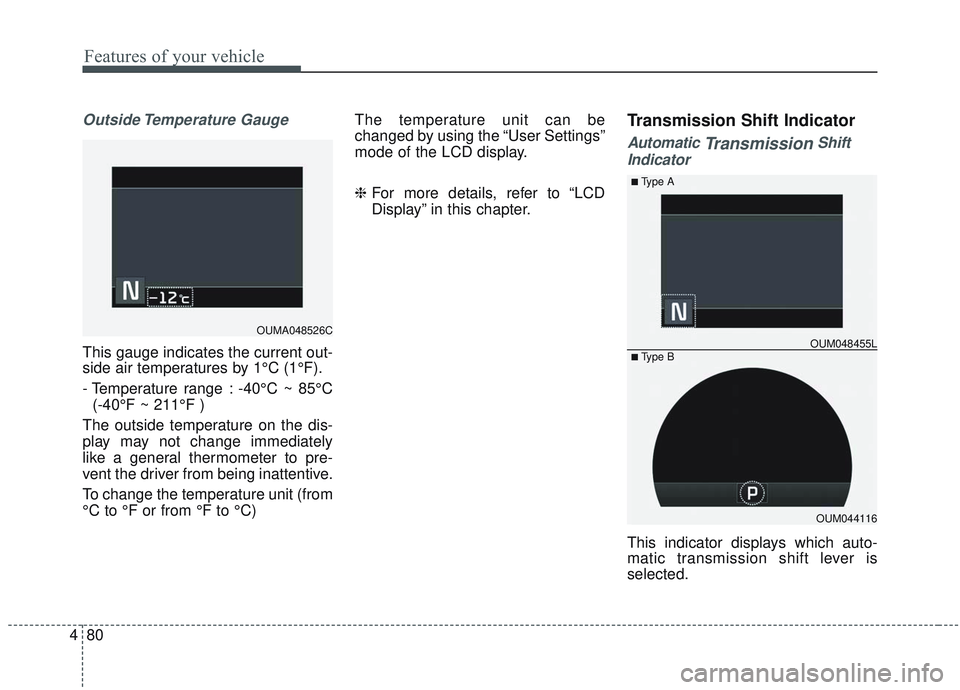
Outside Temperature Gauge
This gauge indicates the current out-
side air temperatures by 1°C (1°F).
- Temperature range : -40°C ~ 85°C
(-40°F ~ 211°F )
The outside temperature on the dis-
play may not change immediately
like a general thermometer to pre-
vent the driver from being inattentive.
To change the temperature unit (from
°C to °F or from °F to °C) The temperature unit can be
changed by using the “User Settings”
mode of the LCD display.
❈
For more details, refer to “LCD
Display” in this chapter.
Transmission Shift Indicator
Automatic TransmissionShift
Indicator
This indicator displays which auto-
matic transmission shift lever is
selected.
OUMA048526C
OUM044116
OUM048455L
■Type A
■ Type B
Page 179 of 573

491
Features of your vehicle
Rear Cross-Traffic CollisionWarning Sound (if equipped)
- If this item is checked, the rearcross traffic collision warning
sound will be activated.
❈ For more details, refer to “Blind-spot
Collision Warning” in chapter 5. Door/Liftgate
Automatically Lock :
- Enable on Speed : All doors willbe automatically locked when the
vehicle speed exceeds 15 km/h
(9.3 mph).
- Enable on Shift : All doors will be automatically locked if the auto-
matic transmission shift lever is
shifted from the P (Park) position
to the R (Reverse), N (Neutral), or
D (Drive) position.
Automatically Unlock : - Disable : The auto door unlockoperation will be canceled.
- Vehicle Off : All doors will be auto- matically unlocked when the
Engine Star/Stop Button or igni-
tion switch is set to the OFF posi-
tion.
- On Shift to P : All doors will be automatically unlocked if the
automatic transmission shift lever
is shifted to the P (Park) position. Two Press Unlock (if equipped)
If this item checked, the two press
unlock function will be activated.
(Only the driver’s door will unlock
when unlock button is pressed once
and all doors will unlock when the
same button is pressed again within
4 seconds.)
Power Liftgate (if equipped)
- If this item is checked, the powerliftgate function will be activated.
❈ For more details, refer to “Power
Liftgate” in this chapter.
Smart Liftgate (if equipped) - If this item is checked, the smartliftgate function will be activated.
- If the power liftgate function is not activated, you cannot activate
this function.
❈ For more details, refer to “Smart
Liftgate” in this chapter.
Page 209 of 573

4121
Features of your vehicle
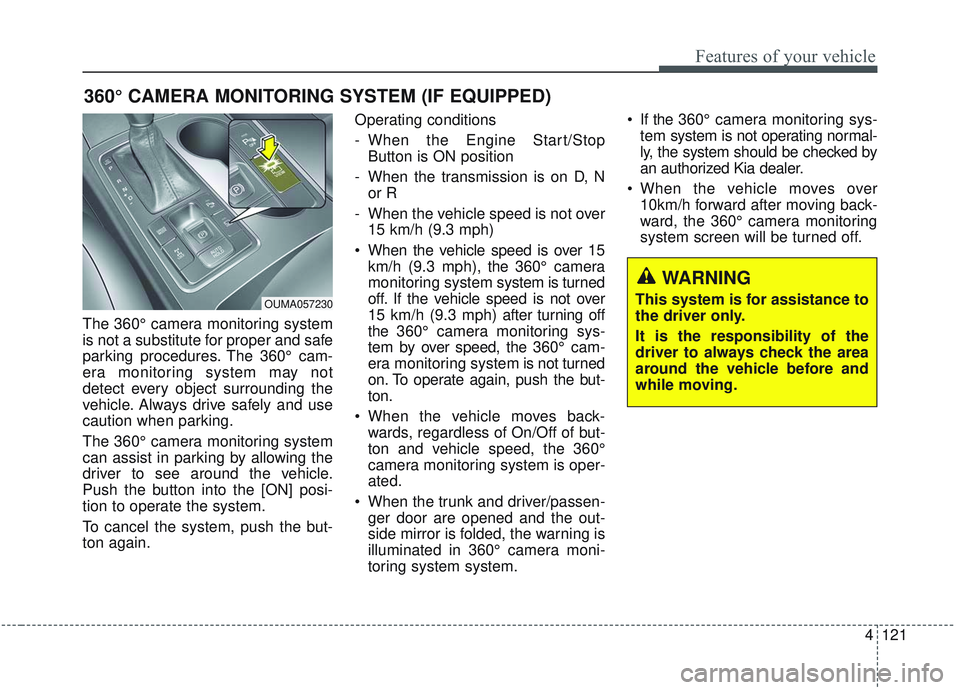
The 360° camera monitoring system
is not a substitute for proper and safe
parking procedures. The 360° cam-
era monitoring system may not
detect every object surrounding the
vehicle. Always drive safely and use
caution when parking.
The 360° camera monitoring system
can assist in parking by allowing the
driver to see around the vehicle.
Push the button into the [ON] posi-
tion to operate the system.
To cancel the system, push the but-
ton again.Operating conditions
- When the Engine Start/Stop
Button is ON position
- When the transmission is on D, N or R
- When the vehicle speed is not over 15 km/h (9.3 mph)
When the vehicle speed is over 15 km/h (9.3 mph), the 360° camera
monitoring system system is turned
off. If the vehicle speed is not over
15 km/h (9.3 mph) after turning off
the 360° camera monitoring sys-
tem by over speed, the 360° cam-
era monitoring system is not turned
on. To operate again, push the but-
ton.
When the vehicle moves back- wards, regardless of On/Off of but-
ton and vehicle speed, the 360°
camera monitoring system is oper-
ated.
When the trunk and driver/passen- ger door are opened and the out-
side mirror is folded, the warning is
illuminated in 360° camera moni-
toring system system. If the 360° camera monitoring sys-
tem system is not operating normal-
ly, the system should be checked by
an authorized Kia dealer.
When the vehicle moves over 10km/h forward after moving back-
ward, the 360° camera monitoring
system screen will be turned off.
360° CAMERA MONITORING SYSTEM (IF EQUIPPED)
OUMA057230
WARNING
This system is for assistance to
the driver only.
It is the responsibility of the
driver to always check the area
around the vehicle before and
while moving.
Page 278 of 573

Driving your vehicle
• Be sure the exhaust system does not leak . . . . . . . . . . 5-4
Before driving . . . . . . . . . . . . . . . . . . . . . . . . . . . . . . 5-5
. . . . . . . . . . . . . . . . . . . . . . . . . 5-5
. . . . . . . . . . . . . . . . . . . . . . . . . . 5-5
. . . . . . . . . . . . . . . . . . . . . . . . . . . . . . . . 5-5
Key positions . . . . . . . . . . . . . . . . . . . . . . . . . . . . . . . 5-7
. . . . . . . . . . . . . . . . . . . . . . 5-7
. . . . . . . . . . . . . . . . . . . . . . . . . 5-7
. . . . . . . . . . . . . . . . . . . . . . . . . . . . 5-8
Engine start/stop button . . . . . . . . . . . . . . . . . . . . 5-10
. . . . . . . . . . . . . 5-10
. . . . . . . . . . . . 5-12
Automatic transmission . . . . . . . . . . . . . . . . . . . . . 5-14
. . . . . . . . . . . . . . . 5-14
. . . . . . . . . . . . . . . . . . . . . . . . 5-20
All Wheel Drive (AWD) . . . . . . . . . . . . . . . . . . . . . 5-21
. . . 5-22
. . . . . . . . . . . . . . . 5-23
Brake system . . . . . . . . . . . . . . . . . . . . . . . . . . . . . . 5-27
. . . . . . . . . . . . . . . . . . . . . . . . . . . . . . . . 5-27
. . . . . . . . . . . . . . . . 5-30
. . . . . . . . . . . . . . . . . . . . . . . . . . . . . . . . . . . 5-\
36
. . . . . . . . . . . . . . 5-41
. . . . . . . . . . . 5-45
. . . . . . . . . . . . . . . . . 5-47
Forward Collision-avoidance Assist (FCA) . . . . . 5-49
. . . . . . . . . . . . . . . . . . . 5-49
. . . . . . . . 5-51
. . . . . . . . . . . . . . . . . . . . . . . . . . . . . . 5-52
. . . . . . . . . . . . . . . . 5-53
. . . . . . . . . . . . . . . . . . . . . . . . . . . 5-55
. . . . . . . . . . . . . . . . . . . . . . . 5-56
Cruise control system. . . . . . . . . . . . . . . . . . . . . . . 5-63
. . . . . . . . . . . . . . . . . . . . . 5-63
. . . . . . . . . . . . . . . . . . 5-65
the cruise control on . . . . . . . . . . . . . . . . . . . . . . . . . 5-65
do one of the following . . . 5-65
approximately 30 km/h (20 mph) . . . . . . . . . . . . . . 5-66
do one of the following . . . 5-66
Smart cruise control with stop & go system . . . . 5-67
. . . . . . . . . . . . . . . . . . . . 5-69
5
Page 285 of 573

Driving your vehicle
85
ON
The warning lights can be checked
before the engine is started. This is
the normal running position after the
engine is started.
Do not leave the ignition switch ON ifthe engine is not running to preventbattery discharge.
START
Turn the ignition switch to the START
position to start the engine. The
engine will crank until you release
the key; then it returns to the ON
position. The brake warning light can
be checked in this position. The anti-theft steering column lock (if
equipped) is not a substitute for the
parking brake. Before leaving the dri-
ver’s seat, always make sure the shift
lever is engaged in P (Park) for auto-
matic transmission, set the parking
brake fully and shut the engine off.
Unexpected and sudden vehicle
movement may occur if these pre-
cautions are not taken.
Starting the engine
1.Make sure the parking brake is
applied.
2.Place the transmission shift lever in P (Park). Depress the brake pedal
fully.
You can also start the engine when
the shift lever is in the N (Neutral)
position.WARNING- Ignition
switch
Never turn the ignition switch to
LOCK or ACC while the vehicle
is moving. This would result in
loss of directional control and
braking function, which could
cause an accident.
WARNING- Proper footwear
Always wear appropriate shoes
when operating your vehicle.
Unsuitable shoes (high heels,
ski boots, sandals, etc.) may
interfere with your ability to use
the brake and accelerator pedal.
Page 288 of 573

511
Driving your vehicle
ACC(Accessory)
Press the engine start/stop button
while it is in the OFF position without
depressing the brake pedal.
If the engine start/stop button is in
the ACC position for more than 1
hour, the button is turned off auto-
matically to prevent battery dis-
charge.
ON
Press the engine start/stop button
while it is in the ACC position without
depressing the brake pedal.
The warning lights can be checked
before the engine is started. Do not
leave the engine start/stop button in
the ON position for a long time. The
battery may discharge, because the
engine is not running.
START/RUN
To start the engine, depress the
brake pedal and press the engine
start/stop button with the shift lever in
the P (Park) or the N (Neutral) posi-
tion. For your safety, start the engine
with the shift lever in the P (Park)
position.
If you press the engine start/stop
button without depressing the brake
pedal for automatic transmission
vehicles, the engine will not start and
the engine start/stop button changes
as follow:
OFF ➔ACC ➔ON ➔OFF or ACC
AmberRedish orangeNot illuminated
Page 289 of 573

Driving your vehicle
12
5
✽ ✽
NOTICE
If you leave the engine start/stop
button in the ACC or ON position
for a long time, the battery will dis-
charge.
Starting the engine with a
smart key
1.Carry the smart key or leave it
inside the vehicle.
2.Make sure the parking brake is firmly applied
3.Place the transmission shift lever in P (Park). Depress the brake pedal
fully.
You can also start the engine whenthe shift lever is in the N (Neutral)position.
4.Press the engine start/stop button while depressing the brake pedal.
It should be started withoutdepressing the accelerator.
5.Do not wait for the engine to warm up while the vehicle remains sta-
tionary.
Start driving at moderate engine
speeds. (Rapid accelerating and
decelerating should be avoided.) Even if the smart key is in the vehi-
cle, if it is far away from you, the
engine may not start.
When the engine start/stop button is in the ACC position or above, if
any door is opened, the system
checks for the smart key. If the
smart key is not in the vehicle, a
message “key is not in the vehicle”
will appear on the LCD display. And
if all doors are closed, the chime
will sound for 5 seconds. The indi-
cator or warning will turn off while
the vehicle is moving. Always have
the smart key with you.
WARNING- Starting
vehicle
Never press the engine
start/stop button while the vehi-
cle is in motion except in an
emergency. This would result in
loss of directional control and
braking function, which could
cause an accident.