2019 KIA SEDONA buttons
[x] Cancel search: buttonsPage 28 of 593
Safety features of your vehicle
12
3
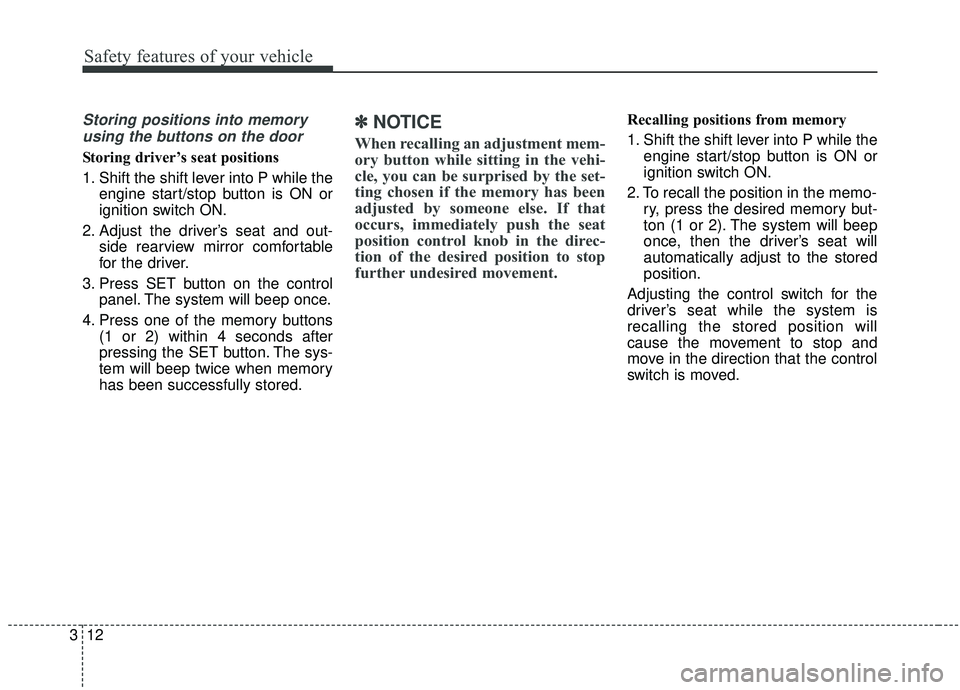
Storing positions into memory
using the buttons on the door
Storing driver’s seat positions
1. Shift the shift lever into P while the engine start/stop button is ON or
ignition switch ON.
2. Adjust the driver’s seat and out- side rearview mirror comfortable
for the driver.
3. Press SET button on the control panel. The system will beep once.
4. Press one of the memory buttons (1 or 2) within 4 seconds after
pressing the SET button. The sys-
tem will beep twice when memory
has been successfully stored.
✽ ✽NOTICE
When recalling an adjustment mem-
ory button while sitting in the vehi-
cle, you can be surprised by the set-
ting chosen if the memory has been
adjusted by someone else. If that
occurs, immediately push the seat
position control knob in the direc-
tion of the desired position to stop
further undesired movement.
Recalling positions from memory
1. Shift the shift lever into P while the
engine start/stop button is ON or
ignition switch ON.
2. To recall the position in the memo- ry, press the desired memory but-
ton (1 or 2). The system will beep
once, then the driver’s seat will
automatically adjust to the stored
position.
Adjusting the control switch for the
driver’s seat while the system is
recalling the stored position will
cause the movement to stop and
move in the direction that the control
switch is moved.
Page 138 of 593
Features of your vehicle
34
4
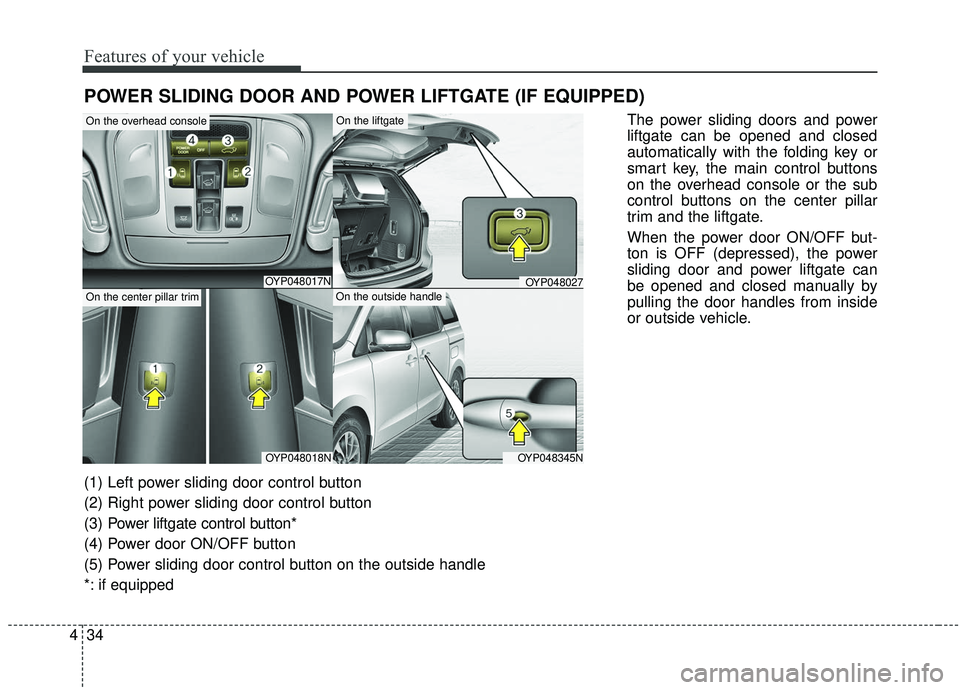
POWER SLIDING DOOR AND POWER LIFTGATE (IF EQUIPPED)
The power sliding doors and power
liftgate can be opened and closed
automatically with the folding key or
smart key, the main control buttons
on the overhead console or the sub
control buttons on the center pillar
trim and the liftgate.
When the power door ON/OFF but-
ton is OFF (depressed), the power
sliding door and power liftgate can
be opened and closed manually by
pulling the door handles from inside
or outside vehicle.
OYP048017N
OYP048018NOYP048345N
OYP048027
On the overhead console
On the center pillar trim
On the liftgate
On the outside handle
(1) Left power sliding door control button
(2) Right power sliding door control button
(3) Power liftgate control button*
(4) Power door ON/OFF button
(5) Power sliding door control button on the outside handle
*: if equipped
Page 142 of 593
Features of your vehicle
38
4
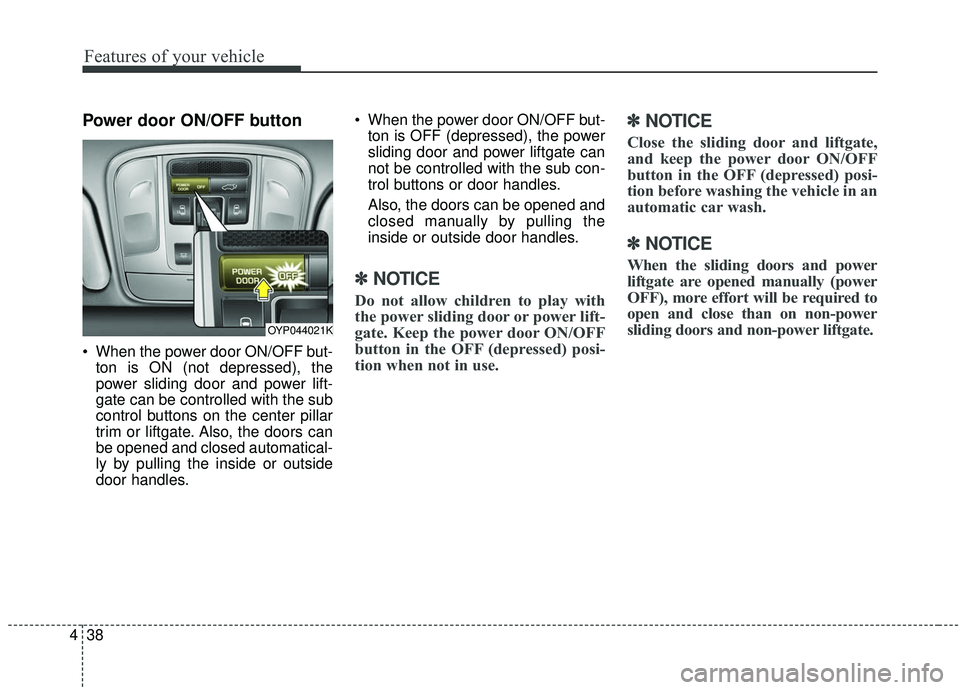
Power door ON/OFF button
When the power door ON/OFF but-
ton is ON (not depressed), the
power sliding door and power lift-
gate can be controlled with the sub
control buttons on the center pillar
trim or liftgate. Also, the doors can
be opened and closed automatical-
ly by pulling the inside or outside
door handles. When the power door ON/OFF but-
ton is OFF (depressed), the power
sliding door and power liftgate can
not be controlled with the sub con-
trol buttons or door handles.
Also, the doors can be opened and
closed manually by pulling the
inside or outside door handles.
✽ ✽ NOTICE
Do not allow children to play with
the power sliding door or power lift-
gate. Keep the power door ON/OFF
button in the OFF (depressed) posi-
tion when not in use.
✽ ✽NOTICE
Close the sliding door and liftgate,
and keep the power door ON/OFF
button in the OFF (depressed) posi-
tion before washing the vehicle in an
automatic car wash.
✽ ✽NOTICE
When the sliding doors and power
liftgate are opened manually (power
OFF), more effort will be required to
open and close than on non-power
sliding doors and non-power liftgate.
OYP044021K
Page 143 of 593
439
Features of your vehicle
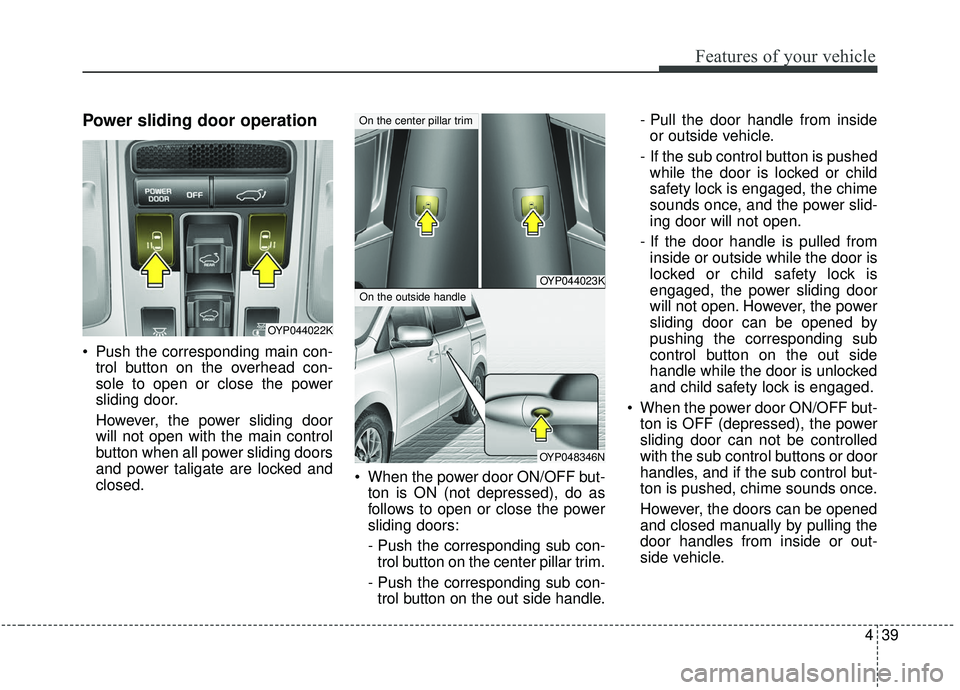
Power sliding door operation
Push the corresponding main con-trol button on the overhead con-
sole to open or close the power
sliding door.
However, the power sliding door
will not open with the main control
button when all power sliding doors
and power taligate are locked and
closed. When the power door ON/OFF but-
ton is ON (not depressed), do as
follows to open or close the power
sliding doors:
- Push the corresponding sub con-trol button on the center pillar trim.
- Push the corresponding sub con- trol button on the out side handle. - Pull the door handle from inside
or outside vehicle.
- If the sub control button is pushed while the door is locked or child
safety lock is engaged, the chime
sounds once, and the power slid-
ing door will not open.
- If the door handle is pulled from inside or outside while the door is
locked or child safety lock is
engaged, the power sliding door
will not open. However, the power
sliding door can be opened by
pushing the corresponding sub
control button on the out side
handle while the door is unlocked
and child safety lock is engaged.
When the power door ON/OFF but- ton is OFF (depressed), the power
sliding door can not be controlled
with the sub control buttons or door
handles, and if the sub control but-
ton is pushed, chime sounds once.
However, the doors can be opened
and closed manually by pulling the
door handles from inside or out-
side vehicle.
OYP044022K
OYP044023K
OYP048346N
On the center pillar trim
On the outside handle
Page 147 of 593
443
Features of your vehicle
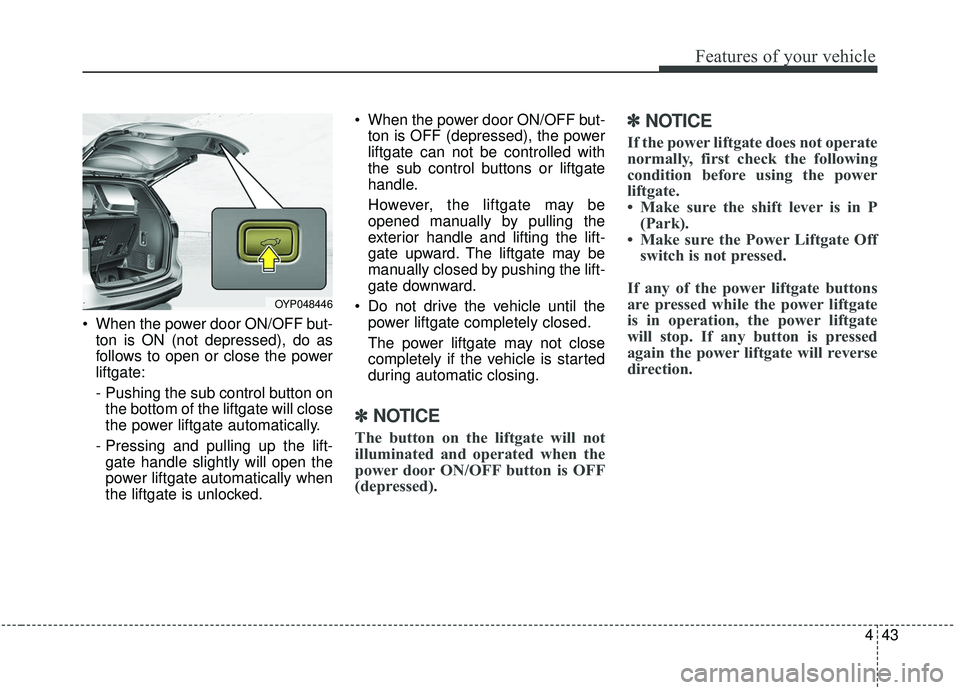
When the power door ON/OFF but-ton is ON (not depressed), do as
follows to open or close the power
liftgate:
- Pushing the sub control button onthe bottom of the liftgate will close
the power liftgate automatically.
- Pressing and pulling up the lift- gate handle slightly will open the
power liftgate automatically when
the liftgate is unlocked. When the power door ON/OFF but-
ton is OFF (depressed), the power
liftgate can not be controlled with
the sub control buttons or liftgate
handle.
However, the liftgate may be
opened manually by pulling the
exterior handle and lifting the lift-
gate upward. The liftgate may be
manually closed by pushing the lift-
gate downward.
Do not drive the vehicle until the power liftgate completely closed.
The power liftgate may not close
completely if the vehicle is started
during automatic closing.
✽ ✽ NOTICE
The button on the liftgate will not
illuminated and operated when the
power door ON/OFF button is OFF
(depressed).
✽ ✽NOTICE
If the power liftgate does not operate
normally, first check the following
condition before using the power
liftgate.
• Make sure the shift lever is in P
(Park).
• Make sure the Power Liftgate Off switch is not pressed.
If any of the power liftgate buttons
are pressed while the power liftgate
is in operation, the power liftgate
will stop. If any button is pressed
again the power liftgate will reverse
direction.
OYP048446
Page 179 of 593

475
Features of your vehicle
Electric chromatic mirror (ECM)with UVO service (if equipped)
The electric rearview mirror automat-
ically controls the glare from the
headlights of the vehicles behind you
in nighttime or low light driving condi-
tions. The sensor (4) mounted in the
mirror senses the light level around
the vehicle, and automatically con-
rols the headlight glare from the vehi-
cles behind you.
When the engine is running, the
glare is automatically controlled by
the sensor mounted in the rearview
mirror. And telematics buttons are on the
mirror.
(1) Roadside Assist
(2) AVN : UVO Voice Local Search
D-AUDIO, UVO AUDIO : Phone
Projection Map
(3) SOS
(4) Rear light sensor
CAUTION - Cleaning
mirror
When cleaning the mirror, use a paper towel or similar materialdampened with glass cleaner.Do not spray glass cleanerdirectly on the mirror. It maycause the liquid cleaner to enterthe mirror housing.
OCK047065C
Page 183 of 593
479
Features of your vehicle
There are some conditions that can
cause changes to the vehicle mag-
nets, such as installing a ski rack or
a CB antenna. Body repair work on
the vehicle can also cause changes
to the vehicle's magnetic field. In
these situations, the compass will
need to be re-calibrated to quickly
correct for these changes. To re-cali-
brate the compass:
1. Press and hold the button formore than 6 seconds. When the
compass memory is cleared, a "C"
will appear in the display.
2. To calibrate the compass, drive the vehicle in 2 complete circles at
less than 8 km/h (5 mph). Integrated HomeLink®Wireless
Control System
The HomeLink
®Wireless Control
System provides a convenient way to
replace up to three hand-held radio-
frequency (RF) transmitters with a
single built-in device. This innovative
feature will learn the radio frequency
codes of most current transmitters to
operate devices such as gate opera-
tors, garage door openers, entry
door locks, security systems, even
home lighting. Both standard and
rolling code-equipped transmitters
can be programmed by following the
outlined procedures. Additional
HomeLink
®information can be found
at: www.homelink.com or by calling
1-800-355-3515.
❈ HomeLink
®is a registered trade-
mark of Johnson Controls, Inc. Retain the original transmitter of the
RF device you are programming for
use in other vehicles as well as for
future HomeLink
®programming. It is
also suggested that upon the sale of
the vehicle, the programmed
HomeLink
®buttons be erased for
security purposes.
Page 184 of 593
Features of your vehicle
80
4
Programming HomeLink®
✽ ✽
NOTICE
• When programming a garage
door opener, it is advised to park
the vehicle outside of the garage.
• It is recommended that a new bat- tery be placed in the hand-held
transmitter of the device being pro-
grammed to HomeLink
®for quick-
er training and accurate transmis-
sion of the radio-frequency signal.
• Some vehicles may require the igni- tion switch to be turned to the sec-
ond position for programming
and/or operation of HomeLink
®.
• In the event that there are still pro- gramming difficulties or questions
after following the programming
steps listed below, contact
HomeLink
®at: www.homelink.com
or 1-800-355-3515.
Standard programming
To train most devices, follow these
instructions:
1. For first-time programming, press
and hold the two outside buttons,
HomeLink
®Channel 1 and
Channel 3 Buttons, until the indi-
cator light begins to flash (after 20
seconds). Release both buttons.
Do not hold the buttons for longer
than 30 seconds.
2. Position the end of your hand-held transmitter 2-8 cm (1-3 inches)
away from the HomeLink
®buttons
while keeping the indicator light in
view.
3. Simultaneously press and hold both the HomeLink
®and hand-
held transmitter button. DO NOT
release the buttons until step 4
has been completed.
4. While continuing to hold the but- tons the red Indicator Status LED
will flash slowly and then rapidly
after HomeLink
®successfully
trains to the frequency signal from
the hand-held transmitter. Release
both buttons. 5. Press and hold the just-trained
HomeLink
®button and observe
the red Status Indicator LED. If the
indicator light stays on constantly,
programming is complete and
your device should activate when
the HomeLink
® button is pressed
and released.
6. To program the remaining two HomeLink
® buttons, follow steps 2
through 5.