2019 KIA SEDONA change time
[x] Cancel search: change timePage 359 of 593
545
Driving your vehicle
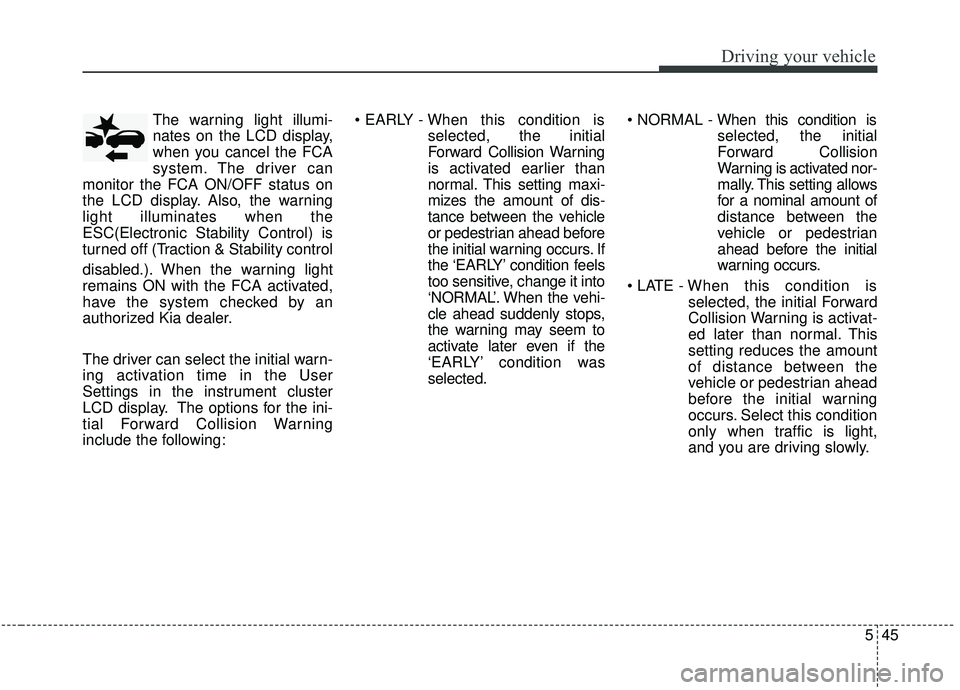
The warning light illumi-
nates on the LCD display,
when you cancel the FCA
system. The driver can
monitor the FCA ON/OFF status on
the LCD display. Also, the warning
light illuminates when the
ESC(Electronic Stability Control) is
turned off (Traction & Stability control
disabled.). When the warning light
remains ON with the FCA activated,
have the system checked by an
authorized Kia dealer.
The driver can select the initial warn-
ing activation time in the User
Settings in the instrument cluster
LCD display. The options for the ini-
tial Forward Collision Warning
include the following:
selected, the initial
Forward Collision Warning
is activated earlier than
normal. This setting maxi-
mizes the amount of dis-
tance between the vehicle
or pedestrian ahead before
the initial warning occurs. If
the ‘EARLY’ condition feels
too sensitive, change it into
‘NORMAL’. When the vehi-
cle ahead suddenly stops,
the warning may seem to
activate later even if the
‘EARLY’ condition was
selected.
selected, the initial
Forward Collision
Warning is activated nor-
mally. This setting allows
for a nominal amount of
distance between the
vehicle or pedestrian
ahead before the initial
warning occurs.
selected, the initial Forward
Collision Warning is activat-
ed later than normal. This
setting reduces the amount
of distance between the
vehicle or pedestrian ahead
before the initial warning
occurs. Select this condition
only when traffic is light,
and you are driving slowly.
Page 381 of 593

567
Driving your vehicle
To temporarily accelerate with thecruise control on:
If you want to speed up temporarily
when the cruise control is on,
depress the accelerator pedal.
Increased speed will not interfere
with cruise control operation or
change the set speed.
To return to the set speed, take your
foot off the accelerator.
If you move the lever down (to SET-)
at increased speed, the cruising
speed will be set again.
✽ ✽ NOTICE
Be careful when accelerating tem-
porarily, because the speed is not
regulated automatically at this time
even if there is a vehicle in front of
you.
Smart cruise control system will
be temporarily canceled when:
Cancelled manually
The smart cruise control systemis
temporarily canceled when the brake
pedal is depressed or the CANCEL
button is pressed. The speed and
vehicle to vehicle distance indicator
on the cluster will disappear and the
CRUISE indicator is illuminated con-
tinuously. Cancelled automatically
The driver's door is opened.
The shift lever is shifted to N
(Neutral), R (Reverse) or P(Parking).
The EPB (electronic parking brake) is applied.
The vehicle speed is over 190 km/h (120 mph)
The ESC, ABS or TCS is operat- ing.
The ESC is turned off.
The sensor or the cover is dirty or blocked with foreign matter.
The driver starts driving by pushing the lever up (RES +) or down
(SET -) or depressing the acceler-
ator pedal approximately 3 sec-
onds after the vehicle is stopped by
the smart cruise control
systemSystem with no other vehi-
cle ahead or a vehicle stopped far
away in front.
The engine speed is in dangerous range.
OYP054134N
Page 384 of 593
Driving your vehicle
70
5
Vehicle to vehicle distance
setting (Smart cruise control
system)
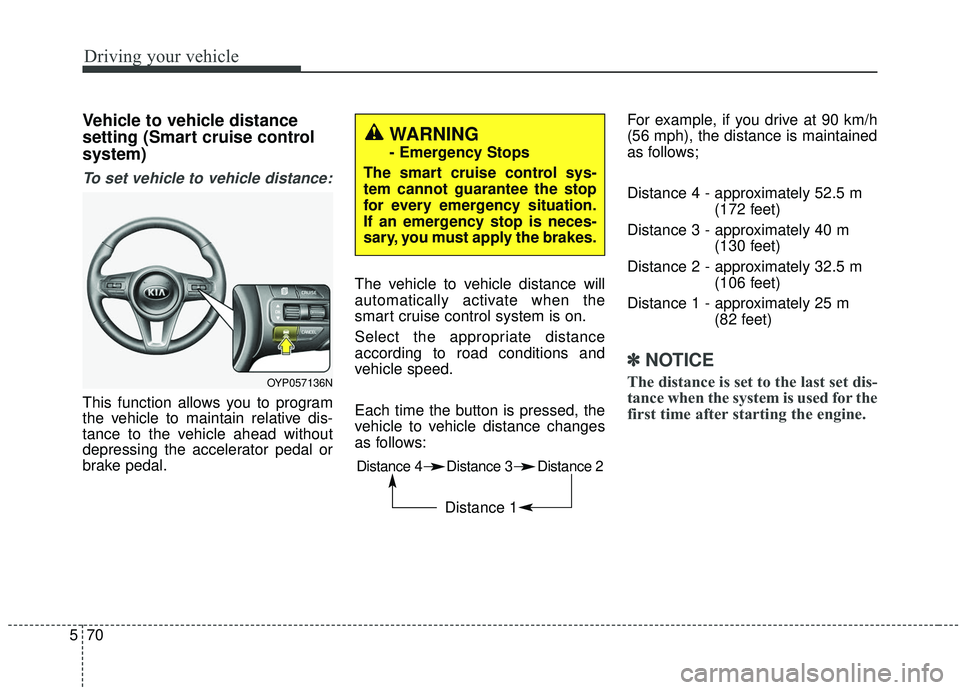
To set vehicle to vehicle distance:
This function allows you to program
the vehicle to maintain relative dis-
tance to the vehicle ahead without
depressing the accelerator pedal or
brake pedal. The vehicle to vehicle distance will
automatically activate when the
smart cruise control system is on.
Select the appropriate distance
according to road conditions and
vehicle speed.
Each time the button is pressed, the
vehicle to vehicle distance changes
as follows:For example, if you drive at 90 km/h
(56 mph), the distance is maintained
as follows;
Distance 4 - approximately 52.5 m
(172 feet)
Distance 3 - approximately 40 m (130 feet)
Distance 2 - approximately 32.5 m (106 feet)
Distance 1 - approximately 25 m (82 feet)
✽ ✽NOTICE
The distance is set to the last set dis-
tance when the system is used for the
first time after starting the engine.OYP057136N
Distance 4 Distance 3 Distance 2
Distance 1
WARNING
- Emergency Stops
The smart cruise control sys-
tem cannot guarantee the stop
for every emergency situation.
If an emergency stop is neces-
sary, you must apply the brakes.
Page 429 of 593
5115
Driving your vehicle
Remember that trailering is different
than just driving your vehicle by itself.
Trailering means changes in han-
dling, durability, and fuel economy.
Successful, safe trailering requires
correct equipment, and it has to be
used properly.
This section contains many time-test-
ed, important trailering tips and safe-
ty rules. Many of these are important
for your safety and that of your pas-
sengers. Please read this section
carefully before you pull a trailer.
Load-pulling components such as
the engine, transaxle, wheel assem-
blies, and tires are forced to work
harder against the load of the added
weight. The engine is required to
operate at relatively higher speeds
and under greater loads. This addi-
tional burden generates extra heat.
The trailer also adds considerably to
wind resistance, increasing the
pulling requirements.Hitches
It's important to have the correct
hitch equipment. Crosswinds, large
trucks going by, and rough roads are
a few reasons why you’ll need the
right hitch. Here are some rules to
follow:
Will you have to make any holes inthe body of your vehicle when you
install a trailer hitch? If you do, then
be sure to seal the holes later
when you remove the hitch.
If you don’t seal them, deadly car-
bon monoxide (CO) from your
exhaust can get into your vehicle,
as well as dirt and water.
The bumpers on your vehicle are not intended for hitches. Do not
attach rental hitches or other
bumper-type hitches to them. Use
only a frame-mounted hitch that
does not attach to the bumper.
Kia trailer hitch accessory is avail- able at an authorized Kia dealer.
Safety chains
You should always attach chains
between your vehicle and your trail-
er. Cross the safety chains under the
tongue of the trailer so that the
tongue will not drop to the road if it
becomes separated from the hitch.
Instructions about safety chains may
be provided by the hitch manufactur-
er or by the trailer manufacturer.
Follow the manufacturer’s recom-
mendation for attaching safety
chains. Always leave just enough
slack so you can turn with your trail-
er. And, never allow safety chains to
drag on the ground.
Page 431 of 593
5117
Driving your vehicle
Following distance
Stay at least twice as far behind the
vehicle ahead as you would when
driving your vehicle without a trailer.
This can help you avoid situations
that require heavy braking and sud-
den turns.
Passing
You’ll need more passing distance
up ahead when you’re towing a trail-
er. And, because of the increased
vehicle length, you’ll need to go
much farther beyond the passed
vehicle before you can return to your
lane. Due to the added load to the
engine when going uphill the vehicle
may also take longer to pass than it
would on flat ground.
Backing up
Hold the bottom of the steering
wheel with one hand. Then, to move
the trailer to the left, just move your
hand to the left. To move the trailer to
the right, move your hand to the
right. Always back up slowly and, if
possible, have someone guide you.
Making turns
When you’re turning with a trailer,
make wider turns than normal. Do
this so your trailer won’t strike soft
shoulders, curbs, road signs, trees,
or other objects near the edge of the
road. Avoid jerky or sudden maneu-
vers. Signal well in advance before
turning or lane changes.
Turn signals when towing a trailer
When you tow a trailer, your vehicle
has to have a different turn signal
flasher and extra wiring. The green
arrows on your instrument panel will
flash whenever you signal a turn or
lane change. Properly connected,
the trailer lights will also flash to alert
other drivers you’re about to turn,
change lanes, or stop.
When towing a trailer, the green
arrows on your instrument panel will
flash for turns even if the bulbs on the
trailer are burned out. Thus, you may
think drivers behind you are seeing
your signals when, in fact, they are
not. It’s important to check occasion-
ally to be sure the trailer bulbs are still
working. You must also check the
lights every time you disconnect and
then reconnect the wires.
Do not connect a trailer lighting sys-
tem directly to your vehicle’s lighting
system. Use only an approved trailer
wiring harness.
An authorized Kia dealer can assist
you in installing the wiring harness.
Page 477 of 593

Maintenance
10
7
Normal Maintenance Schedule - Non Turbo Models
The following maintenance services must be performed to ensure good emission control and performance.
Keep receipts for all vehicle emission services to protect your warranty. Where both mileage and time are shown, the
frequency of service is determined by whichever occurs first.
Number of months or driving distance, whichever comes first
Months1224364860728496108120132144156168180
Miles×1,0007.51522.530 37.5 45 52.5 60 67.5 75 82.5 90 97.5 105 112.5
Km×1,00012 24 36 48 60 72 84 96 108 120 132 144 156 168 180
Drive belts *1At first, inspect at 96,000 km (60,000 miles) or 72 months,
after that, inspect every 24,000 km (15,000 miles) or 24 months
Engine oil and engine oil
filterLambda II 3.3L GDIRRRRRRRRRRRRRRR
Fuel additives *2Add every 12,000 km (7,500 miles) or 12 months
Air cleaner filterIIIRIIIRIIIRIII
Spark plugsLambda II 3.3L GDIReplace every 156,000 km (97,500 miles)
Valve clearance *3Lambda II 3.3L GDIInspect every 96,000 km (60,000 miles) or 72 months
Rotate tiresRotate every 12,000 km (7,500 miles)
Climate control air filterRRRRRRRRRRRRRRR
MAINTENANCE
INTERVALS
MAINTENANCE
ITEM
I : Inspect and if necessary, adjust, correct, clean or replace.
R : Replace or change.
*
1: The drive belt should be replaced when cracks occur or tension is reduced.
*2: If TOP TIER Detergent Gasoline is not available, one bottle of additive is recommended. Additives are available from your authorized Kia dealer along with information on how to use them. Do not mix other additives.
*
3: Inspect for excessive valve noise and/or engine vibration and adjust if necessary. Have an authorized Kia dealer perform the operation.
Page 482 of 593
715
Maintenance
EXPLANATION OF SCHEDULED MAINTENANCE ITEMS
Engine oil and filter
The engine oil and filter should be
changed at the intervals specified in
the maintenance schedule. If the car
is being driven in severe conditions,
more frequent oil and filter changes
are required.
Drive belts
Inspect all drive belts for evidence of
cuts, cracks, excessive wear or oil
saturation and replace if necessary.
Fuel filter (for gasoline)
This gasoline powered vehicle is
equipped with a lifetime fuel filter that
is integrated with the fuel tank.
Regular maintenance or replace-
ment is not needed but depends on
fuel quality. If there are any fuel relat-
ed problems like fuel flow restriction,
surging, loss of power, hard starting
problem etc, fuel filter inspection or
replacement may be needed.
Fuel lines, fuel hoses and con-
nections
Check the fuel lines, fuel hoses and
connections for leakage and dam-
age. Have an authorized Kia dealer
replace any damaged or leaking
parts immediately.
Vapor hose and fuel filler cap
The vapor hose and fuel filler cap
should be inspected at the intervals
specified in the maintenance sched-
ule. Make sure that a new vapor hose
or fuel filler cap is installed correctly.
Page 488 of 593
721
Maintenance
Changing the engine oil and
filter
Have engine oil and filter changed by
an authorized Kia dealer according
to the Maintenance Schedule at the
beginning of this chapter.
WARNING
Used engine oil may cause irrita-
tion or cancer of the skin if left in
contact with the skin for pro-
longed periods of time. Always
protect your skin by washing
your hands thoroughly with
soap and warm water as soon as
possible after handling used oil.