Page 176 of 593

Features of your vehicle
72
4
To change the steering wheel angle,
pull down the lock-release lever (1),
adjust the steering wheel to the
desired angle (2) and height (3) then
pull up the lock-release lever (4) to
lock the steering wheel in place. Be
sure to adjust the steering wheel to
the desired position before driving.
Heated steering wheel
(if equipped)
With the ignition switch in the ON
position, pressing the heated steer-
ing wheel button warms the steering
wheel. The indicator on the button
will illuminate and notify you on the
LCD display. (if equipped)
To turn the heated steering wheel off,
press the button once again. The
indicator on the button will turn off
and notify you on the LCD display. (if
equipped) The heated steering wheel will turn
off automatically approximately 30
minutes after the heated steering
wheel is turned on.
If you turn off the engine within 30
minutes while the heated steering
wheel is ON, the heated steering
wheel will turn on automatically
when you set the ignition switch in
the ON position.
OYP048430
CAUTION
Do not install any grip or acces-
sory to operate the steeringwheel. This causes damage tothe heated steering wheel sys-tem.
OYP047050
Page 183 of 593
479
Features of your vehicle
There are some conditions that can
cause changes to the vehicle mag-
nets, such as installing a ski rack or
a CB antenna. Body repair work on
the vehicle can also cause changes
to the vehicle's magnetic field. In
these situations, the compass will
need to be re-calibrated to quickly
correct for these changes. To re-cali-
brate the compass:
1. Press and hold the button formore than 6 seconds. When the
compass memory is cleared, a "C"
will appear in the display.
2. To calibrate the compass, drive the vehicle in 2 complete circles at
less than 8 km/h (5 mph). Integrated HomeLink®Wireless
Control System
The HomeLink
®Wireless Control
System provides a convenient way to
replace up to three hand-held radio-
frequency (RF) transmitters with a
single built-in device. This innovative
feature will learn the radio frequency
codes of most current transmitters to
operate devices such as gate opera-
tors, garage door openers, entry
door locks, security systems, even
home lighting. Both standard and
rolling code-equipped transmitters
can be programmed by following the
outlined procedures. Additional
HomeLink
®information can be found
at: www.homelink.com or by calling
1-800-355-3515.
❈ HomeLink
®is a registered trade-
mark of Johnson Controls, Inc. Retain the original transmitter of the
RF device you are programming for
use in other vehicles as well as for
future HomeLink
®programming. It is
also suggested that upon the sale of
the vehicle, the programmed
HomeLink
®buttons be erased for
security purposes.
Page 186 of 593
Features of your vehicle
82
4
Gate operator & Canadian pro-
gramming
During programming, your handheld
transmitter may automatically stop
transmitting. Continue to press the
Integrated Hom eLink
®Wireless
Control System button (note steps 2
through 4 in the Standard
Programming portion of this docu-
ment) while you press and re-press
(“cycle”) your handheld transmitter
every two seconds until the frequen-
cy signal has been learned. The indi-
cator light will flash slowly and then
rapidly after several seconds upon
successful training.
Operating HomeLink®
To operate, simply press and release
the programmed HomeLink®button.
Activation will now occur for the
trained device (i.e. garage door
opener, gate operator, security sys-
tem, entry door lock, home/office
lighting, etc.). For convenience, the
hand-held transmitter of the device
may also be used at any time.
Reprogramming a single
HomeLink®button
To program a new device to a previ-
ously trained HomeLink®button, fol-
low these steps:
1. Press and hold the desired HomeLink
®button. Do NOT
release until step 4 has been com-
pleted.
2. When the indicator light begins to flash slowly (after 20 seconds),
position the handheld transmitter 2
to 8 cm (1 to 3 inches) away from
the HomeLink
®surface.
3. Press and hold the handheld transmitter button. The HomeLink
®
indicator light will flash, first slowly
and then rapidly.
4. When the indicator light begins to flash rapidly, release both buttons.
5. Press and hold the just-trained HomeLink
®button and observe
the red Status Indicator LED. If the
indicator light stays on constantly,
programming is complete and
your new device should activate.
Page 191 of 593
487
Features of your vehicle
Center (AUTO, 3):
The mirror will fold or unfold auto-
matically as follows:
The mirror will fold or unfold when the door is locked or unlocked by
the folding key or smart key.
The mirror will fold or unfold when the door is locked or unlocked by the
button on the outside door handle.
The mirror will unfold when you approach the vehicle (all doors
closed and locked) with a smart
key in possession. Manual type
To fold the outside rearview mirror,
grasp the housing of the mirror and
then fold it toward the rear of the
vehicle.
OYP044269N
CAUTION -Electric type
outside rearview mirror
The electric type outside rearview mirror operates eventhough the engine start/stopobutton is in the OFF position.However, to prevent unneces-sary battery discharge, do notadjust the mirrors longer thannecessary while the engine isnot running.
In case it is an electric type out-side rearview mirror, don’t fold itby hand. It could cause motorfailure.
Page 205 of 593

4101
Features of your vehicle
From the point at which the remain-
ing distance to drive amounts to
1,500 km (900 mi.) or the remaining
period amounts to 3 days, Service
Required message automatically
displays and remained on LCD
screen for a number of seconds
every time the engine start/stop but-
ton is ON.
With Service Required in place,
Service Required Alarm message
pops up when an aggregated
amount of miles/time driven reaches
a certain point.
With Service Required mode, press
OK button for more than 1 second.
The values will return to initial setting
values.❈
See User Settings
Mode in this chapter for further
information about Service Required
Setting.
❈ Service Required Setting
Battery Cable Disconnection, Fuse
Switch OFF, or Service Required
Setting values (an amount of
miles/time driven) can be randomly
changed. In such cases, re-enter
Service Required Setting values.Master Warning Mode
This warning light informs the driv- er of the following situations
- Forward Collision-Avoidance (if equipped) blockage
- Forward Collision-Avoidance (if equipped) malfunction
- Blind-Spot Collision Warning (if equipped) malfunction
- Blind-Spot Collision Warning (if equipped) blockage
- LED headlamp (if equipped) mal- function
- High Beam Assist (if equipped) malfunction
- Low engine oil
- Smart Cruise Control with Stop &Go (if equipped) blockage
- Smart Cruise Control with Stop & Go (if equipped) malfunction
Page 208 of 593
Features of your vehicle
104
4
Driver Attention Warning (DAW, if
equipped)
❈ For more details, refer to ‘Driver
Attention Warning (DAW)” in chap-
ter 5.
Blind Spot Collision Warning Timing (if equipped)
- Choose the sensitivity(Late/Normal/Fast) of the Blind
Spot Collision Warning Timing
control.
❈ For more details, refer to “Blind spot
Collision Warning” in chapter 5.
Blind Spot Collision Warning Sound (if equipped)
- If this item is checked, the blindspot collision warning sound
function will be activated.
❈ For more details, refer to “Blind spot
Collision Warning” in chapter 5. Rear Cross Traffic Collision
Warning (if equipped)
- If this item is checked, the reacross traffic collision warning will
be activated.
❈ For more details, refer to “Blind-spot
Collision Warning” in chapter 5. Door/Liftgate
Automatically Unlock :
- Disable : The auto door unlockoperation will be canceled.
- Vehicle Off : All doors will be automatically unlocked when the
Engine Star/Stop Button or igni-
tion switch is set to the OFF posi-
tion.
- On Shift to P : All doors will be automatically unlocked if the
automatic transmission shift lever
is shifted to the P (Park) position.
Two Press Unlock (if equipped) - If this item checked, the two pressunlock function will be activated.
(Only the driver’s door will unlock
when unlock button is pressed
once and all doors will unlock
when the same button is pressed
again within 4 seconds.)
Page 212 of 593
Features of your vehicle
108
4
Press start button while turn
steering (for smart key system)
This warning message illuminates if the steering wheel does not
unlock normally when the Engine
Start/Stop Button is pressed.
It means that you should press the Engine Start/Stop Button while turn-
ing the steering wheel right and left.
Steering wheel unlocked
(for smart key system)
This warning message illuminates if the steering wheel does not lock
when the Engine Start/Stop Button
changes to the OFF position.
Press brake pedal to start engine
(for smart key system)
This warning message illuminates if the Engine Start/Stop Button
changes to the ACC position twice
by pressing the button repeatedly
without depressing the brake pedal.
It means that you should depress the brake pedal to start the engine.
Check steering wheel lock sys-
tem (for smart key system)
This warning message illuminates if the steering wheel does not lock
normally when the Engine
Start/Stop Button changes to the
OFF position.
Key not in vehicle
(for smart key system)
This warning message illuminates if the smart key is not in the vehicle
when you press the Engine
Start/Stop Button.
It means that you should always have the smart key with you.
Key not detected
(for smart key system)
This warning message illuminates if the smart key is not detected
when you press the Engine
Start/Stop Button.
Page 219 of 593
4115
Features of your vehicle
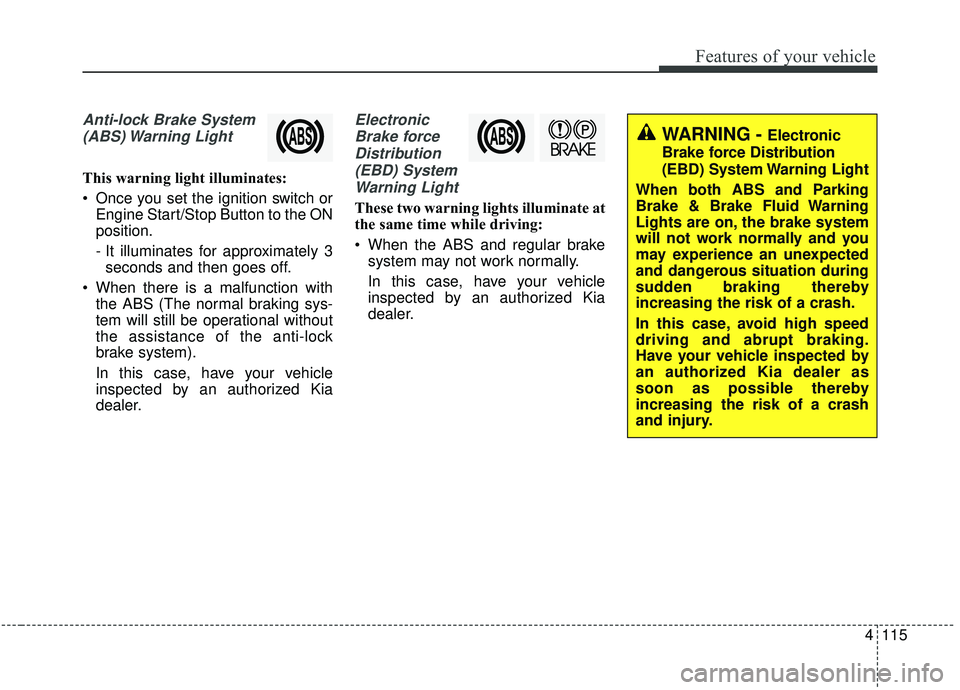
Anti-lock Brake System(ABS) Warning Light
This warning light illuminates:
Once you set the ignition switch or Engine Start/Stop Button to the ON
position.
- It illuminates for approximately 3seconds and then goes off.
When there is a malfunction with the ABS (The normal braking sys-
tem will still be operational without
the assistance of the anti-lock
brake system).
In this case, have your vehicle
inspected by an authorized Kia
dealer.
Electronic
Brake forceDistribution(EBD) SystemWarning Light
These two warning lights illuminate at
the same time while driving:
When the ABS and regular brake system may not work normally.
In this case, have your vehicle
inspected by an authorized Kia
dealer.
WARNING - Electronic
Brake force Distribution
(EBD) System Warning Light
When both ABS and Parking
Brake & Brake Fluid Warning
Lights are on, the brake system
will not work normally and you
may experience an unexpected
and dangerous situation during
sudden braking thereby
increasing the risk of a crash.
In this case, avoid high speed
driving and abrupt braking.
Have your vehicle inspected by
an authorized Kia dealer as
soon as possible thereby
increasing the risk of a crash
and injury.