2019 KIA SEDONA start stop button
[x] Cancel search: start stop buttonPage 15 of 593

INSTRUMENT PANEL OVERVIEW
25
Your vehicle at a glance
1. Electronic parking brake (EPB) ON/OFF button ....................................5-24
2. Driver’s front air bag ............................3-75
3. Horn.....................................................4-73
4. Instrument cluster ................................4-89
5. Wiper and washer control lever .........4-145
6. Ignition switch ........................................5-7 Engine start/stop button ......................5-10
7. Cruise control button ...........................5-59 Smart cruise control button .................5-63
8. Audio .................................................4-210
9. Hazard warning flasher .........................6-2
10. Climate control system.........4-152, 4-168
11. Shift lever...........................................5-14
12. Seat warmer ....................................4-196 Air ventilation seat ...........................4-197
13. Steering wheel warmer ON/OFF button ..................................4-72
14. Active ECO button .............................5-82 Drive mode button .............................5-83
15. Parking distance warning ON/OFF button ................................4-129
16. 360° camera monitoring system......4-134
17. Center console storage box ............4-193
18. Sunglasses holder ...........................4-194
19. USB charger ....................................4-201
20. Power outlet.....................................4-198
21. AC inverter ......................................4-199
22. Glove box ........................................4-193
23. Passenger's front air bag ..................3-75
24. Auto hold ON/OFF button..................5-30
OYP018004N
❈ The actual instrument panel in the vehicle may differ from the illustration
Page 28 of 593
Safety features of your vehicle
12
3
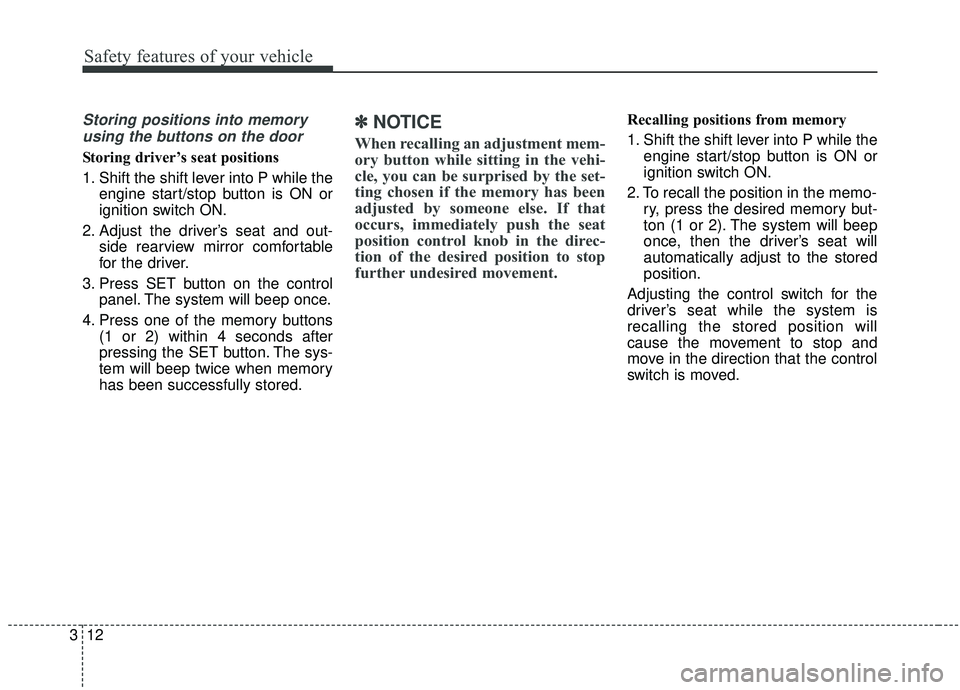
Storing positions into memory
using the buttons on the door
Storing driver’s seat positions
1. Shift the shift lever into P while the engine start/stop button is ON or
ignition switch ON.
2. Adjust the driver’s seat and out- side rearview mirror comfortable
for the driver.
3. Press SET button on the control panel. The system will beep once.
4. Press one of the memory buttons (1 or 2) within 4 seconds after
pressing the SET button. The sys-
tem will beep twice when memory
has been successfully stored.
✽ ✽NOTICE
When recalling an adjustment mem-
ory button while sitting in the vehi-
cle, you can be surprised by the set-
ting chosen if the memory has been
adjusted by someone else. If that
occurs, immediately push the seat
position control knob in the direc-
tion of the desired position to stop
further undesired movement.
Recalling positions from memory
1. Shift the shift lever into P while the
engine start/stop button is ON or
ignition switch ON.
2. To recall the position in the memo- ry, press the desired memory but-
ton (1 or 2). The system will beep
once, then the driver’s seat will
automatically adjust to the stored
position.
Adjusting the control switch for the
driver’s seat while the system is
recalling the stored position will
cause the movement to stop and
move in the direction that the control
switch is moved.
Page 29 of 593
313
Safety features of your vehicle
Easy access function (if equipped)
The system will move the driver's
seat automatically as follows:
Without smart key system
- It will move the driver’s seat rear-ward when the ignition key is
removed.
- It will move the driver’s seat for- ward when the ignition key is
inserted.
With smart key system - It will move the driver’s seat rear-ward when the engine start/stop
button is changed to the OFF
position.
- It will move the driver’s seat for- ward when the engine start/stop
button is changed to the ACC or
START position.
You can activate or deactivate this fea-
ture. Refer to "User settings" in chap-
ter 4.
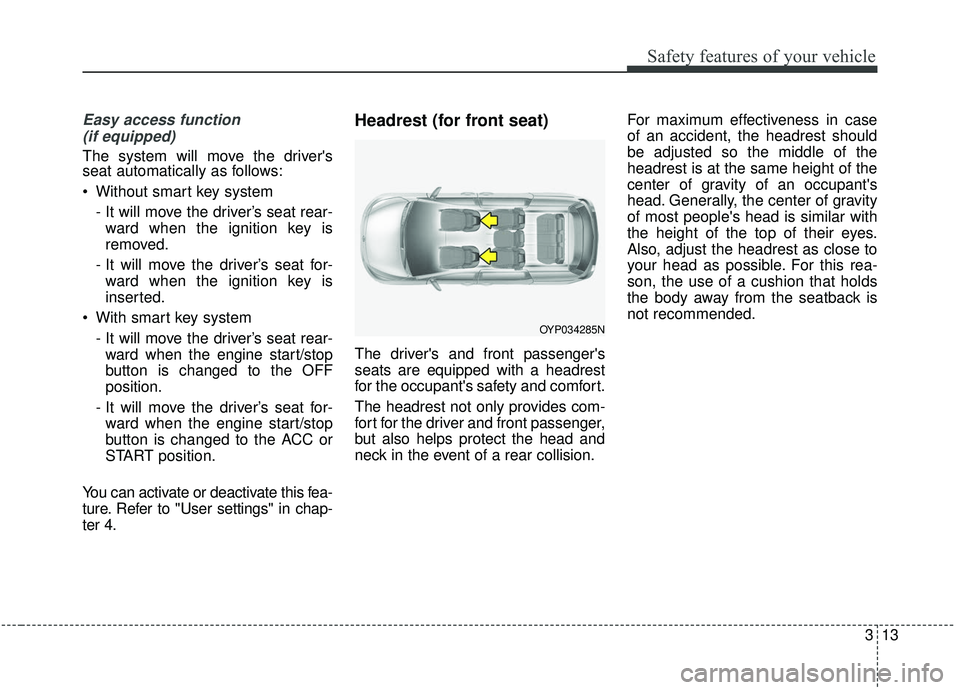
Headrest (for front seat)
The driver's and front passenger's
seats are equipped with a headrest
for the occupant's safety and comfort.
The headrest not only provides com-
fort for the driver and front passenger,
but also helps protect the head and
neck in the event of a rear collision. For maximum effectiveness in case
of an accident, the headrest should
be adjusted so the middle of the
headrest is at the same height of the
center of gravity of an occupant's
head. Generally, the center of gravity
of most people's head is similar with
the height of the top of their eyes.
Also, adjust the headrest as close to
your head as possible. For this rea-
son, the use of a cushion that holds
the body away from the seatback is
not recommended.
OYP034285N
Page 119 of 593
415
Features of your vehicle
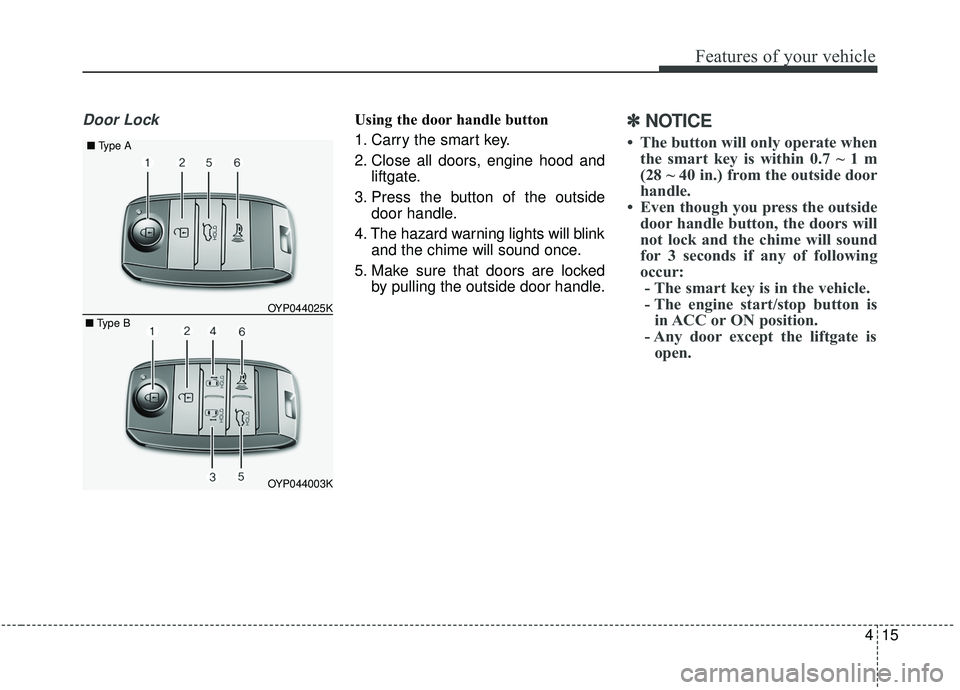
Door LockUsing the door handle button
1. Carry the smart key.
2. Close all doors, engine hood andliftgate.
3. Press the button of the outside door handle.
4. The hazard warning lights will blink and the chime will sound once.
5. Make sure that doors are locked by pulling the outside door handle.✽ ✽NOTICE
• The button will only operate when
the smart key is within 0.7 ~ 1 m
(28 ~ 40 in.) from the outside door
handle.
• Even though you press the outside door handle button, the doors will
not lock and the chime will sound
for 3 seconds if any of following
occur:- The smart key is in the vehicle.
- The engine start/stop button is in ACC or ON position.
- Any door except the liftgate is open.
OYP044003K
OYP044025K
■
Type A
■ Type B
Page 122 of 593
Features of your vehicle
18
4
Using the button on the smart key
1. Press the liftgate unlock button (5)
for more than 1 second.
2. When all doors are locked, the hazard warning lights will blink two
times.
For Power Liftgate Only:
The Power Liftgate will open if the
button is pressed for more than 1
second. Also, once the liftgate is
opened and then closed, the liftgate
will be locked again automatically.
If the power liftgate is switched ‘Off’
using the button in the overhead con-
sole, the liftgate unlock button will
operate to unlock the liftgate as
described above.
❈ For detailed information refer to
the “Power sliding door and power
liftgate”in this chapter.Panic
1. Press the panic button (6) for more
than 1 second.
2. The horn sounds and hazard warning light flash for about 27
seconds.
✽ ✽NOTICE
To stop the horn and lights, press
any button on the smart key.
Start-up
You can start the engine without
inserting the key.
❈ For detailed information refer to
the “Engine start/stop button” in
chapter 5.
Loss of the smart key
A maximum of 2 smart keys can be
registered to a single vehicle.
If you happen to lose your smart key,
you will not be able to start the
engine. You should immediately take
the vehicle and remaining key to your
authorized Kia dealer(tow the vehi-
cle, if necessary) to protect it from
potential theft.
Page 125 of 593
421
Features of your vehicle
Smart key immobilizer system
Your vehicle is equipped with an
electronic engine immobilizer system
to reduce the risk of unauthorized
vehicle use.
Your immobilizer system is com-
prised of a small transponder in the
smart key and electronic devices
inside the vehicle.
With the immobilizer system, when-
ever you turn the engine start/stop
button to the ON position by pressing
the button while carrying the smart
key, it checks and determines and
verifies if the smart key is valid or not.
If the key is determined to be valid,
the engine will start.
If the key is determined to be invalid,
the engine will not start.
To deactivate the immobilizersystem:
Turn the engine start/stop button to
the ON position by pressing the but-
ton while carrying the smart key.
To activate the immobilizer system:
Turn the engine start/stop button to
the OFF position. The immobilizer
system activates automatically.
Without a valid smart key for your
vehicle, the engine will not start.
✽ ✽ NOTICE
When starting the engine, do not use
the key with other immobilizer keys
around. Otherwise the engine may
not start or may stop soon after it
starts. Keep each key separate in
order to avoid a starting malfunction.
✽ ✽NOTICE
If you need additional keys or lose
your keys, contact an authorized
Kia dealer.
This device complies with
Industry Canada licence-exempt
RSS standard(s).
Operation is subject to the following
two conditions:
(1) This device may not cause inter-
ference, and
(2) This device must accept any
interference, including interfer-
ence that may cause undesired
operation of the device.
Page 128 of 593
Features of your vehicle
24
4
✽ ✽
NOTICE
• Avoid trying to start the engine
while the alarm is activated. The
vehicle starting motor is disabled
during the theft-alarm stage.
- If the system is not disarmed withthe transmitter, insert the key
into the ignition switch, turn the
ignition switch to the ON position
and wait for 30 seconds. Then the
system will be disarmed.
- If the system is not disarmed with the smart key, press the engine
start/stop button with smart key.
The side with the lock button
should contact the engine
start/stop button directly.
• If you lose your keys, consult your authorized Kia dealer.
✽ ✽ NOTICE
Malfunctions caused by improper
alterations, adjustments or modifi-
cations to the theft-alarm system are
not covered by your vehicle manu-
facturer warranty.
CAUTION - Adjusting
alarm system
Do not change, alter or adjust
the theft-alarm system becauseit could cause the theft-alarmsystem to malfunction andshould only be serviced by anauthorized Kia dealer.
Page 147 of 593
443
Features of your vehicle
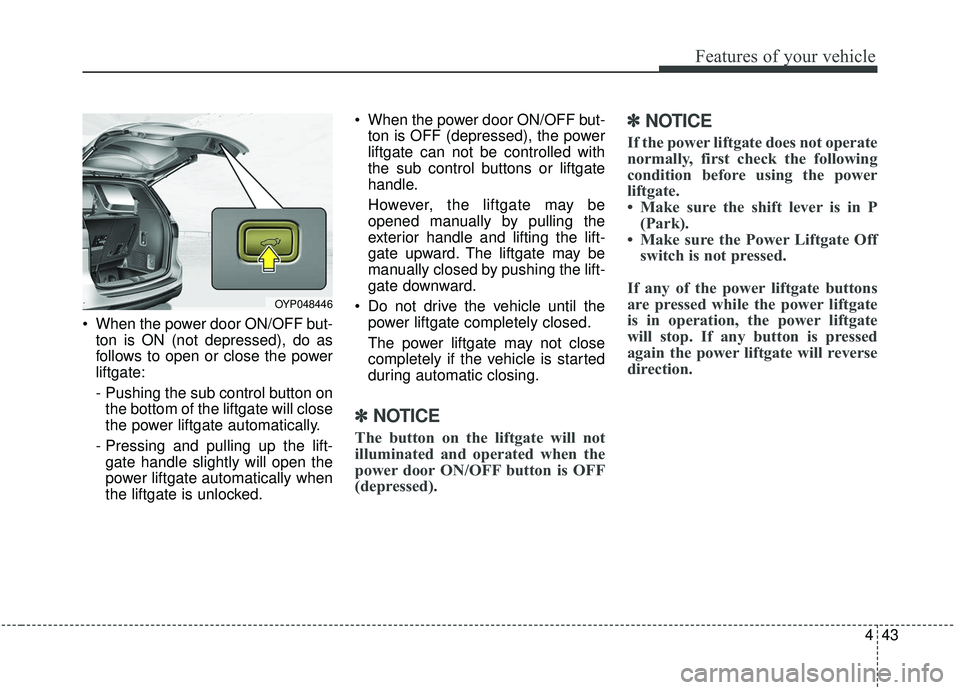
When the power door ON/OFF but-ton is ON (not depressed), do as
follows to open or close the power
liftgate:
- Pushing the sub control button onthe bottom of the liftgate will close
the power liftgate automatically.
- Pressing and pulling up the lift- gate handle slightly will open the
power liftgate automatically when
the liftgate is unlocked. When the power door ON/OFF but-
ton is OFF (depressed), the power
liftgate can not be controlled with
the sub control buttons or liftgate
handle.
However, the liftgate may be
opened manually by pulling the
exterior handle and lifting the lift-
gate upward. The liftgate may be
manually closed by pushing the lift-
gate downward.
Do not drive the vehicle until the power liftgate completely closed.
The power liftgate may not close
completely if the vehicle is started
during automatic closing.
✽ ✽ NOTICE
The button on the liftgate will not
illuminated and operated when the
power door ON/OFF button is OFF
(depressed).
✽ ✽NOTICE
If the power liftgate does not operate
normally, first check the following
condition before using the power
liftgate.
• Make sure the shift lever is in P
(Park).
• Make sure the Power Liftgate Off switch is not pressed.
If any of the power liftgate buttons
are pressed while the power liftgate
is in operation, the power liftgate
will stop. If any button is pressed
again the power liftgate will reverse
direction.
OYP048446