2019 KIA RIO HATCHBACK reset
[x] Cancel search: resetPage 79 of 503
Features of your vehicle
Keys . . . . . . . . . . . . . . . . . . . . . . . . . . . . . . . . . . . . \
. . 4-4
• Record your key number . . . . . . . . . . . . . . . . . . . . . . . 4-4
• Key operations . . . . . . . . . . . . . . . . . . . . . . . . . . . . . . . . 4-4
Smart key . . . . . . . . . . . . . . . . . . . . . . . . . . . . . . . . . 4-6
• Smart key functions . . . . . . . . . . . . . . . . . . . . . . . . . . . 4-6
• Smart key precautions . . . . . . . . . . . . . . . . . . . . . . . . . 4-8
Remote keyless entry . . . . . . . . . . . . . . . . . . . . . . . 4-10
• Remote keyless entry system operations . . . . . . . . . . 4-10
• Transmitter precautions . . . . . . . . . . . . . . . . . . . . . . . 4-11
• Battery replacement . . . . . . . . . . . . . . . . . . . . . . . . . . 4-12
• Immobilizer system . . . . . . . . . . . . . . . . . . . . . . . . . . . 4-14
• Limp home (override) procedure . . . . . . . . . . . . . . . 4-15
Theft-alarm system . . . . . . . . . . . . . . . . . . . . . . . . 4-16
• Armed stage . . . . . . . . . . . . . . . . . . . . . . . . . . . . . . . . . 4-16
• Theft-alarm stage . . . . . . . . . . . . . . . . . . . . . . . . . . . . 4-17
• Disarmed stage. . . . . . . . . . . . . . . . . . . . . . . . . . . . . . . 4-18
Door locks . . . . . . . . . . . . . . . . . . . . . . . . . . . . . . . . 4-19
• Operating door locks from outside the vehicle. . . . . 4-19
• Operating door locks from inside the vehicle . . . . . . 4-20
• Impact sensing door unlock system . . . . . . . . . . . . . . 4-22
• Auto door lock/unlock feature . . . . . . . . . . . . . . . . . . 4-22
• Speed sensing door lock system . . . . . . . . . . . . . . . . . 4-22
• Child-protector rear door lock. . . . . . . . . . . . . . . . . . 4-22
Trunk (for 4 door) . . . . . . . . . . . . . . . . . . . . . . . . . 4-24
• Opening the trunk . . . . . . . . . . . . . . . . . . . . . . . . . . . . 4-24
• Closing the trunk . . . . . . . . . . . . . . . . . . . . . . . . . . . . . 4-24
• Emergency trunk safety release . . . . . . . . . . . . . . . . . 4-25
Smart trunk (for 4 door) . . . . . . . . . . . . . . . . . . . . 4-26
Tailgate (for 5 door) . . . . . . . . . . . . . . . . . . . . . . . . 4-30
• Opening the tailgate . . . . . . . . . . . . . . . . . . . . . . . . . . 4-30
• Closing the tailgate . . . . . . . . . . . . . . . . . . . . . . . . . . . 4-30
• Emergency tailgate safety release . . . . . . . . . . . . . . . 4-31
Windows . . . . . . . . . . . . . . . . . . . . . . . . . . . . . . . . . 4-33
• Power windows . . . . . . . . . . . . . . . . . . . . . . . . . . . . . . 4-34
• Manual windows . . . . . . . . . . . . . . . . . . . . . . . . . . . . . 4-38
Hood. . . . . . . . . . . . . . . . . . . . . . . . . . . . . . . . . . . . \
. 4-39
• Opening the hood . . . . . . . . . . . . . . . . . . . . . . . . . . . . 4-39
• Closing the hood . . . . . . . . . . . . . . . . . . . . . . . . . . . . . 4-40
• Hood open warning . . . . . . . . . . . . . . . . . . . . . . . . . . . 4-40
Fuel filler lid . . . . . . . . . . . . . . . . . . . . . . . . . . . . . . 4-42
• Opening the fuel filler lid . . . . . . . . . . . . . . . . . . . . . . 4-42
• Closing the fuel filler lid . . . . . . . . . . . . . . . . . . . . . . . 4-42
Sunroof . . . . . . . . . . . . . . . . . . . . . . . . . . . . . . . . . . 4-45\
• Sunroof open warning. . . . . . . . . . . . . . . . . . . . . . . . . 4-46
• Sliding the sunroof . . . . . . . . . . . . . . . . . . . . . . . . . . . 4-47
• Tilting the sunroof . . . . . . . . . . . . . . . . . . . . . . . . . . . . 4-48
• Sunshade. . . . . . . . . . . . . . . . . . . . . . . . . . . . . . . . \
. . . . 4-49
• Resetting the sunroof . . . . . . . . . . . . . . . . . . . . . . . . . 4-49
4
SC CAN (ENG) 4.QXP 7/18/2018 5:45 PM Page 1
Page 113 of 503
435
Features of your vehicle
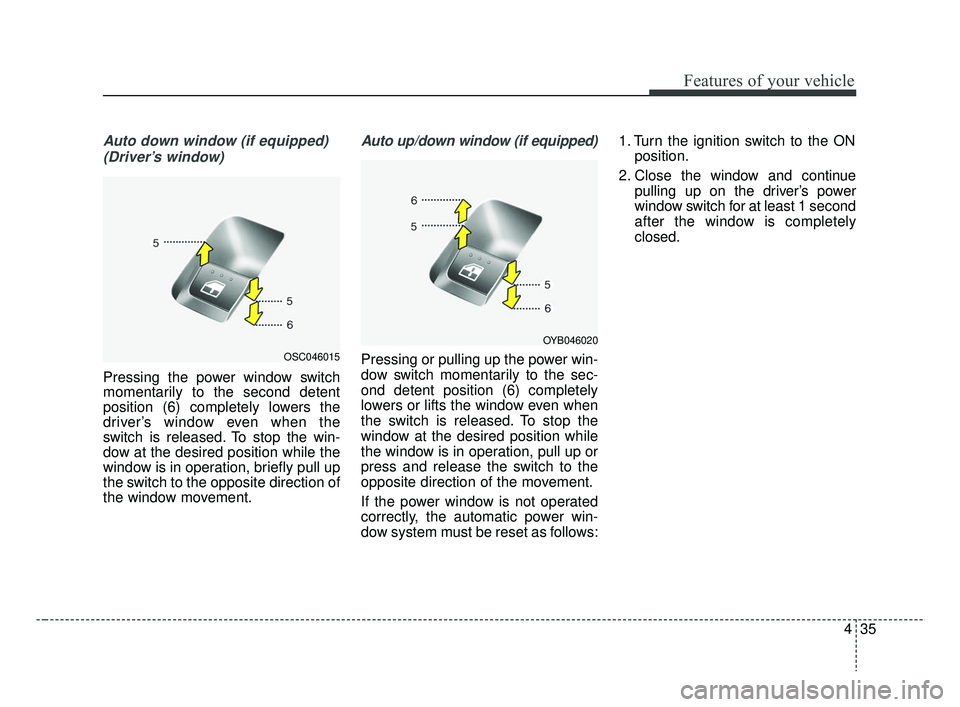
Auto down window (if equipped) (Driver’s window)
Pressing the power window switch
momentarily to the second detent
position (6) completely lowers the
driver’s window even when the
switch is released. To stop the win-
dow at the desired position while the
window is in operation, briefly pull up
the switch to the opposite direction of
the window movement.
Auto up/down window (if equipped)
Pressing or pulling up the power win-
dow switch momentarily to the sec-
ond detent position (6) completely
lowers or lifts the window even when
the switch is released. To stop the
window at the desired position while
the window is in operation, pull up or
press and release the switch to the
opposite direction of the movement.
If the power window is not operated
correctly, the automatic power win-
dow system must be reset as follows: 1. Turn the ignition switch to the ON
position.
2. Close the window and continue pulling up on the driver’s power
window switch for at least 1 second
after the window is completely
closed.OSC046015
OYB046020
SC CAN (ENG) 4.QXP 7/18/2018 5:46 PM Page 35
Page 114 of 503
Features of your vehicle
36
4
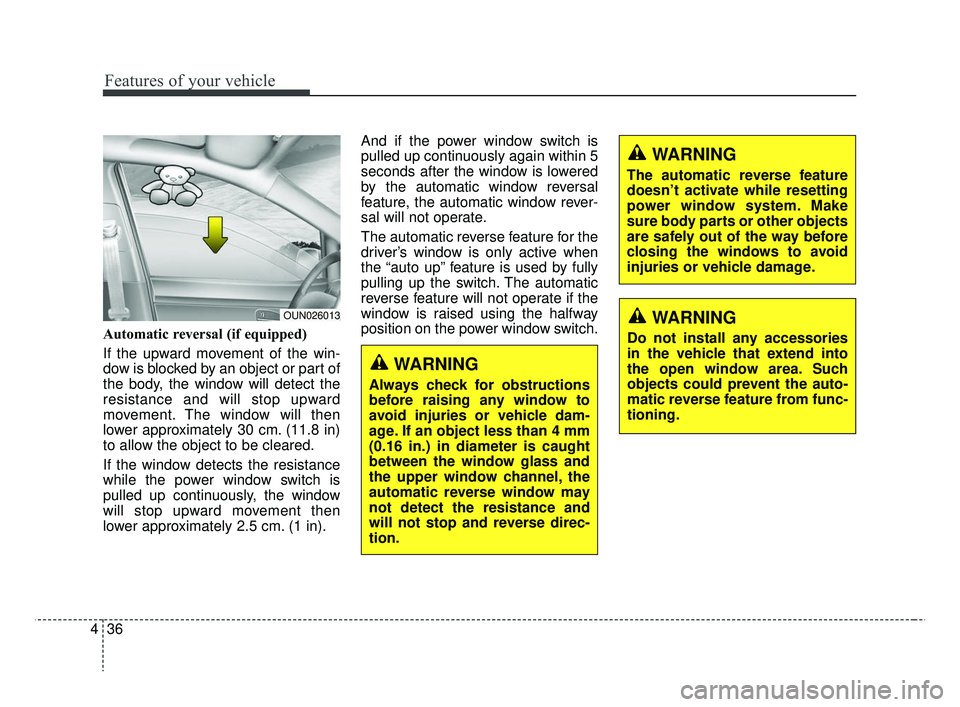
Automatic reversal (if equipped)
If the upward movement of the win-
dow is blocked by an object or part of
the body, the window will detect the
resistance and will stop upward
movement. The window will then
lower approximately 30 cm. (11.8 in)
to allow the object to be cleared.
If the window detects the resistance
while the power window switch is
pulled up continuously, the window
will stop upward movement then
lower approximately 2.5 cm. (1 in). And if the power window switch is
pulled up continuously again within 5
seconds after the window is lowered
by the automatic window reversal
feature, the automatic window rever-
sal will not operate.
The automatic reverse feature for the
driver’s window is only active when
the “auto up” feature is used by fully
pulling up the switch. The automatic
reverse feature will not operate if the
window is raised using the halfway
position on the power window switch.
WARNING
Always check for obstructions
before raising any window to
avoid injuries or vehicle dam-
age. If an object less than 4 mm
(0.16 in.) in diameter is caught
between the window glass and
the upper window channel, the
automatic reverse window may
not detect the resistance and
will not stop and reverse direc-
tion.
OUN026013
WARNING
The automatic reverse feature
doesn’t activate while resetting
power window system. Make
sure body parts or other objects
are safely out of the way before
closing the windows to avoid
injuries or vehicle damage.
WARNING
Do not install any accessories
in the vehicle that extend into
the open window area. Such
objects could prevent the auto-
matic reverse feature from func-
tioning.
SC CAN (ENG) 4.QXP 7/18/2018 5:47 PM Page 36
Page 127 of 503

449
Features of your vehicle
Sunshade
When opening the sunroof, the sun-
shade will also open. Once the sun-
roof is closed, the sunshade can be
manually closed.
Resetting the sunroof
Whenever the vehicle battery is dis-
connected or discharged, or related
fuse is blown, you must reset your
sunroof system as follows:
1.The ignition switch must be in theON position.
2.Close the sunroof completely.
3.Release the control lever.
4.Push the control lever forward until the sunroof tilts and slightly moves
up and down. Then, release lever.
5.Push the control lever forward until the sunroof is operated as follows:
TILT OPEN → SLIDE OPEN →
SLIDE CLOSE
Then, release the control lever.
✽ ✽ NOTICE
Do not release the lever until the
operation is completed.
If you release the lever during oper-
ation, try again from step 2.
CAUTION- Sunroof
motor damage
If you try to open the sunroofwhen the temperature is belowfreezing or when the sunroof iscovered with snow or ice, theglass or the motor could bedamaged.
WARNING- Sunroof
Be careful that no head, hands and body parts are obstructed
by a closing sunroof.
Do not extend the face, neck, arms or body outside the sun-
roof while driving.
OBK049019
SC CAN (ENG) 4.QXP 7/18/2018 5:47 PM Page 49
Page 128 of 503
Features of your vehicle
50
4
❈ For more detailed information,
contact an authorized Kia dealer.
✽ ✽
NOTICE
If the sunroof is not reset when the
vehicle battery is disconnected or
discharged, or related fuse is blown,
the sunroof may operate improperly.
SC CAN (ENG) 4.QXP 7/18/2018 5:47 PM Page 50
Page 136 of 503
Features of your vehicle
58
4
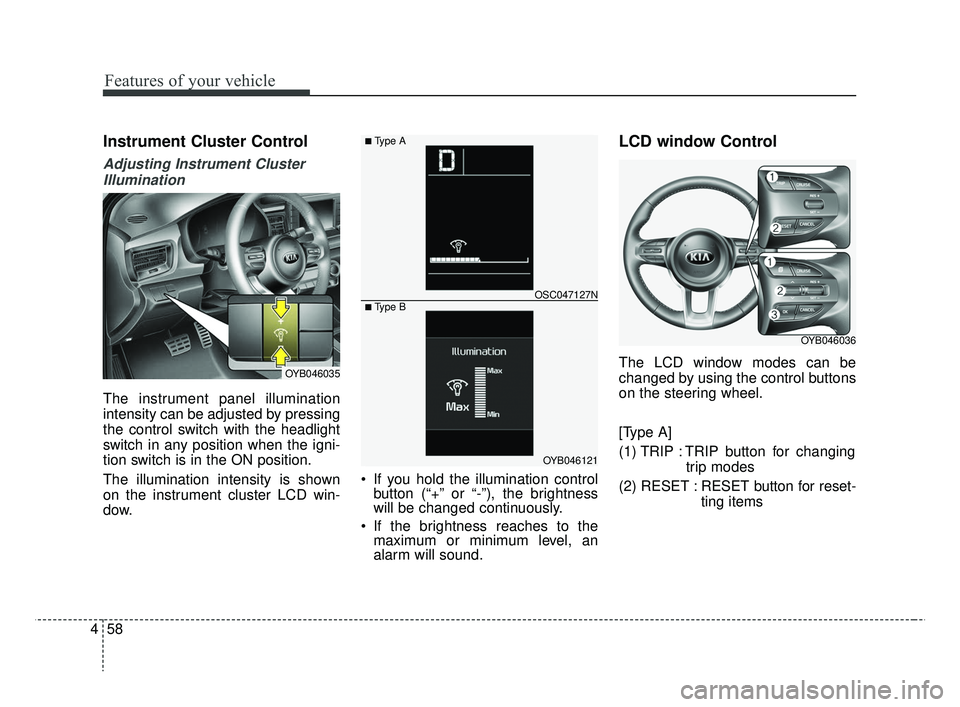
Instrument Cluster Control
Adjusting Instrument Cluster
Illumination
The instrument panel illumination
intensity can be adjusted by pressing
the control switch with the headlight
switch in any position when the igni-
tion switch is in the ON position.
The illumination intensity is shown
on the instrument cluster LCD win-
dow. If you hold the illumination control
button (“+” or “-”), the brightness
will be changed continuously.
If the brightness reaches to the maximum or minimum level, an
alarm will sound.
LCD window Control
The LCD window modes can be
changed by using the control buttons
on the steering wheel.
[Type A]
(1) TRIP : TRIP button for changing
trip modes
(2) RESET : RESET button for reset- ting itemsOYB046035
OYB046121
OSC047127N
■ Type A
■ Type B
OYB046036
SC CAN (ENG) 4.QXP 7/18/2018 5:48 PM Page 58
Page 137 of 503
![KIA RIO HATCHBACK 2019 Owners Manual 459
Features of your vehicle
[Type B]
(1) : MODE button for change theLCD MODES
(2) / : MOVE scroll switch for select the items
(3) OK : SET/RESET button for set the items or reset the items
❈ KIA RIO HATCHBACK 2019 Owners Manual 459
Features of your vehicle
[Type B]
(1) : MODE button for change theLCD MODES
(2) / : MOVE scroll switch for select the items
(3) OK : SET/RESET button for set the items or reset the items
❈](/manual-img/2/57981/w960_57981-136.png)
459
Features of your vehicle
[Type B]
(1) : MODE button for change theLCD MODES
(2) / : MOVE scroll switch for select the items
(3) OK : SET/RESET button for set the items or reset the items
❈ For the LCD modes, refer to “LCD
window” in this chapter.Gauges
Speedometer
The speedometer indicates the for-
ward speed of the vehicle.
The speedometer is calibrated in
miles per hour and/or kilometers per
hour.
Tachometer
The tachometer indicates the
approximate number of engine revo-
lutions per minute (rpm).
Use the tachometer to select the cor-
rect shift points and to prevent lug-
ging and/or over-revving the engine.
The tachometer pointer may move
slightly when the ignition switch is in
ACC or ON position with the engine
OFF. This movement is normal and
will not affect the accuracy of the
tachometer once the engine is run-
ning.OSC047448C
OYB046106
SC CAN (ENG) 4.QXP 7/18/2018 5:48 PM Page 59
Page 142 of 503

Features of your vehicle
64
4
Over view
LCD windows show the following var-
ious information to drivers.
- Trip information
- LCD modes
- Warning messages
Trip information (Trip computer)
The trip computer is a microcomput-
er-controlled driver information sys-
tem that displays information related
to driving.
✽ ✽
NOTICE
Some driving information stored in
the trip computer (for example
Average Vehicle Speed) resets if the
battery is disconnected.
Trip Modes
- For Type A cluster
LCD WINDOWS (IF EQUIPPED)
OSC046119
To change the trip mode, press the
TRIP button.
Elapsed Time [A]
TRIP A
TRIP B
FUEL ECONOMY
Service
Service
Speed
SC CAN (ENG) 4.QXP 7/18/2018 5:48 PM Page 64