Page 189 of 611
Features of your vehicle
54
4
1. Hybrid system gauge
2. Fuel gauge
3. Speedometer
4. Warning and indicator lights
5. LCD window
6. Battery SOC (State of Charge) gauge
7. Distance To Empty
ODEP047168N/ODEP047183N
■ ■
Type A for Plug-in Hybrid
❈For more details, refer to the “Gauges” in
this chapter.
■ ■
Type B for Plug-in Hybrid
❈ The actual cluster and contents of the LCD display in the vehicle may differ from the illustration.
Page 190 of 611
455
Features of your vehicle
ODEP047184N
■ ■Type B Sport mode for Plug-in Hybrid
1. Hybrid system gauge
2. Fuel gauge
3. Speedometer
4. Warning and indicator lights
5. LCD window
6. Battery SOC (State of Charge) gauge
❈For more details, refer to the “Gauges” in
this chapter.
❈ The actual cluster and contents of the LCD display in the vehicle may differ from the illustration.
Page 191 of 611
Features of your vehicle
56
4
Instrument Cluster Control
Adjusting Instrument Cluster
Illumination
The brightness of the instrument
panel illumination is changed by
pressing the illumination control but-
ton (“+” or “-”) when Engine
Start/Stop button is ON, or the tail-
lights are turned on. If you hold the illumination control
button (“+” or “-”), the brightness
will be changed continuously.
If the brightness reaches to the maximum or minimum level, an
alarm will sound.
LCD window control
The LCD window modes can be
changed by using the control buttons
on the steering wheel.
ODE047102N
OQLE045233 ODE046103
ODE046104
■Type A
■Type B
Page 198 of 611
463
Features of your vehicle
The outside temperature on the dis-
play may not change immediately
like a general thermometer to pre-
vent the driver from being distracted.
To change the temperature unit (from
°C to °F or from °F to °C)
The temperature unit can be
changed by using the “User Settings”
mode of the LCD window.
❈For more details, refer to “LCD
window” in this chapter.
■Type A-Drive mode
■Type B-Drive mode
■Type A-Sport mode
■Type B-Sport mode
ODE046141L/ODEP047191/ODE046140L/ODEP047215N
This indicator displays which shift lever is selected.
Dual clutch transmission shift indicator
Reverse : R
Neutral : N
Sports mode (if equipped) : S
Page 207 of 611

Features of your vehicle
72
4
Manual reset
To clear the average fuel economy
manually, press the OK button
(reset) on the steering wheel for
more than 1 second when the aver-
age fuel economy is displayed. Automatic reset
To make the average fuel economy
be reset automatically whenever
refueling, select the “Fuel economy
auto reset” mode in User Setting
menu of the LCD display (Refer to
“LCD window”).
OFF - You may set to default man-
ually by using the trip switch reset
button.
After ignition - The vehicle will automatically set to default once 4
hours pass after the Engine
start/stop button is turned to the
OFF position.
After refueling - After refueling more than 1.5 gallons (6 liters) and
driving over 1 mph (1 km/h), the
vehicle will reset to default auto-
matically.
✽ ✽ NOTICE
The average vehicle speed is not dis-
played, when the vehicle drives
shorter than 0.19 miles (300 meters)
or less than 10 seconds after turning
ON the Engine Start/Stop button.
Instant Fuel Economy (2)
This mode displays the instant fuel
economy during the last few sec-
onds when the vehicle speed is
more than 6.2 MPH (10 km/h).
- Fuel economy range : 0.0 ~ 50.0MPG or 0.0 ~ 30L/100km
Page 213 of 611

Features of your vehicle
78
4
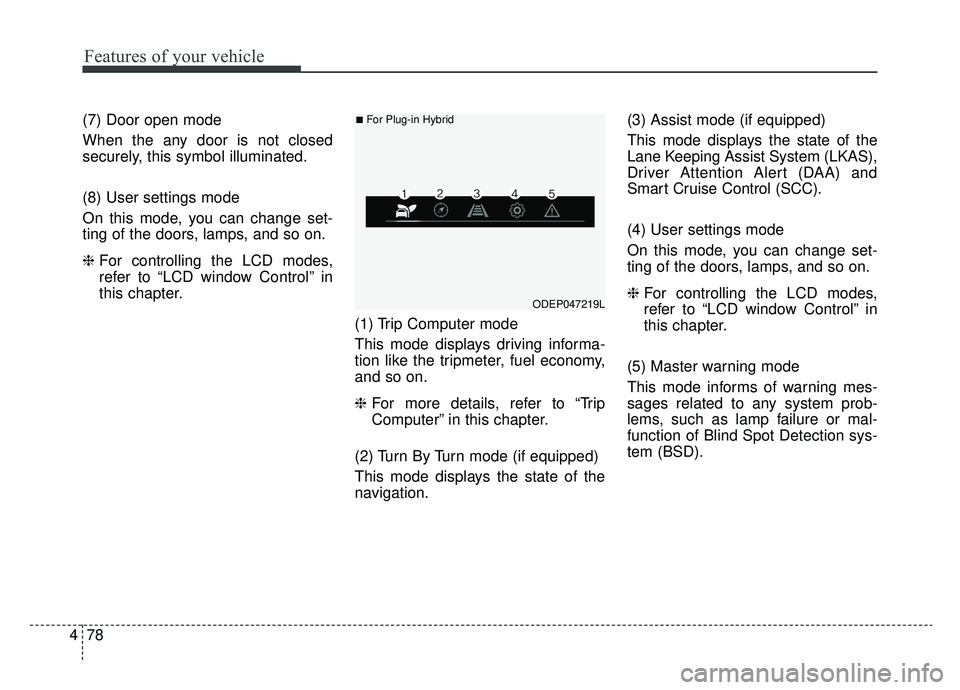
(7) Door open mode
When the any door is not closed
securely, this symbol illuminated.
(8) User settings mode
On this mode, you can change set-
ting of the doors, lamps, and so on.
❈ For controlling the LCD modes,
refer to “LCD window Control” in
this chapter.
(1) Trip Computer mode
This mode displays driving informa-
tion like the tripmeter, fuel economy,
and so on.
❈For more details, refer to “Trip
Computer” in this chapter.
(2) Turn By Turn mode (if equipped)
This mode displays the state of the
navigation. (3) Assist mode (if equipped)
This mode displays the state of the
Lane Keeping Assist System (LKAS),
Driver Attention Alert (DAA) and
Smart Cruise Control (SCC).
(4) User settings mode
On this mode, you can change set-
ting of the doors, lamps, and so on.
❈
For controlling the LCD modes,
refer to “LCD window Control” in
this chapter.
(5) Master warning mode
This mode informs of warning mes-
sages related to any system prob-
lems, such as lamp failure or mal-
function of Blind Spot Detection sys-
tem (BSD).
ODEP047219L
■For Plug-in Hybrid
Page 215 of 611

Features of your vehicle
80
4
Service Mode
Service in
This mode calculates and displays
when you need a scheduled mainte-
nance service (mileage or days).
If the remaining mileage or time
reaches 900 mi (1,500 km) or 30
days, respectively, “Service in” mes-
sage is displayed for several sec-
onds each time you set the ignition
switch or Engine Start/Stop Button to
the ON position. Service required
If you do not have your vehicle serv-
iced according to the already
inputted service interval, “Service
required” message is displayed for
several seconds each time you set
the ignition switch or Engine
Start/Stop Button to the ON position.
To reset the service interval to the
mileage and days you inputted
before:
- Press the OK button (reset) for
more than 1 second. Service interval OFF
If the service interval is not set,
“Service interval OFF” message is
displayed on the LCD window.
✽ ✽
NOTICE
If any of the following conditions
occurs, the mileage and days may be
incorrect.
- The battery cable is disconnected.
- The fuse switch is turned off.
- The battery is discharged.
OJFA045294
ODE047231N
ODE046169N
Page 253 of 611

Features of your vehicle
118
4
Auto light position
When the light switch is in the AUTO
light position, the taillights and head-
lights will turn ON or OFF automati-
cally depending on the amount of
light outside the vehicle.
When the light switch is positioned at
an auto light position, at first, the
wiper will turn on and then, after 5
seconds the head lamp will turn on
automatically.
If the head lamp has been turned on
due to this function of the vehicle, the
head lamp will turn off 60 seconds
after the wiper has been turned off.
High beam operation
To turn on the high beam headlamp,
push the lever away from you. The
lever will return to its original position.
The high beam indicator will light
when the headlight high beams are
switched on.
To prevent the battery from being
discharged, do not leave the lights
on for a prolonged time while the
engine is not running.
ODE046408NODE046460N
CAUTION
Never place anything over the
sensor (1) located on theinstrument panel as this willensure better auto-light sys-tem control.
Don’t clean the sensor using a window cleaner, the cleanermay leave a light film whichcould interfere with sensoroperation.
If your vehicle has window tint or other types of metallic coat-ing on the front windshield,the Auto light system may notwork properly.