2019 KIA NIRO light
[x] Cancel search: lightPage 290 of 611
4155
Features of your vehicle
Sunvisor
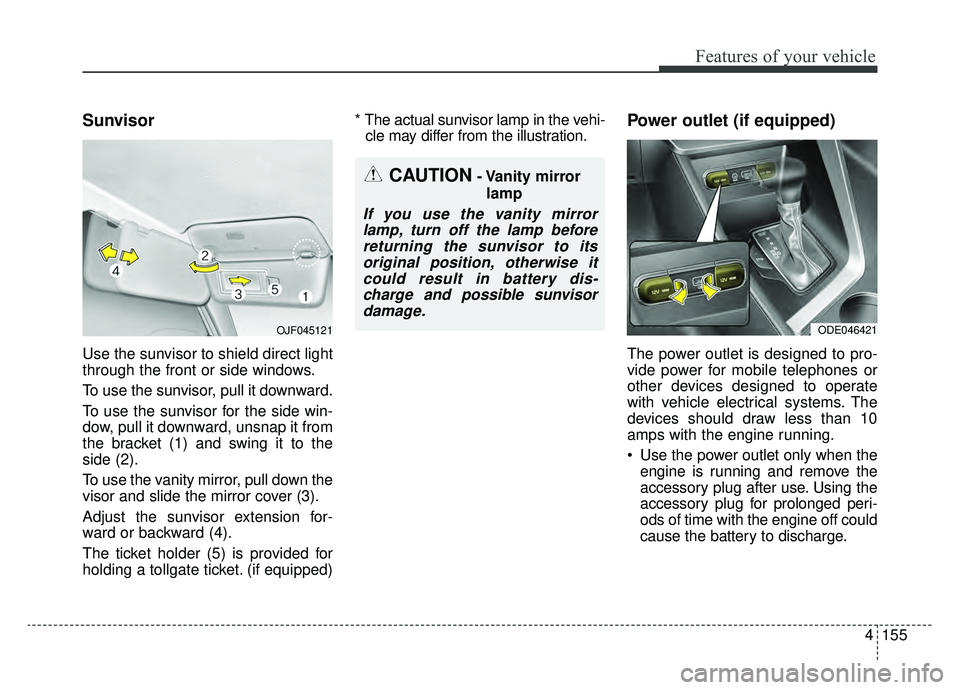
Use the sunvisor to shield direct light
through the front or side windows.
To use the sunvisor, pull it downward.
To use the sunvisor for the side win-
dow, pull it downward, unsnap it from
the bracket (1) and swing it to the
side (2).
To use the vanity mirror, pull down the
visor and slide the mirror cover (3).
Adjust the sunvisor extension for-
ward or backward (4).
The ticket holder (5) is provided for
holding a tollgate ticket. (if equipped)* The actual sunvisor lamp in the vehi-
cle may differ from the illustration.
Power outlet (if equipped)
The power outlet is designed to pro-
vide power for mobile telephones or
other devices designed to operate
with vehicle electrical systems. The
devices should draw less than 10
amps with the engine running.
Use the power outlet only when the engine is running and remove the
accessory plug after use. Using the
accessory plug for prolonged peri-
ods of time with the engine off could
cause the battery to discharge.
CAUTION- Vanity mirror
lamp
If you use the vanity mirrorlamp, turn off the lamp beforereturning the sunvisor to itsoriginal position, otherwise itcould result in battery dis-charge and possible sunvisordamage.
ODE046421OJF045121
Page 294 of 611
4159
Features of your vehicle
For best wireless charging results,
place the smart phone on the center
of the charging pad.
The wireless charging system is
designed for one smart phone
equipped with QI per single usage
only. Please refer to the smart phone
accessory cover or the smart phone
manufacturer homepage to check
whether your smart phone supports
QI function.Wireless smart phone charging
1. Remove any object on the smartphone charging pad including the
smart key. If there is any foreign
object on the pad other than a
smart phone, the wireless charging
function may not operate properly.
2. Place the smart phone on the cen- ter of the wireless charging pad.
3. The indicator light will change to orange once the wireless charging
begins. After the charging is com-
plete, the orange light will change
to green.
4. You can choose to turn the wireless charging function to either ON or
OFF by selecting the USM on the
instrument cluster. (Please refer to
“Instrument Cluster” for details).
If the wireless charging does not
work, gently move your smart phone
around the pad until the charging
indicator light turns orange.
Depending on the smart phone, the
charging indicator light may not turn
green even after the charging is com-
plete. If the wireless charging is not func-
tioning properly, the orange light will
blink and flash for ten seconds then
turn off. In such cases, remove the
smart phone from the pad and
replace it on the pad again, or double
check the charging status.
If you leave the smart phone on the
charging pad when the vehicle igni-
tion is in OFF, the vehicle will alert
you through warning messages and
sound (applicable for vehicles with
voice guidance function) after the
‘Good bye’ function on the instru-
ment cluster ends.
Page 296 of 611
4161
Features of your vehicle
(Continued)
• The wireless charging will stopwhen the vehicle is turned OFF.
• The wireless charging will stop when the smart phone is not in
complete contact with the wireless
charging pad.
• Items equipped with magnetic components such as credit card,
telephone card, bankbook or any-
transportation ticket may become
damaged during wireless charg-
ing.
• Place the smart phone on the cen- ter of the charge pad for best
results. The smart phone may not
charge when placed near the rim
of the charging pad. When the
smart phone does get charged, it
may heat up excessively.
• For smart phones without built-in wireless charging system, an
appropriate accessory has to be
equipped in order to use the vehi-
cle's wireless charging system. (Continued)(Continued)
• Smart phones of some manufac-
turers may display messages on
weak current. This is due to the
particular characteristic of the
smart phone and does not imply a
malfunction on wireless charging
function.
• The indicator light of some manu- facturers’ smart phones may still
be orange after the smart phone is
fully charged. This is due to the
particular characteristic of the
smart phone and not a malfunc-
tion of the wireless charging.
• When any smart phone without a wireless charging function or a
metallic object is placed on the
charging pad, a small noise may
sound. This small sound is due to
the vehicle discerning compatibili-
ty of the object placed on the
charging pad. It does not affect
your vehicle or the smart phone in
any way. This device complies with part 15
of the FCC Rules
Operation is subject to the follow-
ing two conditions:
(1) This device may not cause harm- ful interference, and
(2) this device must accept any inter- ference received, including inter-
ference that may cause unde-
sired operation.
Page 310 of 611
Audio system
95
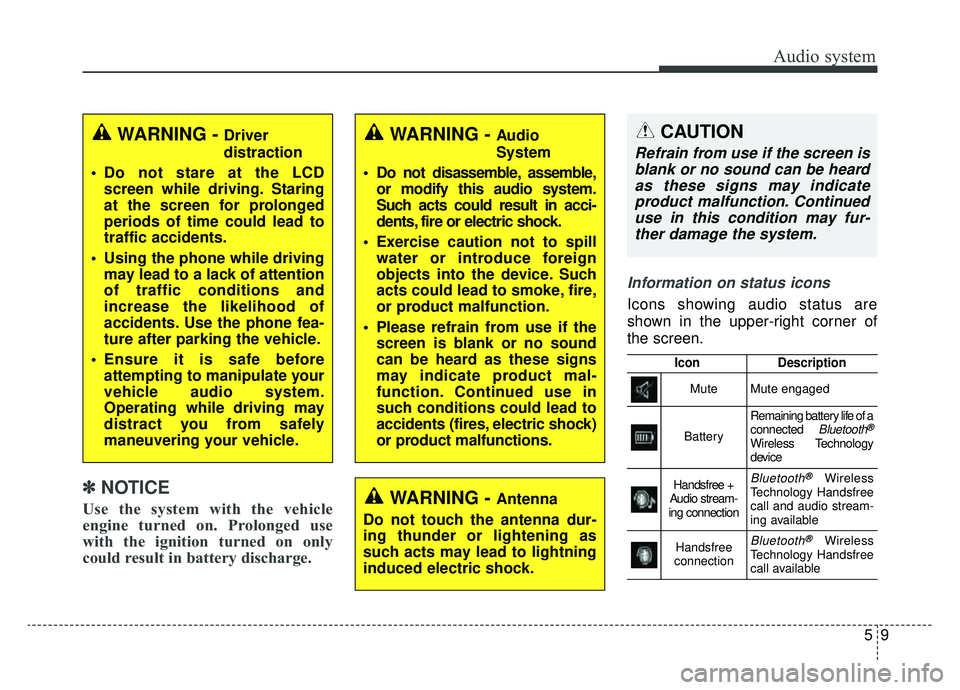
Information on status icons
Icons showing audio status are
shown in the upper-right corner of
the screen.
IconDescription
MuteMute engaged
Battery
Remaining battery life of a
connected Bluetooth®
Wireless Technology
device
Handsfree +
Audio stream-
ing connectionBluetooth®Wireless
Technology Handsfree
call and audio stream-
ing available
Handsfree
connectionBluetooth®Wireless
Technology Handsfree
call available
WARNING - Driver
distraction
Do not stare at the LCD screen while driving. Staring
at the screen for prolonged
periods of time could lead to
traffic accidents.
Using the phone while driving may lead to a lack of attention
of traffic conditions and
increase the likelihood of
accidents. Use the phone fea-
ture after parking the vehicle.
Ensure it is safe before attempting to manipulate your
vehicle audio system.
Operating while driving may
distract you from safely
maneuvering your vehicle.
WARNING - Antenna
Do not touch the antenna dur-
ing thunder or lightening as
such acts may lead to lightning
induced electric shock.
WARNING - Audio
System
Do not disassemble, assemble, or modify this audio system.
Such acts could result in acci-
dents, fire or electric shock.
Exercise caution not to spill water or introduce foreign
objects into the device. Such
acts could lead to smoke, fire,
or product malfunction.
Please refrain from use if the screen is blank or no sound
can be heard as these signs
may indicate product mal-
function. Continued use in
such conditions could lead to
accidents (fires, electric shock)
or product malfunctions.CAUTION
Refrain from use if the screen isblank or no sound can be heardas these signs may indicateproduct malfunction. Continueduse in this condition may fur-ther damage the system.
✽ ✽ NOTICE
Use the system with the vehicle
engine turned on. Prolonged use
with the ignition turned on only
could result in battery discharge.
Page 333 of 611
![KIA NIRO 2019 Owners Manual Audio system
532
Setup
Access Display, Sound, Date/Time,
Bluetooth, System, Screen Saver
and Display Off settings.
Press the [SETUP]button on the
audio system.
Display
Press the [SETUP] button on the KIA NIRO 2019 Owners Manual Audio system
532
Setup
Access Display, Sound, Date/Time,
Bluetooth, System, Screen Saver
and Display Off settings.
Press the [SETUP]button on the
audio system.
Display
Press the [SETUP] button on the](/manual-img/2/54812/w960_54812-332.png)
Audio system
532
Setup
Access Display, Sound, Date/Time,
Bluetooth, System, Screen Saver
and Display Off settings.
Press the [SETUP]button on the
audio system.
Display
Press the [SETUP] button on the
audio system ➟ Select [Display].
Mode - Adjusts the brightness automati-cally according to surrounding
brightness.
- Brightness is automatically adjust- ed according to the headlight
use.
Illumination: The brightness of the audio screen can be changed.
✽ ✽ NOTICE
Mode display settings may differ
according to vehicle model.
Sound
Press the [SETUP] button on the
audio system ➟ Select [Sound].
Position: Sound balance and fader can be adjusted.
Tone: Sound tone color can be adjusted.
Speed Dependent Volume: Automatically adjust volume based
on vehicle speed.
Beep: Select whether to play a beep sound when the screen is
touched.
Date/Time
Press the [SETUP] button on the
audio system ➟ Select [Date/Time].
Set Time: Set the time displayed on the audio screen.
Time Format: Choose between 12- hour and 24-hour time formats.
Set Date: Set the date displayed on the audio screen.
Page 340 of 611

Driving your vehicle
46
Before entering vehicle
• Be sure that all windows, outsidemirror(s), and outside lights are
clean.
Check the condition of the tires.
Check under the vehicle for any sign of leaks.
Be sure there are no obstacles behind you if you intend to back up.
Necessary inspections
Fluid levels, such as engine oil,
engine coolant, brake fluid, and
washer fluid should be checked on a
regular basis, at the exact interval
depending on the fluid. Further
details are provided in chapter 8,
“Maintenance”.
Before starting
Close and lock all doors.
Position the seat so that all con-trols are easily reached.
Buckle your seat belt.
Adjust the inside and outside rearview mirrors.
Be sure that all lights work.
Check all gauges.
Check the operation of warning lights when the engine start/stop
button is turned to the ON position.
Release the parking brake and make sure the brake warning light
goes out.
For safe operation, be sure you are
familiar with your vehicle and its
equipment.
BEFORE DRIVING
WARNING - Distracted driving
Focus on the road while driving.
The driver's primary responsi-
bility is in the safe and legal
operation of the vehicle. Use of
any handled devices, other
equipment or vehicle systems
that distract the driver should
not be used during vehicle
operation.
Page 342 of 611

Driving your vehicle
66
Illuminated ignition switch
(if equipped)
Whenever a front door is opened, the
ignition switch will illuminate for your
convenience, provided the ignition
switch is not in the ON position. The
light will go off immediately when the
ignition switch is turned on. It will
also go off after about 30 seconds
when the door is closed.
Ignition switch position
LOCK
From the left dot, dot sequence is
LOCK-ACC-ON-START.
The ignition key can be removed only
in the LOCK position.
ACC (Accessory)
The electrical accessories are opera-
tive. If difficulty is experienced turn-
ing the ignition switch to the ACC
position, turn the key while turning
the steering wheel right and left to
release the tension.
ON
The warning lights can be checked
before the engine is started. This is
the normal running position after the
engine is started.
Do not leave the ignition switch ON ifthe engine is not running to preventbattery discharge.
START
Turn the ignition switch to the START
position to start the engine. The
engine will crank until you release
the key; then it returns to the ON
position. The brake warning light can
be checked in this position.
The anti-theft steering column lock (if
equipped) is not a substitute for the
parking brake. Before leaving the dri-
ver’s seat, always make sure the shift
lever is engaged in P (Park) for dual
clutch transmission, set the parking
brake fully and shut the engine off.
Unexpected and sudden vehicle
movement may occur if these pre-
cautions are not taken.
KEY POSITIONS (IF EQUIPPED)
OQLE055065OQLE055066
Page 345 of 611
69
Driving your vehicle
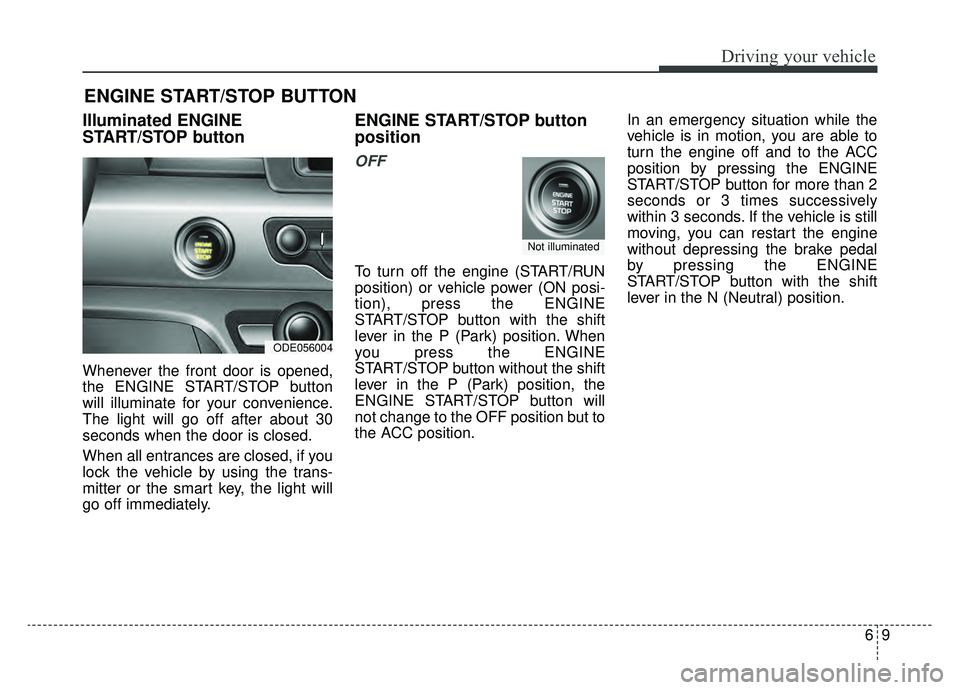
Illuminated ENGINE
START/STOP button
Whenever the front door is opened,
the ENGINE START/STOP button
will illuminate for your convenience.
The light will go off after about 30
seconds when the door is closed.
When all entrances are closed, if you
lock the vehicle by using the trans-
mitter or the smart key, the light will
go off immediately.
ENGINE START/STOP button
position
OFF
To turn off the engine (START/RUN
position) or vehicle power (ON posi-
tion), press the ENGINE
START/STOP button with the shift
lever in the P (Park) position. When
you press the ENGINE
START/STOP button without the shift
lever in the P (Park) position, the
ENGINE START/STOP button will
not change to the OFF position but to
the ACC position.In an emergency situation while the
vehicle is in motion, you are able to
turn the engine off and to the ACC
position by pressing the ENGINE
START/STOP button for more than 2
seconds or 3 times successively
within 3 seconds. If the vehicle is still
moving, you can restart the engine
without depressing the brake pedal
by pressing the ENGINE
START/STOP button with the shift
lever in the N (Neutral) position.
ENGINE START/STOP BUTTON
ODE056004
Not illuminated