2019 JEEP PATRIOT lights
[x] Cancel search: lightsPage 66 of 332

•Commands..................................86
•Voice Training.................................88
•SEATS ......................................88•Power Seats — If Equipped........................88
•Heated Seats — If Equipped........................89
•Manual Front Seat Adjustment.......................90
•Manual Seat Height Adjustment — If Equipped.............90
•Manual Lumbar — If Equipped......................91
•Driver’s Seatback Recline.........................91
•Fold-Flat Front Passenger Seat — If Equipped.............92
•Head Restraints...............................92
•Folding Rear Seat..............................94
•Reclining Rear Seat — If Equipped....................95
•TO OPEN AND CLOSE THE HOOD . ....................95
•LIGHTS......................................96
•Multifunction Lever.............................96
•Headlights And Parking Lights......................96
•Daytime Running Lights — If Equipped.................97
•Lights-On Reminder.............................97
•Front Fog Lights...............................97
•Rear Fog Lights................................97
•Turn Signals.................................97
•Lane Change Assist.............................98
•High/Low Beam Switch...........................98
•Flash-To-Pass................................98
•Instrument Panel Dimmer..........................98
•Headlight Leveling System — If Equipped................98
62
Page 67 of 332

•Map/Reading/Lights...........................99•WINDSHIELD WIPERS AND WASHERS . . . . . . .. . . . . . . .100•Windshield Wiper Operation.....................100
•Intermittent Wiper System......................100
•Windshield Washers..........................101
•Mist Feature...............................101
•TILT STEERING COLUMN . . . . . . . . . . . . . . . . . . . . . . . .101
•ELECTRONIC SPEED CONTROL — IF EQUIPPED . . . . .. . . .102
•To Activate................................102
•To Set A Desired Speed........................103
•To Deactivate..............................103
•To Resume Speed...........................103
•To Vary The Speed Setting......................103
•Manual Transmission..........................104
•To Accelerate For Passing......................104
•PARKVIEW REAR BACK UP CAMERA — IF EQUIPPED . . . . .104
•POWER SUNROOF — IF EQUIPPED . . .. . . . . . . . . . . . . .106
•Opening Sunroof — Express.....................106
•Opening Sunroof — Manual Mode..................106
•Closing Sunroof — Express......................106
•Closing Sunroof — Manual Mode..................107
•Pinch Protect Feature.........................107
•Venting Sunroof — Express......................107
•Sunshade Operation..........................107
•Wind Buffeting.............................107
•Sunroof Maintenance..........................107
•Ignition Off Operation.........................107
63
Page 93 of 332

WARNING!
•Adjusting a seat while driving may be
dangerous. Moving a seat while driving
could result in loss of control which could
cause a collision and serious injury or
death.
•Seats should be adjusted before fastening
the seat belts and while the vehicle is
parked. Serious injury or death could result
from a poorly adjusted seat belt.
CAUTION!
Do not place any article under a power seat
or impede its ability to move as it may cause
damage to the seat controls. Seat travel may
become limited if movement is stopped by an
obstruction in the seat’s path.
Adjusting The Seat Forward Or Rearward
The seat can be adjusted both forward and
rearward. Push the seat switch forward or rear-
ward. The seat will move in the direction of theswitch. Release the switch when the desired
position has been reached.
Adjusting The Seat Up Or Down
The height of the seats can be adjusted up or
down. Pull upward or push downward on the
seat switch. The seat will move in the direction
of the switch. Release the switch when the
desired position is reached.
Tilting The Seat Up Or Down
The angle of the seat cushion can be adjusted
in four directions. Pull upward or push down-
ward on the front or rear of the seat switch, the
front or rear of the seat cushion will move in the
direction of the switch. Release the switch when
the desired position is reached.
Heated Seats — If EquippedOn some models, the front driver and passen-
ger seats may be equipped with heaters in both
the seat cushions and seatbacks. The controls
for the front heated seats are located on the
center instrument panel area.
You can choose from HI, LO or OFF heat
settings. Amber indicator lights in each switchindicate the level of heat in use. Two indicator
lights will illuminate for HI, one for LO and none
for OFF.
Push the switch once to select HI-
level heating. Push the switch a sec-
ond time to select LO-level heating.
Push the switch a third time to shut
the heating elements OFF.
When the HI-level setting is selected, the heater
will provide a boosted heat level during the
initial stages of operation. Then, the heat output
will drop to the normal HI-level. If the HI-level
setting is selected, the system will automatically
switch to LO-level after approximately 30 min-
utes of continuous operation. At that time, the
display will change from HI to LO, indicating the
change. When the LO-level heating is selected,
the system automatically turns the heater and
the indicator light OFF after approximately 30
minutes of continuous operation.
NOTE:
Once a heat setting is selected, heat will be
felt within two to five minutes.
89
Page 100 of 332

CAUTION!
To prevent possible damage:
•Before closing hood, make sure the hood
prop rod is fully seated into its storage
retaining clips.
•
Do not slam the hood to close it. Use a firm
downward push at the center front edge of the
hood to ensure that both latches engage.
Never drive your vehicle unless the hood is
fully closed, with both latches engaged.
WARNING!
Be sure the hood is fully latched before
driving your vehicle. If the hood is not fully
latched, it could open when the vehicle is in
motion and block your vision. Failure to
follow this warning could result in serious
injury or death.
LIGHTS
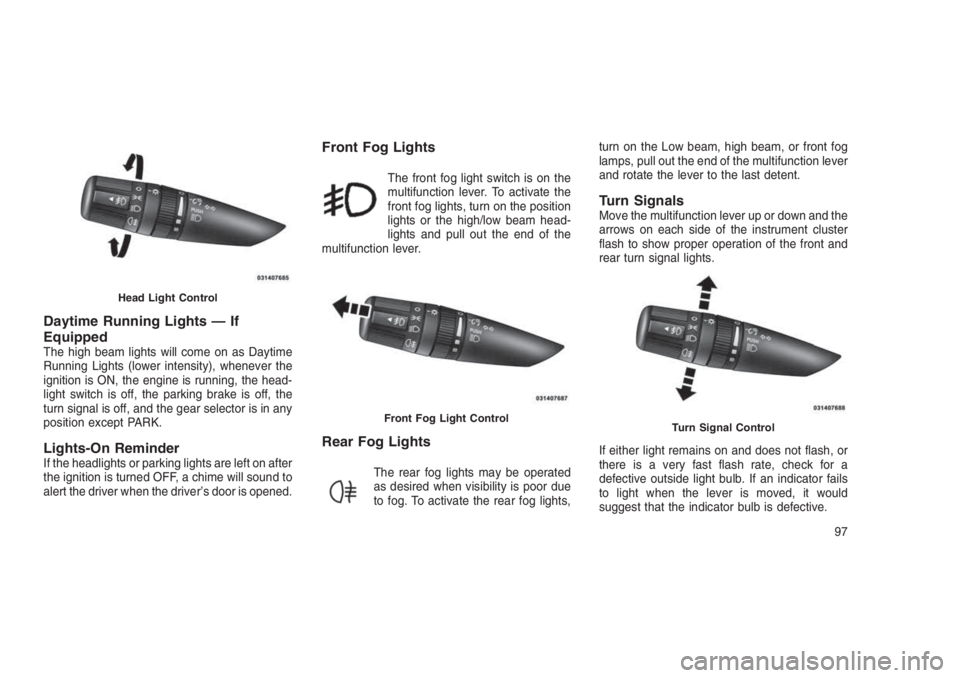
Multifunction LeverThe multifunction lever controls the operation of
the headlights, position lights, side marker
lights, turn signals, headlight beam selection,
instrument panel light dimming, interior lights,
the passing lights and fog lights. The lever is
located on the left side of the steering column.Headlights And Parking LightsTurn the end of the multifunction lever to the first
detent to activate parking lights. Turn to the
second detent for headlight operation.
Prop Rod LocationMultifunction Lever
96
Page 101 of 332

Daytime Running Lights — If
Equipped
The high beam lights will come on as Daytime
Running Lights (lower intensity), whenever the
ignition is ON, the engine is running, the head-
light switch is off, the parking brake is off, the
turn signal is off, and the gear selector is in any
position except PARK.
Lights-On ReminderIf the headlights or parking lights are left on after
the ignition is turned OFF, a chime will sound to
alert the driver when the driver’s door is opened.
Front Fog Lights
The front fog light switch is on the
multifunction lever. To activate the
front fog lights, turn on the position
lights or the high/low beam head-
lights and pull out the end of the
multifunction lever.
Rear Fog Lights
The rear fog lights may be operated
as desired when visibility is poor due
to fog. To activate the rear fog lights,turn on the Low beam, high beam, or front fog
lamps, pull out the end of the multifunction lever
and rotate the lever to the last detent.
Turn SignalsMove the multifunction lever up or down and the
arrows on each side of the instrument cluster
flash to show proper operation of the front and
rear turn signal lights.
If either light remains on and does not flash, or
there is a very fast flash rate, check for a
defective outside light bulb. If an indicator fails
to light when the lever is moved, it would
suggest that the indicator bulb is defective.
Head Light Control
Front Fog Light ControlTurn Signal Control
97
Page 102 of 332

Lane Change AssistTap the lever up or down once, without moving
beyond the detent, and the turn signal (right or
left) will flash three times then automatically turn
off.
High/Low Beam SwitchPush the multifunction lever away from you to
switch the headlights to high beam. Pull the
multifunction lever toward you to switch the
headlights back to low beam.
Flash-To-PassYou can signal another vehicle with your head-
lights by lightly pulling the multifunction lever
toward you. This will turn on the high beam
headlights until the lever is released.
NOTE:
If the multifunction lever is held in the flash-
to-pass position for more than 15 seconds,
the high beams will shut off. If this occurs,
wait 30 seconds for the next flash-to-pass
operation.
Instrument Panel DimmerRotate the center portion of the lever to the
extreme bottom position to fully dim the instru-
ment panel lights and prevent the interior lights
from illuminating when a door is opened.
Rotate the center portion of the lever up to
increase the brightness of the instrument panel
lights when the position lights or headlights are
on.
Rotate the center portion of the lever upward to
the next detent position to brighten the odom-
eter and radio when the position lights or head-
lights are on.
Rotate the center portion of the lever upward to
the last detent to turn on the interior lighting.
Headlight Leveling System — If
Equipped
This system allows the driver to maintain proper
headlight beam position with the road surface
regardless of vehicle load.
The headlight leveling switch is located on the
instrument panel below the radio.
To operate: push the headlight lev-
eling switch until the appropriate
number, which corresponds to the
load listed on the following chart,
illuminates on the switch.
Dimmer Control
98
Page 103 of 332

0Driver only, or driver
and front passen-
ger.
1All seating positions
occupied.
2All seating positions
occupied, plus an
evenly distributed
load in the luggage
compartment. The
total weight of pas-
sengers and load
does not exceed the
maximum load ca-
pacity of the ve-
hicle.
3Driver, plus an
evenly distributed
load in the luggage
compartment. The
total weight of the
driver and load
does not exceed the
maximum load ca-
pacity of the ve-
hicle.
Calculations based
on a passenger
weight of 165 lbs
(75 kg).
Map/Reading/LightsThese lights are mounted above the rear view
mirror. Each light is turned on by pushing on the
light itself or a button next to the light (if
equipped). Push the light/button a second time
to turn the light off.The lights also come on when a door is opened
or the dimmer control is turned fully upward,
past the second detent.
NOTE:
The lights will remain on until the switch is
pushed a second time, so be sure they have
been turned off before leaving the vehicle.
They will not turn off automatically.
Map/Reading Lights
99
Page 113 of 332

CAUTION!
•Many accessories that can be plugged in
draw power from the vehicle’s battery,
even when not in use (i.e., cellular phones,
etc.). Eventually, if plugged in long enough,
the vehicle’s battery will discharge suffi-
ciently to degrade battery life and/or pre-
vent the engine from starting.
•Accessories that draw higher power (i.e.,
coolers, vacuum cleaners, lights, etc.) will
degrade the battery even more quickly.
Only use these intermittently and with
great caution.
•After the use of high power draw accesso-
ries, or long periods of the vehicle not
being started (with accessories still
plugged in), the vehicle must be driven a
sufficient length of time to allow the gen-
erator to recharge the vehicle’s battery.CUPHOLDERS
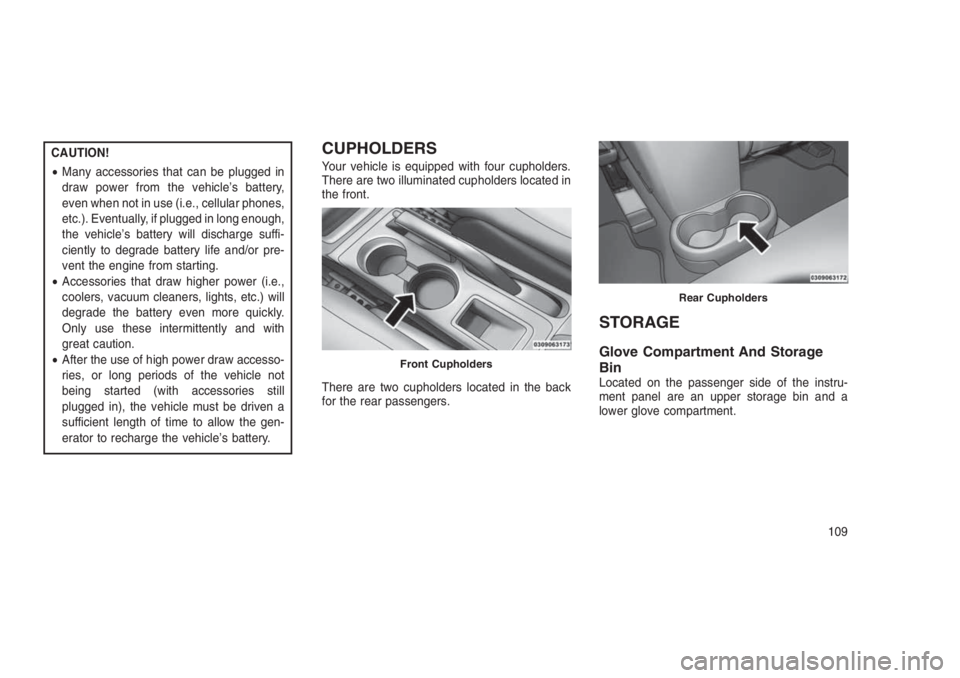
Your vehicle is equipped with four cupholders.
There are two illuminated cupholders located in
the front.
There are two cupholders located in the back
for the rear passengers.
STORAGE
Glove Compartment And Storage
Bin
Located on the passenger side of the instru-
ment panel are an upper storage bin and a
lower glove compartment.
Front Cupholders
Rear Cupholders
109