Page 31 of 344

The RHRs will automatically return to their
normal position following a rear impact. If the
RHRs do not return to their normal position,
see your authorized dealer immediately.
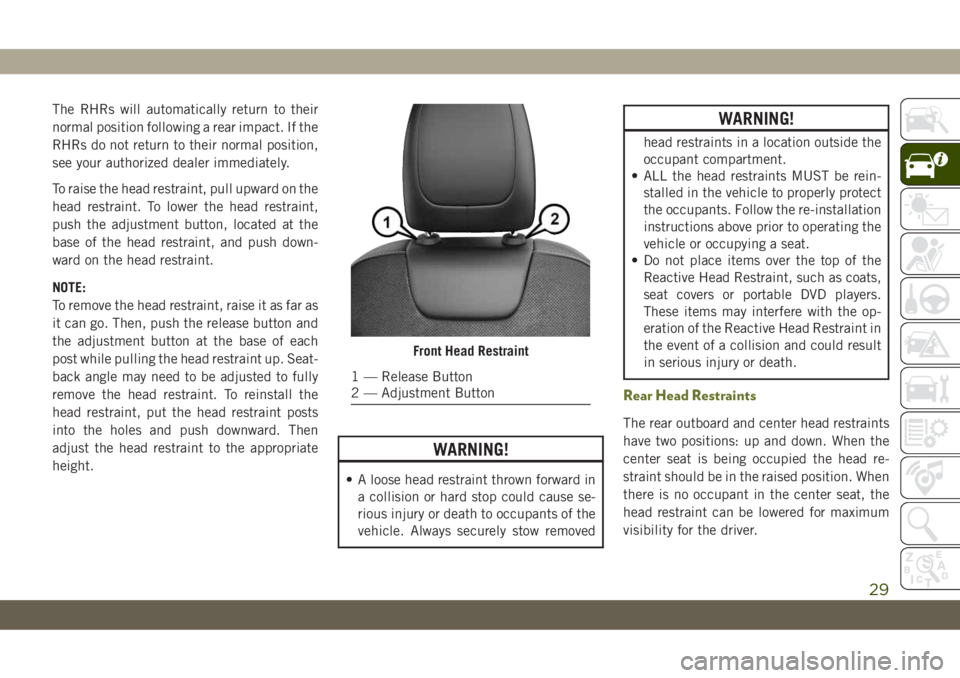
To raise the head restraint, pull upward on the
head restraint. To lower the head restraint,
push the adjustment button, located at the
base of the head restraint, and push down-
ward on the head restraint.
NOTE:
To remove the head restraint, raise it as far as
it can go. Then, push the release button and
the adjustment button at the base of each
post while pulling the head restraint up. Seat-
back angle may need to be adjusted to fully
remove the head restraint. To reinstall the
head restraint, put the head restraint posts
into the holes and push downward. Then
adjust the head restraint to the appropriate
height.
WARNING!
• A loose head restraint thrown forward in
a collision or hard stop could cause se-
rious injury or death to occupants of the
vehicle. Always securely stow removed
WARNING!
head restraints in a location outside the
occupant compartment.
• ALL the head restraints MUST be rein-
stalled in the vehicle to properly protect
the occupants. Follow the re-installation
instructions above prior to operating the
vehicle or occupying a seat.
• Do not place items over the top of the
Reactive Head Restraint, such as coats,
seat covers or portable DVD players.
These items may interfere with the op-
eration of the Reactive Head Restraint in
the event of a collision and could result
in serious injury or death.
Rear Head Restraints
The rear outboard and center head restraints
have two positions: up and down. When the
center seat is being occupied the head re-
straint should be in the raised position. When
there is no occupant in the center seat, the
head restraint can be lowered for maximum
visibility for the driver.
Front Head Restraint
1 — Release Button
2 — Adjustment Button
29
Page 32 of 344
To raise the head restraint, pull upward on
the head restraint. To lower the head re-
straint, push the adjustment button, located
at the base of the head restraint, and push
downward on the head restraint.
NOTE:
To remove the head restraint, raise it as far as
it can go. Then, push the release button and
the adjustment button at the base of each
post while pulling the head restraint up. To
reinstall the head restraint, put the head
restraint posts into the holes and push down-
ward. Then, adjust the head restraint to the
appropriate height.
WARNING!
ALL the head restraints MUST be rein-
stalled in the vehicle to properly protect
the occupants. Follow the re-installation
instructions above prior to operating the
vehicle or occupying a seat.
Outboard Head Restraint
1 — Release Button
2 — Adjustment Button
Center Head Restraint
1 — Release Button
2 — Adjustment Button
GETTING TO KNOW YOUR VEHICLE
30
Page 107 of 344

WARNING!
your seat belt safely and to keep your
passengers safe, too.
• Position the shoulder belt across the
shoulder and chest with minimal, if any
slack so that it is comfortable and not
resting on your neck. The retractor will
withdraw any slack in the shoulder belt.
• Misadjustment of the seat belt could
reduce the effectiveness of the safety
belt in a crash.
• Always make all seat belt height adjust-
ments when the vehicle is stationary.
Second Row Center Seat Belt Operating In-
structions — Fixed Rear Seat — If Equipped
The second row center seat belt may feature a
seat belt with a mini-latch plate and buckle,
which allows the seat belt to detach from the
lower anchor when the seat is folded. The
mini-latch plate and regular latch plate can
then be stored out of the way in the left side
trim panel for added convenience to open up
utilization of the storage areas behind the
front seats when the seat is not occupied.1. Remove the mini-latch plate and regular
latch plate from its stowed position in the
left rear side trim panel.
2. Grasp the mini-latch plate and pull the
seat belt over the seat.3. Route the shoulder belt through the seat
belt guide loop on the top of the seat back
near the inboard side of the left head
restraint.Mini-Latch Stowage
Shoulder Belt Routed Through The Seat
Belt Guide Loop
105