2019 JEEP CHEROKEE service
[x] Cancel search: servicePage 244 of 344

flated tire condition, please replace the TPM
sensor as it is not designed to be reused when
driven under run flat mode (14 psi (96 kPa))
condition.
NOTE:
TPM Sensor must be replaced after driving
the vehicle on a flat tire condition.
It is not recommended driving a vehicle
loaded at full capacity or to tow a trailer while
a tire is in the run flat mode.
See the tire pressure monitoring section for
more information.
Tire Spinning
When stuck in mud, sand, snow, or ice con-
ditions, do not spin your vehicle's wheels
above 30 mph (48 km/h) or for longer than
30 seconds continuously without stopping.
Refer to “Freeing A Stuck Vehicle” in “In
Case Of Emergency” for further information.
WARNING!
Fast spinning tires can be dangerous.
Forces generated by excessive wheel
WARNING!
speeds may cause tire damage or failure. A
tire could explode and injure someone. Do
not spin your vehicle's wheels faster than
30 mph (48 km/h) for more than 30 sec-
onds continuously when you are stuck,
and do not let anyone near a spinning
wheel, no matter what the speed.
Tread Wear Indicators
Tread wear indicators are in the original
equipment tires to help you in determining
when your tires should be replaced.These indicators are molded into the bottom
of the tread grooves. They will appear as
bands when the tread depth becomes a
1/16 of an inch (1.6 mm). When the tread is
worn to the tread wear indicators, the tire
should be replaced.
Refer to “Replacement Tires” in this section
for further information.
Life Of Tire
The service life of a tire is dependent upon
varying factors including, but not limited to:
• Driving style.
• Tire pressure - Improper cold tire inflation
pressures can cause uneven wear patterns
to develop across the tire tread. These ab-
normal wear patterns will reduce tread life,
resulting in the need for earlier tire replace-
ment.
• Distance driven.
• Performance tires, tires with a speed rating
of V or higher, and Summer tires typically
have a reduced tread life. Rotation of these
tires per the vehicle scheduled mainte-
nance is highly recommended.
Tire Tread
1 — Worn Tire
2 — New Tire
SERVICING AND MAINTENANCE
242
Page 246 of 344

Tire Types
All Season Tires — If Equipped
All Season tires provide traction for all sea-
sons (Spring, Summer, Fall, and Winter).
Traction levels may vary between different all
season tires. All season tires can be identi-
fied by the M+S, M&S, M/S or MS designa-
tion on the tire sidewall. Use all season tires
only in sets of four; failure to do so may
adversely affect the safety and handling of
your vehicle.
Summer Or Three Season Tires — If
Equipped
Summer tires provide traction in both wet
and dry conditions, and are not intended to
be driven in snow or on ice. If your vehicle is
equipped with Summer tires, be aware these
tires are not designed for Winter or cold
driving conditions. Install Winter tires on your
vehicle when ambient temperatures are less
than 40°F (5°C) or if roads are covered with
ice or snow. For more information, contact an
authorized dealer.
Summer tires do not contain the all season
designation or mountain/snowflake symbolon the tire sidewall. Use Summer tires only in
sets of four; failure to do so may adversely
affect the safety and handling of your vehicle.
WARNING!
Do not use Summer tires in snow/ice con-
ditions. You could lose vehicle control,
resulting in severe injury or death. Driving
too fast for conditions also creates the
possibility of loss of vehicle control.
Snow Tires
Some areas of the country require the use of
snow tires during the Winter. Snow tires can
be identified by a “mountain/snowflake”
symbol on the tire sidewall.
If you need snow tires,
select tires equivalent
in size and type to the
original equipment
tires. Use snow tires
only in sets of four;
failure to do so may
adversely affect the
safety and handling of your vehicle.
Snow tires generally have lower speed ratings
than what was originally equipped with your
vehicle and should not be operated at sustained
speeds over 75 mph (120 km/h). For speeds
above 75 mph (120 km/h) refer to original
equipment or an authorized tire dealer for rec-
ommended safe operating speeds, loading and
cold tire inflation pressures.
While studded tires improve performance on
ice, skid and traction capability on wet or dry
surfaces may be poorer than that of non-
studded tires. Some states prohibit studded
tires; therefore, local laws should be checked
before using these tire types.
Spare Tires — If Equipped
NOTE:
For vehicles equipped with Tire Service Kit
instead of a spare tire, please refer to “Tire
Service Kit” in “In Case Of Emergency” in
the Owner’s Manual for further information.
CAUTION!
Because of the reduced ground clearance,
do not take your vehicle through an auto-
SERVICING AND MAINTENANCE
244
Page 256 of 344

nuts/bolts should be torqued using a properly
calibrated torque wrench using a high quality
six sided (hex) deep wall socket.
Torque Specifications
Lug Nut/Bolt
Torque**Lug Nut/Bolt
SizeLug Nut/Bolt
Socket Size
100 Ft-Lbs
(135 N·m)M12 x 1.25 19 mm
**Use only an authorized dealer recom-
mended lug nuts/bolts and clean or remove
any dirt or oil before tightening.
Inspect the wheel mounting surface prior to
mounting the tire and remove any corrosion
or loose particles.
Tighten the lug nuts/bolts in a star pattern
until each nut/bolt has been tightened twice.
Ensure that the socket is fully engaged on the
lug nut/bolt (do not insert it halfway).After 25 miles (40 km), check the lug nut/
bolt torque to be sure that all the lug nuts/
bolts are properly seated against the wheel.
WARNING!
To avoid the risk of forcing the vehicle off
the jack, do not tighten the lug nuts/bolts
fully until the vehicle has been lowered.
Failure to follow this warning may result in
personal injury.
FUEL REQUIREMENTS —
GASOLINE ENGINE
This engine is designed to meet all emissions
regulations and provide excellent fuel
economy and performance when using high
quality unleaded gasoline with a minimum
research octane rating (RON) of 91.
Light spark knock at low engine speeds is not
harmful to your engine. However, continued
heavy spark knock at high speeds can cause
damage, and immediate service is required.
Poor quality gasoline can cause problems
such as hard starting, stalling, and hesita-
tions. If you experience these symptoms, try
another brand of gasoline before considering
service for the vehicle.
Torque PatternTECHNICAL SPECIFICATIONS
254
Page 275 of 344

• Press the “+” or “–” buttons on the touch-
screen, or press and drag over the level bar
for each of the equalizer bands. The level
value, which spans between plus or minus
nine, is displayed at the bottom of each of
the bands.
Speed Adjusted Volume
• Press the “Speed Adjusted Volume” button
on the touchscreen to activate the Speed
Adjusted Volume screen. The Speed Ad-
justed Volume is adjusted by pressing the
volume level indicator. This alters the auto-
matic adjustment of the audio volume with
variation to vehicle speed.
Loudness — If Equipped
• Press the “On” button on the touchscreen
to activate Loudness. Press “Off” to deac-
tivate this feature. When Loudness is On,
the sound quality at lower volumes
improves.
AUX Volume Offset
• Press the “AUX Volume Offset” button on
the touchscreen to activate the AUX Vol-
ume Offset screen. The AUX Volume Offset
is adjusted by pressing of the “+” and “–”buttons. This alters the AUX input audio
volume. The level value, which spans be-
tween plus or minus three, is displayed
above the adjustment bar.
Auto Play — If Equipped
• Press the “Auto Play” button on the touch-
screen to activate the Auto Play screen. The
Auto Play feature has two settings “On” and
“Off.” With Auto Play on, music begins
playing from a connected device, immedi-
ately after it is connected to the radio.
Auto On Radio — If Equipped
• The Radio automatically turns on when
vehicle is in run or will recall whether it was
on or off at last ignition off.
Radio Off With Door — If Equipped
• Press the “Radio Off With Door” button on
the touchscreen to activate the Radio Off
With Door screen. The Radio Off With Door
feature, when activated, keeps the radio on
until the driver or passenger door is opened,
or when the Radio Off Delay selected time
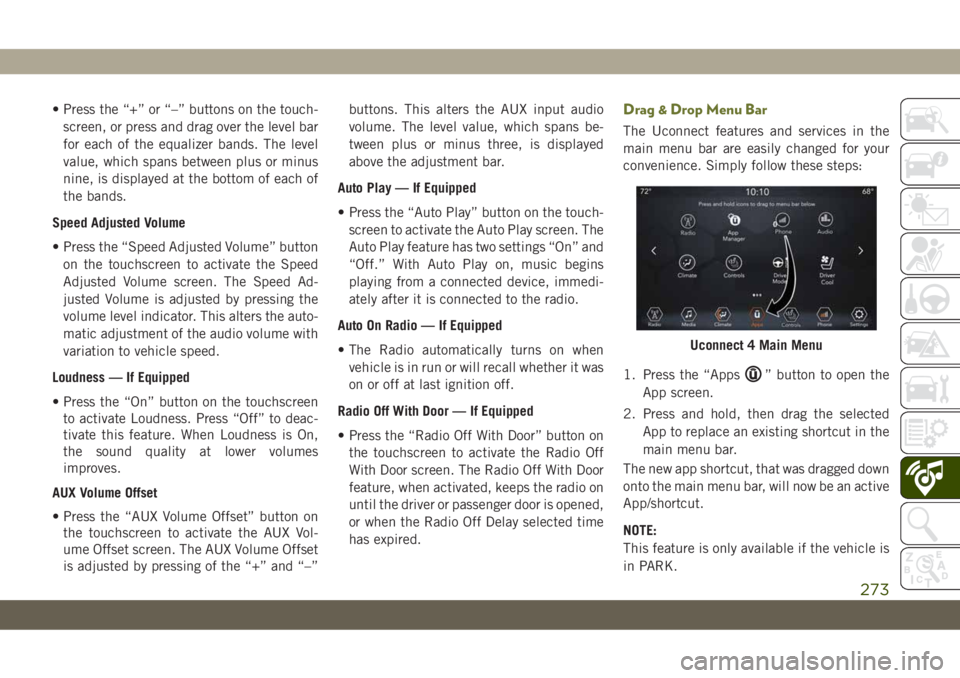
has expired.Drag & Drop Menu Bar
The Uconnect features and services in the
main menu bar are easily changed for your
convenience. Simply follow these steps:
1. Press the “Apps
” button to open the
App screen.
2. Press and hold, then drag the selected
App to replace an existing shortcut in the
main menu bar.
The new app shortcut, that was dragged down
onto the main menu bar, will now be an active
App/shortcut.
NOTE:
This feature is only available if the vehicle is
in PARK.
Uconnect 4 Main Menu
273
Page 280 of 344

• TuneIn
• Deezer
• Reuters
• Twitter
• Facebook Check-In
• Apple CarPlay
• Android Auto, and many more.
UCONNECT 4C/4C NAV
WITH 8.4-INCH DISPLAY
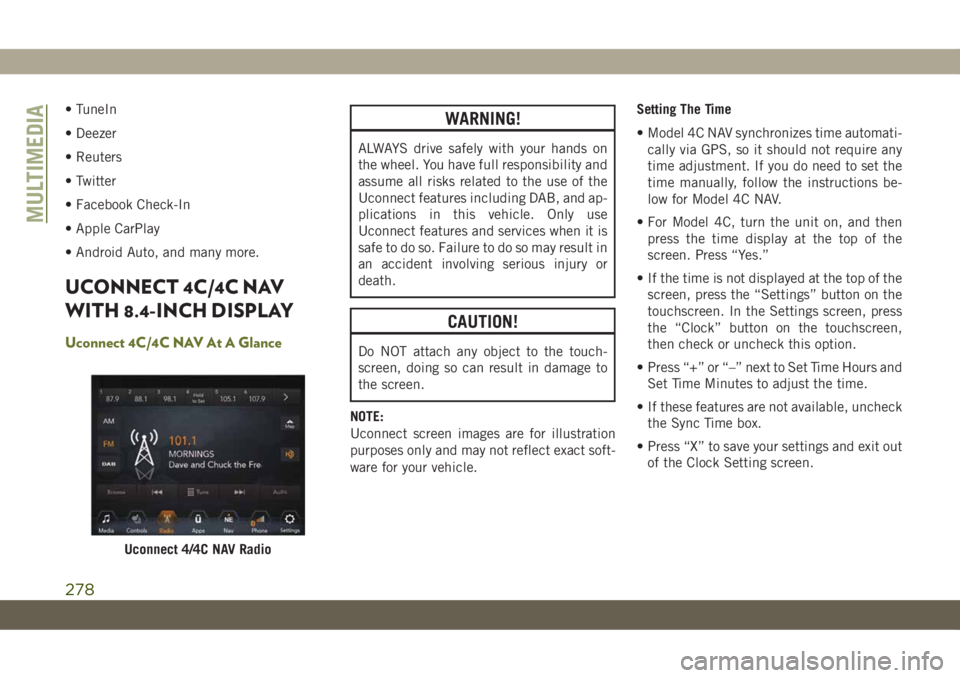
Uconnect 4C/4C NAV At A Glance
WARNING!
ALWAYS drive safely with your hands on
the wheel. You have full responsibility and
assume all risks related to the use of the
Uconnect features including DAB, and ap-
plications in this vehicle. Only use
Uconnect features and services when it is
safe to do so. Failure to do so may result in
an accident involving serious injury or
death.
CAUTION!
Do NOT attach any object to the touch-
screen, doing so can result in damage to
the screen.
NOTE:
Uconnect screen images are for illustration
purposes only and may not reflect exact soft-
ware for your vehicle.Setting The Time
• Model 4C NAV synchronizes time automati-
cally via GPS, so it should not require any
time adjustment. If you do need to set the
time manually, follow the instructions be-
low for Model 4C NAV.
• For Model 4C, turn the unit on, and then
press the time display at the top of the
screen. Press “Yes.”
• If the time is not displayed at the top of the
screen, press the “Settings” button on the
touchscreen. In the Settings screen, press
the “Clock” button on the touchscreen,
then check or uncheck this option.
• Press “+” or “–” next to Set Time Hours and
Set Time Minutes to adjust the time.
• If these features are not available, uncheck
the Sync Time box.
• Press “X” to save your settings and exit out
of the Clock Setting screen.
Uconnect 4/4C NAV Radio
MULTIMEDIA
278
Page 281 of 344

Background Themes
• Screen background themes are selectable
from a pre-loaded list of themes. If you’d
like to set a theme, follow the instructions
below.
• Press the “Settings” button on the touch-
screen and select the display menu.
• Then press “Set Theme” button on the
touchscreen and select a theme.
Audio Settings
• Press the “Audio” button on the touch-
screen to activate the Audio settings screen
to adjust Balance\Fade, Equalizer, and
Speed Adjusted Volume.
• You can return to the Radio screen by
pressing the “X” located at the top right.
Balance/Fade
• Press the “Balance/Fade” button on the
touchscreen to Balance audio between the
front speakers or fade the audio between
the rear and front speakers.• Pressing the “Front,” “Rear,” “Left,” or
“Right” buttons on the touchscreen or
press and drag the Speaker Icon to adjust
the Balance/Fade.
Equalizer
• Press the “Equalizer” button on the touch-
screen to activate the Equalizer screen.
• Press the “+” or “–” buttons on the touch-
screen, or press and drag over the level bar
for each of the equalizer bands. The level
value, which spans between plus or minus
nine, is displayed at the bottom of each of
the Bands.
Speed Adjusted Volume
• Press the “Speed Adjusted Volume” button
on the touchscreen to activate the Speed
Adjusted Volume screen. The Speed Ad-
justed Volume is adjusted by pressing the
volume level indicator. This alters the auto-
matic adjustment of the audio volume with
variation to vehicle speed.
Drag & Drop Menu Bar
The Uconnect features and services in the
main menu bar are easily changed for your
convenience. Simply follow these steps:1. Press the “Apps
” button to open the
App screen.
2. Press and hold, then drag the selected
App to replace an existing shortcut in the
main menu bar.
The new app shortcut, that was dragged
down onto the main menu bar, will now
be an active App/shortcut.
NOTE:
This feature is only available if the vehicle is
in PARK.
Uconnect 4C/4C NAV With 8.4–inch
Display Main Menu
279
Page 289 of 344

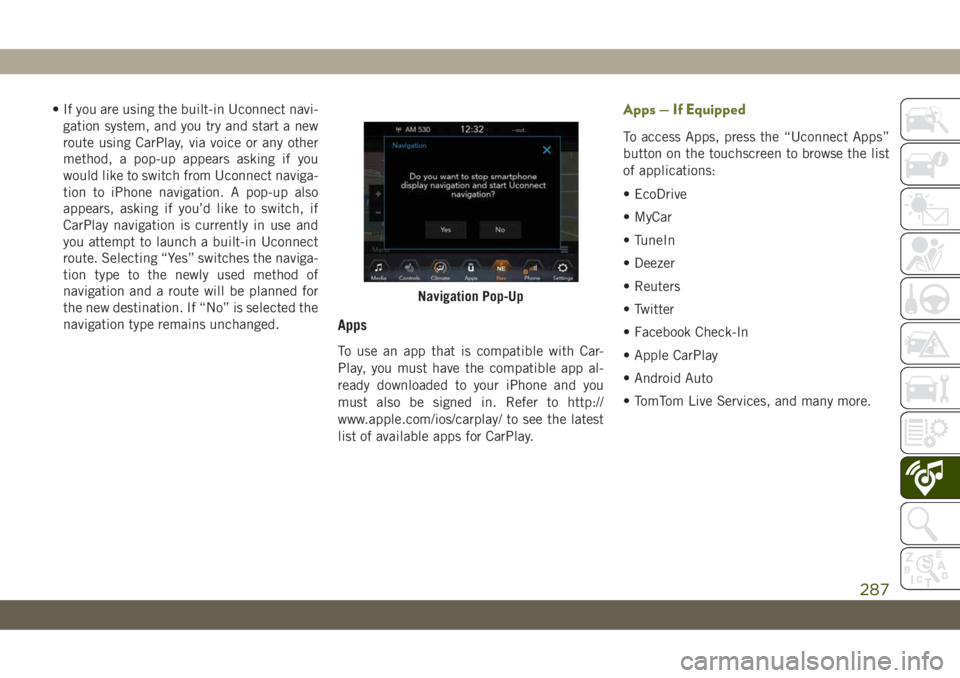
• If you are using the built-in Uconnect navi-
gation system, and you try and start a new
route using CarPlay, via voice or any other
method, a pop-up appears asking if you
would like to switch from Uconnect naviga-
tion to iPhone navigation. A pop-up also
appears, asking if you’d like to switch, if
CarPlay navigation is currently in use and
you attempt to launch a built-in Uconnect
route. Selecting “Yes” switches the naviga-
tion type to the newly used method of
navigation and a route will be planned for
the new destination. If “No” is selected the
navigation type remains unchanged.
Apps
To use an app that is compatible with Car-
Play, you must have the compatible app al-
ready downloaded to your iPhone and you
must also be signed in. Refer to http://
www.apple.com/ios/carplay/ to see the latest
list of available apps for CarPlay.
Apps — If Equipped
To access Apps, press the “Uconnect Apps”
button on the touchscreen to browse the list
of applications:
• EcoDrive
• MyCar
• TuneIn
• Deezer
• Reuters
• Twitter
• Facebook Check-In
• Apple CarPlay
• Android Auto
• TomTom Live Services, and many more.
Navigation Pop-Up
287
Page 317 of 344

IF YOU NEED ASSISTANCE
The manufacturer distributors are vitally in-
terested in your satisfaction with their prod-
ucts and services. If a servicing problem or
other difficulty should occur, we recommend
that you take the following steps:
Discuss the problem at the authorized dealer
with the dealer principal or the service man-
ager. Management personnel at the autho-
rized dealer are in the best position to resolve
the problem.When you contact the distributor please pro-
vide all of the following information:
• Your name, address and phone number.
• Vehicle Identification Number (this
17 digit number is found on a label, located
on the left front corner of the instrument
panel, visible through the windshield. It is
also available from your vehicle registration
or title).• Selling and servicing authorized dealer.
• Vehicle's delivery date and current odom-
eter distance.
• Service history of your vehicle.
• An accurate description of the problem and
the conditions under which it occurs.
315