2019 JEEP CHEROKEE brakes
[x] Cancel search: brakesPage 222 of 344

Mileage or time passed (which-
ever comes first)
7,500
15,000
22,500
30,000
37,500
45,000
52,500
60,000
67,500
75,000
82,500
90,000
97,500
105,000
112,500
120,000
127,500
135,000
142,500
150,000
Or Months: 12 24 36 48 60 72 84 96 108 120 132 144 156 168 180 192 204 216 228 240
Or Kilometers:
12,000
24,000
36,000
48,000
60,000
72,000
84,000
96,000
108,000
120,000
132,000
144,000
156,000
168,000
180,000
192,000
204,000
216,000
228,000
240,000
Change engine oil and oil filter
(2.0L gasoline engine with GPF -
Gasoline Particulate Filter).(*)
Change engine oil and oil filter
(2.4L, 3.2L engines and 2.0L
gasoline engine without GPF -
Gasoline Particulate Filter). **XX X X X X X X X X X X X X X X X X X X
Rotate tires X X X X X X X X X X X X X X X X X X X X
If using your vehicle in dusty or
off-road conditions, inspect the
air cleaner filter, and replace if
necessary.XXX X X X X X X X
Inspect the brake linings, re-
place if necessary.XX X X X X X X X X
Inspect the front suspension, tie
rod ends and boot seals, replace
if necessary.XX X X X X X X X X
Visually inspect condition of:
exterior bodywork, underbody
protection, pipes and hoses (ex-
haust - fuel system - brakes),
rubber elements (boots, sleeves,
bushings, etc.).XXX X X X X X X X
SERVICING AND MAINTENANCE
220
Page 226 of 344

Mileage or time passed (whichever comes first)12,500
25,000
37,500
50,000
62,500
75,000
87,500
100,000
112,500
125,000
137,500
150,000
162,500
175,000
187,500
Or Years: 1 2 3 4 5 6 7 8 9 10 11 12 13 14 15
Or Kilometers:
20,000
40,000
60,000
80,000
100,000
120,000
140,000
160,000
180,000
200,000
220,000
240,000
260,000
280,000
300,000
Additional Inspections
Change the engine oil and engine oil filter.(*)
Inspect the CV joints. X X X X X X X
Inspect front suspension, boot seals, tie rod ends, and replace if
necessary.XXX X X X X
Visually inspect condition of: exterior bodywork, underbody pro-
tection, pipes and hoses (exhaust - fuel system - brakes), rubber
elements (boots, sleeves, bushings, etc.).XXX X X X X
If using your vehicle in dusty or off-road conditions, inspect the
air cleaner filter, and replace if necessary.XX X X X X X X X X X X X X X
Inspect the brake linings, parking brake function. X X X X X X X
Check and, if necessary, top up fluid levels. (°) X X X X X X X X X X X X X X X
SERVICING AND MAINTENANCE
224
Page 235 of 344

WARNING!
Riding the brakes can lead to brake failure
and possibly a collision. Driving with your
foot resting or riding on the brake pedal
can result in abnormally high brake tem-
peratures, excessive lining wear, and pos-
sible brake damage. You would not have
your full braking capacity in an emergency.
Fluid Level Check — Brake Master Cylinder
The fluid level of the master cylinder should
be checked whenever the vehicle is serviced,
or immediately if the brake system warning
light is on. If necessary, add fluid to bring
level within the designated marks on the side
of the reservoir of the brake master cylinder.
Be sure to clean the top of the master cylin-
der area before removing cap. With disc
brakes, fluid level can be expected to fall as
the brake pads wear. Brake fluid level should
be checked when pads are replaced. If the
brake fluid is abnormally low, check the sys-
tem for leaks.
Refer to “Fluids And Lubricants” in “Techni-
cal Specifications” for further information.
WARNING!
• Brake fluid is poisonous and highly cor-
rosive. In the event of accidental con-
tact, immediately wash the affected
parts with water and neutral soap. Then
rinse thoroughly. Call a doctor immedi-
ately if swallowed.
• Use only manufacturer's recommended
brake fluid. Refer to “Fluids And Lubri-
cants” in “Technical Specifications” for
further information. Using the wrong
type of brake fluid can severely damage
your brake system and/or impair its per-
formance. The proper type of brake fluid
for your vehicle is also identified on the
original factory installed hydraulic mas-
ter cylinder reservoir.
• To avoid contamination from foreign
matter or moisture, use only new brake
fluid or fluid that has been in a tightly
closed container. Keep the master cylin-
der reservoir cap secured at all times.
Brake fluid in a open container absorbs
moisture from the air resulting in a lower
boiling point. This may cause it to boil
WARNING!
unexpectedly during hard or prolonged
braking, resulting in sudden brake fail-
ure. This could result in a collision.
• Overfilling the brake fluid reservoir can
result in spilling brake fluid on hot en-
gine parts, causing the brake fluid to
catch fire. Brake fluid can also damage
painted and vinyl surfaces, care should
be taken to avoid its contact with these
surfaces.
• Do not allow petroleum based fluid to
contaminate the brake fluid. Brake seal
components could be damaged, causing
partial or complete brake failure. This
could result in a collision.
Manual Transmission — If Equipped
Fluid Level Check
Check the fluid level by removing the fill
plug. The fluid level should be between the
bottom of the fill hole and a point not more
than 3/16 inch (4.7 mm) below the bottom of
the hole.
233
Page 249 of 344

NOTE:
If you intend parking or storing your vehicle
for an extended period after cleaning the
wheels with wheel cleaner, drive your vehicle
and apply the brakes to remove the water
droplets from the brake components. This
activity will remove the red rust on the brake
rotors and prevent vehicle vibration when
braking.
Dark Vapor Chrome, Black Satin Chrome, or Low
Gloss Clear Coat Wheels
CAUTION!
If your vehicle is equipped with these
specialty wheels, DO NOT USE wheel
cleaners, abrasives, or polishing com-
pounds. They will permanently damage
this finish and such damage is not covered
by the New Vehicle Limited Warranty.
HAND WASH ONLY USING MILD SOAP
AND WATER WITH A SOFT CLOTH. Used
on a regular basis; this is all that is re-
quired to maintain this finish.
Tire Chains (Traction Devices)
Use of traction devices require sufficient tire-
to-body clearance. Follow these recommen-
dations to guard against damage.
• Traction device must be of proper size for
the tire, as recommended by the traction
device manufacturer
• Use on Front Tires Only
• Due to limited clearance, the following
traction devices are recommended:
Front Wheel Drive (FWD) Models
• Original equipment 225/60R17 and 225/
55R18 tire sizes are not chainable.
• The use of 7mm snow chains is permitted
with the use of 215/60R17 tires on size
17 x 7.0 ET41 wheels.
Four Wheel Drive (4WD) Non-Trailhawk Models
Without A Two-Speed Power Takeoff Unit
• Original equipment 225/60R17 and 225/
55R18 tire sizes are not chainable.
• The use of 9mm snow chains is permitted
with the use of 215/60R17 tires on size
17 x 7.0 ET41 wheels.Four Wheel Drive (4WD) Non-Trailhawk Models
With A Two-Speed Power Takeoff Unit
• The use of 7mm snow chains is permitted
with 225/60R17 and 225/55R18 tires.
Four Wheel Drive (4WD) Trailhawk Models
• The use of 9mm snow chains is permitted
with the use of 225/65R17 tires on size
17 x 7.5 ET31 wheels.
CAUTION!
• Use on Front Tires Only
• Damage to Front Wheel Drive (FWD)
Models may result if tire chains or trac-
tion devices are used with original
equipment size tires.
• Damage to Four Wheel Drive (4WD)
Models without a Two-Speed Power
Takeoff Unit may result if tire chains or
traction devices are used with original
equipment size tires.
• Damage to Four Wheel Drive (4WD)
Trailhawk Models may result if tire
chains or traction devices are used with
original equipment size tires.
247
Page 290 of 344

UCONNECT SETTINGS
The Uconnect system allows you to access
Customer Programmable feature settings
such as Display, Voice, Clock, Safety & Driv-
ing Assistance, Lights, Doors & Locks,
Auto-On Comfort, Engine Off Options, Sus-
pension, Compass Settings, Audio, Phone/
Bluetooth, Radio Setup, Restore Settings,
Clear Personal Data, and System Information
through buttons on the touchscreen.
Push the SETTINGS button (Uconnect 3), or
press the “Apps” button (Uconnect 4 or
4C/4C NAV) located near the bottom of the
touchscreen, then press the “Settings” but-
ton on the touchscreen to access the Settings
screen. When making a selection, scroll up or
down until the preferred setting is high-
lighted, then press the preferred setting until
a check-mark appears next to the setting,
showing that setting has been selected. The
following feature settings are available:
• Language • Engine Off Options
• Display • Compass — If
Equipped
• Units • Audio• Voice • Phone/Bluetooth
• Clock • Suspension — If
Equipped
• Camera — If
Equipped• AUX Switches
• Safety & Driving
Assistance• Restore Settings
• Brakes • Clear Personal Data
• Mirrors & Wipers —
If Equipped• System Information
• Lights • Radio Setup
• Doors & Locks
• Auto-On Comfort
NOTE:
Depending on the vehicles options, feature
settings may vary.
Refer to “Uconnect Settings” in “Multime-
dia” in your Owner’s Manual for further infor-
mation.
TIPS CONTROLS AND
GENERAL INFORMATION
Steering Wheel Audio Controls
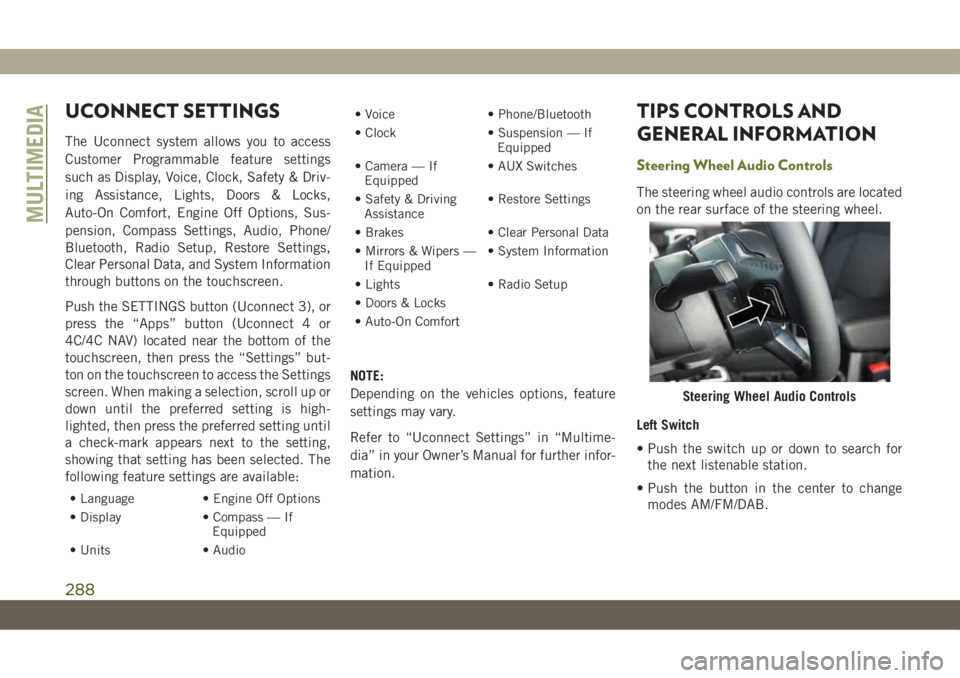
The steering wheel audio controls are located
on the rear surface of the steering wheel.
Left Switch
• Push the switch up or down to search for
the next listenable station.
• Push the button in the center to change
modes AM/FM/DAB.
Steering Wheel Audio Controls
MULTIMEDIA
288