2019 JEEP CHEROKEE navigation
[x] Cancel search: navigationPage 292 of 344

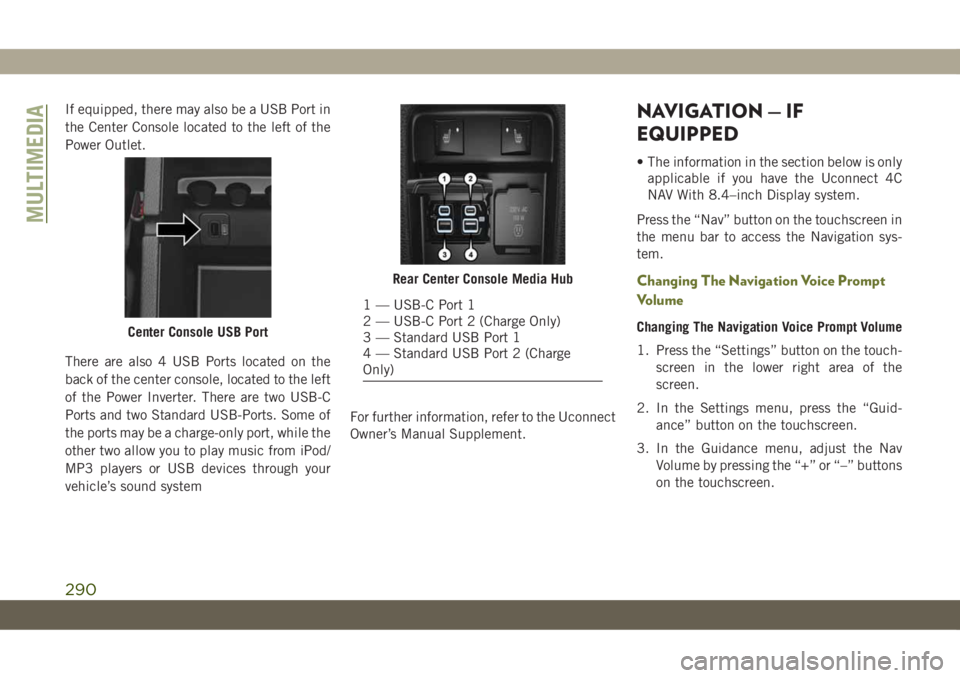
If equipped, there may also be a USB Port in
the Center Console located to the left of the
Power Outlet.
There are also 4 USB Ports located on the
back of the center console, located to the left
of the Power Inverter. There are two USB-C
Ports and two Standard USB-Ports. Some of
the ports may be a charge-only port, while the
other two allow you to play music from iPod/
MP3 players or USB devices through your
vehicle’s sound systemFor further information, refer to the Uconnect
Owner’s Manual Supplement.NAVIGATION — IF
EQUIPPED
• The information in the section below is only
applicable if you have the Uconnect 4C
NAV With 8.4–inch Display system.
Press the “Nav” button on the touchscreen in
the menu bar to access the Navigation sys-
tem.
Changing The Navigation Voice Prompt
Volume
Changing The Navigation Voice Prompt Volume
1. Press the “Settings” button on the touch-
screen in the lower right area of the
screen.
2. In the Settings menu, press the “Guid-
ance” button on the touchscreen.
3. In the Guidance menu, adjust the Nav
Volume by pressing the “+” or “–” buttons
on the touchscreen.Center Console USB Port
Rear Center Console Media Hub
1 — USB-C Port 1
2 — USB-C Port 2 (Charge Only)
3 — Standard USB Port 1
4 — Standard USB Port 2 (Charge
Only)
MULTIMEDIA
290
Page 293 of 344

Uconnect 4C NAV With 8.4–inch Display Navigation
1 — Search For A Destination In All Categories
2 — Find A Destination
3 — View Map
4 — Navigate To Saved Home Destination5 — Navigate To Saved Work Destination
6 — Navigation Settings
7 — Emergency
8 — Information
291
Page 294 of 344

Finding Points Of Interest
• From the main Navigation menu, press the
“Where To?” button on the touchscreen,
then press the “Points of Interest” button
on the touchscreen.
• Select a category and then a subcategory, if
necessary.
• Select your destination and press the
“GO!” button on the touchscreen.
Finding A Place By Spelling The Name
• From the Main Navigation Menu press the
“Where to?” button on the touchscreen,
press the “Points of Interest” button on the
touchscreen, then press the “Spell Name”
or “Search All” button on the touchscreen.
• Enter the name of your destination.
• Press the “List” or “OK” button on the
touchscreen.
• Select your destination and press the
“GO!” button on the touchscreen.
One-Step Voice Destination Entry
• Enter a navigation destination without tak-
ing your hands off the wheel.
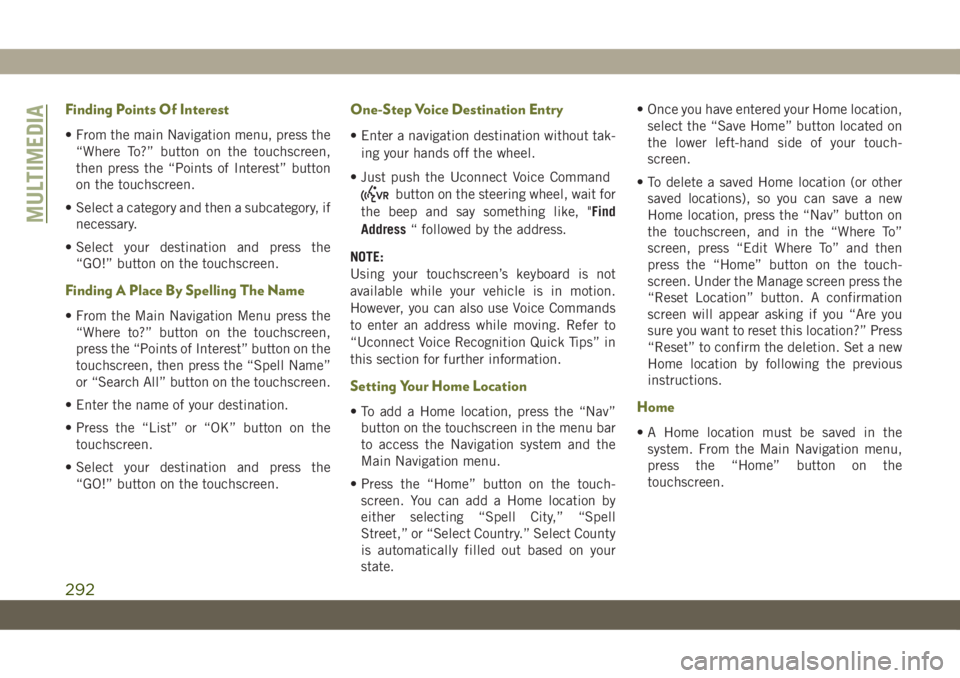
• Just push the Uconnect Voice Command
button on the steering wheel, wait for
the beep and say something like, "Find
Address“ followed by the address.
NOTE:
Using your touchscreen’s keyboard is not
available while your vehicle is in motion.
However, you can also use Voice Commands
to enter an address while moving. Refer to
“Uconnect Voice Recognition Quick Tips” in
this section for further information.
Setting Your Home Location
• To add a Home location, press the “Nav”
button on the touchscreen in the menu bar
to access the Navigation system and the
Main Navigation menu.
• Press the “Home” button on the touch-
screen. You can add a Home location by
either selecting “Spell City,” “Spell
Street,” or “Select Country.” Select County
is automatically filled out based on your
state.• Once you have entered your Home location,
select the “Save Home” button located on
the lower left-hand side of your touch-
screen.
• To delete a saved Home location (or other
saved locations), so you can save a new
Home location, press the “Nav” button on
the touchscreen, and in the “Where To”
screen, press “Edit Where To” and then
press the “Home” button on the touch-
screen. Under the Manage screen press the
“Reset Location” button. A confirmation
screen will appear asking if you “Are you
sure you want to reset this location?” Press
“Reset” to confirm the deletion. Set a new
Home location by following the previous
instructions.Home
• A Home location must be saved in the
system. From the Main Navigation menu,
press the “Home” button on the
touchscreen.
MULTIMEDIA
292
Page 295 of 344

Your route is marked with a blue line on the
map. If you depart from the original route,
your route is recalculated. A speed limit icon
could appear as you travel on major roadways.
Uconnect 4C NAV With 8.4–inch Display Map
1 — Distance To Next Turn
2 — Next Turn Street
3 — Estimated Time Of Arrival
4 — Zoom In And Out5 — Your Location On The Map
6 — Navigation Main Menu
7 — Current Street Location
8 — Navigation Routing Options
293
Page 296 of 344

Adding A Stop
• To add a stop you must be navigating a
route.
• Press the “Menu” button on the touch-
screen to return to the Main Navigation
menu.
• Press the “Where To?” button on the touch-
screen, then search for the extra stop.
When another location has been selected,
you can choose to cancel your previous
route, add as the first destination or add as
the last destination.
• Press the desired selection and press the
“GO!” button on the touchscreen.
Taking A Detour
• To take a detour you must be navigating a
route.
• Press the “Detour” button on the
touchscreen.
NOTE:
If the route you are currently taking is the
only reasonable option, the device may not
calculate a detour. For more information, see
your Uconnect Owner's Manual Supplement.
Map Update
To update your map, please refer to
www.maps.mopar.eu, or contact an autho-
rized dealer.
MULTIMEDIA
294
Page 308 of 344

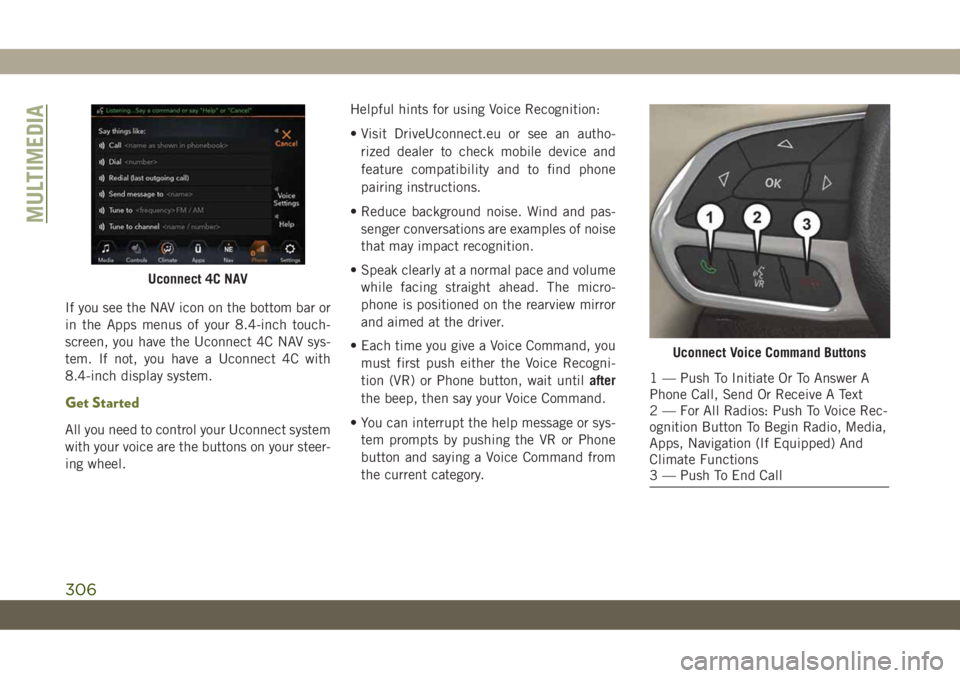
If you see the NAV icon on the bottom bar or
in the Apps menus of your 8.4-inch touch-
screen, you have the Uconnect 4C NAV sys-
tem. If not, you have a Uconnect 4C with
8.4-inch display system.
Get Started
All you need to control your Uconnect system
with your voice are the buttons on your steer-
ing wheel.Helpful hints for using Voice Recognition:
• Visit DriveUconnect.eu or see an autho-
rized dealer to check mobile device and
feature compatibility and to find phone
pairing instructions.
• Reduce background noise. Wind and pas-
senger conversations are examples of noise
that may impact recognition.
• Speak clearly at a normal pace and volume
while facing straight ahead. The micro-
phone is positioned on the rearview mirror
and aimed at the driver.
• Each time you give a Voice Command, you
must first push either the Voice Recogni-
tion (VR) or Phone button, wait untilafter
the beep, then say your Voice Command.
• You can interrupt the help message or sys-
tem prompts by pushing the VR or Phone
button and saying a Voice Command from
the current category.
Uconnect 4C NAV
Uconnect Voice Command Buttons
1 — Push To Initiate Or To Answer A
Phone Call, Send Or Receive A Text
2 — For All Radios: Push To Voice Rec-
ognition Button To Begin Radio, Media,
Apps, Navigation (If Equipped) And
Climate Functions
3 — Push To End Call
MULTIMEDIA
306
Page 313 of 344

Navigation (4C NAV)
The Uconnect navigation feature helps you
save time and become more productive when
you know exactly how to get to where you
want to go.
1. To enter a destination, push the VR button
. After the beep, say: “Find address,”
followed by the address.
2. Then follow the system prompts.
TIP:To start a POI search, push the VR but-
ton
. After the beep, say: “Find nearest
coffee shop.”Map Update
To update your map, please refer to
www.maps.mopar.eu, or contact an autho-
rized dealer.
Siri Eyes Free — If Equipped
Siri lets you use your voice to send text
messages, select media, place phone calls
and much more. Siri uses your natural lan-
guage to understand what you mean and
responds back to confirm your requests. The
system is designed to keep your eyes on the
road and your hands on the wheel by letting
Siri help you perform useful tasks.
To enable Siri, push and hold, then release
the Uconnect Voice Recognition (VR) button
on the steering wheel. After you hear a double
beep you can ask Siri to play podcasts and
music, get directions, read text messages and
many other useful requests.
Uconnect 4C NAV Navigation
Uconnect 4 Siri Eyes Free Available
Uconnect 4C/4C NAV With 8.4–inch Siri
Eyes Free Available
311
Page 339 of 344

Multi-Function Control Lever........32
Navigation..................290
New Vehicle Break-In Period.......141
Occupant Restraints.............98
Octane Rating, Gasoline (Fuel) . .254, 262
Oil, Engine..................262
Capacity.................260
Checking.................231
Dipstick..................231
Filter....................262
Pressure Warning Light.........67
Recommendation............260
Viscosity.................260
Oil Pressure Light...............67
Onboard Diagnostic System.........75
Operating Precautions............75
Operator Manual
Owner's Manual...............2
Overheating, Engine............212
Paddle Shifters...............149
Parking Brake................142
ParkSense Active Park Assist.......169
ParkSense System, Rear......166, 168
Passive Entry..................20Personalized Main Menu......273, 279
Pets......................135
Phonebook..................302
Phone (Uconnect)..............295
Pairing..................298
Power
Inverter...................60
Outlet (Auxiliary Electrical Outlet) . . .58
Windows..................49
Pregnant Women And Seat Belts.....107
Preparation For Jacking..........196
Pretensioners
Seat Belts................107
Radial Ply Tires...............241
Radio
Presets...........270, 274, 280
Radio Operation........268, 272, 278
Radio Screens............
.272, 278
Rain Sensitive Wiper System........38
Rear Camera.................173
Rear Cross Path................90
Rear ParkSense System.......166, 168
Rear Seats, Folding..............23
Rear Wiper/Washer..............39
Recreational Towing.............182
Release, Hood.................53Reminder, Lights On.............35
Reminder, Seat Belt............100
Remote Control
Starting System..............17
Remote Keyless Entry............14
Arm The Alarm..............19
Disarm The Alarm.............19
Remote Starting System...........17
Replacement Keys..............15
Replacement Tires.............243
Restraints, Child...............119
Restraints, Head...............28
Roll Over Warning................2
Roof Type Carrier...............60
Rotation, Tires................248
Safety Checks Inside Vehicle.......136
Safety Checks Outside Vehicle......138
Safety, Exhaust Gas.............136
Safety Tips..................136
Schedule, Maintenance..........218
Seat Belt Reminder..............64
Seat Belts...............100, 136
Adjustable Shoulder Belt.......104
Adjustable Upper Shoulder
Anchorage................104
337