Page 443 of 491
![HYUNDAI VELOSTER 2019 Owners Manual 7-69
7
Maintenance
[1] : High beam, [2] : Low beam
Headlamp
1. Open the hood.
2. Disconnect the negative batterycable.
3. Remove the headlamp bulb cover by turning it counterclockwise.
4. Disconnect t HYUNDAI VELOSTER 2019 Owners Manual 7-69
7
Maintenance
[1] : High beam, [2] : Low beam
Headlamp
1. Open the hood.
2. Disconnect the negative batterycable.
3. Remove the headlamp bulb cover by turning it counterclockwise.
4. Disconnect t](/manual-img/35/41152/w960_41152-442.png)
7-69
7
Maintenance
[1] : High beam, [2] : Low beam
Headlamp
1. Open the hood.
2. Disconnect the negative batterycable.
3. Remove the headlamp bulb cover by turning it counterclockwise.
4. Disconnect the headlamp bulb socket-connector. 5. Remove the bulb from the head-
lamp assembly.
6. Install a new headlamp bulb and snap the headlamp bulb retaining
wire into position by aligning the
wire with the groove on the bulb.
7. Connect the headlamp bulb sock- et-connector.
8. Install the headlamp bulb cover by turning it clockwise.
Information
The headlamp aiming should be
adjusted after an accident or after the
headlamp assembly is reinstalled at an
authorized HYUNDAI dealer.
Turn signal
1. Open the hood.
2. Disconnect the negative batterycable.
3. Remove the socket (1) from the assembly by turning the socket
counterclockwise until the tabs on
the socket align with the slots on
the assembly.
4. Remove the bulb from the socket by pressing it in and rotating it
counterclockwise until the tabs on
the bulb align with the slots in the
socket. Pull the bulb out of the
socket.
iOJS078028OJS078027
■
High/Low beam
Page 444 of 491
7-70
Maintenance
5. Install a new bulb by inserting it into the socket and rotating it until
it locks into place.
6. Install the socket in the assembly by aligning the tabs on the socket
with the slots in the assembly.
7. Push the socket into the assembly and turn the socket clockwise.
Position lamp and daytime running
light
Your vehicle is equipped with LED
lamps. LED lamps do not have
replaceable bulbs. If the LED lamp
does not operate, have the vehicle
checked by an authorized HYUNDAI
dealer.Side marker lamp
1. Open the hood.
2. Disconnect the negative batterycable.
3. Remove the socket from the assembly by turning the socket
counterclockwise until the tabs on
the socket align with the slots on
the assembly.
4. Remove the bulb from the socket by pulling out the bulb.
5. Insert a new bulb.
Type B
(1) Headlamp (High)
(2) Headlamp (Low)
(3) Turn signal lamp
(4) Position lamp & Daytime running light (DRL)
(5) Side marker
OJS078058N
OJS078070N
Page 445 of 491

7-71
7
Maintenance
Always handle them carefully, andavoid scratches and abrasions. If
the bulbs are lit, avoid contact with
liquids.
Never touch the glass with bare hands. Residual oil may cause the
bulb to overheat and burst when lit.
A bulb should be operated only when installed in a headlamp.
If a bulb becomes damaged or cracked, replace it immediately
and carefully dispose of it.
Headlamp (Low beam), side mark-
er, position lamp and daytime run-
ning light
Your vehicle is equipped with LED
lamps. LED lamps do not have
replaceable bulbs. If the LED lamp
does not operate, have the vehicle
checked by an authorized HYUNDAI
dealer.
Headlamp (High beam)
1. Open the hood.
2. Disconnect the negative battery cable.
3. Remove the headlamp bulb cover by turning it counterclockwise.
4. Disconnect the headlamp bulb socket-connector.
5. Remove the bulb from the head- lamp assembly.
6. Install a new headlamp bulb and snap the headlamp bulb retaining
wire into position by aligning the
wire with the groove on the bulb.
7. Connect the headlamp bulb sock- et-connector.
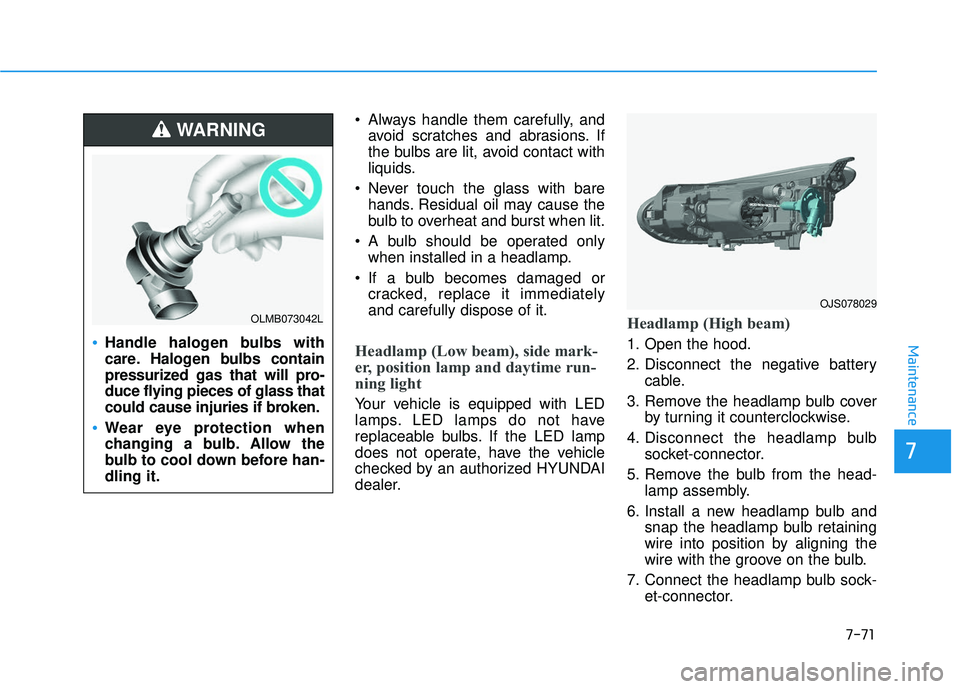
OJS078029
Handle halogen bulbs with
care. Halogen bulbs contain
pressurized gas that will pro-
duce flying pieces of glass that
could cause injuries if broken.
Wear eye protection when
changing a bulb. Allow the
bulb to cool down before han-
dling it.
WARNING
OLMB073042L
Page 446 of 491

7-72
Maintenance
8. Install the headlamp bulb cover by turning it clockwise.
Information
The headlamp aiming should be
adjusted after an accident or after the
headlamp assembly is reinstalled at an
authorized HYUNDAI dealer.
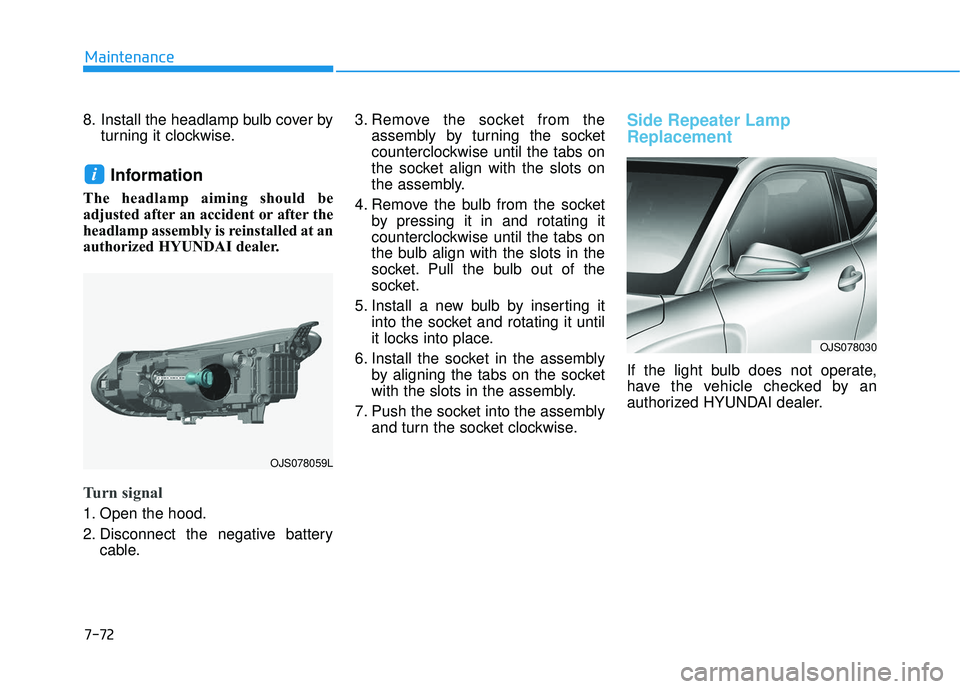
Turn signal
1. Open the hood.
2. Disconnect the negative batterycable. 3. Remove the socket from the
assembly by turning the socket
counterclockwise until the tabs on
the socket align with the slots on
the assembly.
4. Remove the bulb from the socket by pressing it in and rotating it
counterclockwise until the tabs on
the bulb align with the slots in the
socket. Pull the bulb out of the
socket.
5. Install a new bulb by inserting it into the socket and rotating it until
it locks into place.
6. Install the socket in the assembly by aligning the tabs on the socket
with the slots in the assembly.
7. Push the socket into the assembly and turn the socket clockwise.
Side Repeater Lamp
Replacement
If the light bulb does not operate,
have the vehicle checked by an
authorized HYUNDAI dealer.
i
OJS078030
OJS078059L
Page 447 of 491
7-73
7
Maintenance
Rear Combination Light Bulb
Replacement
(1) Stop/Tail lamp
(2) Tail lamp or Stop/Tail lamp
(3) Turn signal lamp
(4) Backup lamp
(5) Side marker
Side marker and Stop/Tail lamp
light
Your vehicle is equipped with LED
lamps. LED lamps do not have
replaceable bulbs. If the LED lamp
does not operate, have the vehicle
checked by an authorized HYUNDAI
dealer.
Stop/Tail lamp and turn signal lamp
1. Open the liftgate.
2. Open the lamp assembly retainingscrew covers.
3. Loosen the lamp assembly retain- ing screws with a cross-tip screw-
driver. 4. Remove the rear combination
lamp assembly from the body of
the vehicle.
5. Remove the socket from the assembly by turning the socket
counterclockwise until the tabs on
the socket align with the slots on
the assembly.
OJS078032OJS078033
OJS078031N
Page 448 of 491
7-74
Maintenance
[A] : Stop/Tail lamp, [B] : Turn signal lamp
6. Remove the bulb from the socket bypressing it in and rotating it counter-
clockwise until the tabs on the bulb
align with the slots in the socket.
Pull the bulb out of the socket. 7. Insert a new bulb by inserting it
into the socket and rotating it until
it locks into place.
8. Install the socket into the assem- bly by aligning the tabs on the
socket with the slots in the assem-
bly. Push the socket into the
assembly and turn the socket
clockwise.
9. Reinstall the lamp assembly to the body of the vehicle.
Tail lamp and backup lamp
1. Turn off the engine.
2. Open the tailgate.
3. Remove the service cover using aflat-blade screwdriver.
OJS078034OJS078035L
■Type A
OJS078036L
■Type B
Page 449 of 491
![HYUNDAI VELOSTER 2019 Owners Manual 7-75
7
Maintenance
[A] : Tail lamp, [B] : Backup lamp
4. Remove the socket from theassembly by turning the socket
counterclockwise until the tabs on
the socket align with the slots on
the assembly. 5. HYUNDAI VELOSTER 2019 Owners Manual 7-75
7
Maintenance
[A] : Tail lamp, [B] : Backup lamp
4. Remove the socket from theassembly by turning the socket
counterclockwise until the tabs on
the socket align with the slots on
the assembly. 5.](/manual-img/35/41152/w960_41152-448.png)
7-75
7
Maintenance
[A] : Tail lamp, [B] : Backup lamp
4. Remove the socket from theassembly by turning the socket
counterclockwise until the tabs on
the socket align with the slots on
the assembly. 5. Remove the bulb from the socket
by pressing it in and rotating it
counterclockwise until the tabs on
the bulb align with the slots in the
socket. Pull the bulb out of the
socket.
6. Insert a new bulb by inserting it into the socket and rotating it until
it locks into place.
7. Install the socket into the assem- bly by aligning the tabs on the
socket with the slots in the assem-
bly. Push the socket into the
assembly and turn the socket
clockwise.
8. Reinstall the lamp assembly to the body of the vehicle.
Side marker
1. Turn off the engine.
2. Open the liftgate.
3. Remove the service cover using a flat-blade screwdriver.
4. Remove the rear combination light assembly from the body of the
vehicle.
5. Remove the socket from the assembly by turning the socket
counterclock wise until the tabs on
the socket align with the slots on
the assembly.
OJS078037L
■Type A
OJS078038L
■Type B
OJS078071N
Page 450 of 491
7-76
Maintenance
6. Remove the bulb by pulling it out.
7. Inset a new bulb by inserting it into the socket.
8. Install the socket in the assembly by aligning the tabs on the socket
with the slots in the assembly.
Push the socket into the assembly
and turn the socket clockwise.
High Mounted Stop Lamp
Replacement
If the high mounted stop lamp does
not operate, have the vehicle
checked by an authorized HYUNDAI
dealer.
License Plate Light Bulb
Replacement
1. Using a flat-blade screwdriver,gently pry the lens cover from the
lamp housing.
2. Remove the bulb by pulling it straight out.
3. Install a new bulb.
4. Reinstall in the reverse order.
OJS078039OJS078040