2019 HYUNDAI VELOSTER Driving
[x] Cancel search: DrivingPage 102 of 491
3-22
Convenient features of your vehicle
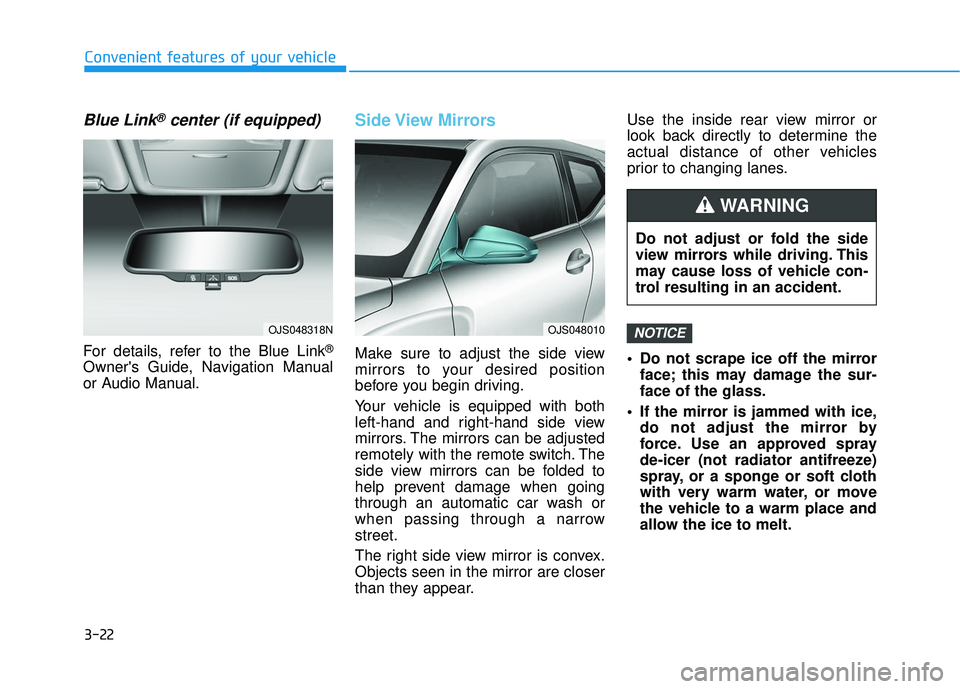
Blue Link®center (if equipped)
For details, refer to the Blue Link®
Owner's Guide, Navigation Manual
or Audio Manual.
Side View Mirrors
Make sure to adjust the side view
mirrors to your desired position
before you begin driving.
Your vehicle is equipped with both
left-hand and right-hand side view
mirrors. The mirrors can be adjusted
remotely with the remote switch. The
side view mirrors can be folded to
help prevent damage when going
through an automatic car wash or
when passing through a narrow
street.
The right side view mirror is convex.
Objects seen in the mirror are closer
than they appear.Use the inside rear view mirror or
look back directly to determine the
actual distance of other vehicles
prior to changing lanes.
Do not scrape ice off the mirror
face; this may damage the sur-
face of the glass.
If the mirror is jammed with ice, do not adjust the mirror by
force. Use an approved spray
de-icer (not radiator antifreeze)
spray, or a sponge or soft cloth
with very warm water, or move
the vehicle to a warm place and
allow the ice to melt.
NOTICEOJS048010
Do not adjust or fold the side
view mirrors while driving. This
may cause loss of vehicle con-
trol resulting in an accident.
WARNING
OJS048318N
Page 103 of 491
3-23
Convenient features of your vehicle
3
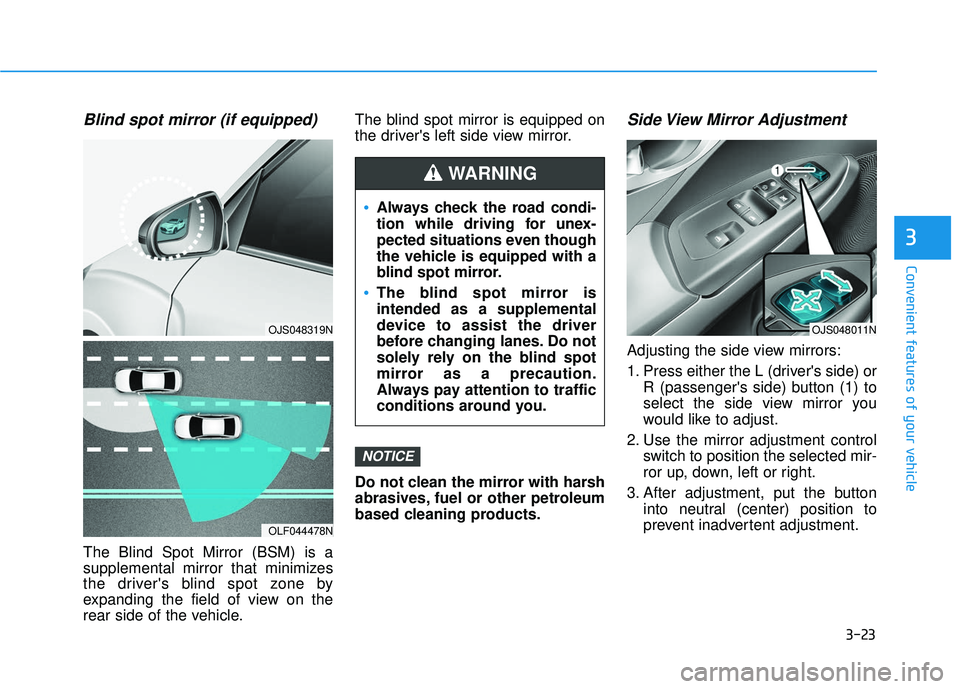
Blind spot mirror (if equipped)
The Blind Spot Mirror (BSM) is a
supplemental mirror that minimizes
the driver's blind spot zone by
expanding the field of view on the
rear side of the vehicle.The blind spot mirror is equipped on
the driver's left side view mirror.
Do not clean the mirror with harsh
abrasives, fuel or other petroleum
based cleaning products.
Side View Mirror Adjustment
Adjusting the side view mirrors:
1. Press either the L (driver's side) or
R (passenger's side) button (1) to
select the side view mirror you
would like to adjust.
2. Use the mirror adjustment control switch to position the selected mir-
ror up, down, left or right.
3. After adjustment, put the button into neutral (center) position to
prevent inadvertent adjustment.
NOTICE
OJS048319N
OLF044478N
Always check the road condi-
tion while driving for unex-
pected situations even though
the vehicle is equipped with a
blind spot mirror.
The blind spot mirror is
intended as a supplemental
device to assist the driver
before changing lanes. Do not
solely rely on the blind spot
mirror as a precaution.
Always pay attention to traffic
conditions around you.
WARNING
OJS048011N
Page 106 of 491
3-26
Convenient features of your vehicle
Power Windows
The ignition switch must be in the ON
position to be able to raise or lower
the windows. Each door has a Power
Window switch to control that door's
window. The driver has a Power
Window Lock switch which can block
the operation of rear passenger win-
dows. The power windows will oper-
ate for approximately 30 seconds
after the ignition switch is placed in
the ACC or LOCK/OFF position.
However, if the front doors are
opened, the Power Windows will not
operate even within the 30 second
period.
Information
• In cold and wet climates, power win-dows may not work properly due to
freezing conditions.
• While driving with the rear win- dows down or with the sunroof (if
equipped) opened (or partially
opened), your vehicle may demon-
strate a wind buffeting or pulsation
noise. This noise is normal and can
be reduced or eliminated by taking
the following actions. If the noise
occurs with one or both of the rear
windows down, partially lower both
front windows approximately one
inch. If you experience the noise
with the sunroof open, slightly close
the sunroof.
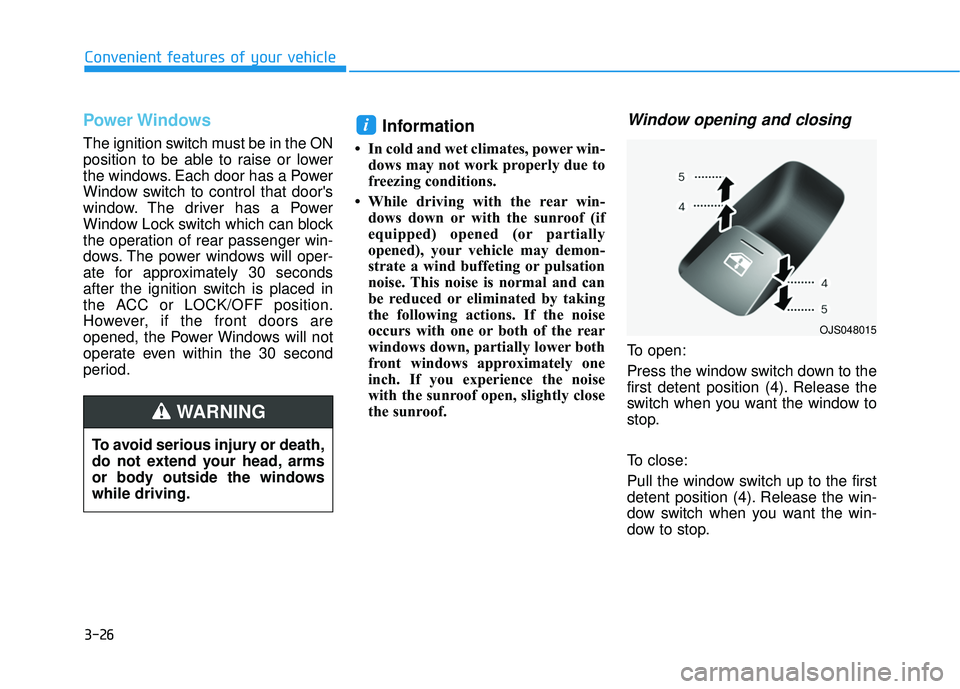
Window opening and closing
To open:
Press the window switch down to the
first detent position (4). Release the
switch when you want the window to
stop.
To close:
Pull the window switch up to the first
detent position (4). Release the win-
dow switch when you want the win-
dow to stop.
i
To avoid serious injury or death,
do not extend your head, arms
or body outside the windows
while driving.
WARNING
OJS048015
Page 109 of 491
3-29
Convenient features of your vehicle
3
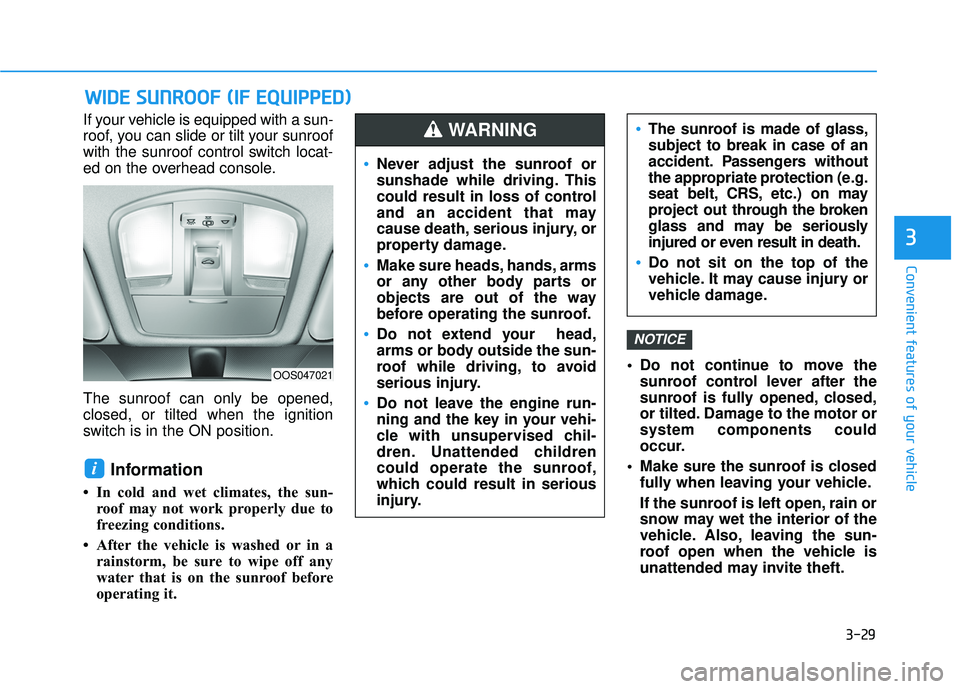
If your vehicle is equipped with a sun-
roof, you can slide or tilt your sunroof
with the sunroof control switch locat-
ed on the overhead console.
The sunroof can only be opened,
closed, or tilted when the ignition
switch is in the ON position.
Information
• In cold and wet climates, the sun-roof may not work properly due to
freezing conditions.
• After the vehicle is washed or in a rainstorm, be sure to wipe off any
water that is on the sunroof before
operating it. Do not continue to move the
sunroof control lever after the
sunroof is fully opened, closed,
or tilted. Damage to the motor or
system components could
occur.
Make sure the sunroof is closed fully when leaving your vehicle.
If the sunroof is left open, rain or
snow may wet the interior of the
vehicle. Also, leaving the sun-
roof open when the vehicle is
unattended may invite theft.
NOTICE
i
W W I
ID
D E
E
S
S U
U N
NR
RO
O O
OF
F
(
( I
IF
F
E
E Q
Q U
UI
IP
P P
PE
ED
D )
)
Never adjust the sunroof or
sunshade while driving. This
could result in loss of control
and an accident that may
cause death, serious injury, or
property damage.
Make sure heads, hands, arms
or any other body parts or
objects are out of the way
before operating the sunroof.
Do not extend your head,
arms or body outside the sun-
roof while driving, to avoid
serious injury.
Do not leave the engine run-
ning and the key in your vehi-
cle with unsupervised chil-
dren. Unattended children
could operate the sunroof,
which could result in serious
injury.
The sunroof is made of glass,
subject to break in case of an
accident. Passengers without
the appropriate protection (e.g.
seat belt, CRS, etc.) on may
project out thr ough the broken
glass and may be seriously
injured or even result in death.
Do not sit on the top of the
vehicle. It may cause injury or
vehicle damage.
WARNING
OOS047021
Page 110 of 491
3-30
Convenient features of your vehicle
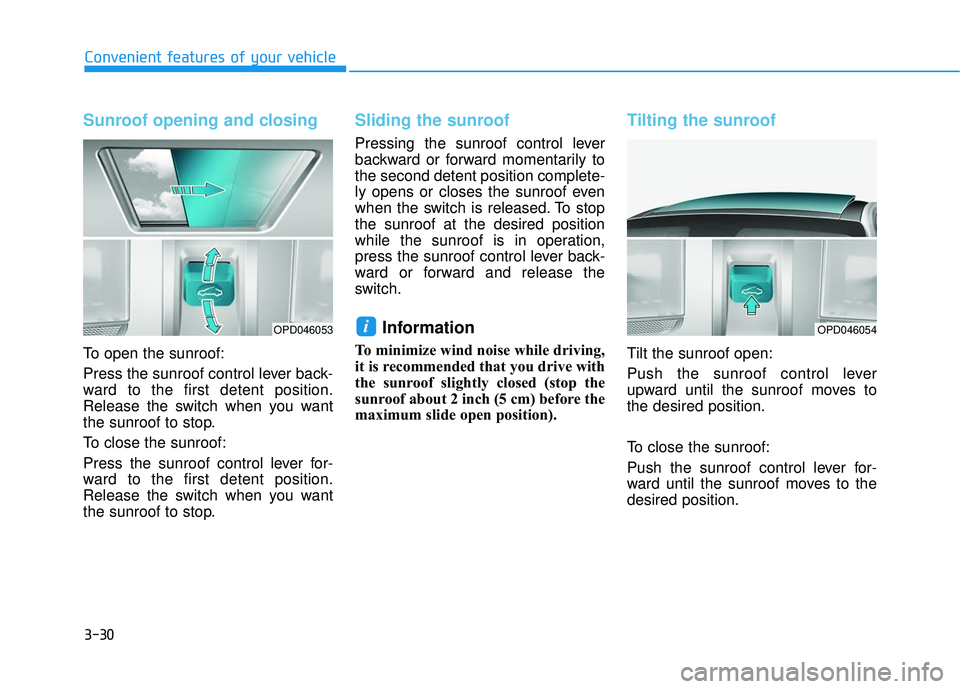
Sunroof opening and closing
To open the sunroof:
Press the sunroof control lever back-
ward to the first detent position.
Release the switch when you want
the sunroof to stop.
To close the sunroof:
Press the sunroof control lever for-
ward to the first detent position.
Release the switch when you want
the sunroof to stop.
Sliding the sunroof
Pressing the sunroof control lever
backward or forward momentarily to
the second detent position complete-
ly opens or closes the sunroof even
when the switch is released. To stop
the sunroof at the desired position
while the sunroof is in operation,
press the sunroof control lever back-
ward or forward and release the
switch.
Information
To minimize wind noise while driving,
it is recommended that you drive with
the sunroof slightly closed (stop the
sunroof about 2 inch (5 cm) before the
maximum slide open position).
Tilting the sunroof
Tilt the sunroof open:
Push the sunroof control lever
upward until the sunroof moves to
the desired position.
To close the sunroof:
Push the sunroof control lever for-
ward until the sunroof moves to the
desired position.
iOPD046053OPD046054
Page 114 of 491
3-34
Convenient features of your vehicle
Closing the hood
1. Before closing the hood, check inand around the engine compart-
ment to ensure the following:
- Any tools or other loose objects are removed from the engine
room area or hood opening area
- All glove, rags, or other com- bustible material is removed
from the engine compartment
- All filler caps are tightly and cor- rectly installed
2. Lower the hood halfway (lifted approximately 12 inches (30 cm)
from the closed position) and push
down to securely lock in place.
Then double check to be sure the
hood is secure. If the hood can be
raised slightly, it is not securely
locked. Open it again and close it
with more force.
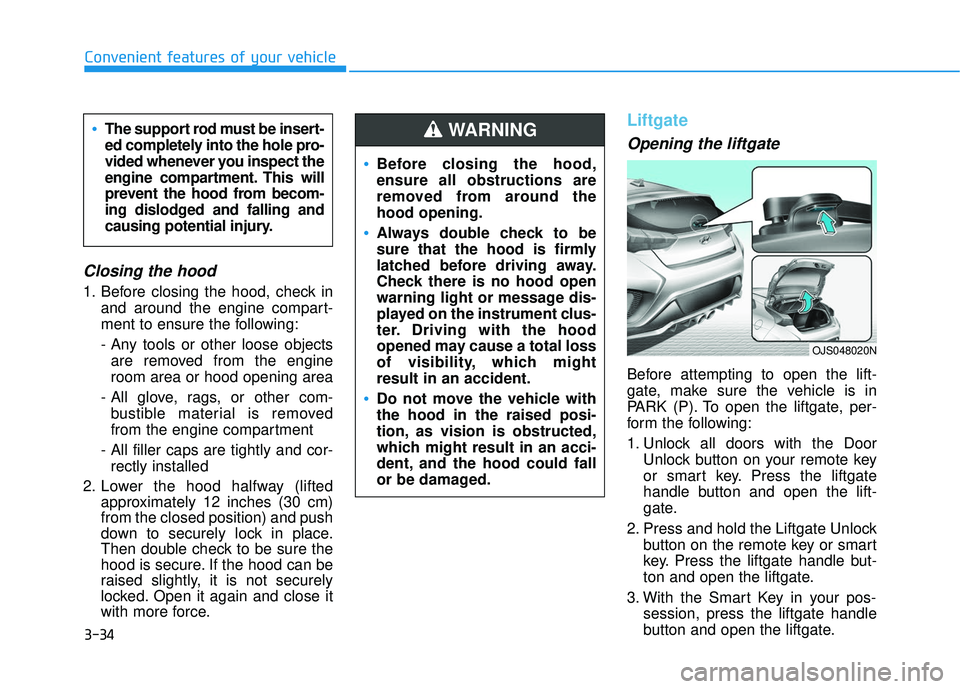
Liftgate
Opening the liftgate
Before attempting to open the lift-
gate, make sure the vehicle is in
PARK (P). To open the liftgate, per-
form the following:
1. Unlock all doors with the Door
Unlock button on your remote key
or smart key. Press the liftgate
handle button and open the lift-
gate.
2. Press and hold the Liftgate Unlock button on the remote key or smart
key. Press the liftgate handle but-
ton and open the liftgate.
3. With the Smart Key in your pos- session, press the liftgate handle
button and open the liftgate.
Before closing the hood,
ensure all obstructions are
removed from around the
hood opening.
Always double check to be
sure that the hood is firmly
latched before driving away.
Check there is no hood open
warning light or message dis-
played on the instrument clus-
ter. Driving with the hood
opened may cause a total loss
of visibility, which might
result in an accident.
Do not move the vehicle with
the hood in the raised posi-
tion, as vision is obstructed,
which might result in an acci-
dent, and the hood could fall
or be damaged.
WARNING The support rod must be insert-
ed completely into the hole pro-
vided whenever you inspect the
engine compartment. This will
prevent the hood from becom-
ing dislodged and falling and
causing potential injury.
OJS048020N
Page 115 of 491
3-35
Convenient features of your vehicle
3
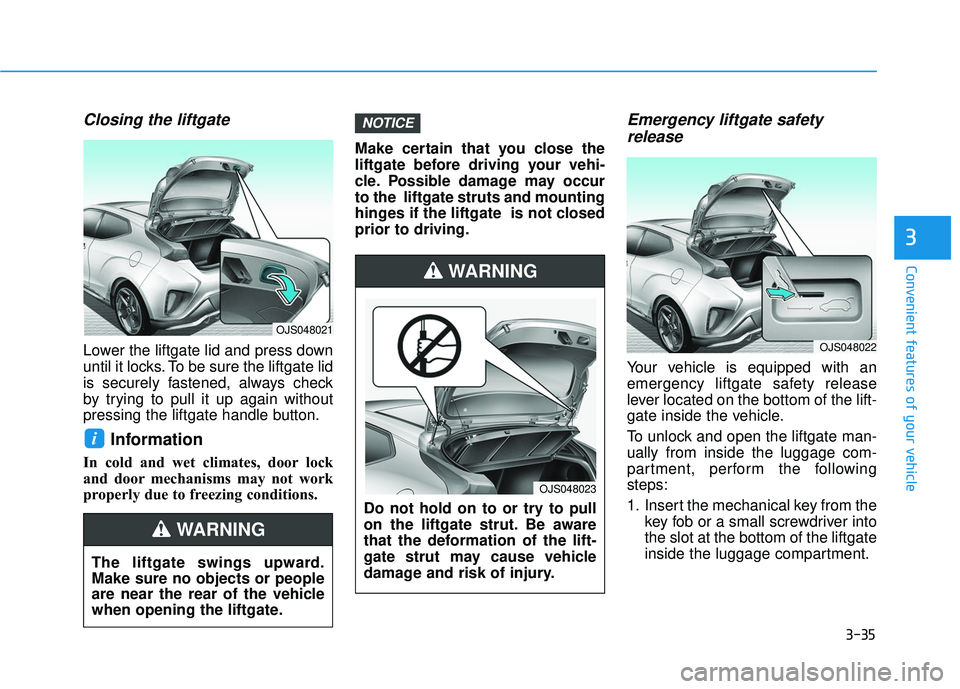
Closing the liftgate
Lower the liftgate lid and press down
until it locks. To be sure the liftgate lid
is securely fastened, always check
by trying to pull it up again without
pressing the liftgate handle button.
Information
In cold and wet climates, door lock
and door mechanisms may not work
properly due to freezing conditions.Make certain that you close the
liftgate before driving your vehi-
cle. Possible damage may occur
to the liftgate struts and mounting
hinges if the liftgate is not closed
prior to driving.
Emergency liftgate safety
release
Your vehicle is equipped with an
emergency liftgate safety release
lever located on the bottom of the lift-
gate inside the vehicle.
To unlock and open the liftgate man-
ually from inside the luggage com-
partment, perform the following
steps:
1. Insert the mechanical key from the
key fob or a small screwdriver into
the slot at the bottom of the liftgate
inside the luggage compartment.
NOTICE
i
The liftgate swings upward.
Make sure no objects or people
are near the rear of the vehicle
when opening the liftgate.
WARNING
Do not hold on to or try to pull
on the liftgate strut. Be aware
that the deformation of the lift-
gate strut may cause vehicle
damage and risk of injury.
WARNING
OJS048023
OJS048021
OJS048022
Page 120 of 491
3-40
Convenient features of your vehicle
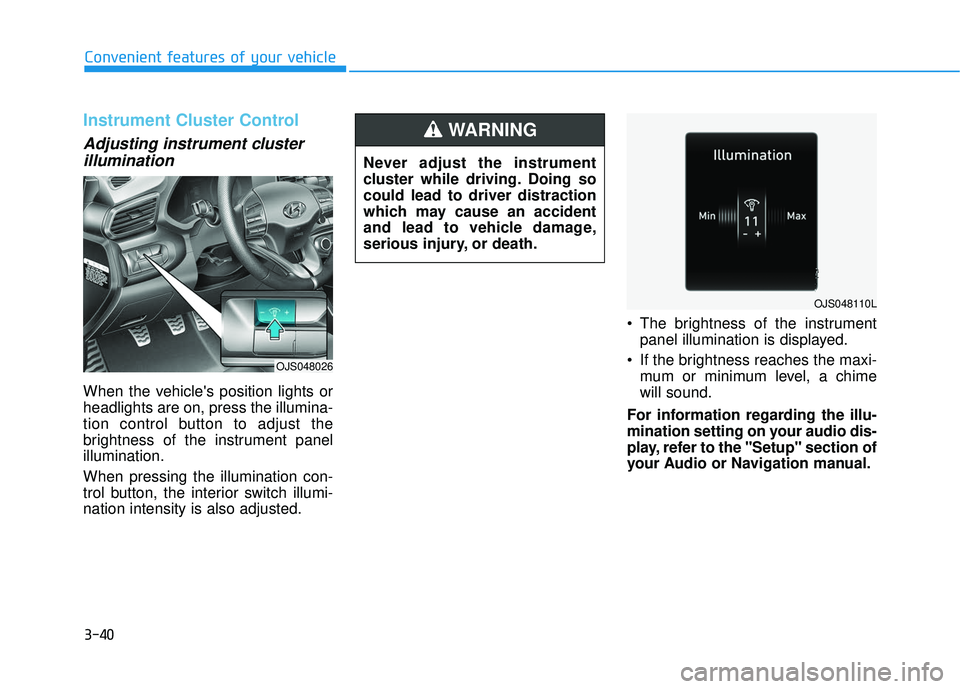
Instrument Cluster Control
Adjusting instrument clusterillumination
When the vehicle's position lights or
headlights are on, press the illumina-
tion control button to adjust the
brightness of the instrument panel
illumination.
When pressing the illumination con-
trol button, the interior switch illumi-
nation intensity is also adjusted. The brightness of the instrument
panel illumination is displayed.
If the brightness reaches the maxi- mum or minimum level, a chime
will sound.
For information regarding the illu-
mination setting on your audio dis-
play, refer to the "Setup" section of
your Audio or Navigation manual.
Never adjust the instrument
cluster while driving. Doing so
could lead to driver distraction
which may cause an accident
and lead to vehicle damage,
serious injury, or death.
WARNING
OJS048110L
OJS048026