Page 402 of 546

5-136
Driving your vehicle
5. Start the vehicle, apply the brakes,
shift to neutral, release the park-
ing brake and slowly release the
brakes until the trailer chocks
absorb the load.
6. Reapply the brakes and parking
brakes.
7. Move the shift lever to P (Park).
8. Shut off the vehicle and release
the vehicle brakes but leave the
parking brake set.
Driving the vehicle after it has
been parked on a hill
1. With the gear shift lever in P
(Park), apply the brakes and hold
the brake pedal down while per-
forming the following:
and
2. Slowly remove your foot from the
brake pedal.
3. Drive slowly until the trailer is clear
of the chocks.
4. Stop and have someone pick up
and store the chocks.
Maintenance when trailer tow-
ing
Your vehicle will need service more
often when you regularly pull a trail-
er. Important items to pay particular
attention to include engine oil, auto-
matic transmission fluid, axle lubri-
cant and cooling system fluid. Brake
condition is another important item to
frequently check. If you’re trailering,
it’s a good idea to review these items
before you start your trip. Don't forget
to also maintain your trailer and
hitch. Follow the maintenance sched-
ule that accompanied your trailer and
check it periodically. Preferably,
inspect the vehicle and trailer at the
start of each day's driving. Inspect
the hitch mounting to make sure the
hitch is properly secured to the vehi-
cle. Inspect the trailer electrical
wiring to make sure brake lights, turn
signal lights, running lights, and haz-
ard lights are working properly.
Do not get out of the vehicle
without the parking brake
firmly set. If you have left the
engine running, the vehicle
can move suddenly. You and
others could be seriously or
fatally injured.
Do not apply the accelerator
pedal to hold the vehicle on
an uphill.
WARNING
Page 411 of 546

6-2
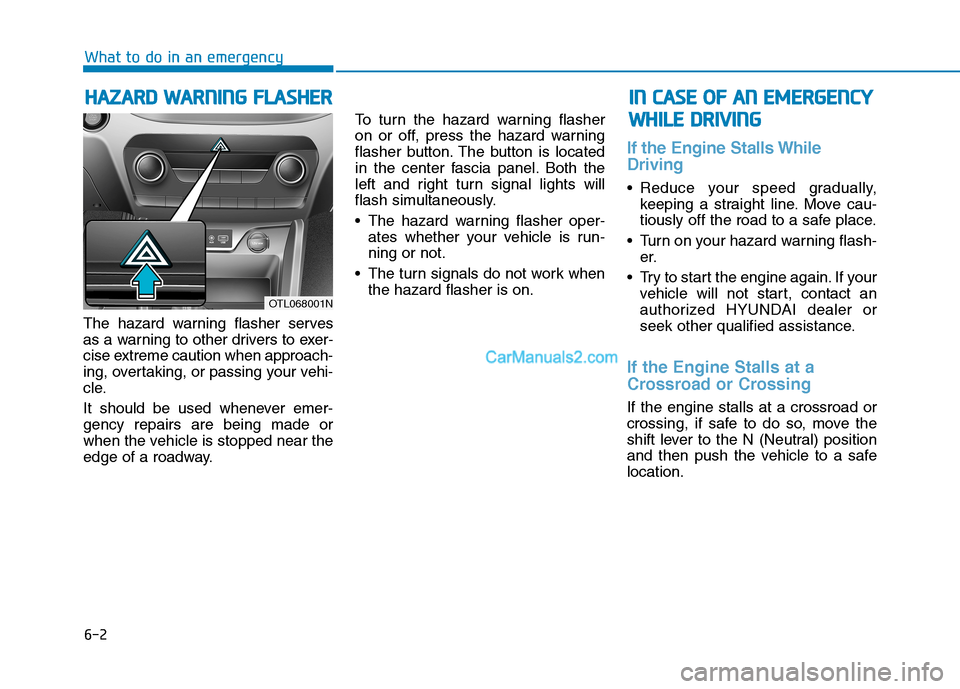
The hazard warning flasher serves
as a warning to other drivers to exer-
cise extreme caution when approach-
ing, overtaking, or passing your vehi-
cle.
It should be used whenever emer-
gency repairs are being made or
when the vehicle is stopped near the
edge of a roadway.To turn the hazard warning flasher
on or off, press the hazard warning
flasher button. The button is located
in the center fascia panel. Both the
left and right turn signal lights will
flash simultaneously.
• The hazard warning flasher oper-
ates whether your vehicle is run-
ning or not.
The turn signals do not work when
the hazard flasher is on.
If the Engine Stalls While
Driving
Reduce your speed gradually,
keeping a straight line. Move cau-
tiously off the road to a safe place.
Turn on your hazard warning flash-
er.
Try to start the engine again. If your
vehicle will not start, contact an
authorized HYUNDAI dealer or
seek other qualified assistance.
If the Engine Stalls at a
Crossroad or Crossing
If the engine stalls at a crossroad or
crossing, if safe to do so, move the
shift lever to the N (Neutral) position
and then push the vehicle to a safe
location.
H HA
AZ
ZA
AR
RD
D
W
WA
AR
RN
NI
IN
NG
G
F
FL
LA
AS
SH
HE
ER
R
What to do in an emergency
I
IN
N
C
CA
AS
SE
E
O
OF
F
A
AN
N
E
EM
ME
ER
RG
GE
EN
NC
CY
Y
W WH
HI
IL
LE
E
D
DR
RI
IV
VI
IN
NG
G
OTL068001N
Page 436 of 546

7
Tire Traction .....................................................................7-41
Tire Maintenance ............................................................7-41
Tire Sidewall Labeling ....................................................7-41
Tire Terminology and Definitions................................7-45
All Season Tires ...............................................................7-48
Summer Tires ...................................................................7-48
Snow Tires ........................................................................7-49
Radial-Ply Tires ...............................................................7-49
Low Aspect Ratio Tires..................................................7-50
Fuses ......................................................................7-51
Instrument Panel Fuse Replacement..........................7-52
Engine Compartment Panel Fuse Replacement.......7-53
Fuse/Relay Panel Description ......................................7-56
Light Bulbs ............................................................7-64
Headlamp, Daytime Running Lamp, Side Marker,
Parking Lamp, Turn Signal Lamp and
Fog Lamp Replacement .................................................7-65
Side Repeater Lamp Replacement ..............................7-69
Rear Combination Light Bulb Replacement ..............7-70
High Mounted Stop Lamp Replacement ....................7-73
License Plate Light Bulb Replacement ......................7-73
Interior Light Bulb Replacement .................................7-73
Appearance Care..................................................7-75
Exterior Care ....................................................................7-75
Interior Care .....................................................................7-80
Emission Control System ....................................7-83
Crankcase Emission Control System ..........................7-83
Evaporative Emission Control System Including
Onboard Refueling Vapor Recovery (ORVR)............7-83
Exhaust Emission Control System ..............................7-84
California Perchlorate Notice.............................7-87
Page 440 of 546

7-6
Maintenance
Owner Maintenance Schedule
When you stop for fuel:
• Check the engine oil level.
Check the coolant level in the
engine coolant reservoir.
Check the windshield washer fluid
level.
Check for tire for low or under-
inflated tires.
While operating your vehicle:
Note any changes in the sound of
the exhaust or any smell of
exhaust fumes in the vehicle.
Check for vibrations in the steering
wheel. Notice if there is any
increased steering effort or loose-
ness in the steering wheel, or
change in its straight-ahead posi-
tion.
Notice if your vehicle constantly
turns slightly or "pulls" to one side
when traveling on smooth, level
road.
When stopping, listen and check
for unusual sounds, pulling to one
side, increased brake pedal travel
or "hard-to-push" brake pedal.
If any slipping or changes in the
operation of your transmission
occurs, check the transmission
fluid level.
Check the automatic transmission
P (Park) function. Check the parking brake.
Check for fluid leaks under your
vehicle (water dripping from the air
conditioning system during or after
use is normal).
At least monthly:
Check coolant level in the engine
coolant reservoir.
Check the operation of all exterior
lights, including the brake lights,
turn signals and hazard warning
flashers.
Check the inflation pressures of all
tires including the spare for tires
that are worn, show uneven wear,
or are damaged.
Check for loose wheel lug nuts. Be careful when checking your
engine coolant level when the
engine is hot. This may result in
coolant being blown out of the
opening and cause serious
burns and other injuries.
WARNING
Page 499 of 546
7-65
Maintenance
Headlamp, Daytime Running
Lamp, Side Marker, Parking
Lamp, Turn Signal Lamp and
Fog Lamp ReplacementType A
(1) Headlamp (Low)
(2) Headlamp (High)
(3) Turn signal lamp/Parking lamp
(4) Side Marker
(5) Fog lamp*
(6) Daytime running lamp*
* : if equipped
Ty p e B
(1) Headlamp (Low)
(2) Headlamp (High)
(3) Turn signal lamp
OTL078064N
OTLE078106
OTL078065N
OTL078016N
7
Page 501 of 546

7-67
7
Maintenance
1. Open the hood.
2. Disconnect the negative battery
cable.
3. Remove the headlamp bulb cover
by turning it counterclockwise.
4. Disconnect the headlamp bulb
socket-connector.
5. Unsnap the headlamp bulb retain-
ing wire by pressing the end and
pushing it upward.
6. Remove the bulb from the head-
lamp assembly.
7. Install a new headlamp bulb and
snap the headlamp bulb retaining
wire into position by aligning the
wire with the groove on the bulb.8. Connect the headlamp bulb sock-
et-connector.
9. Install the headlamp bulb cover by
turning it clockwise.
Information
The headlamp aiming should be
adjusted after an accident or after the
headlamp assembly is reinstalled at an
authorized HYUNDAI dealer.
Turn signal lamp/Parking lamp
1. Open the hood.
2. Disconnect the negative battery
cable.
3. Remove the socket from the
assembly by turning the socket
counterclockwise until the tabs on
the socket align with the slots on
the assembly.
4. Remove the bulb from the socket
by pressing it in and rotating it
counterclockwise until the tabs on
the bulb align with the slots in the
socket. Pull the bulb out of the
socket.
i
OTLE078013
■High/Low beam
Low
HighOTLE078019
Page 502 of 546
7-68
Maintenance
5. Install a new bulb by inserting it
into the socket and rotating it until
it locks into place.
6. Install the socket in the assembly
by aligning the tabs on the socket
with the slots in the assembly.
7. Push the socket into the assembly
and turn the socket clockwise.
Daytime running light (DRL),
Parking lamp and Side marker
(LED type, if equipped)
If the LED lamp does not operate,
have the system checked by an
authorized HYUNDAI dealer.
The LED lamps cannot be replaced
as a single unit because it is an inte-
grated unit. The LED lamps has to be
replaced with the unit.
A skilled technician should check or
repair the LED lamp, for it may dam-
age related parts of the vehicle.
Front fog lamp (if equipped)
If the light bulb does not operate,
have the vehicle checked by an
authorized HYUNDAI dealer.
Ty p e C
(1) Headlamp (Low)
(2) Headlamp (High)
(3) Turn signal lamp
OTL078032N
OTL078016N
Page 503 of 546

7-69
Maintenance
(4) Parking lamp
(5) Side Marker
(6) Fog lamp
(7) Daytime running lampHeadlamp, Turn signal lamp,
Parking lamp, Daytime running
light and Side marker (LED type)
If the LED lamp does not operate,
have the system checked by an
authorized HYUNDAI dealer.
The LED lamps cannot be replaced
as a single unit because it is an inte-
grated unit. The LED lamps has to be
replaced with the unit.
A skilled technician should check or
repair the LED lamp, for it may dam-
age related parts of the vehicle.
Front fog lamp
If the light bulb does not operate,
have the vehicle checked by an
authorized HYUNDAI dealer.
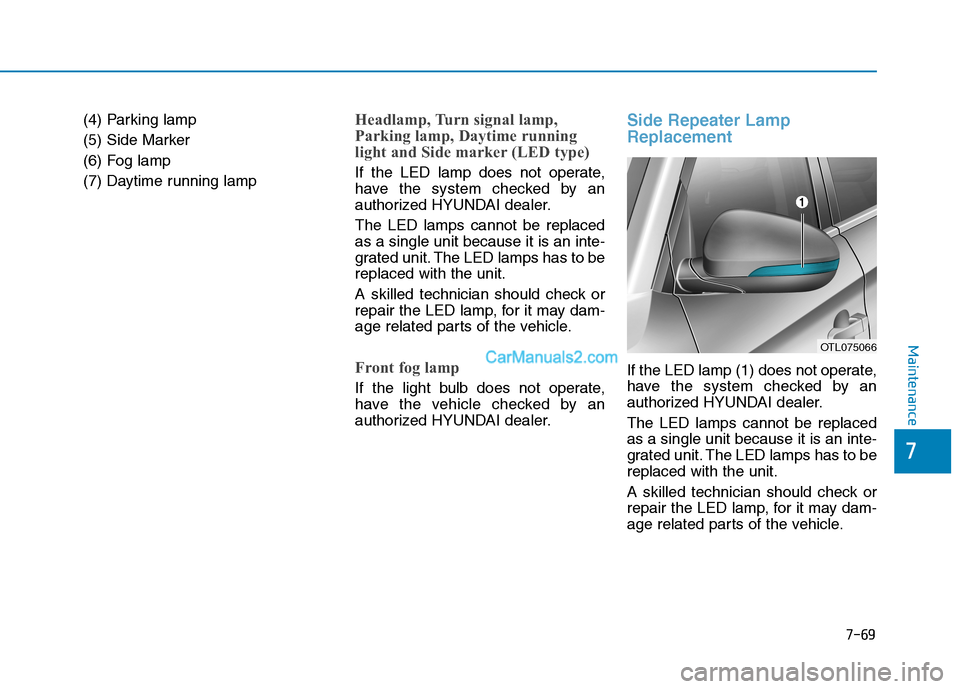
Side Repeater Lamp
Replacement
If the LED lamp (1) does not operate,
have the system checked by an
authorized HYUNDAI dealer.
The LED lamps cannot be replaced
as a single unit because it is an inte-
grated unit. The LED lamps has to be
replaced with the unit.
A skilled technician should check or
repair the LED lamp, for it may dam-
age related parts of the vehicle.
OTL075066
7